 BUY NOW, PAY LATER. Starting at 0% APR


Polaris XP Turbo/S & Pro XP Silicone Charge Tube Kit
XP Turbo/S & Pro XP Silicone Charge Tube Kit
Before you start
The bed of the vehicle has been removed in these pictures to better show the installation process. The charge tube can be installed with the bed on, but it is best to loosen the back to provide more clearance.
In the box
Parts and tools
Included parts
- 1EVP Charge Tubes
- 214.5mm Pinch Clamp
- 1Aux Port Block-Off
- 1Barbed Fitting
- 1M6 x 16mm Head Cap Screw with Thread-Locker.
- 132mm Worm Drive Clamp
Required tools
- Torx Bits
- Allen Wrenches
- Silicone Grease
- 7/16” Socket
- Side Cutters
Procedure
Installation Steps
- Step 1
Remove the rear access panel to the top of the engine.
- Step 2
Remove diverter valve from factory charge tube.
- Step 3
Disconnect map sensor electrical connection.
- Step 4
Loosen both front and rear T-bolt clamps – these will be reused.
- Step 5
Remove the OEM charge tube being careful not to damage the OEM map sensor, wiring, or vacuum hoses.
- Step 6
Remove map sensor from OEM charge tube by unscrewing the T25 bolt securing the sensor.
- Step 7
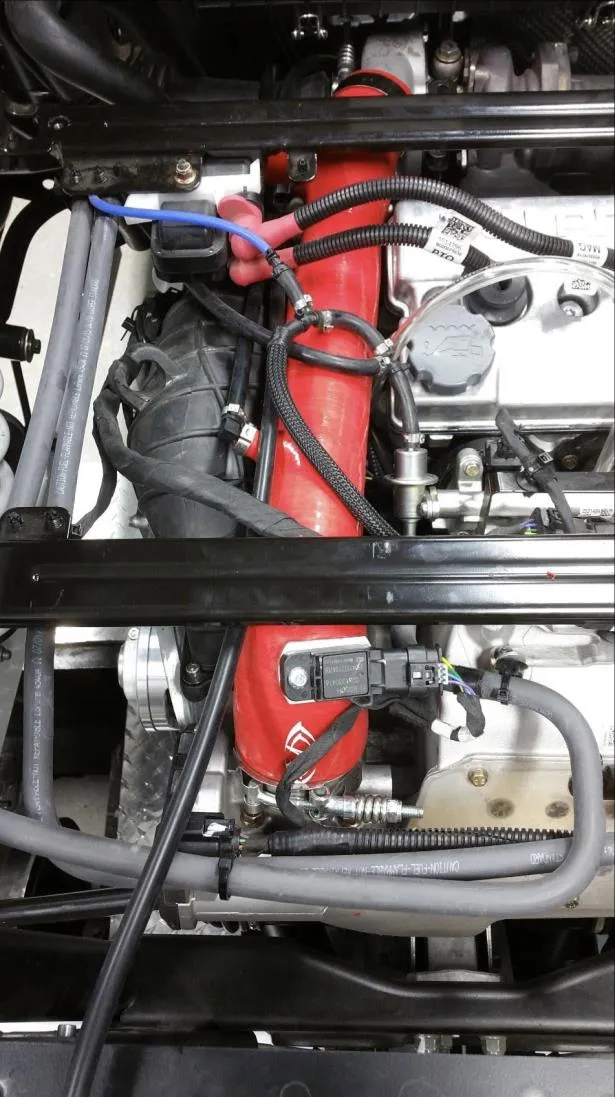
Apply silicone grease to the map sensor O-ring and install map sensor into the EVP silicone charge tube. Secure using the Thread-Locked M6 X 12mm bolt.
- Step 8
Install the supplied barb fitting into the small port on the side of the EVP charge tube. Slide a 14.5mm pinch clamp onto the port. Using a side cutter or pinch clamp tool, pinch the ears of the clamp to tighten. Install vacuum port block-off onto the exposed barb end. Alternatively, this port can be used for a boost gauge, or to operate the EVP Captain’s Choice cut out exhaust. Please see Captain’s Choice instructions if this is the case.
- Step 9
Install the OEM T-bolt clamps (without springs) onto the respective ends of the charge tubes. Install the charge tube onto the OEM intercooler first, then install front end onto the turbocharger. Do Not tighten clamps.
- Step 10
Slide the supplied 32mm worm drive clamp onto the BOV port and install BOV or diverter valve. Tighten clamp.
Noteif the fitment is tight, wet the silicone with soapy water and retry.
- Step 11
Rotate EVP silicone charge tube to provide adequate clearance for the BOV or diverter valve. Once clearance is achieved tighten both charge tube t-bolt clamps.
- Step 12
Reconnect map sensor electrical connection. Charge tube installation is complete.
Need technical support?
Submit a ticket with your vehicle and what you're seeing, and our support team will get back to you.
