CF Moto Z10 Dual Fan Intercooler Shroud

CF Moto Z10 Dual Fan Intercooler Shroud

Revision
REV_100726

In the box

Parts and tools

CF Moto Z10 Dual Fan Intercooler Shroud

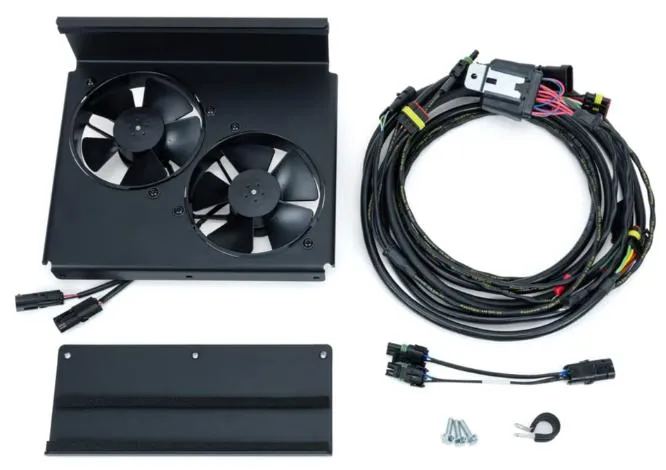
Included parts

  • Hardware Kit
  • Dual Fan Shroud
  • Harness

Required tools

  • Metric Sockets
  • Ratchet
  • Zip-ties
  • Screwdrivers

Procedure

Installation

  1. Step 1

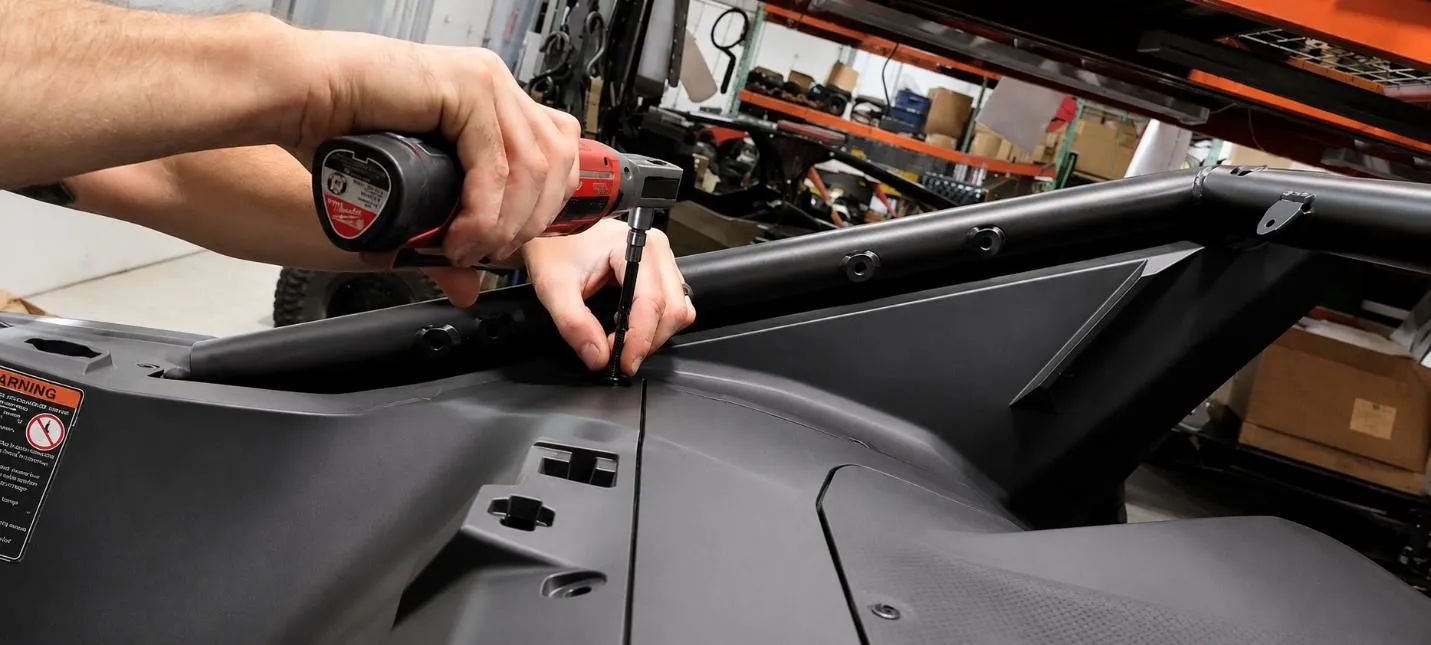
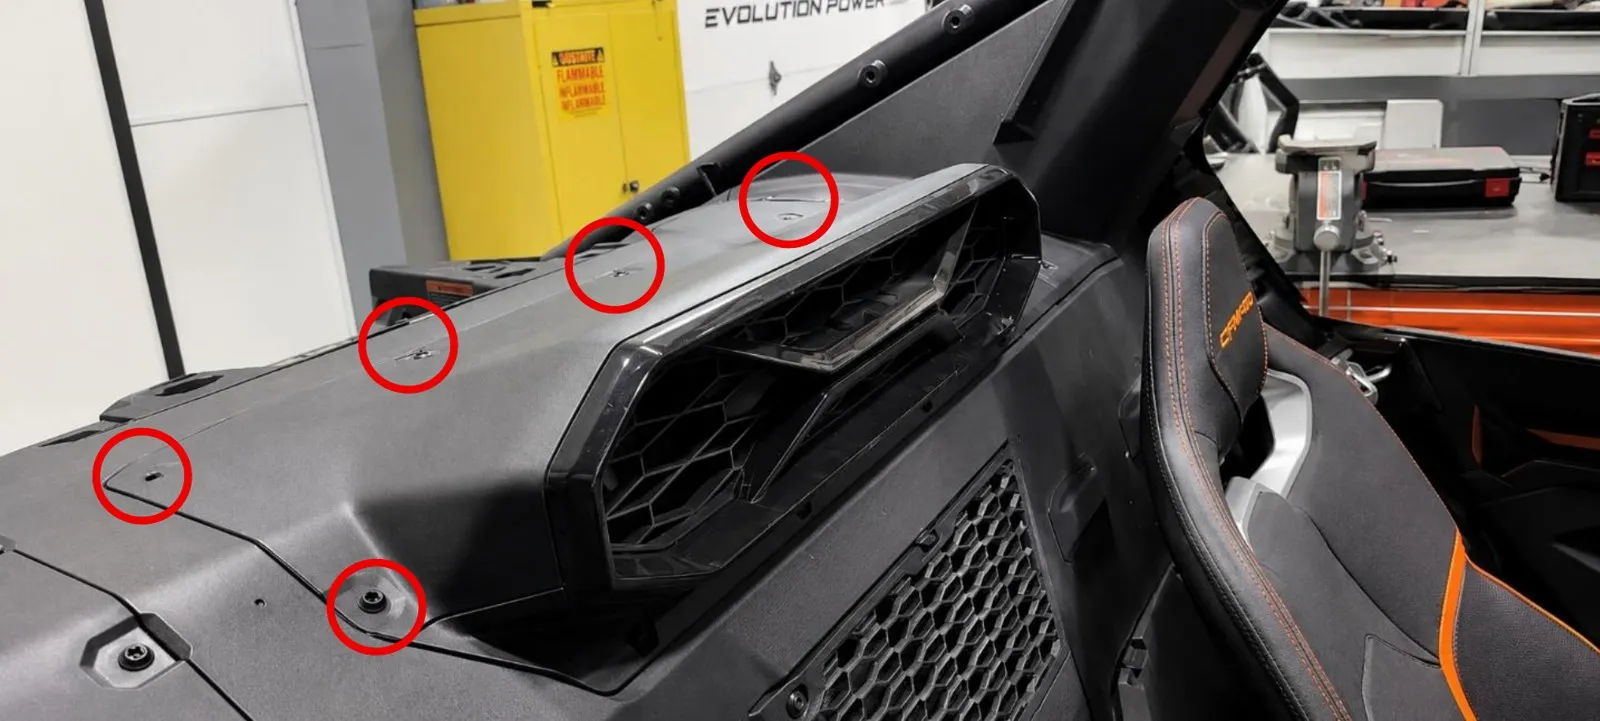
    Begin by removing all of the screws holding the bed on. Also remove intercooler intake. With a T-30
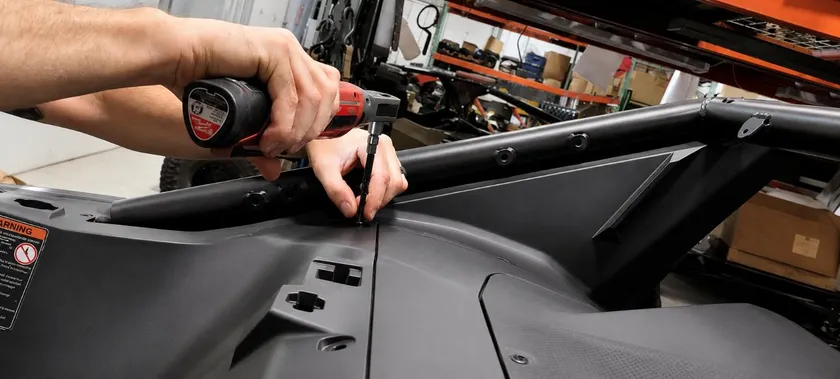
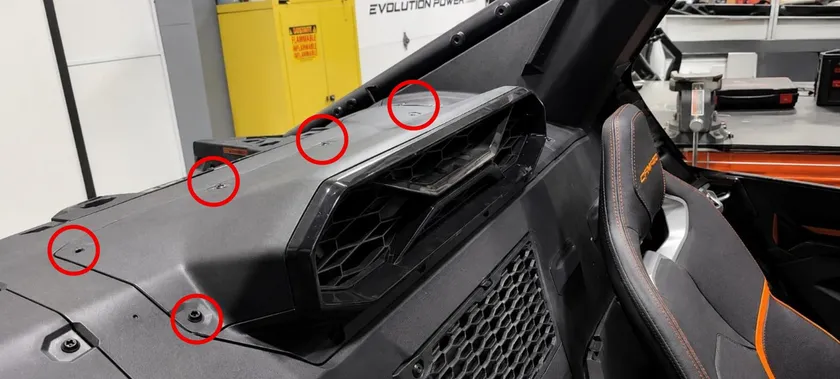
    Begin by removing all of the screws holding the bed on.
    Also remove intercooler intake.
  2. Step 2

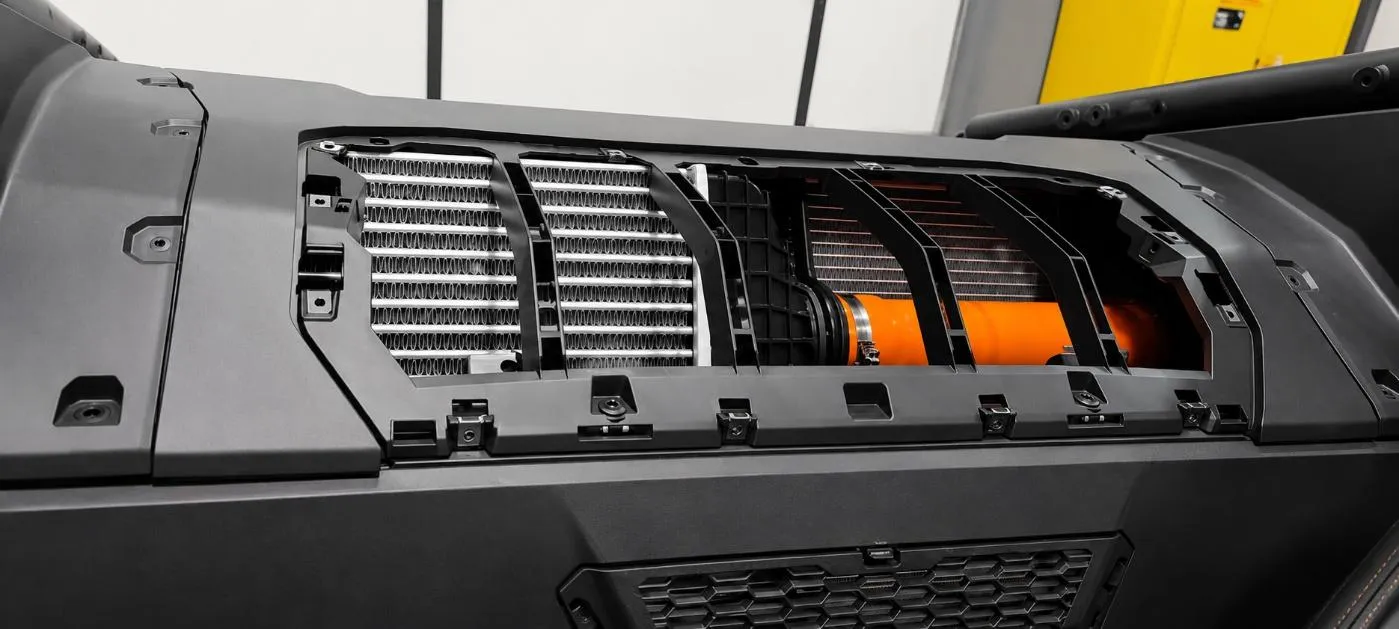
    Remove screws around perimeter of intercooler shroud and remove center panel.
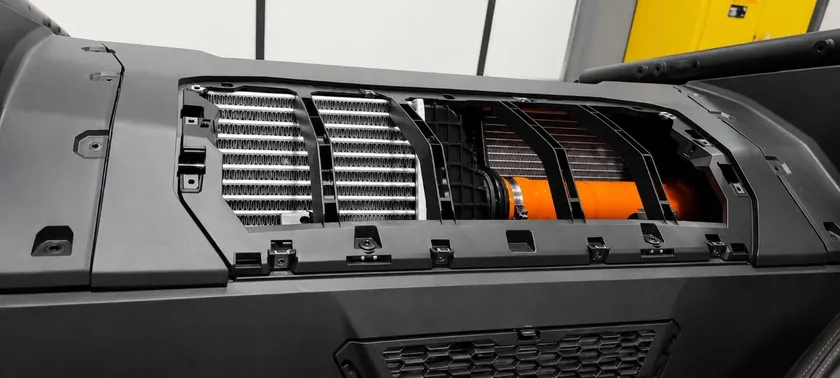
    Remove screws around perimeter of intercooler shroud and remove center panel.
  3. Step 3

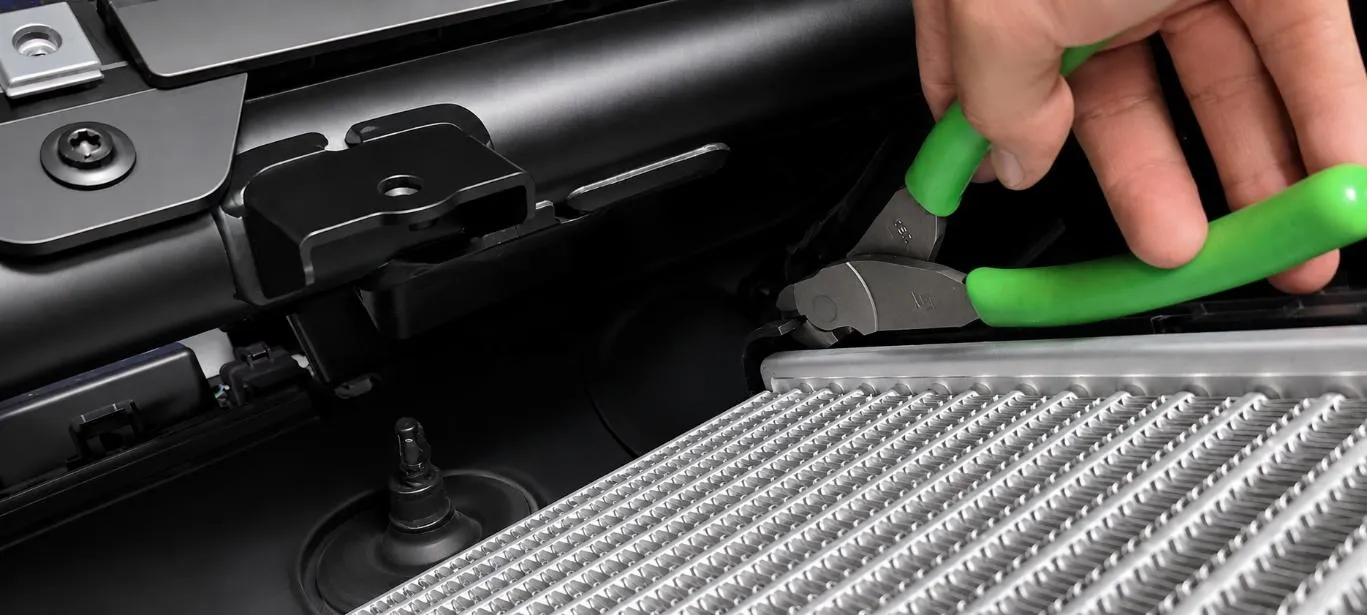
    Trim a 3/4” square of the plastic shroud around the bottom passenger side of the intercooler. Use a side cutter for this.
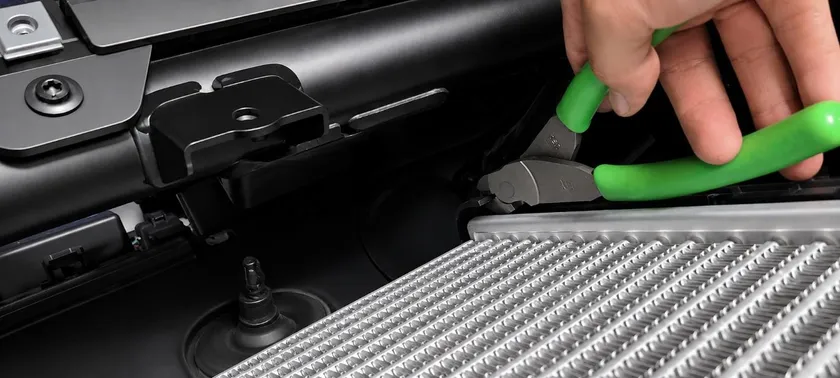
    Trim a 3/4” square of the plastic shroud around the bottom passenger side of the intercooler.
  4. Step 4

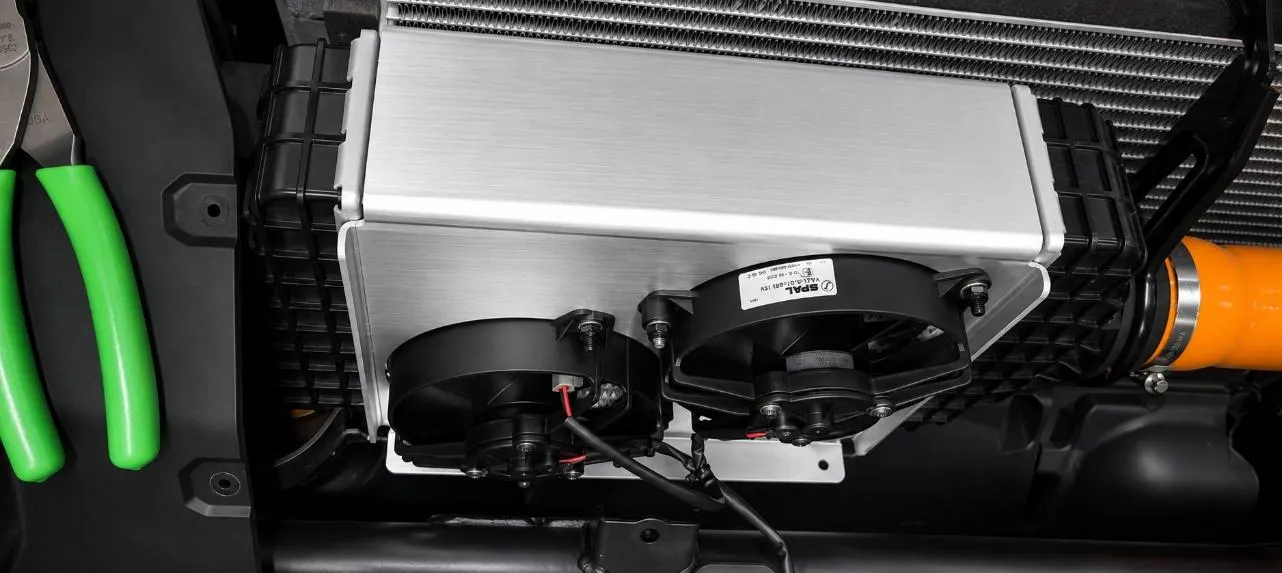
    Install the fan shroud over the intercooler.
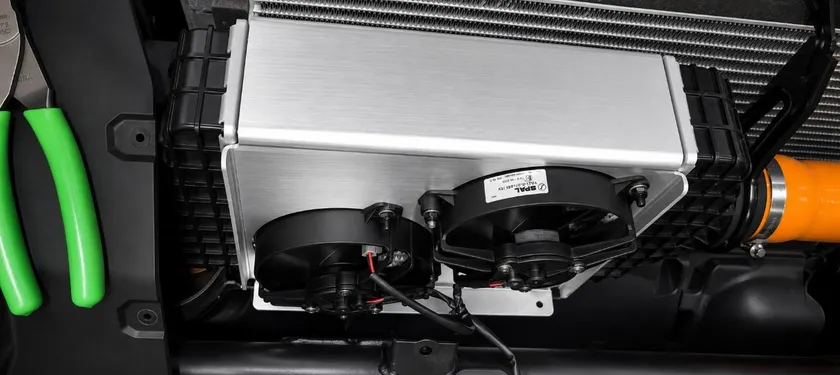
    Install the fan shroud over the intercooler.
  5. Step 5

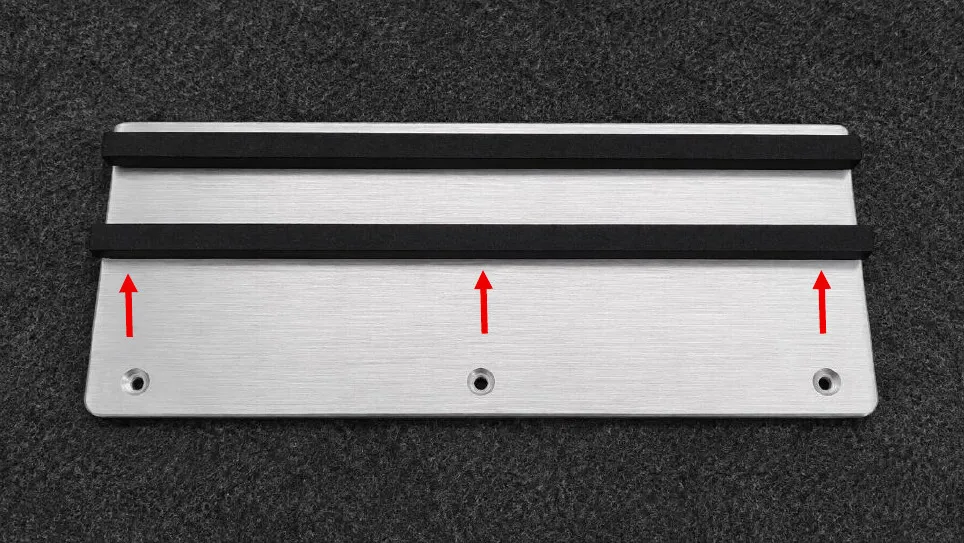
    Locate the bottom plate of the intercooler shroud, Adel clamp, and the three flanged hex head bolts.
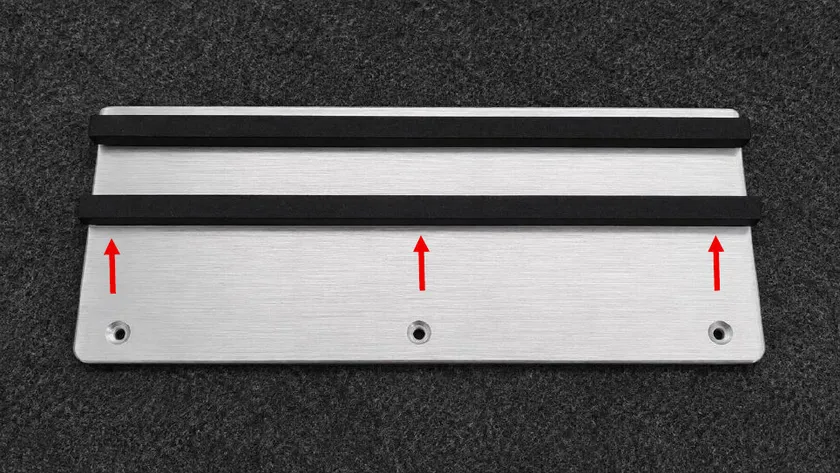
    Locate the bottom plate of the intercooler shroud, Adel clamp, and the three flanged hex head bolts.
  6. Step 6

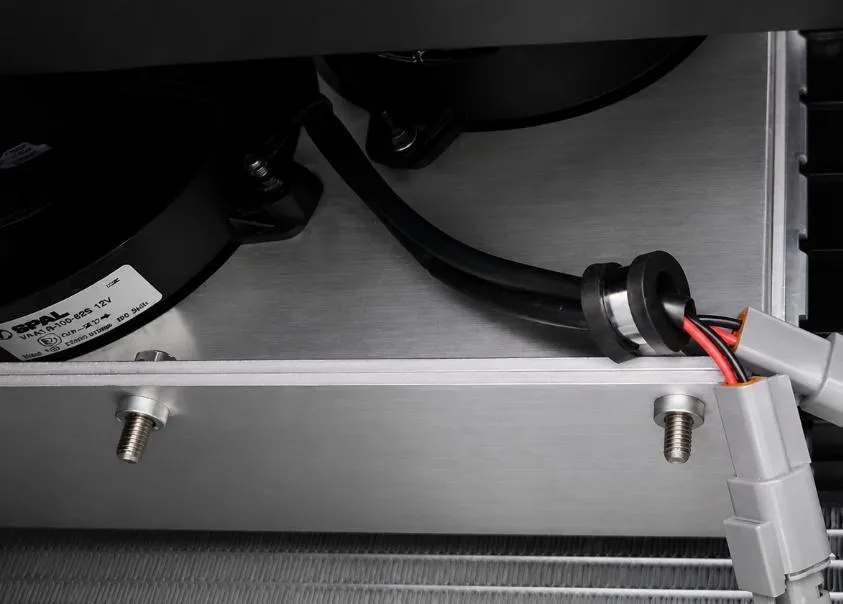
    Install the bottom plate to the intercooler and shroud. Install (3) bolts from topside. The Adel clamp is used to secure the fan leads and is installed on the right side bolt towards the center of the vehicle. Make sure the flange on the bottom plate fits around the backside of the intercooler, the foam strips keep the shroud secure to the intercooler.
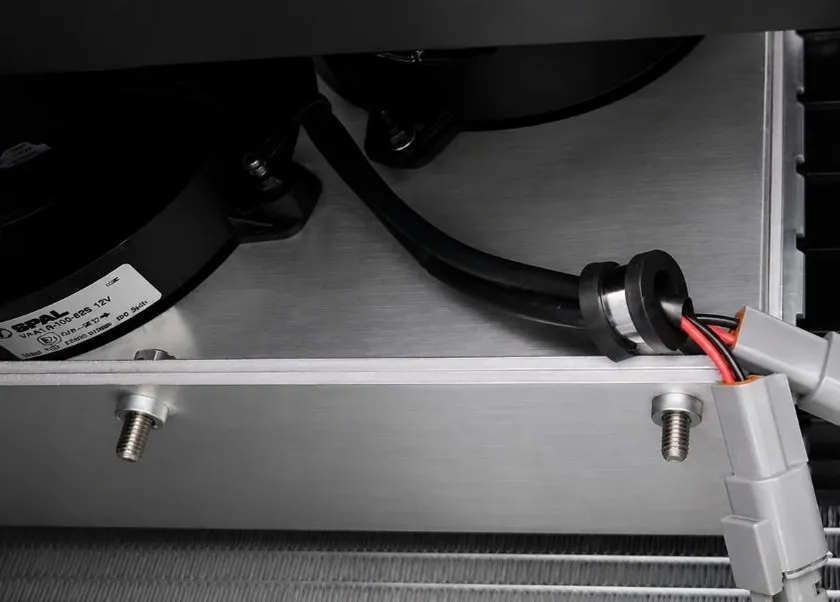
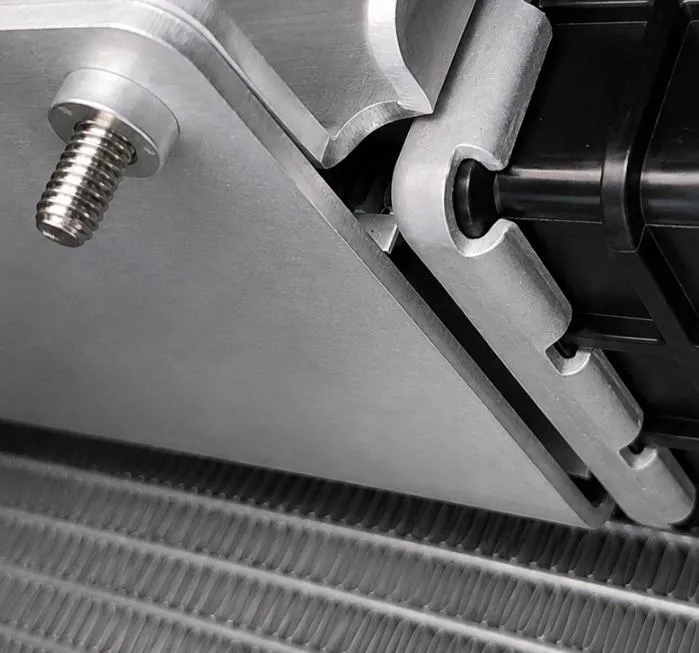
    Install the bottom plate to the intercooler and shroud.
    Install the bottom plate to the intercooler and shroud.
  7. Step 7

    Remove center dash panel. Remove passenger seat and small access panel on center console. Seat removes by pulling a strap and tip seat forward and out.
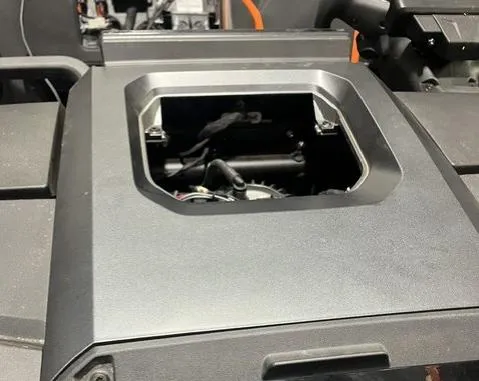
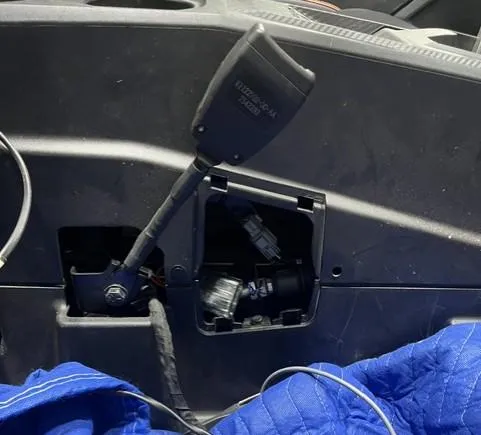
    Remove center dash panel.
    Remove passenger seat and small access panel on center console.
    Seat removes by pulling a strap and tip seat forward and out.
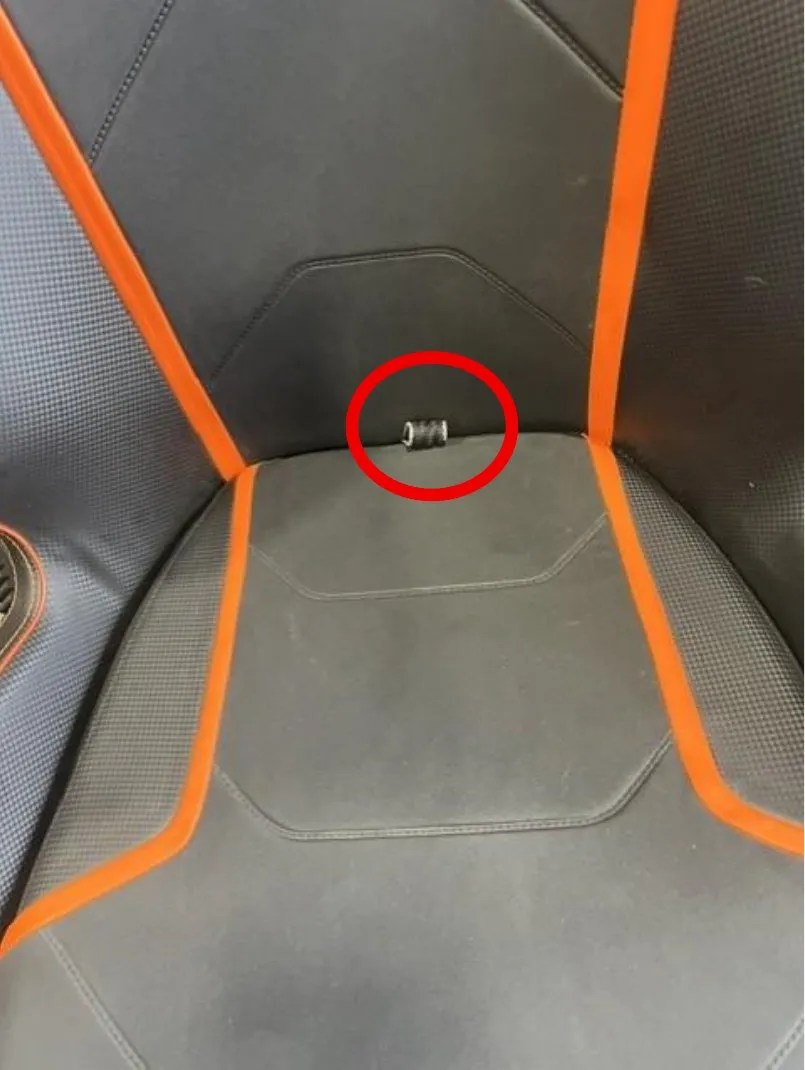
  8. Step 8

    Insert fuel pump side of harness through small access panel and route to open space at front console.
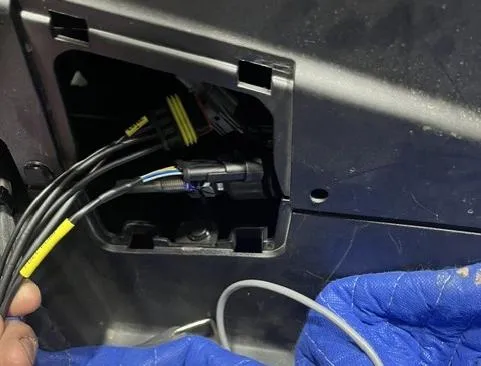
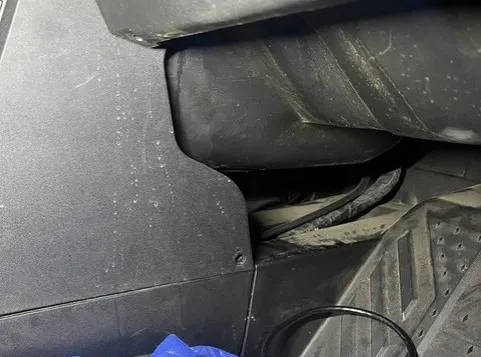
    Insert fuel pump side of harness through small access panel and route to open space at front console.
    Insert fuel pump side of harness through small access panel and route to open space at front console.
  9. Step 9

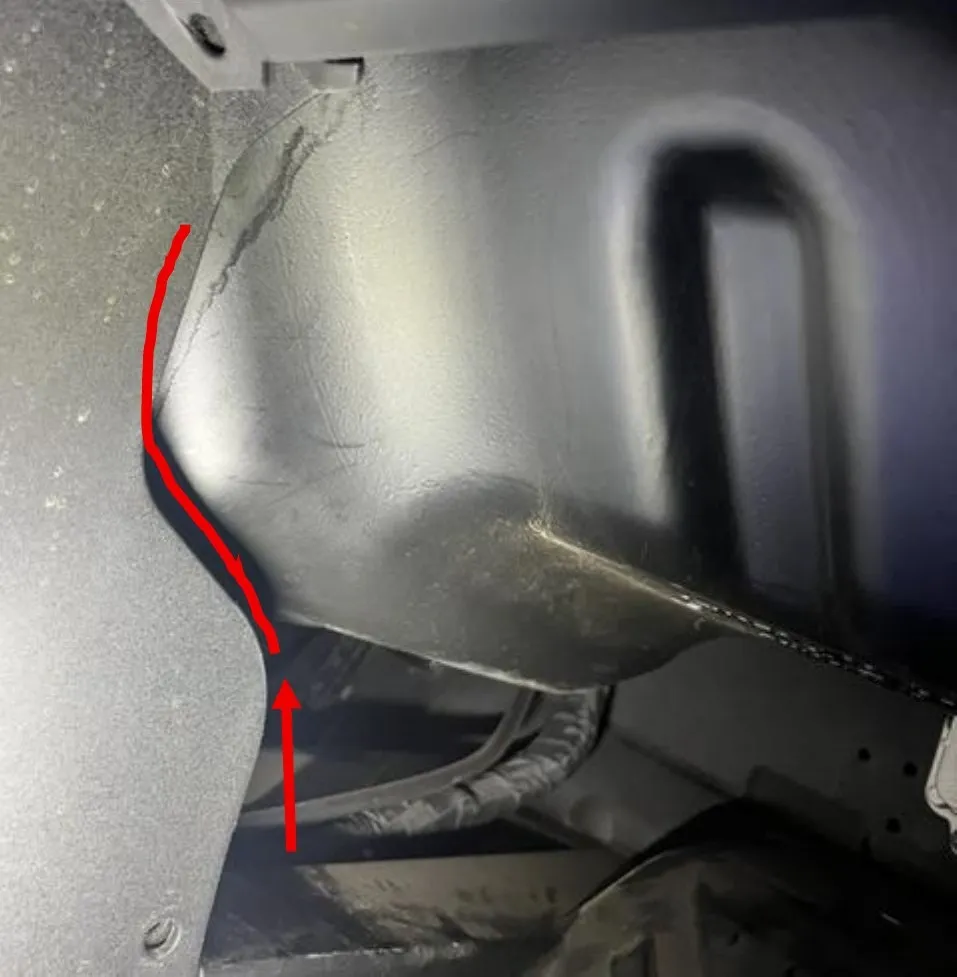
    Pull harness up through the hole just behind fuel tank and connect inline between factory harness and fuel pump pigtails.
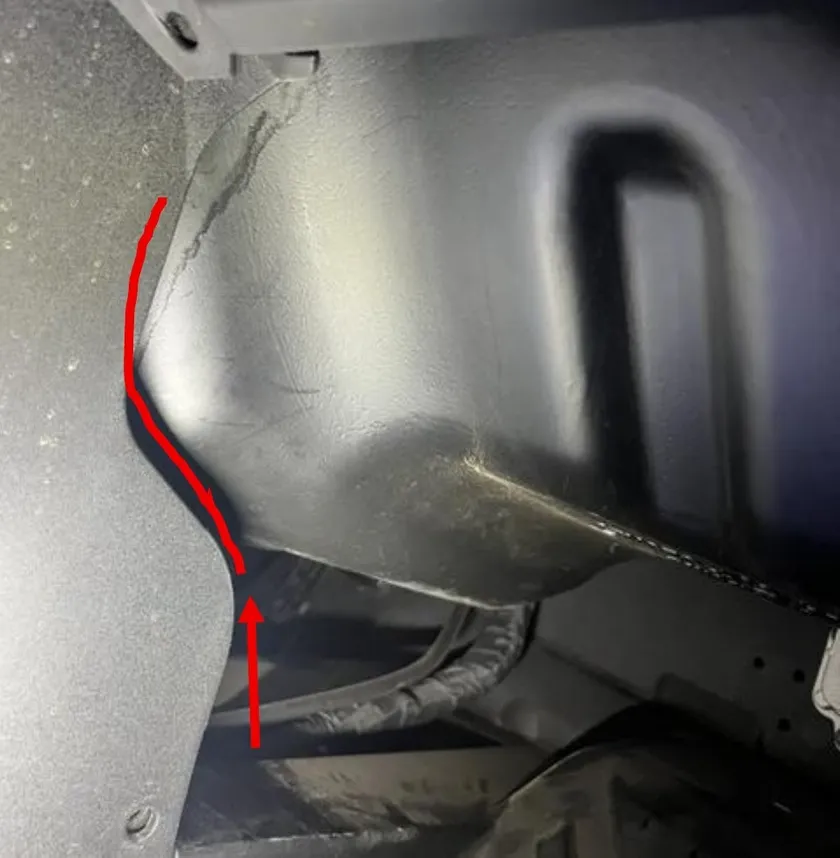
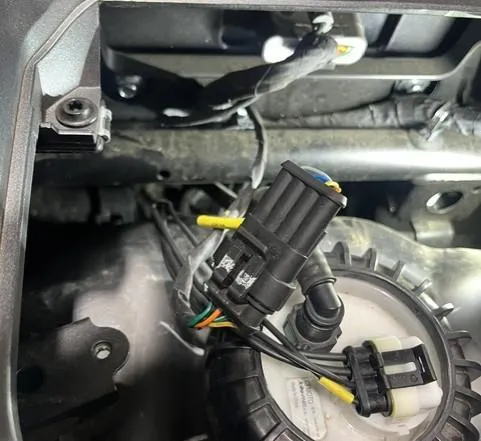
    Pull harness up through the hole just behind fuel tank and connect inline between factory harness and fuel pump pigtails.
    Pull harness up through the hole just behind fuel tank and connect inline between factory harness and fuel pump pigtails.
  10. Step 10

    Pull opposite end of harness through small hole on firewall side of console. Connect positive and negative directly to battery.
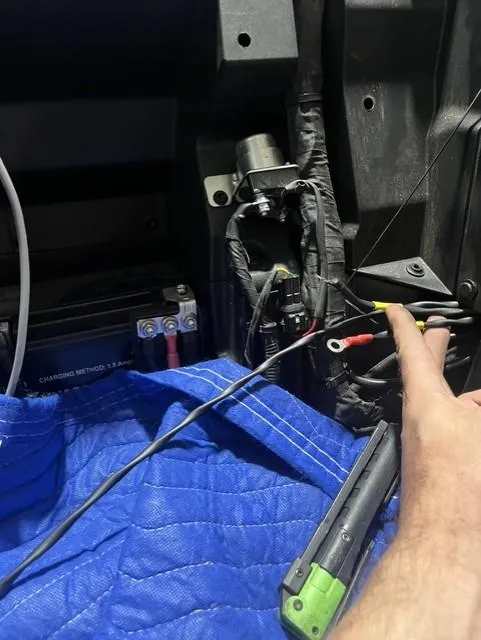
    Connect positive and negative directly to battery.
  11. Step 11

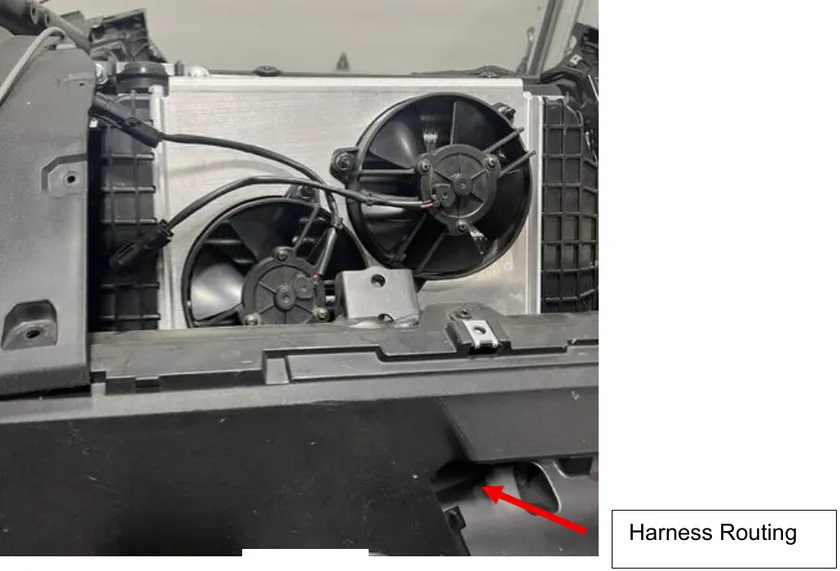
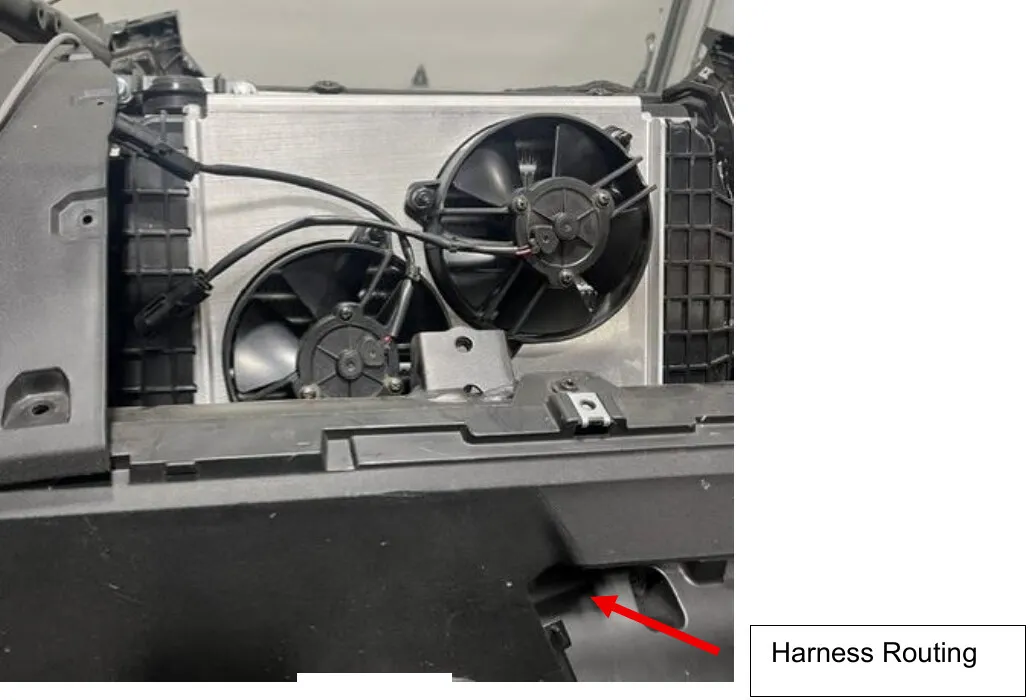
    Follow OEM harness up with intercooler lead. Attach the Y-Harness adapter to harness and intercooler fans. Attach any loose points of harness with zip-ties.
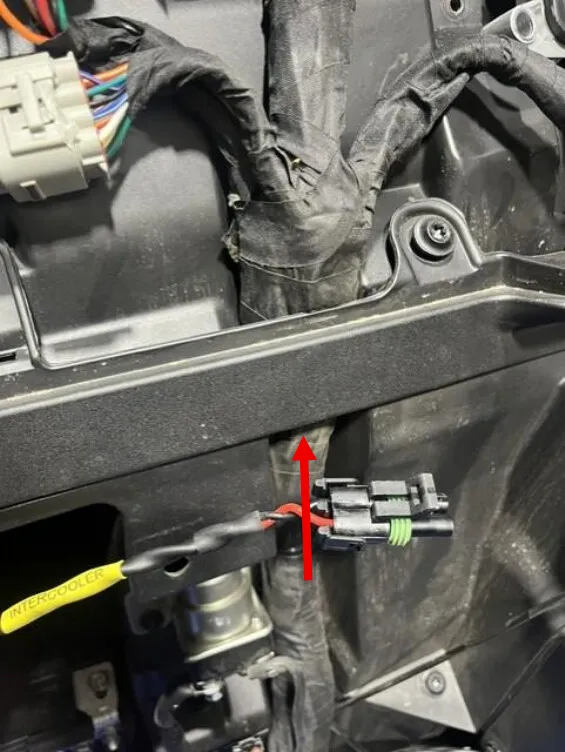
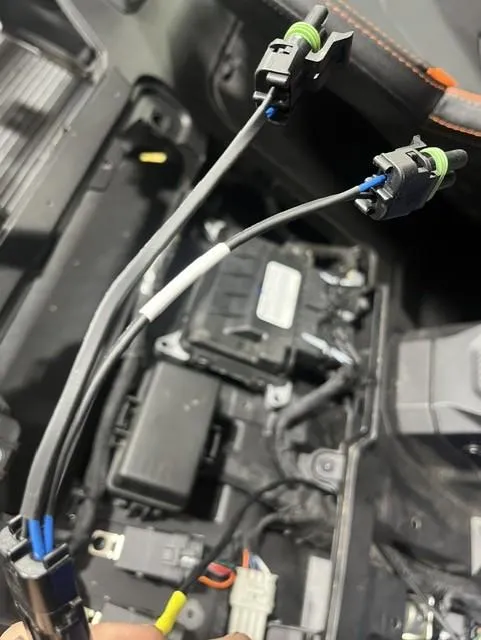
    Follow OEM harness up with intercooler lead.
    Attach the Y-Harness adapter to harness and intercooler fans.
    Harness Routing
Emissions notice. This product is exempt from the emission standards and related requirements of 40 C.F.R. § 1051 as provided by 40 C.F.R. § 1051.620, and California law [e.g., vehicle code §§ 27156 and 38391]. This product is sold only for use in connection with EPA certified, purpose-built, nonroad vehicles used solely for closed course, nonroad competition/racing and not used for any recreational purpose or on public highways or right of ways maintained by and open to the public. This product is sold only in connection with machines that do not fall under state and/or federal noise or emission standards/regulations. Purchasers who/that purchase this product represent and warrant that the product is purchased only in connection with EPA-certified, emission-regulations-exempt and noise-regulations-exempt competition/racing vehicles as interpreted under applicable state and/or federal law.

Need technical support?

Submit a ticket with your vehicle and what you're seeing, and our support team will get back to you.

Contact Support
We use cookies to improve your experience on our website. Read about how we use cookies in our Privacy Policy. By browsing this website, you agree to our use of cookies. privacy policy
accept

Your cart

×
×