 BUY NOW, PAY LATER. Starting at 0% APR


Can-Am X3 Blow-Off Valve V2 (BOV) Kit
Installation instructions for the X3 Blow-Off Valve V2 (BOV) Kit on the Can-Am Maverick X3 (SKU 100FC0115). Parts, tools, and full procedure.
Before you start
THIS KIT REQUIRES THE EVP SILICONE CHARGE TUBE (TU-CAMX3T-SBH)
In the box
Parts and tools
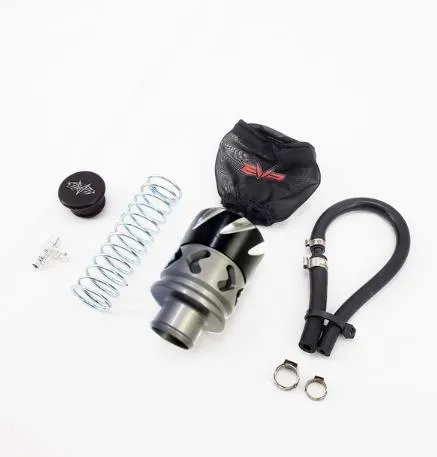
Included parts
- 1EVP Blow-Off Valve
- 1Blow-Off Valve Prefilter
- 1Silicone Vacuum Line Kit
- 113.3mm Pinch Clamp
- 111.3mm Pinch Clamp
- 1Manifold Port Adaptor
- 2Plastic Cable Ties
Required tools
- T-30 Torx
- Side Cutters
- Flat Head Screwdriver
- Spring Puller
Procedure
Installation Steps
BOV operations will become more consistent after a few short minutes when the piston O-rings slide up and down in the BOV cylinder. You can also push your finger up and down on the piston before installing. These BOV kits come pre-lubricated.
- Step 1
Remove BOV block off from the EVP silicone charge tube set (if installed).
- Step 2
Adjust BOV cap – for the Can Am X3, screw the adjustment cap clockwise until it stops.
- Step 3
Install BOV Prefilter and secure with supplied zip tie to the groove in the BOV body.
- Step 4
Install EVP BOV into the EVP Silicone Charge Tube port and secure with supplied worm drive clamp.
- Step 5
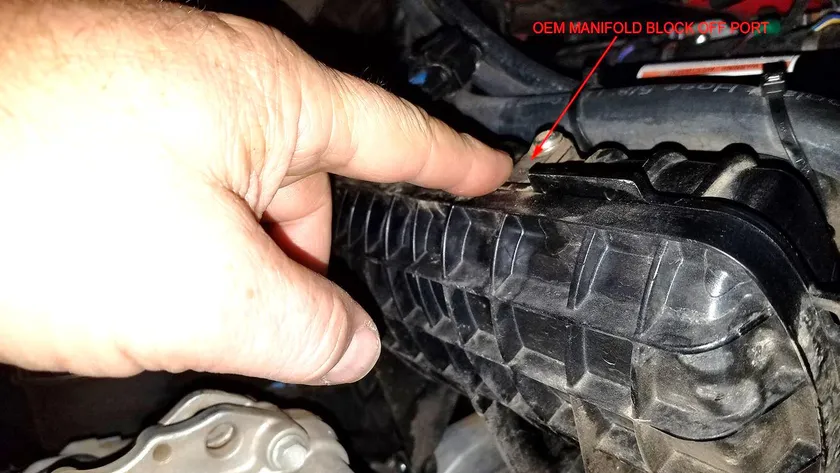
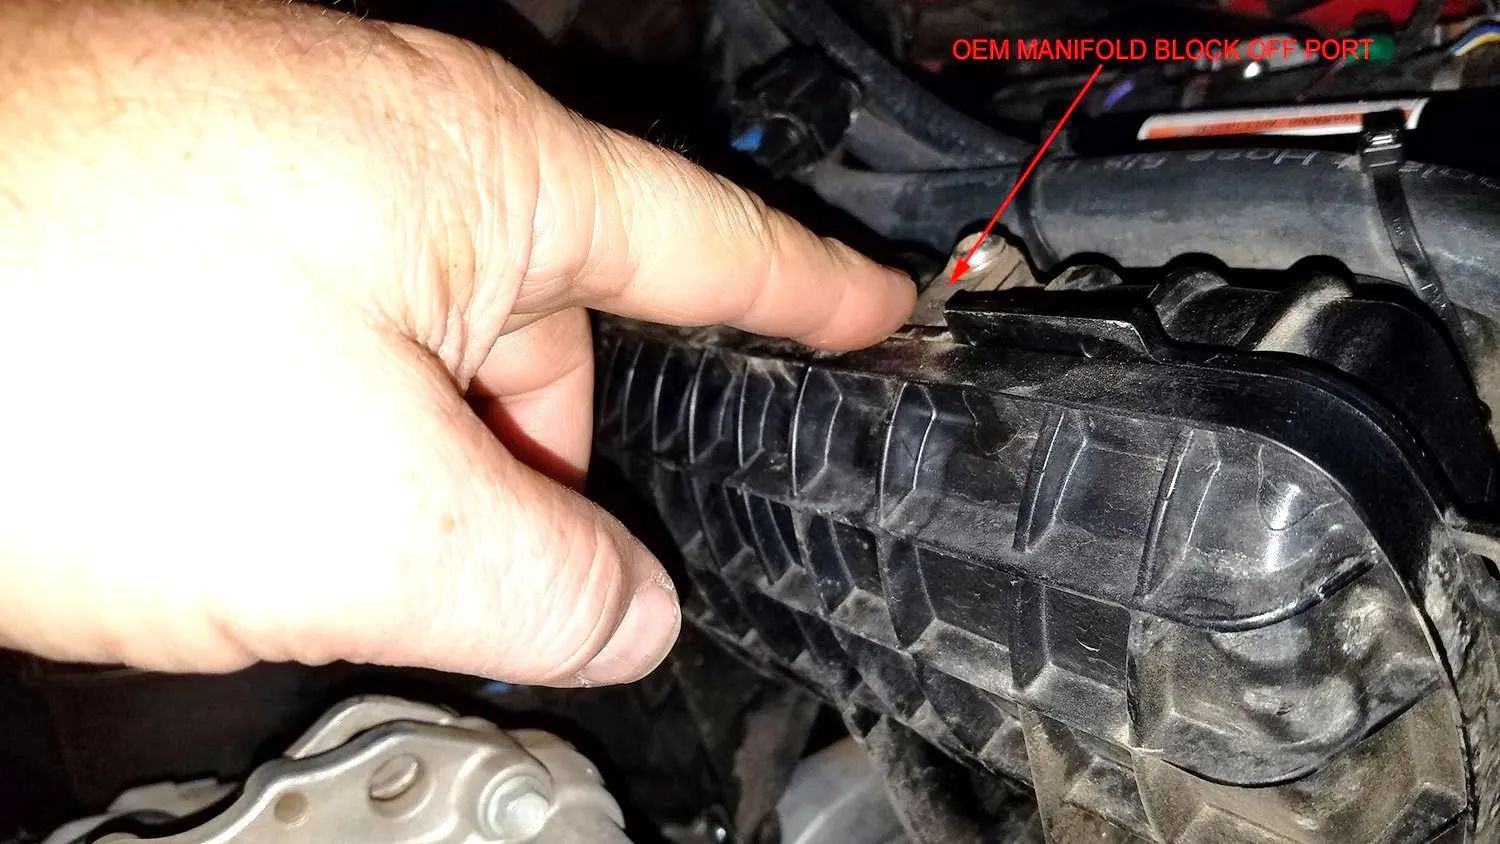
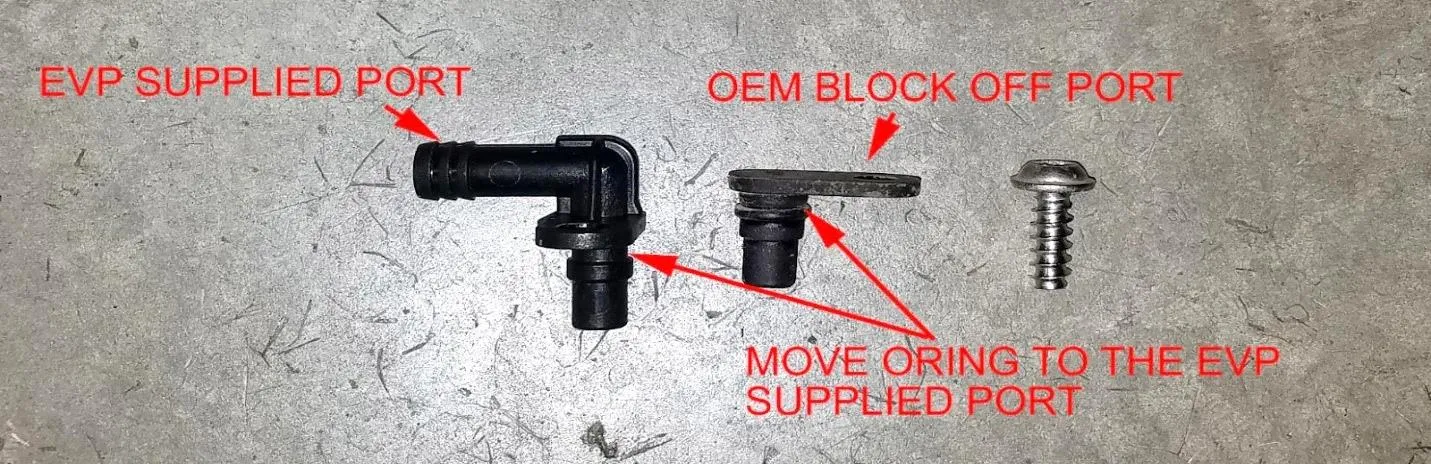
Remove OEM manifold port block off (see picture below) using a T-30 Torx. Pry up with screwdriver to remove (the O-ring is holding it in place.)
- Step 6
Move the O-ring from the OEM block off port to the EVP supplied port and install into manifold in place of the block off.
- Step 7
Connect EVP supplied hose to the Port – wet with water or brake cleaner to make it slide on easier. Install the other end of the silicone onto the BOV barb and secure with supplied pinch clamp.
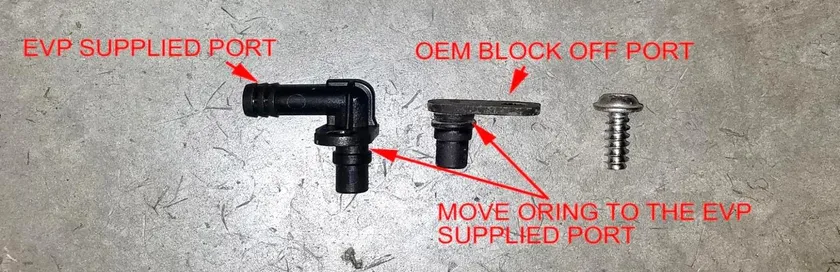
MOVE ORING TO THE EVP SUPPLIED PORT - Step 8
Make sure all steps were completed and all clamps are tight. Reinstall exhaust and all panels removed earlier.
- Step 9
Drive vehicle – BOV spring tension can be adjusted for desired performance/sound by loosening/tightening the BOV cap. Do not loosen to the point where you can see the O-ring that seals the cap to the body. Less spring pressure will allow the BOV to blow off earlier, more pressure, later.
Need technical support?
Submit a ticket with your vehicle and what you're seeing, and our support team will get back to you.
