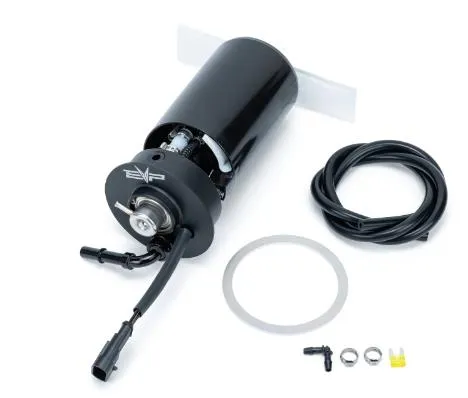
Polaris Rising Rate Surge Tank Kit

Polaris Rising Rate Surge Tank Kit

Category
Fuel Systems
Vehicles
Polaris RZR
SKU
2502020007 (XP Turbo/S), 2502020006 (Pro XP & Turbo R)
Legacy SKU
500FP0040, 500FP0039
Revision
Rev_012924

In the box

Parts and tools

Included parts

  • 1EVP Surge Tank Assembly
  • 120amp Mini Fuse
  • 113.3mm Pinch Clamp
  • 12” Heat Shrink
  • 1Shim (XP Turbo ONLY)

Required tools

  • EVP Fuel Pump Nut Tool
  • Solder Gun
  • Heat Gun
  • Pinch Clamp Tool
Polaris Rising Rate Surge Tank Kit

Procedure

Installation

  1. Step 1

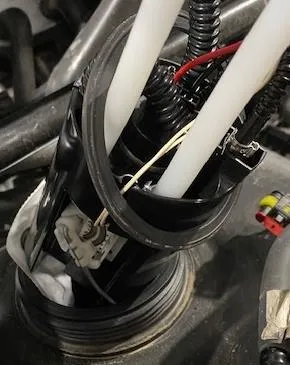
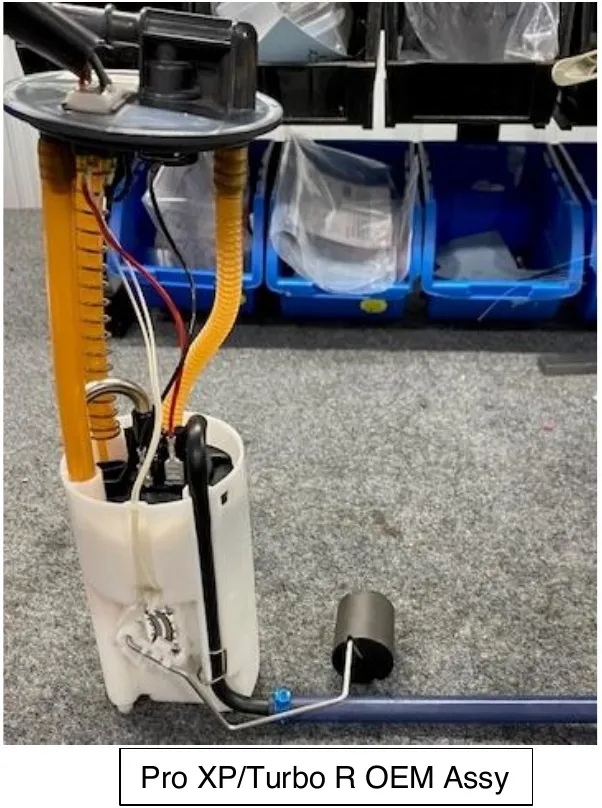
    Remove the OEM fuel pump assembly out of your vehicle. It will be located underneath the passenger seat (back passenger seat if 4-seater). DO NOT break the green/blue safety clips holding the fuel lines on. It is easiest to remove the fuel pump assembly nut with EVP tool (953RU0305).
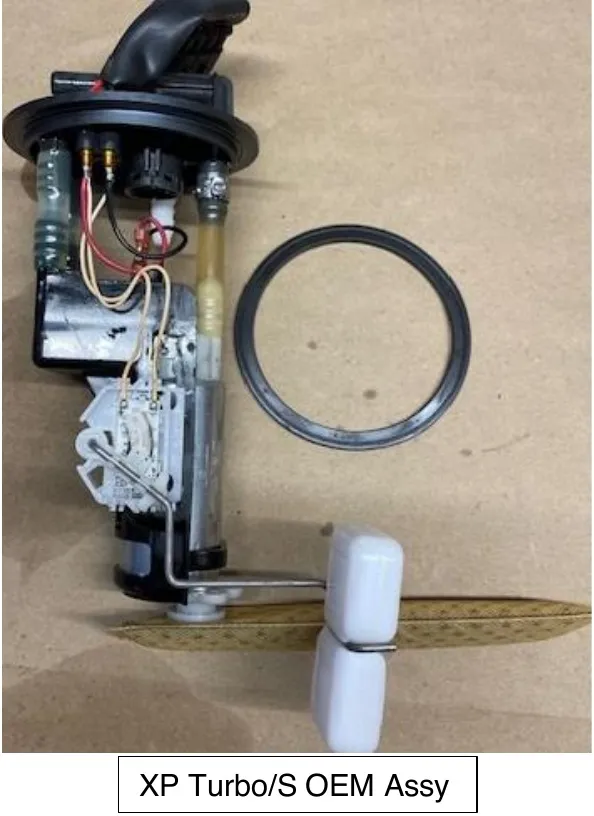
    XP Turbo/S OEM Assy
    Pro XP/Turbo R OEM Assy
  2. Step 2

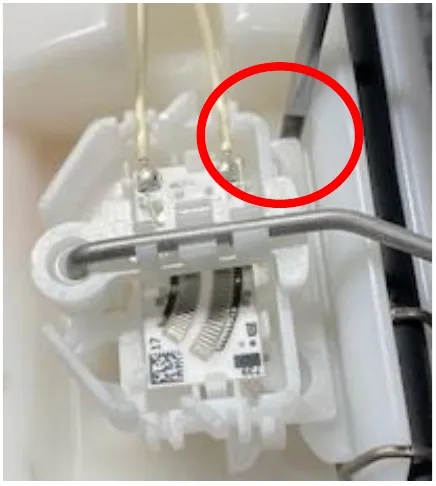
    Remove the float sending unit from the OEM fuel pump. On the XP Turbo/S assembly use a small screwdriver to push the black clip inward, push the sending unit upward. On a Pro XP/Turbo R use a small screwdriver and push the sending unit downward. Remove.
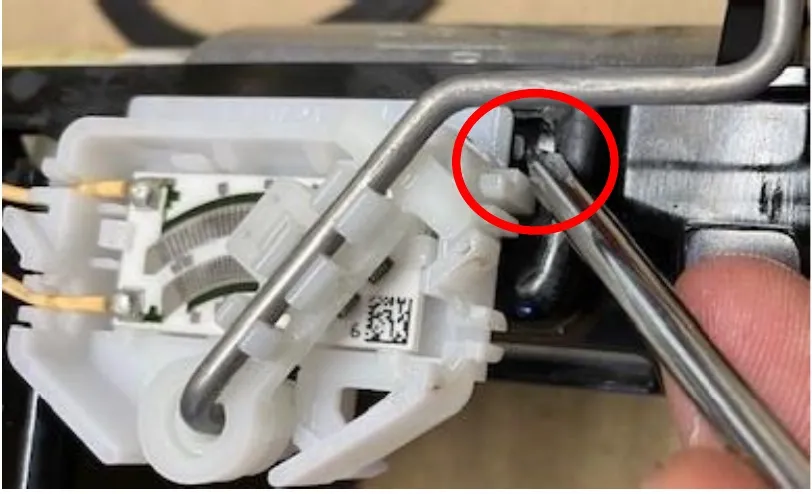
    On the XP Turbo/S assembly use a small screwdriver to push the black clip inward, push the sending unit upward.
    On a Pro XP/Turbo R use a small screwdriver and push the sending unit downward.
  3. Step 3

    Remove the OEM float from the OEM assembly, install it onto the EVP rising rate assembly. Solider the float assembly, wires orientation doesn’t matter.

  4. Step 4

    Double check all hoses, clamps, float, and wiring harness before installing. Make sure to reuse the OEM circle gasket between the fuel hat and fuel tank.

  5. Step 5

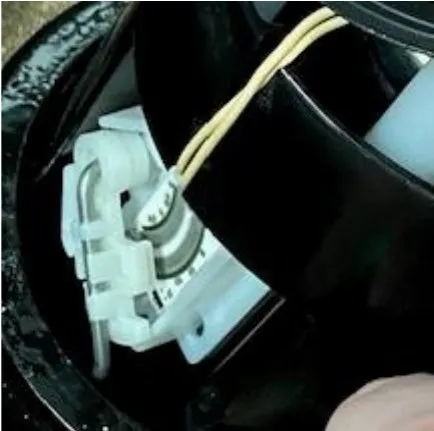
    Always install the fuel float first and fuel sock second. You can also remove the float arm from the assembly and install into the tank. Install the surge tank into the fuel tank about 2.0”. Then reinstall the float arm to the float assembly. See below.
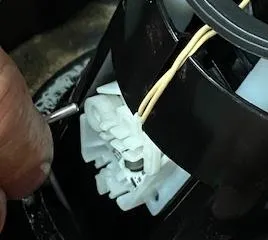
    You can also remove the float arm from the assembly and install into the tank.
    Then reinstall the float arm to the float assembly.
    Install the surge tank into the fuel tank about 2.0”.
  6. Step 6

    install the fuel nut, connect the fuel pump to the OEM harness. Reinstall the fuel line to the quick-connect swivel fitting and install the fuel regulator vacuum hose to the charge tube. DO NOT connect it to anything else.
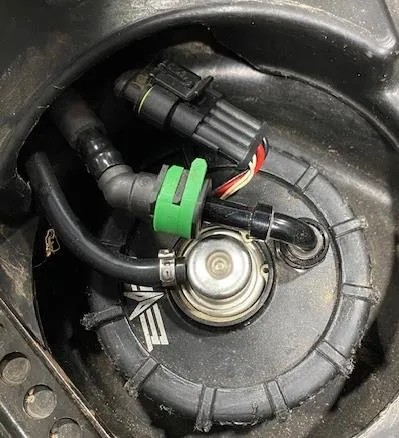
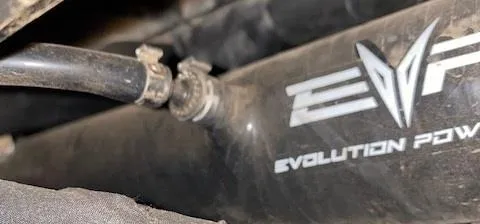
    install the fuel nut, connect the fuel pump to the OEM harness.
    Reinstall the fuel line to the quick-connect swivel fitting and install the fuel regulator vacuum hose to the charge tube.
  7. Step 7

    Locate your fuse box (underneath steering wheel). Remove the fuel pump fuse and install supplied 20amp fuse.
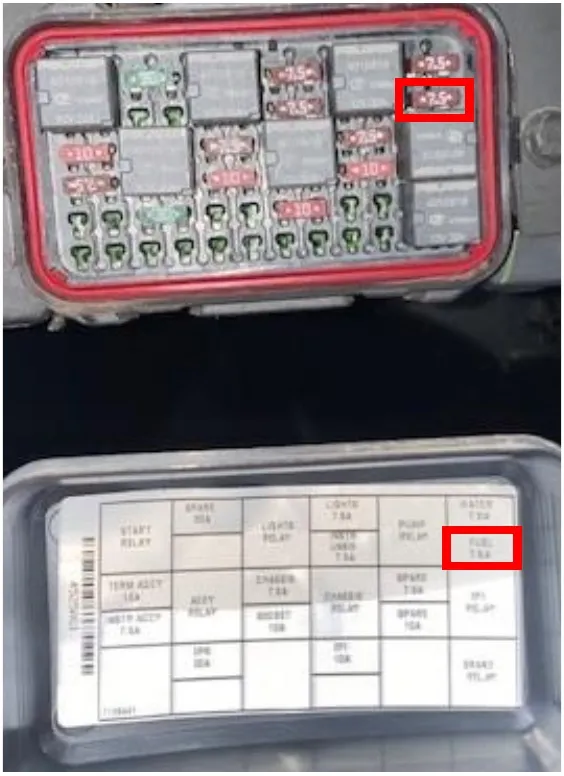
    Remove the fuel pump fuse and install supplied 20amp fuse.
Emissions notice. This product is exempt from the emission standards and related requirements of 40 C.F.R. § 1051 as provided by 40 C.F.R. § 1051.620, and California law [e.g., vehicle code §§ 27156 and 38391]. This product is sold only for use in connection with EPA certified, purpose-built, nonroad vehicles used solely for closed course, nonroad competition/racing and not used for any recreational purpose or on public highways or right of ways maintained by and open to the public. This product is sold only in connection with machines that do not fall under state and/or federal noise or emission standards/regulations. Purchasers who/that purchase this product represent and warrant that the product is purchased only in connection with EPA-certified, emission-regulations-exempt and noise-regulations-exempt competition/racing vehicles as interpreted under applicable state and/or federal law.

Need technical support?

Submit a ticket with your vehicle and what you're seeing, and our support team will get back to you.

Contact Support
We use cookies to improve your experience on our website. Read about how we use cookies in our Privacy Policy. By browsing this website, you agree to our use of cookies. privacy policy
accept

Your cart

×
×