 BUY NOW, PAY LATER. Starting at 0% APR


Polaris XP Turbo/S & Pro XP & Turbo R 11mm Head Stud Kit
XP Turbo/S & Pro XP & Turbo R 11mm Head Stud Kit
In the box
Parts and tools
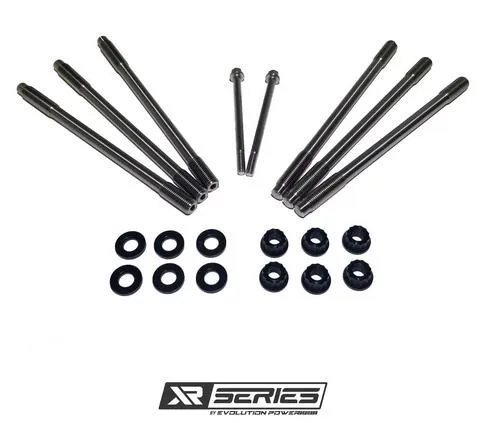
Included parts
- 611mm Nuts
- 611mm Washers
- 611mm Studs
- 1Assembly Lube
- 26mm Head Studs
Required tools
- Torque Wrench (ft-lb)
- Metric Socket Set
- Flat Head Screwdriver
- Torx Set
Procedure
Installation
- Step 1
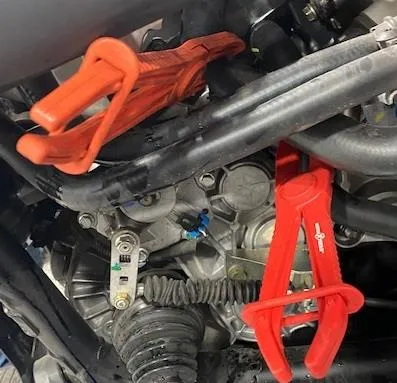
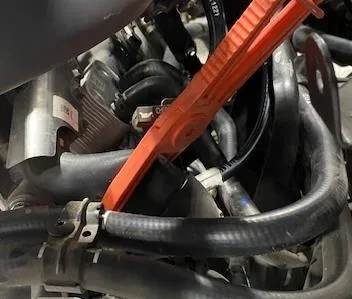
Pinch off all coolant lines going to the engine and valve cover. Remove the coolant reservoir cap if you haven’t done that already. Once all coolant lines are pinched off remove the valve cover coolant line.
 Note
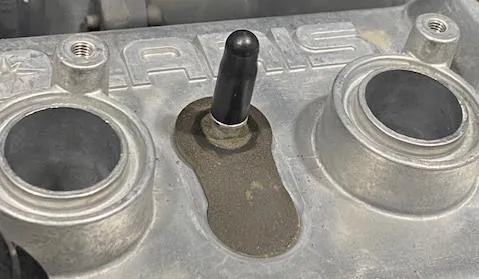
there may be pressure behind this hose, cap the barb off with a silicone cap.
- Step 2
Disconnect the spark plug coil packs and loosen the coil packs with a 8mm socket. Pull the coil packs out of the valve cover.
- Step 3
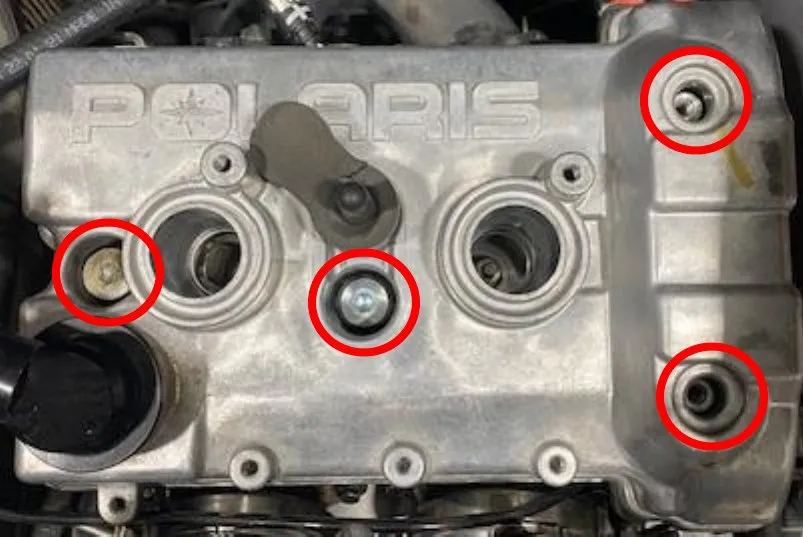
Remove the (4) valve cover screws using a T-40 torxs. Keep the rubber gromets. Remove the valve cover and gasket.
- Step 4
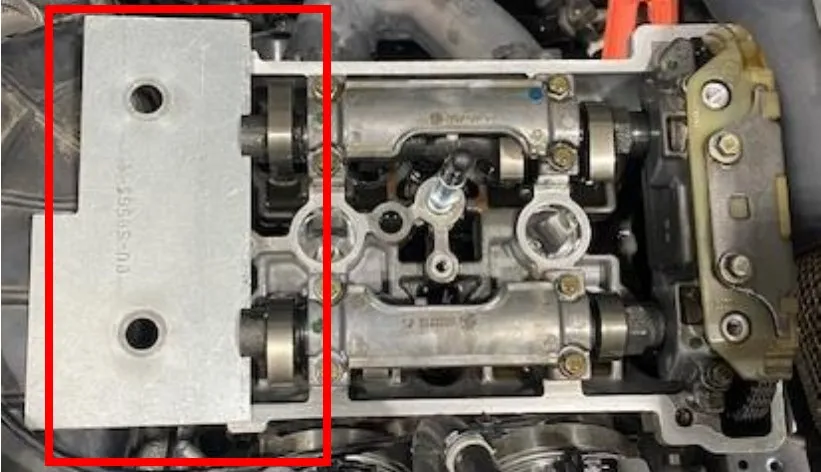
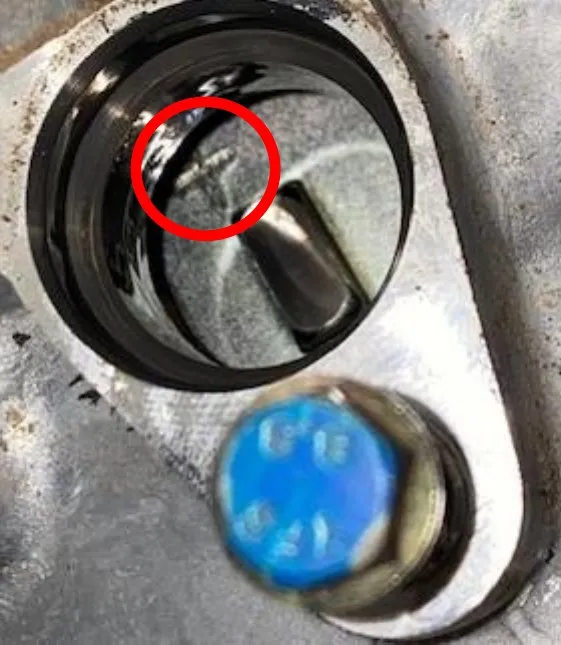
Remove the crankcase position sensor using an 8mm socket. Find TDC and slide the cam locking tool into place. Tool Number: PU-50563-1. To double check TDC you can find a (+) sign looking through the crankcase position sensor port.
- Step 5
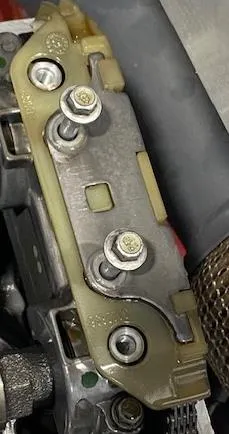
Remove the cam chain tensioner using a M6 Allen. Check gasket for any tears.
- Step 6
Remove the (2) retaining bolts holding the top guide in place, using a 8mm socket.
- Step 7
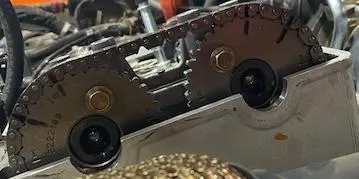
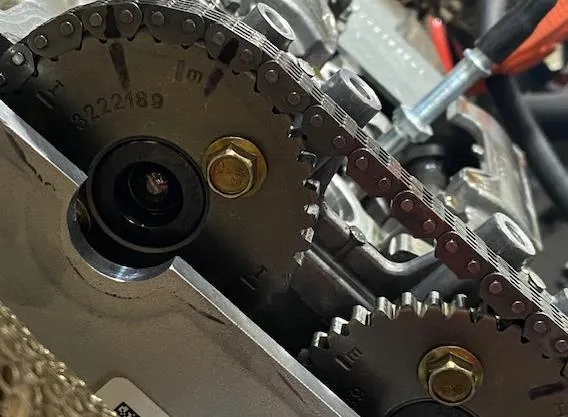
Clean the cam sprockets and chain. With a sharpie make (2) marks on each gear and chain for installation purposes.
- Step 8
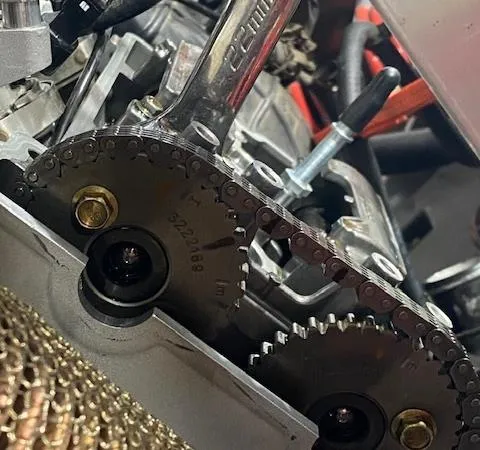
Place a 22mm wrench on the intake cam, spin the clutch to release pressure off the valves while loosening the intake cam sprocket. Remove the sprocket once hardware is removed.
- Step 9
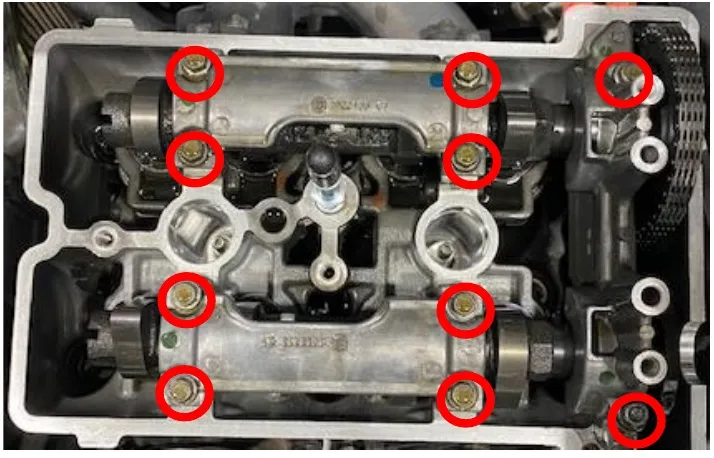
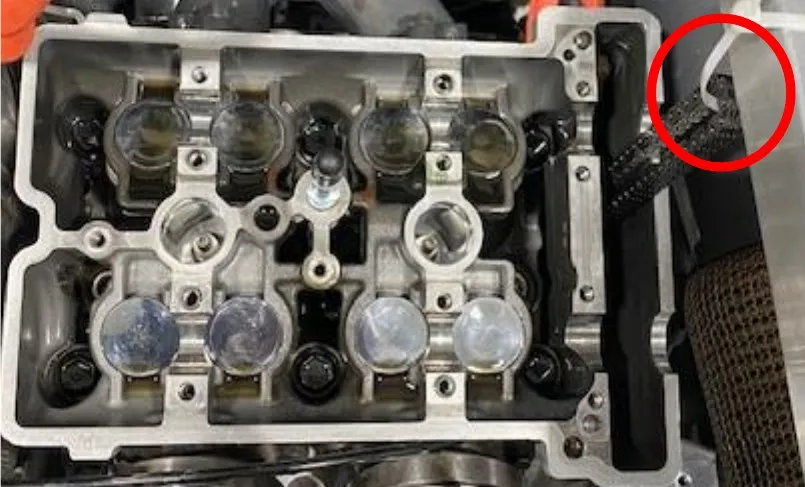
Loosen both camshaft carriers using a 8mm socket. Remove carriers and cam shafts from the engine. Zip tie the cam chain up to the bed mount so the chain doesn’t come off the crank.
- Step 10
Remove one head bolt and replace it with a stud at a time so the cylinder head never has more than one bolt/stud loose at a time. Lather both ends of the stud with supplied ARP assembly lube. Hand tighten the stud until it bottoms out. Place assembly lube on both sides of the washer, place the washer on the stud. Finger tighten the nut onto the stud and torque to 50 ft/lbs. See torque sequence and specifications below.
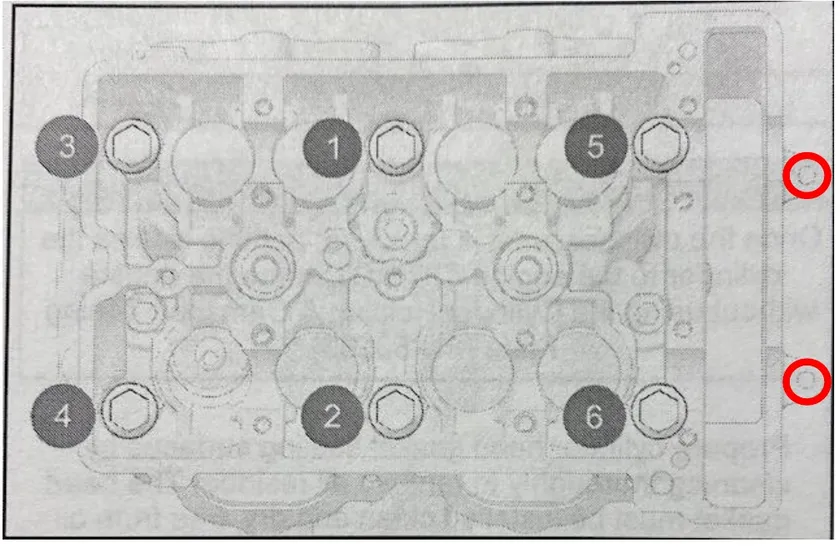
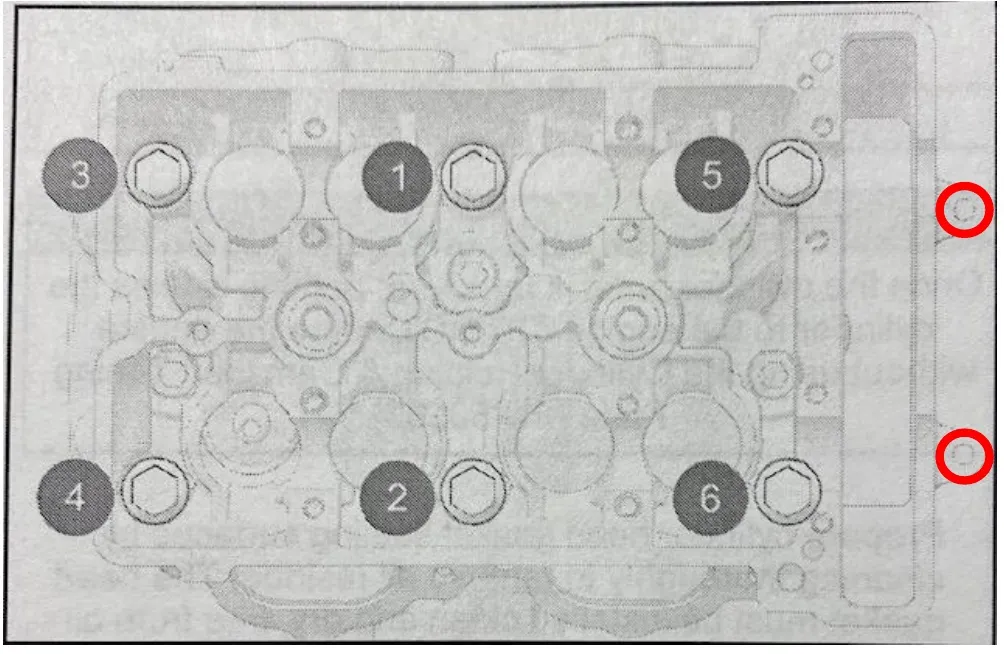
| Torque Specification: Head Stud | 11mm ARP 2000 | 11mm ARP 625 |
|---|---|---|
| Step 1 | 50 ft/lb | 50 ft/lb |
| Step 2 | 68 ft/lb | 72 ft/lb |
| Step 3 | 85 ft/lb | 95 ft/lb |
| Torque Specification: M6 Outer Bolts | 11mm ARP 2000 | 11mm ARP 625 |
|---|---|---|
| Step 1 | 10 ft/lb | 10 ft/lb |
On final torque go over the pattern a total of (3) times.
- Step 11
Reinstall the camshafts and camshaft carriers. Snug up the camshaft carriers. Install cam shaft timing plate back into the camshafts. Verify TDC mark on the flywheel making sure the engine is still timed. Install the intake sprocket back onto the intake camshaft. Make sure your sharpie marks align properly. Apply red Loctite to the sprocket hardware and torque camshaft sprocket to 14 ft/lb. Reinstall the outer camshaft carrier and chain guide. Torque all camshaft carrier bolts to 7 ft/lb.
- Step 12
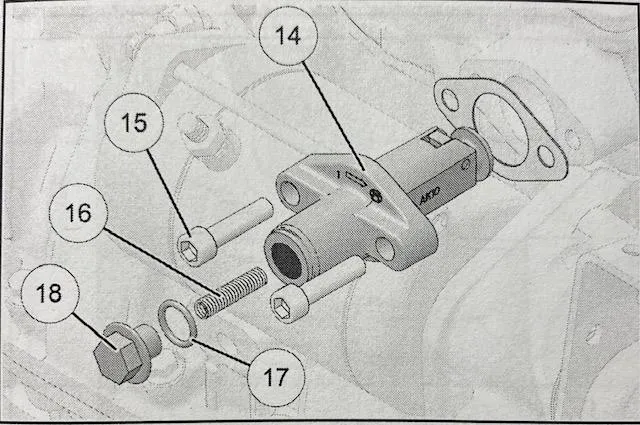
Remove the spring retainer bolt out of the spring tensioner and push the adjuster all the way in. Install the cam chain tensioner into the block and torque the mounting bolts to 7 ft/lb. Install the tensioner spring, washer and retainer bolt. Torque spring tensioner bolt to 12 ft/lb.
- Step 13
Rotate the crankshaft two full revolutions to verify camshaft timing.
- Step 14
Reinstall the valve cover gasket, place a silicone based liquid gasket around the two lobes before installing. Place the valve cover over the camshafts and torque (4) valve cover screws to 7 ft/lb.
Need technical support?
Submit a ticket with your vehicle and what you're seeing, and our support team will get back to you.
