 BUY NOW, PAY LATER. Starting at 0% APR


Can-Am X3 XR Series Billet PTO Cover Kit
X3 XR Series Billet PTO Cover Kit
In the box
Parts and tools
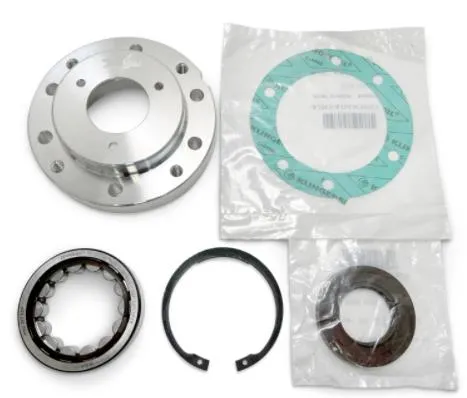
Included parts
- 17075 Billet PTO Cover
- 1PTO Gasket
- 1Circlip
- 1Roller Bearing
- 1Oil Seal
Required tools
- Circlip Tool
- Torque Wrench
- Map Gas
- Torx Sockets
- Socket Set
Procedure
Installation
- Step 1
You can do this installation with the motor out or in the vehicle. To access the PTO cover on the vehicle, remove the clutch cover, primary and secondary clutch, and back clutch cover.
- Step 2
Remove the (6) M8x35mm Torx screws holding the cover on. Once all screws are removed, you can pull the cover off. It may take some finessing.
- Step 3
Once the PTO assembly is removed, remove the circlip. Heat up the outside of the cover with Map Gas, turn the cover over and drop it evenly onto a table (open face down). This will remove the roller bearing from its seat and allow it to be removed without damaging it. Underneath the roller bearing will be an oil seal.
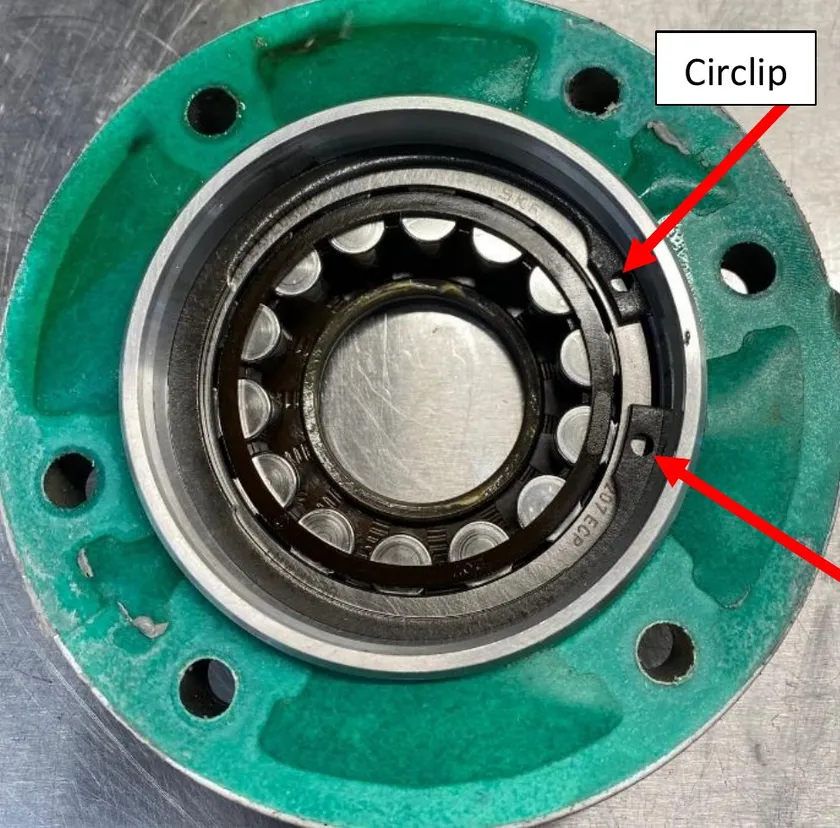
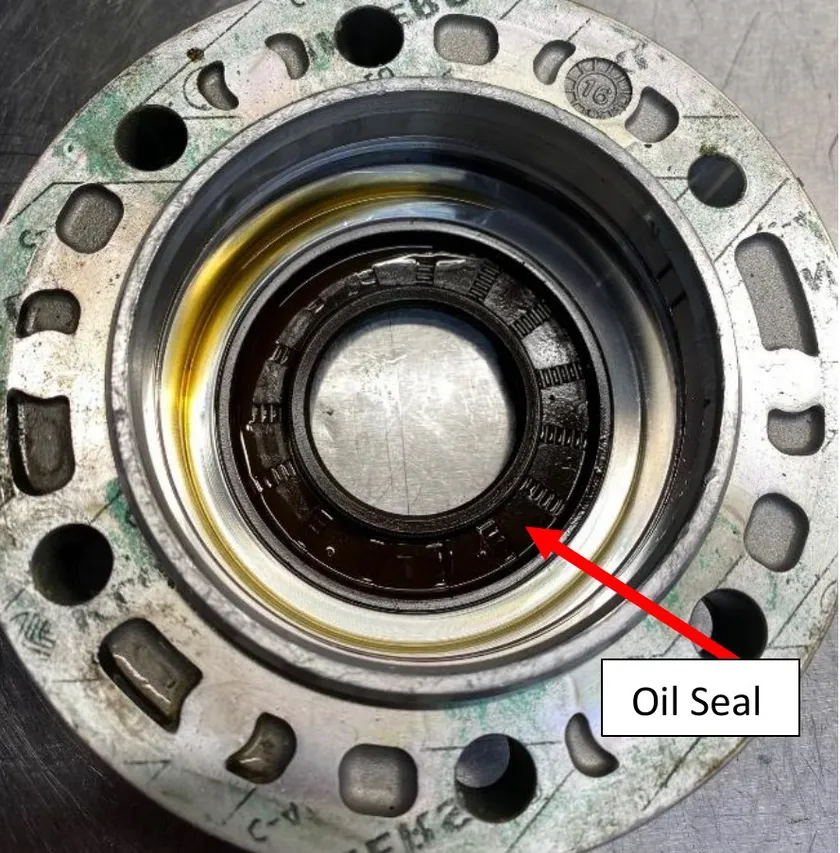
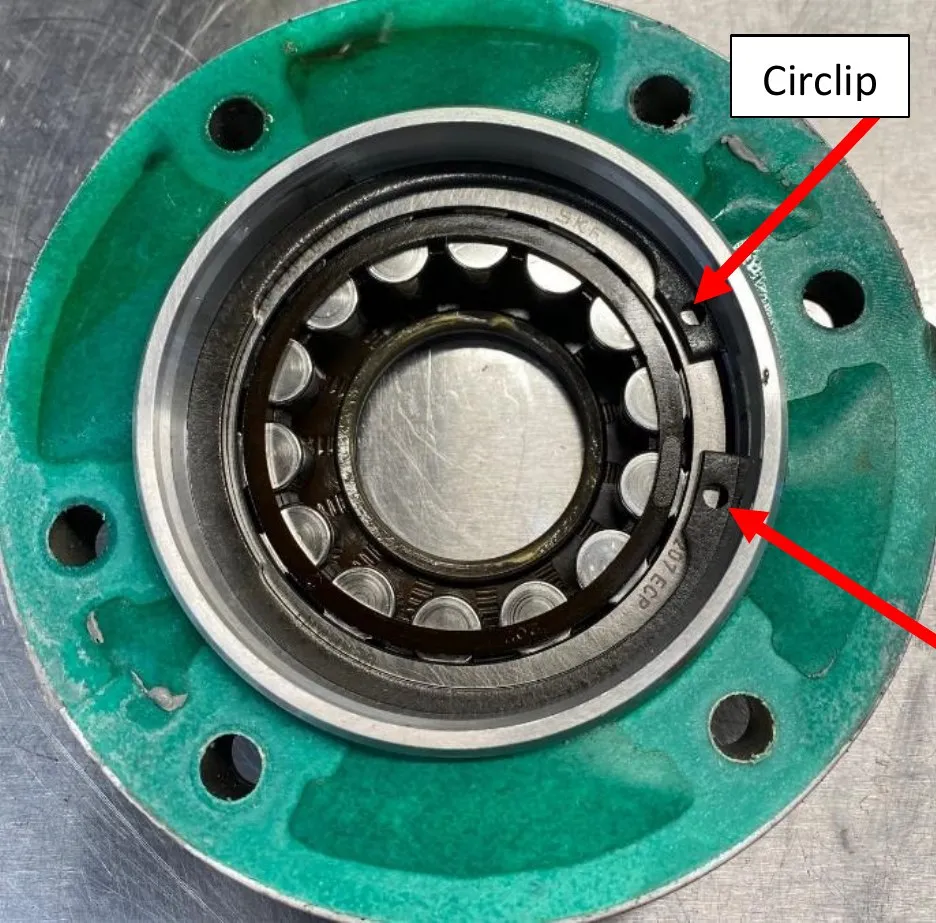
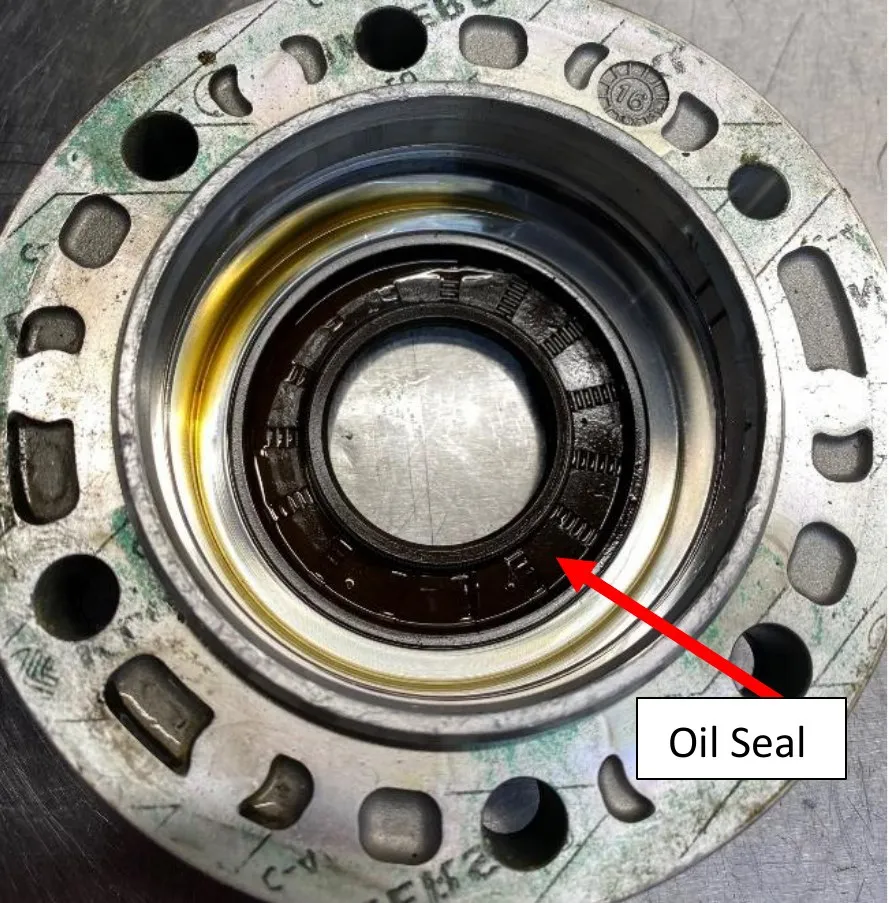
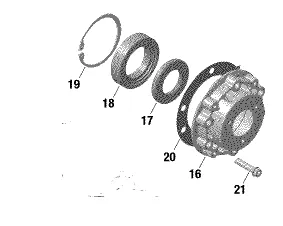
- Step 4
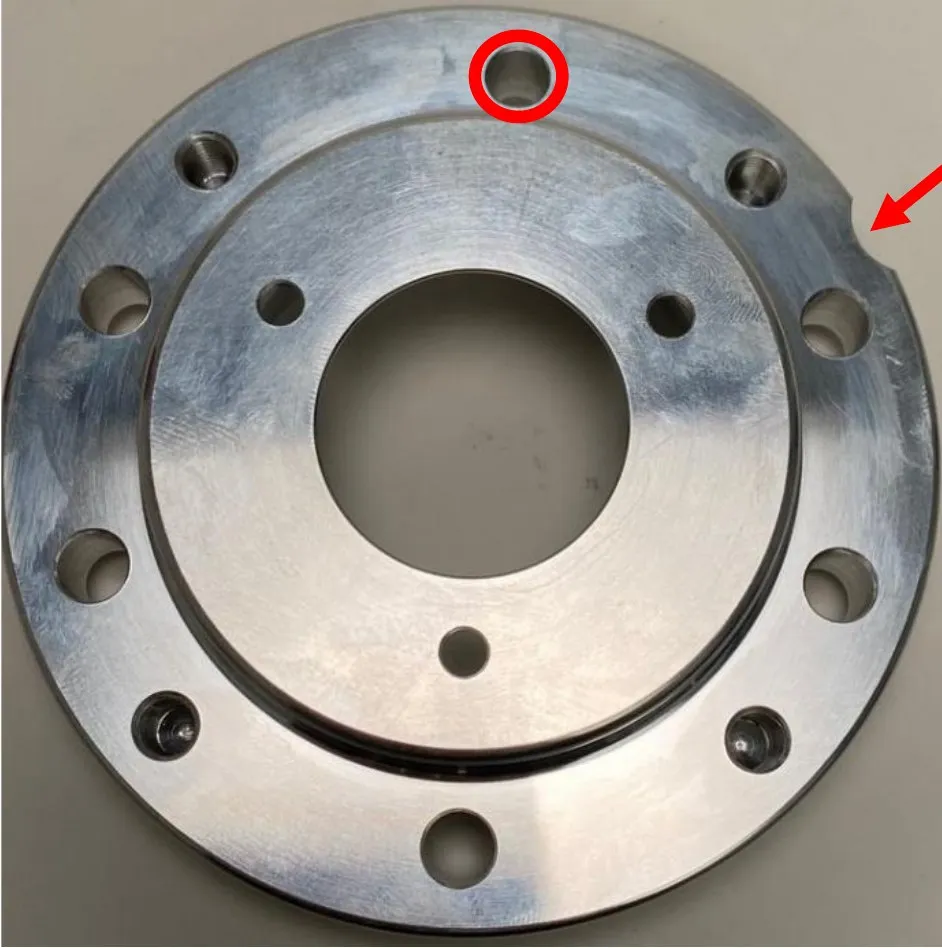
Reinstall the components into the Billet PTO cover in this order: oil seal, roller bearing, circlip, PTO gasket. Circled in red is the top hole.
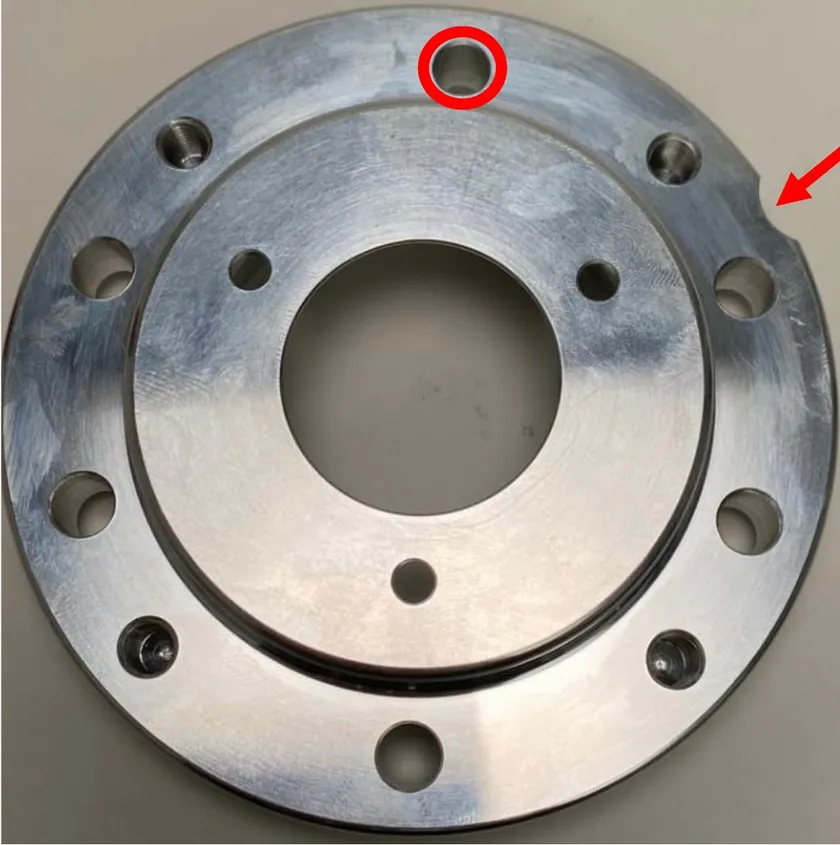
Notch is at the 2 O’clock position. - Step 5
Install the new billet PTO cover, torque all (6) M8 x 35mm Torx screws to 17 ft lbs.
- Step 6
Reinstall the rear CVT cover, followed by the secondary and primary clutches.
Need technical support?
Submit a ticket with your vehicle and what you're seeing, and our support team will get back to you.
