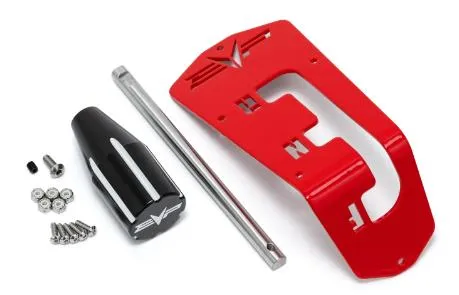
Polaris RZR 200 Shift Knob Kit

Installation instructions for the RZR 200 Shift Knob Kit on the Polaris RZR (SKU 925FP0190 (red), 925FP0191 (white)). Parts, tools, and full procedure.

Vehicles
Polaris RZR
Legacy SKU
925FP0190, 925FP0191
Revision
Rev_021523

In the box

Parts and tools

RZR 200 Shift Knob Kit

Included parts

  • 1Shift Gate
  • 1Shift Knob
  • 1Shift Lever
  • 1Hardware Kit

Required tools

  • Push Dart Tool
  • 10,12mm Socket/Wrench
  • 1/16” Allen Wrench
  • 1/4" Socket
  • Philips Screwdriver
  • 7/64” Drill Bit

Procedure

Installation

  1. Step 1

    Slide both seats forward, behind the seats you will find (2) bolts. With a 10mm socket remove the bolts and remove the seats.

    Slide both seats forward, behind the seats you will find (2) bolts.
  2. Step 2

    With a push dart tool remove (11) push darts holding the center console in. Also remove (4) more push darts on both driver and passenger side. This will help remove the center console.
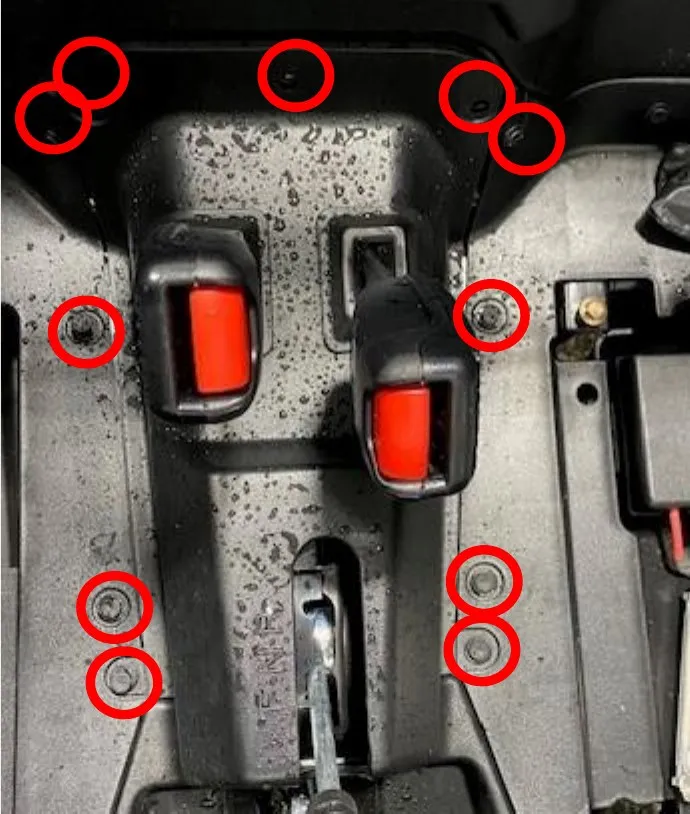
    With a push dart tool remove (11) push darts holding the center console in.
  3. Step 3

    Push the seat belt boots down into the center console. Lift and remove the center console out of the vehicle.
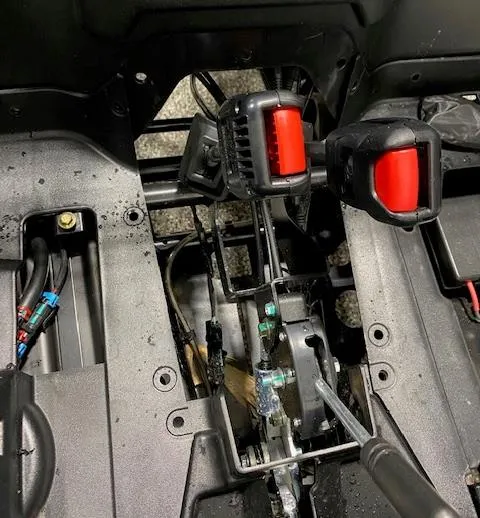
    Push the seat belt boots down into the center console. Lift and remove the center console out of the vehicle.
  4. Step 4

    Bring the center console to a work bench. Place shift gate on the center of the console. Line up the passenger side cut out right before the “R-N-F” letters. This will allow for proper shifting. With a 7/64” drill bit, drill out one hole at a time and install supplied hardware.
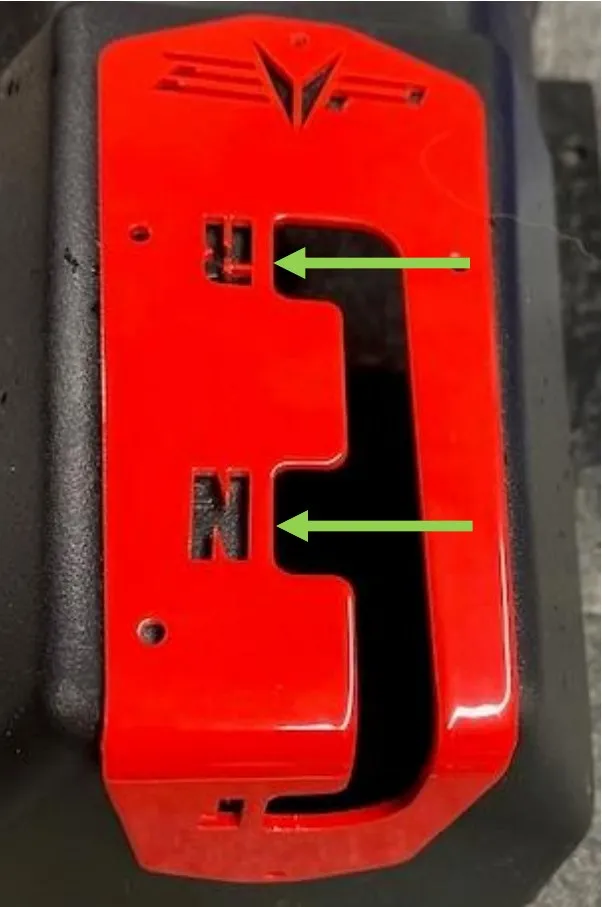
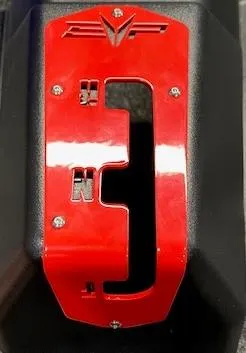
    Bring the center console to a work bench.
    Bring the center console to a work bench.
  5. Step 5

    Remove the OEM shift lever by loosening the bolt and nut with a 12mm socket and wrench. Be careful not to break the plastic. There is spring tension on the driver side plastic plate. With a screwdriver loosen and remove the lever set screw.
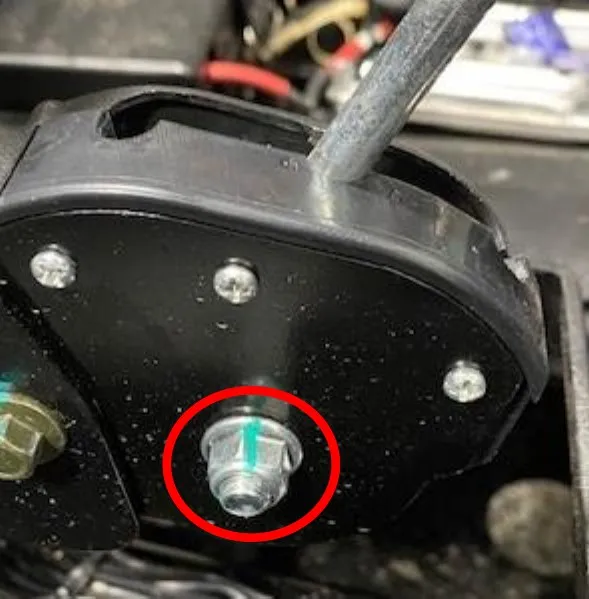
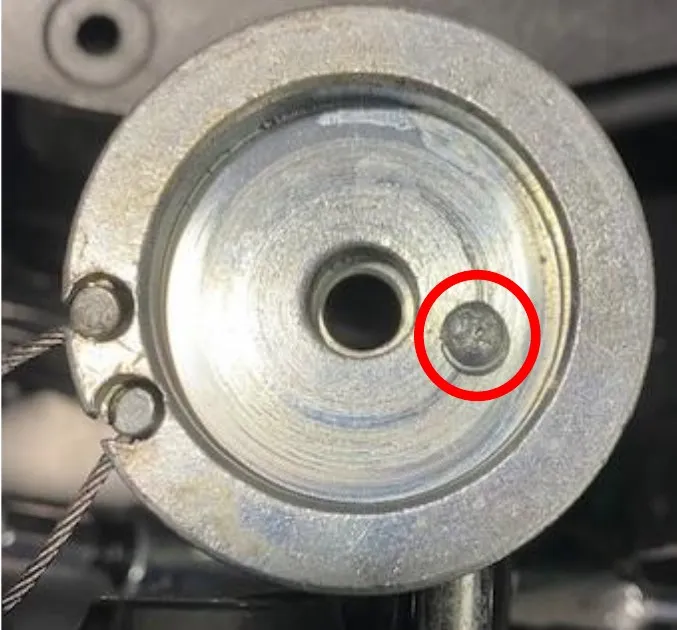
    Remove the OEM shift lever by loosening the bolt and nut with a 12mm socket and wrench.
    Remove the OEM shift lever by loosening the bolt and nut with a 12mm socket and wrench.
  6. Step 6

    Install supplied shift lever with supplied set screw. Reinstall the spring, plastic cover and bolt. Make sure the shift lever cut out is facing the passenger side. This will orientate the shift knob in the correct direction.
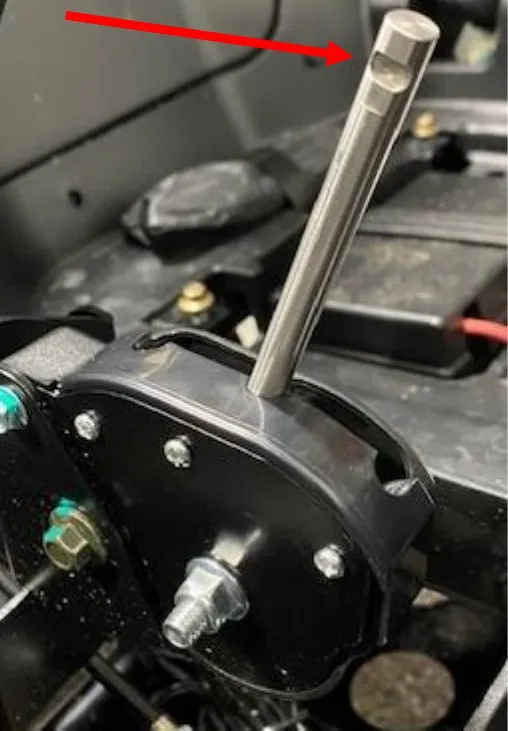
    Install supplied shift lever with supplied set screw.
  7. Step 7

    Reinstall the center console with shift gate. Reinstall the seat belt boots and all push darts.
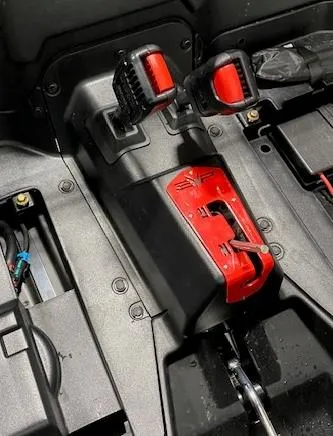
    Reinstall the center console with shift gate. Reinstall the seat belt boots and all push darts.
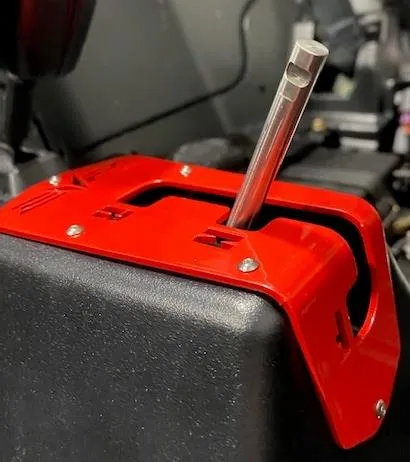
    Reinstall the center console with shift gate. Reinstall the seat belt boots and all push darts.
  8. Step 8

    Install the billet shift knob and secure with supplied Allen set screw.

    Install the billet shift knob and secure with supplied Allen set screw.
  9. Step 9

    Reinstall both seats and torque frame bolts to 30 ft-lb.

Emissions notice. This product is exempt from the emission standards and related requirements of 40 C.F.R. § 1051 as provided by 40 C.F.R. § 1051.620, and California law [e.g., vehicle code §§ 27156 and 38391]. This product is sold only for use in connection with EPA certified, purpose-built, nonroad vehicles used solely for closed course, nonroad competition/racing and not used for any recreational purpose or on public highways or right of ways maintained by and open to the public. This product is sold only in connection with machines that do not fall under state and/or federal noise or emission standards/regulations. Purchasers who/that purchase this product represent and warrant that the product is purchased only in connection with EPA-certified, emission-regulations-exempt and noise-regulations-exempt competition/racing vehicles as interpreted under applicable state and/or federal law.

Need technical support?

Submit a ticket with your vehicle and what you're seeing, and our support team will get back to you.

Contact Support
We use cookies to improve your experience on our website. Read about how we use cookies in our Privacy Policy. By browsing this website, you agree to our use of cookies. privacy policy
accept

Your cart

×
×