 BUY NOW, PAY LATER. Starting at 0% APR


Polaris Pro XP Wastegate Actuator
Installation instructions for the Pro XP Wastegate Actuator on the Polaris Pro XP (RZR) (SKU 100RP0074). Parts, tools, and full procedure.
In the box
Parts and tools
Included parts
- 17LB Wastegate
Required tools
- T-15 Torx
- T-40 Torx
- 8mm Socket
- 10mm Socket
- 13mm Socket
- 15mm Socket
- 14mm Open End Wrench
- 15mm Open End Wrench
- 5mm Allen Wrench
- Mity Vac
Procedure
Installation Steps
- Step 1
Using a T40 remove the (4) bolts holding the bed on, remove the bed
- Step 2
Remove both seats for 2-seater, both rear seats for a 4-seater
- Step 3
Remove upper firewall, by turning the (4) locking pins on the top corners
- Step 4
Open center console, and turn both locking pins, then remove the (4) T40 bolts on the side of the center console and remove it.
- Step 5
Remove lower firewall and airbox.
- Step 6
Using a 10mm socket, remove the (6) bolts holding the solid heat shield above the turbo.
- Step 7
Using 10mm socket, remove the (4) bolts holding the flexible heat shield onto the exhaust manifold.
- Step 8
Using an 8mm socket, remove the (2) bolts holding the heat shield on the bottom of the exhaust manifold.
- Step 9
Using a 13mm socket, remove the oil line banjo bolt, as well as both clamps holding the oil line to the turbo mount.
- Step 10
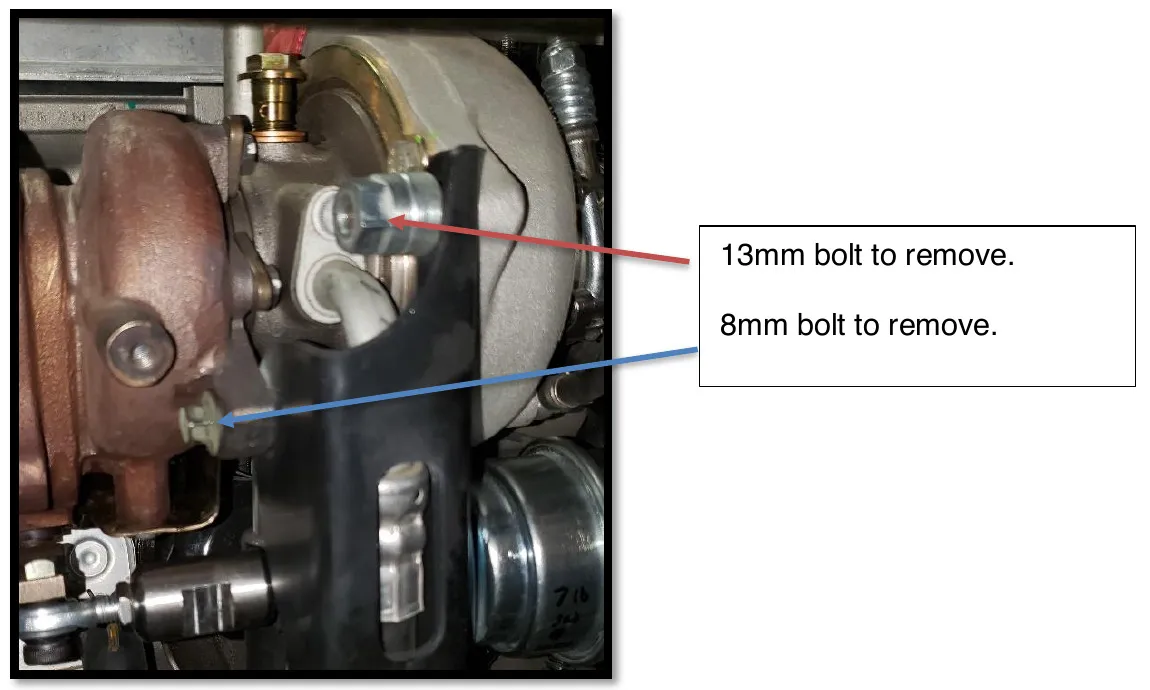
With a 13mm and 8mm socket, remove the (2) bolts that attach the bracket to the turbo.
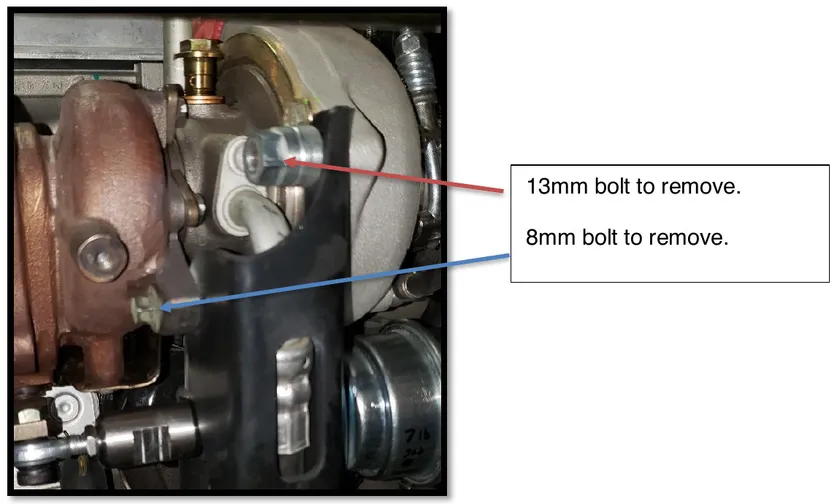
13mm bolt to remove. 8mm bolt to remove. - Step 11
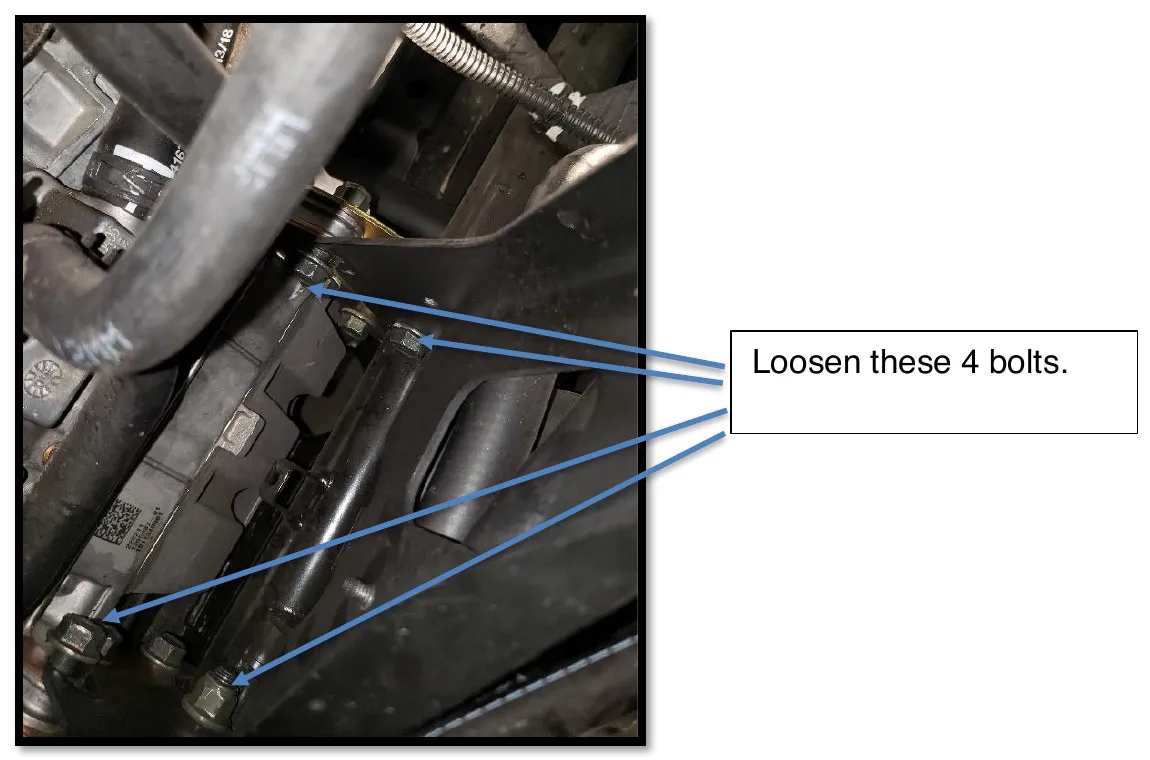
Using a 15mm socket and 15mm wrench, loosen the (4) bolts on the turbo mount, on the bottom and front side.
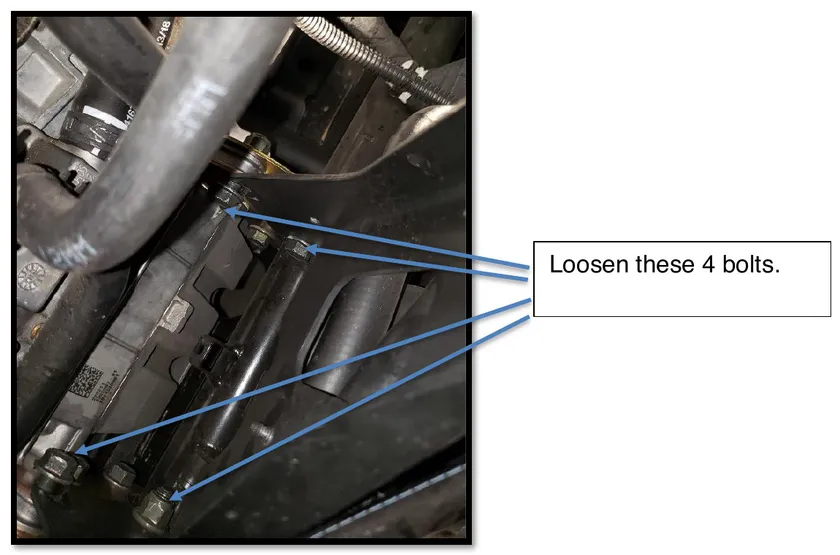
Loosen these 4 bolts. - Step 12
Connect your mity vac (pressure gauge) to the wastegate and apply pressure till wastegate opens.
- Step 13
Using the 5mm Allen, and 14mm wrench, disconnect wastegate from the exhaust manifold.
- Step 14
Release pressure from the mity vac (pressure gauge) and remove from the wastegate.
- Step 15
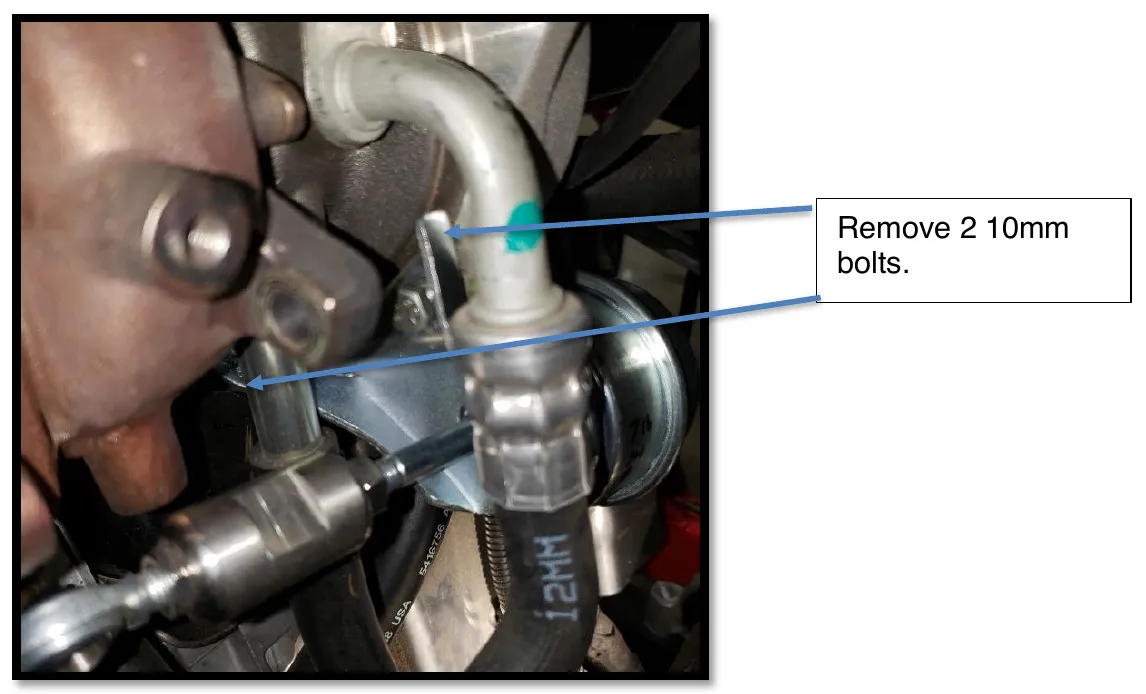
With your 10mm socket, remove the (2) bolts holding your wastegate to the turbo (one is on the front side of the turbo, the other is on the back side.)
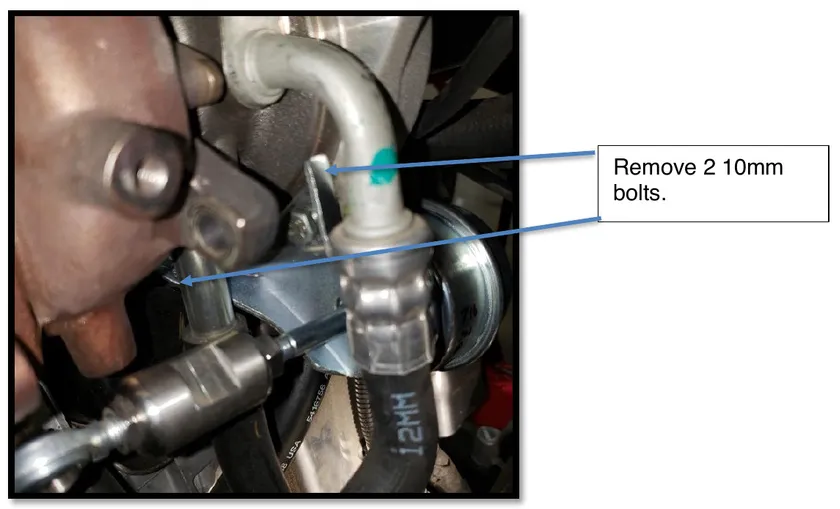
Remove 2 10mm bolts. - Step 16
Install the EVP upgraded wastegate and set crack pressure to 8psi.
- Step 17
Re-install turbo bracket, making sure to tighten the bottom (4) bolts.
- Step 18
Re-install the oil line and clamps.
NoteRun oil line and install banjo bolt but do NOT tighten banjo bolt till both clamps have been installed and tightened.
- Step 19
Double check your crack pressure. (8psi)
- Step 20
Make sure to hook vacuum line back up to the wastegate.
- Step 21
Re-install the heat shields on the bottom and top of exhaust manifold.
- Step 22
Re-install solid heat shield above turbo.
- Step 23
Install lower firewall and center console.
- Step 24
Install upper firewall and both seats.
- Step 25
Re-install bed.
Need technical support?
Submit a ticket with your vehicle and what you're seeing, and our support team will get back to you.
