 BUY NOW, PAY LATER. Starting at 0% APR


Can-Am Maverick R Rising Rate 340LPH Fuel Pump Assembly
Installation instructions for the Maverick R Rising Rate 340LPH Fuel Pump Assembly on the Can-Am Maverick R (SKU 500FC0065). Parts, tools, and full procedure.
In the box
Parts and tools
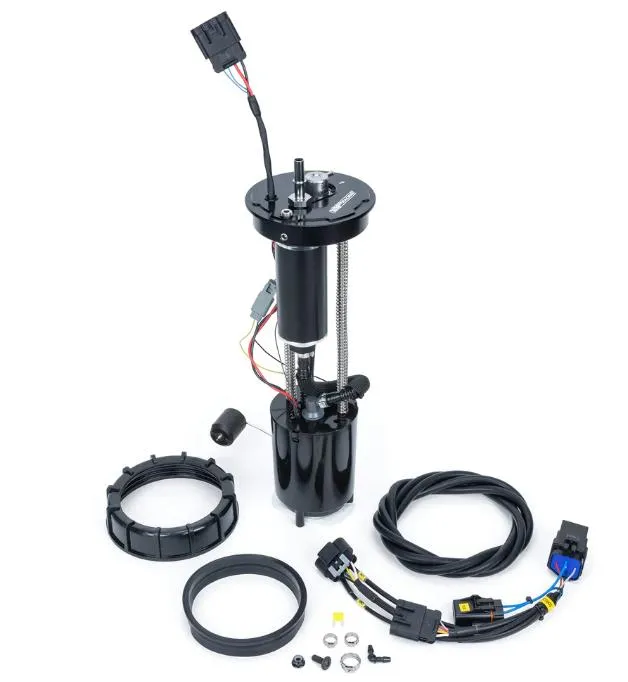
Included parts
- 1EVP Fuel Pump Assembly
- 1Vacuum Hose
- 120 AMP Fuse
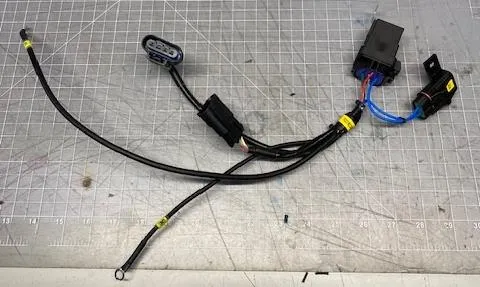
- 1Fuel Pump Relay Harness
Required tools
- 10mm Socket
- T-30 Socket
- Dielectric Grease
- Rags
Procedure
Installation
- Step 1
Remove the center dash cover (if it hasn’t already fell off).

- Step 2
Remove the passenger side yellow panel. Slightly lift on each corner, (4) tabs are holding it in place.
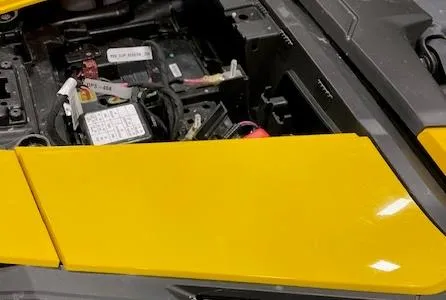
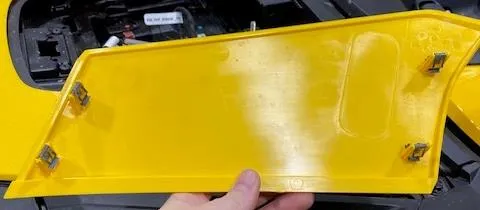
- Step 3
With a T-30 socket, remove the cage trim piece. You can open the fuel door to help remove.
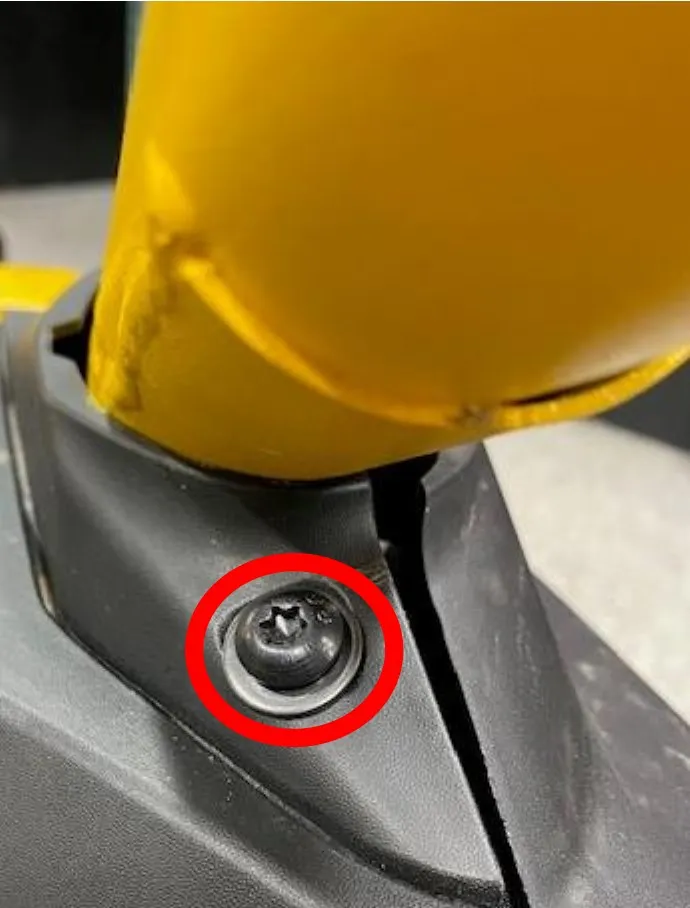
- Step 4
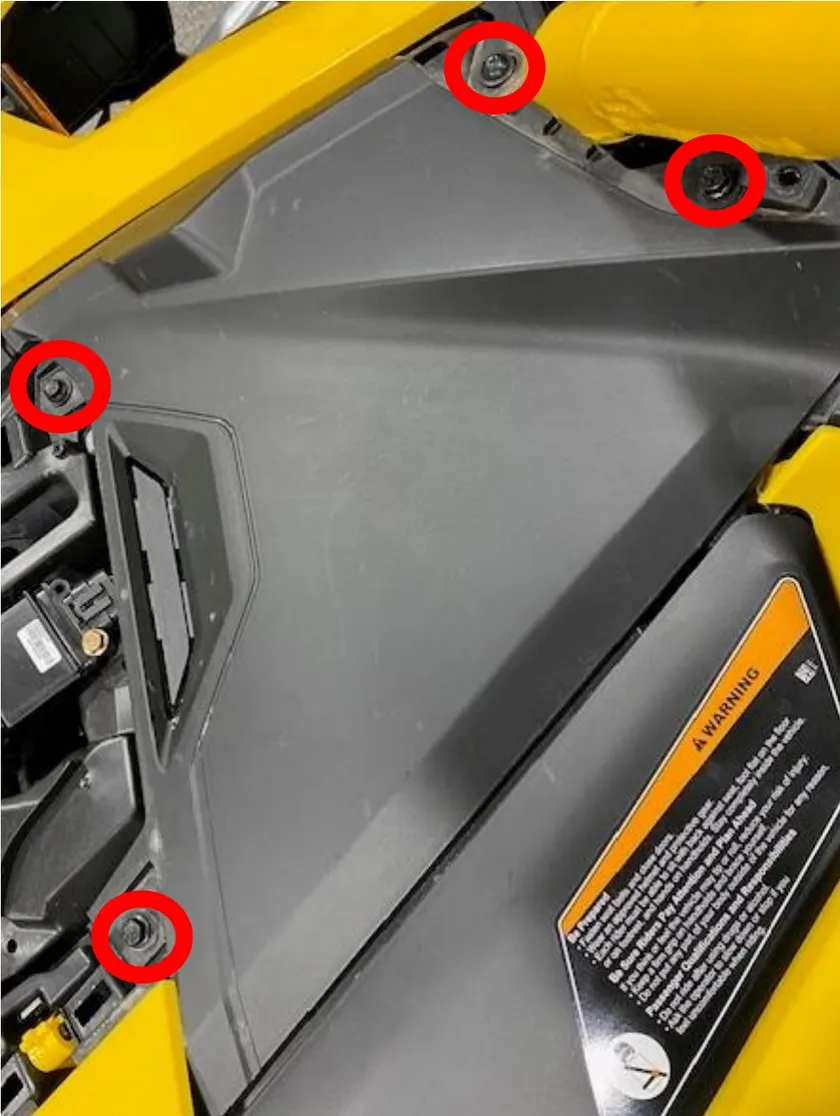
Remove the passenger side upper dash. (3) 10mm screws and (1) T-25 screw.
- Step 5
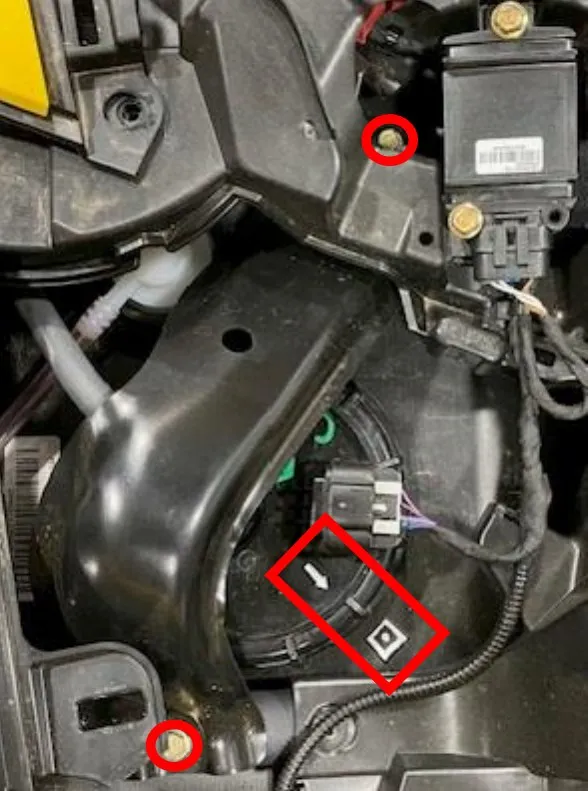
Remove the fuel pump safety bracket by removing (2) 10mm screws.
 Note
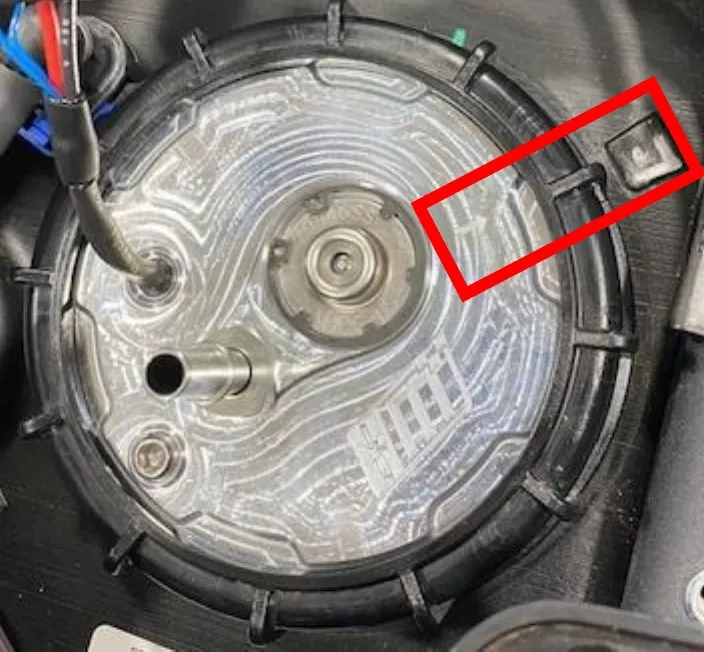
Notice the arrow on the fuel pump is facing the middle of the box. When reinstalling make sure the arrow is facing the middle of the box or your fuel float will read incorrectly.
- Step 6
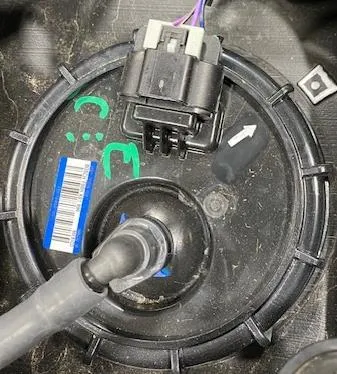
Remove the silver safety clip on the electrical connector, then remove plug. Remove the blue safety clip on the fuel connector, press the black quick connect and remove the fuel hose.
- Step 7
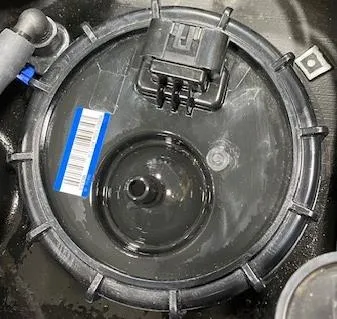
Remove the fuel pump nut, be careful not to damage it. The fuel pump assembly has springs so the hat might spring up about one inch.
NoteIf you are changing fuel octane, drain your fuel tank now!
- Step 8
Install the new fuel pump assembly with a seal. Apply dielectric grease on the seal. Clock the fuel pump assembly correctly. Don’t install the bracket yet.
- Step 9
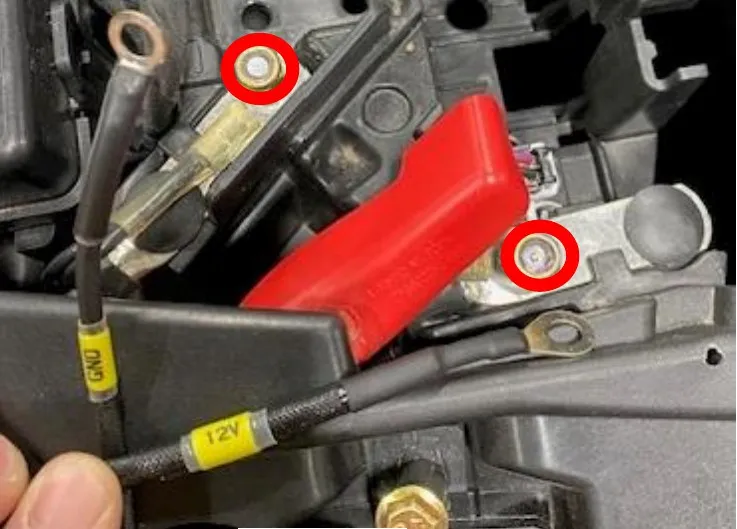
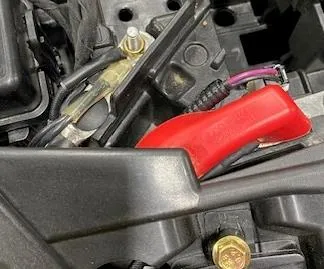
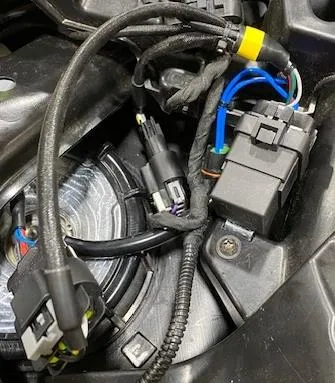
Install the fuel pump relay harness into the vehicle. Use the positive and negative to the upper dash bus bar. Route the wires under the plastics, use a 10mm socket.
- Step 10
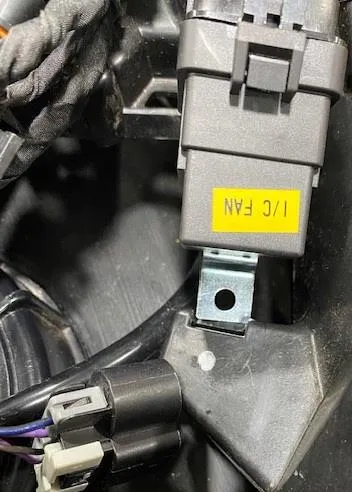
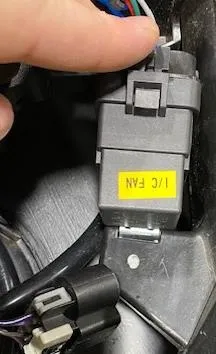
Locate the plastic opening right in front of the fuel pump. Install the relay mounting clip into the slot. Mark with a sharpie and drill a 1/4" hole. Install supplied M6 flange screw and nut. Install the fuel pump harness to the fuel pump and OEM harness.
- Step 11
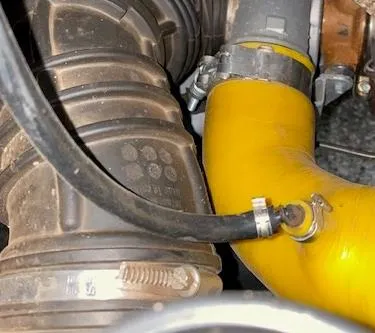
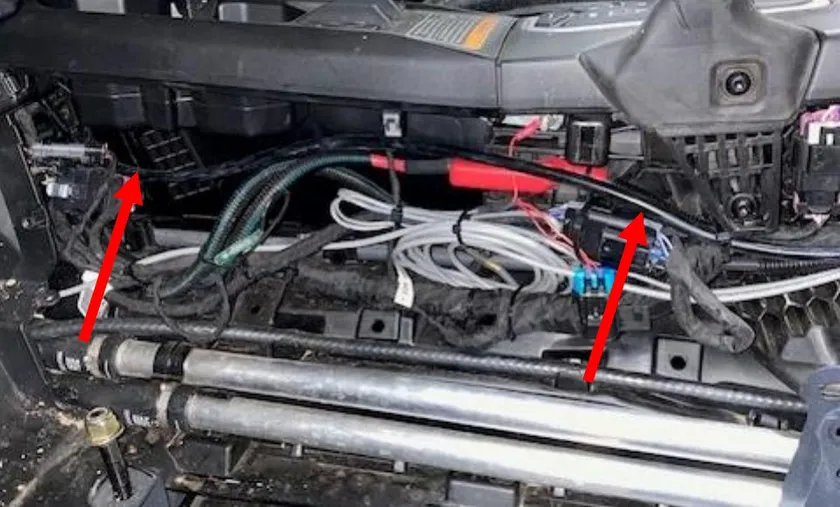
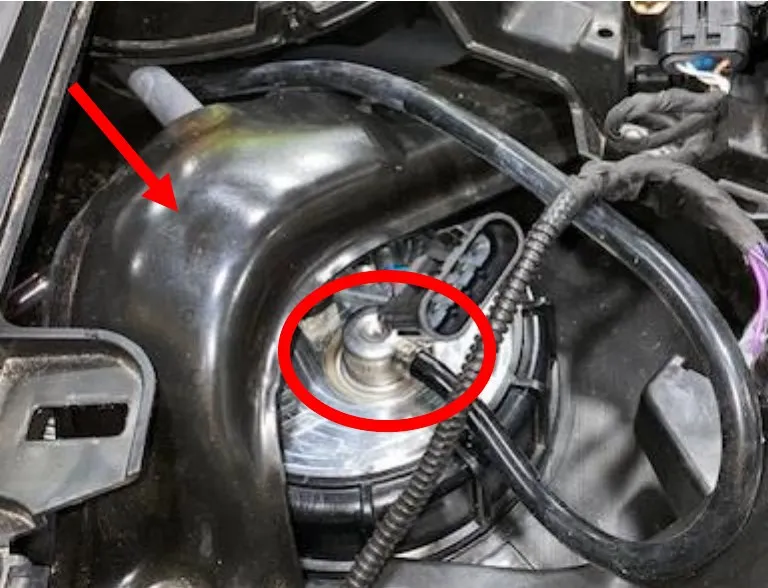
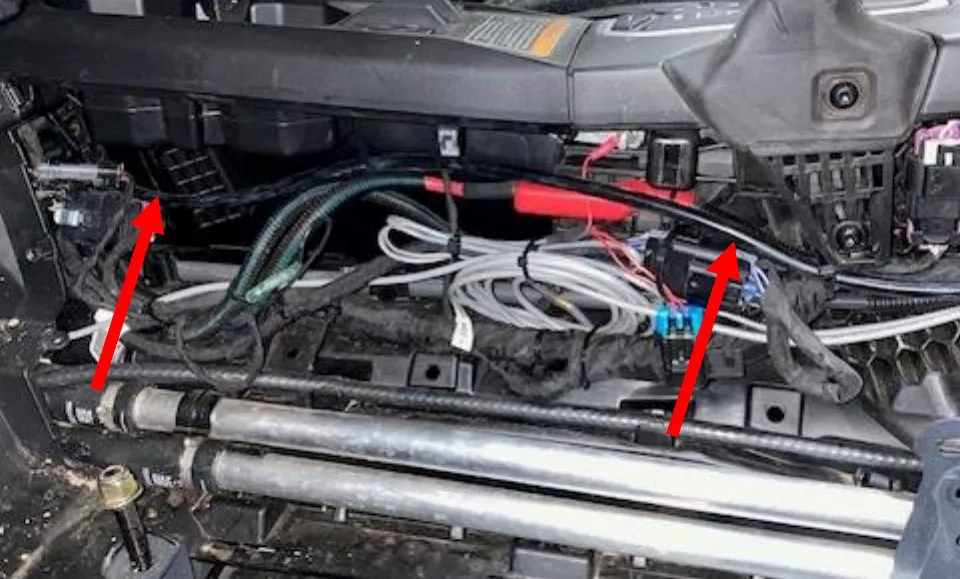
Install supplied 3/16” 90-degree or straight barb into the charge tube, use supplied pinch clamp to fasten. Install vacuum hose and clamp to the barb, route the hose through the firewall and up through the center tunnel, up the dash and to the fuel pump regulator. Loosely zip tie the hose (without kinking). 2-seat models can cut off extra 50” vacuum line. 4-seat models will use all 144”.
- Step 12
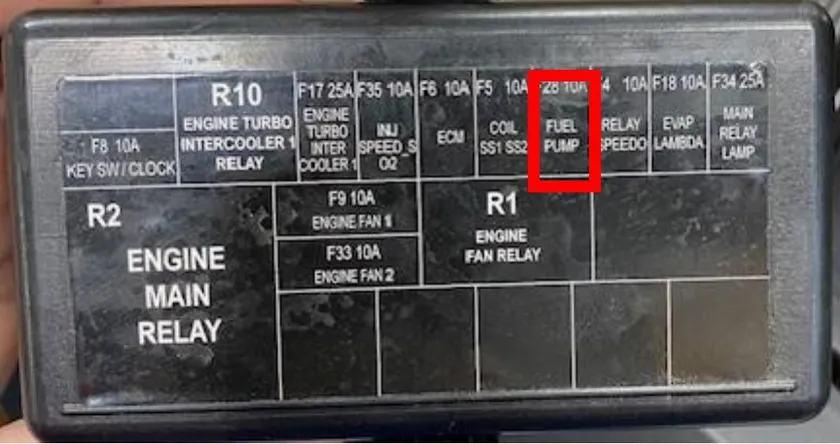
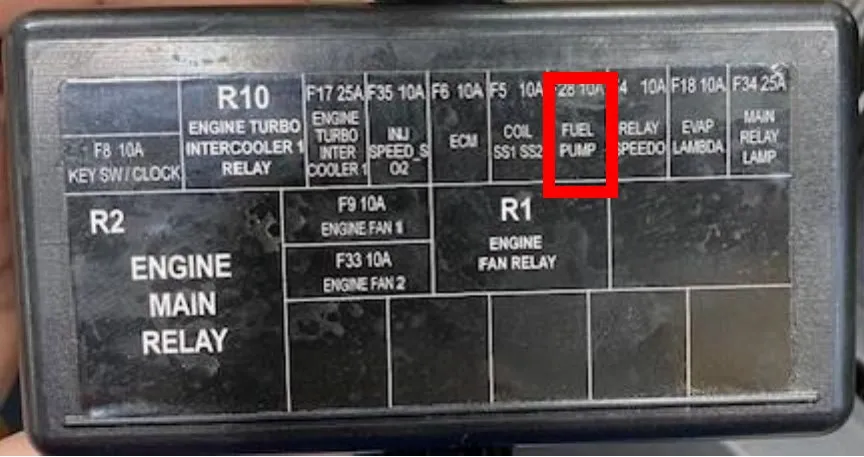
Once the fuel pump relay harness, fuel line and vacuum line is connected; reinstall the fuel pump bracket. It is much easier to access everything with this removed. Behind the driver’s seat you will find the fuse box. Locate the fuel pump fuse (F28), replace the 10amp with supplied 20amp.

Plug the CodeShooter device into the vehicle and UPDATE your tune file for the rising rate fuel pump assembly. If you are changing your tune file make sure you have the correct fuel octane in the vehicle!
- Step 13
Key the vehicle on a few times and look for fuel leaks. If everything checks out reinstall all plastics.
Need technical support?
Submit a ticket with your vehicle and what you're seeing, and our support team will get back to you.
