 BUY NOW, PAY LATER. Starting at 0% APR


CHANGING TRANSMISSION OIL: Drive the vehicle a few minutes to warm up the transmission fluid, park it on a level surface. Proceed to STEP 1.
Can-Am Maverick R DCT Transmission Oil Change Kit
Installation instructions for the Maverick R DCT Transmission Oil Change Kit on the Can-Am Maverick R. Parts, tools, and full procedure.
Before you start
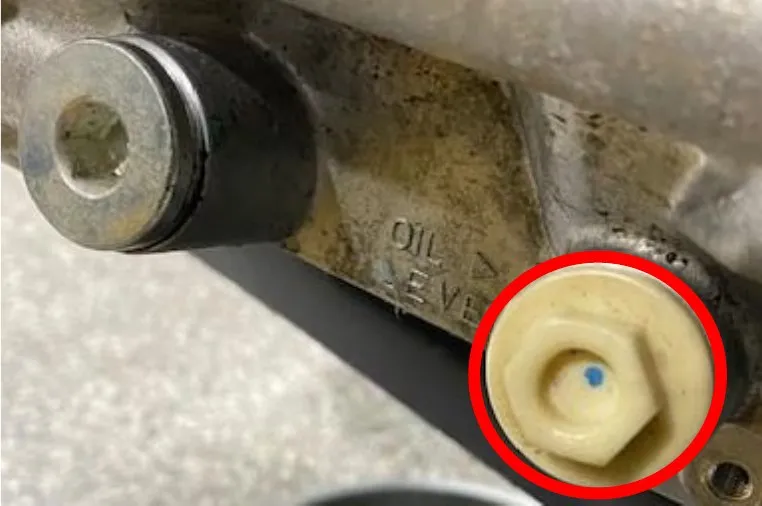
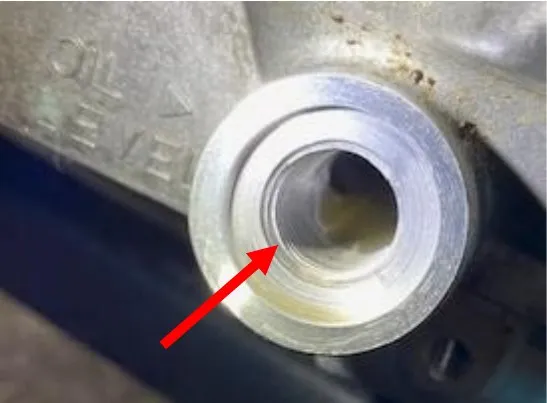
CHECKING TRANSMISSION OIL: To properly check the transmission oil, start the engine and let it idle for minimum 1 minute. Shut the engine down and remove the oil level plug. Check the oil level, it should be at the top of the outermost thread of the hole.
In the box
Parts and tools
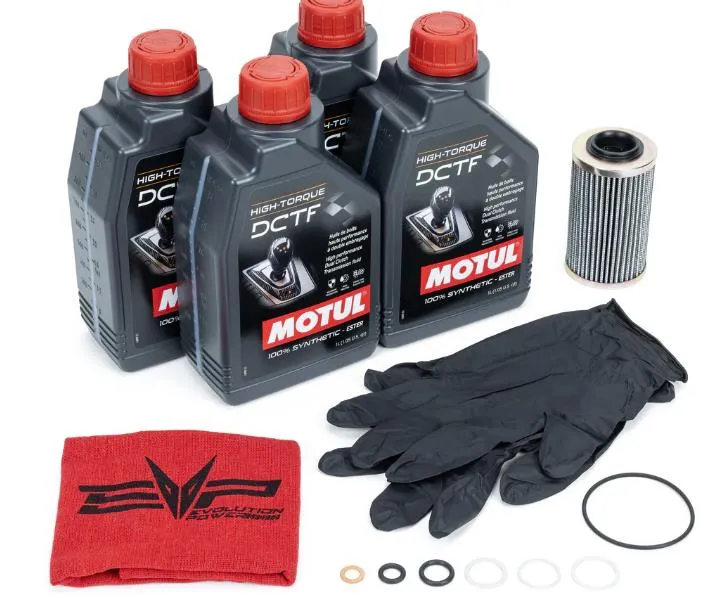
Included parts
- 4Motul DTCF 1 Liter Jug
- 1OEM Oil Filter
- 4Sealing Rings
- 2O-Rings
- 1Shop Rag
- 1Set of Gloves
Required tools
- Torque Wrench
- 8, 15, 17mm Socket
- Drain Pan
- Screwdriver
- Funnel/Syringe
Procedure
Installation
- Step 1
Located on the right rear of the vehicle, clean around the oil level plug and remove with a 15mm socket.
- Step 2
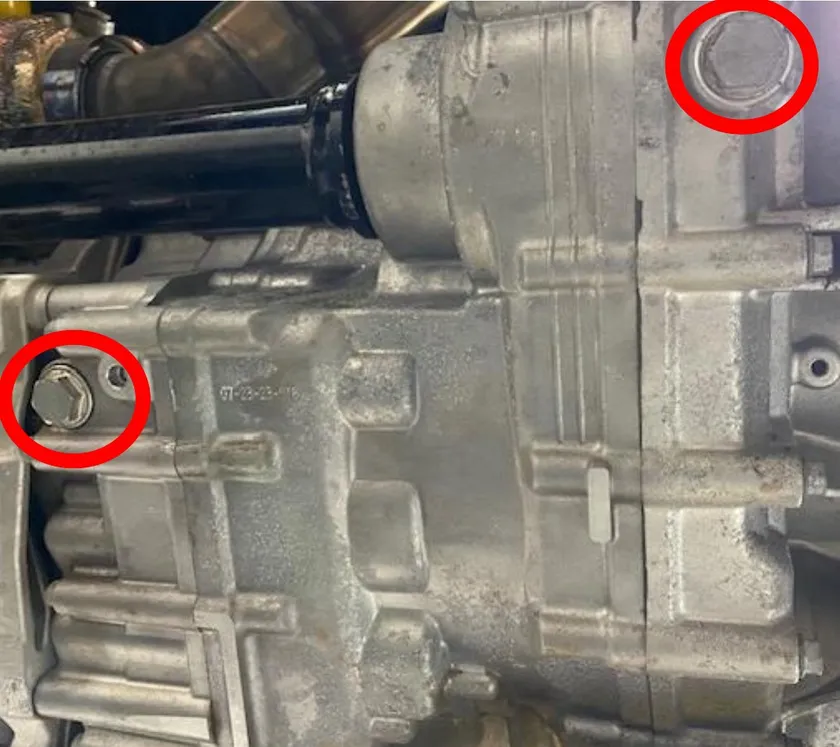
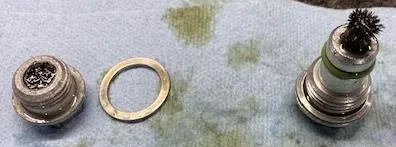
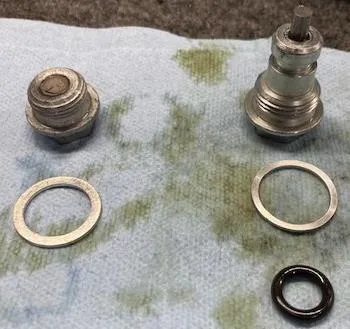
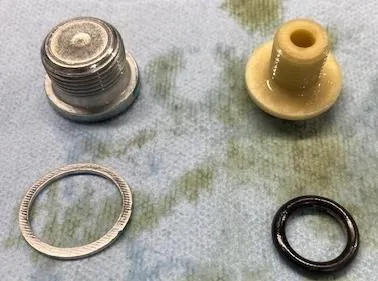
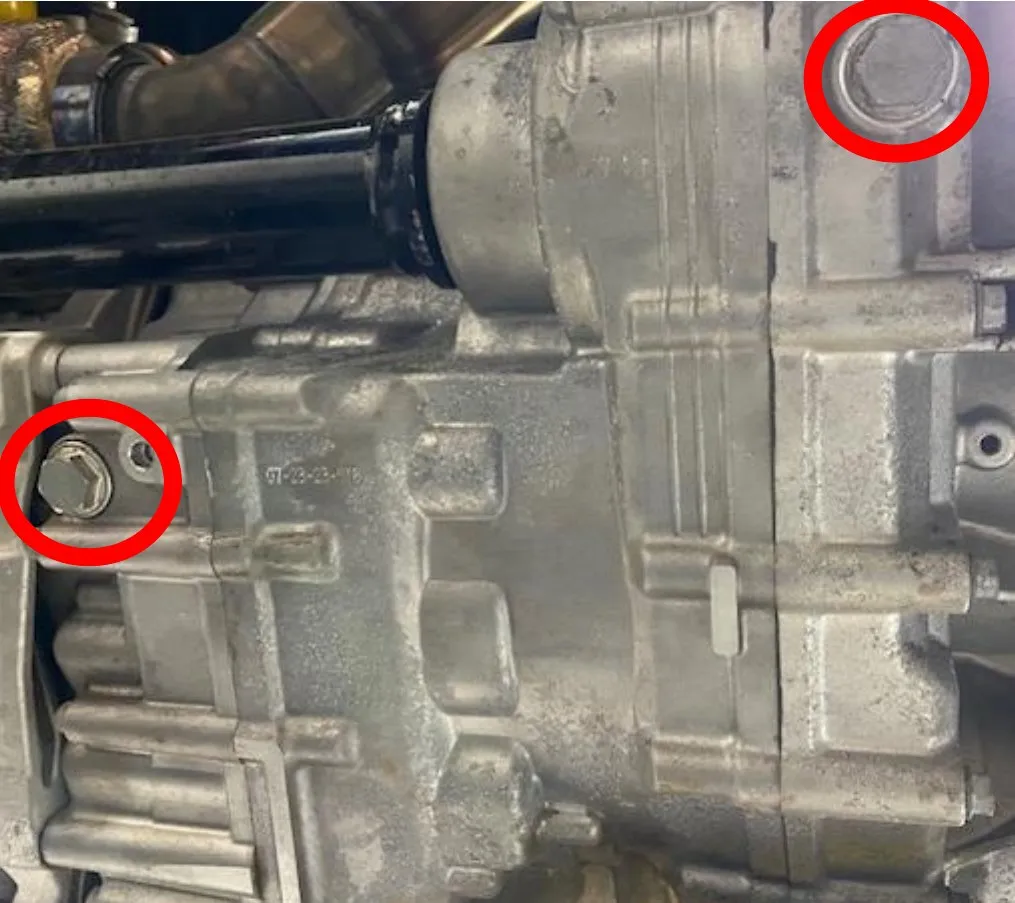
For these photos we removed the skid plate for better photos. This step is NOT needed. Underneath the vehicle you will locate (2) oil drains. On the left is the magnetic oil drain plug with O-ring. On the right is the magnetic short drain plug. Remove both with a 17mm socket.
- Step 3
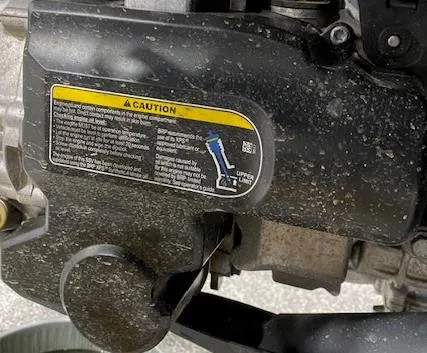
Located on the right rear of the vehicle, remove the oil filter and hydraulic valve cover by removing (6) 8mm or T-30 screws.
- Step 4
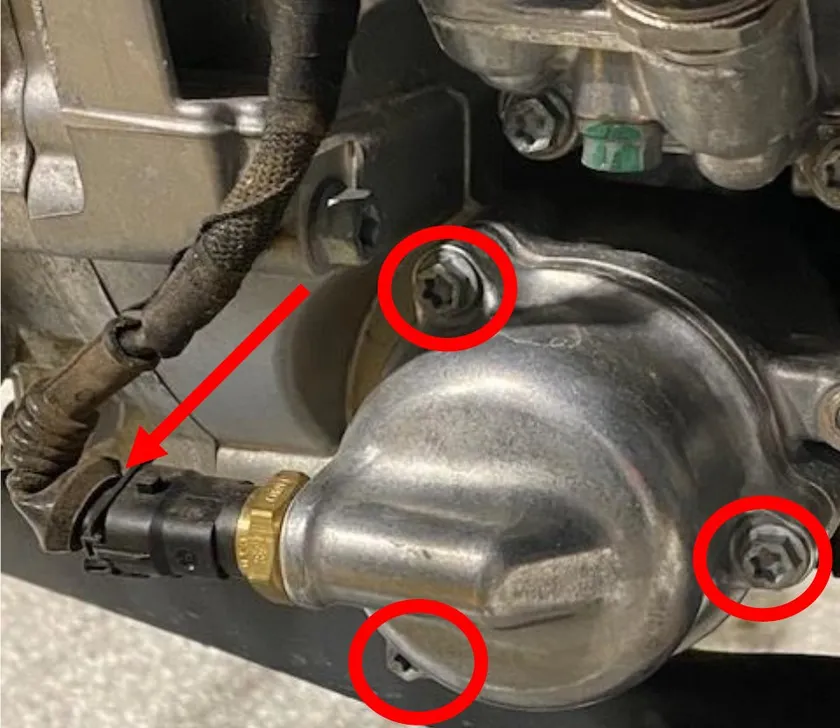
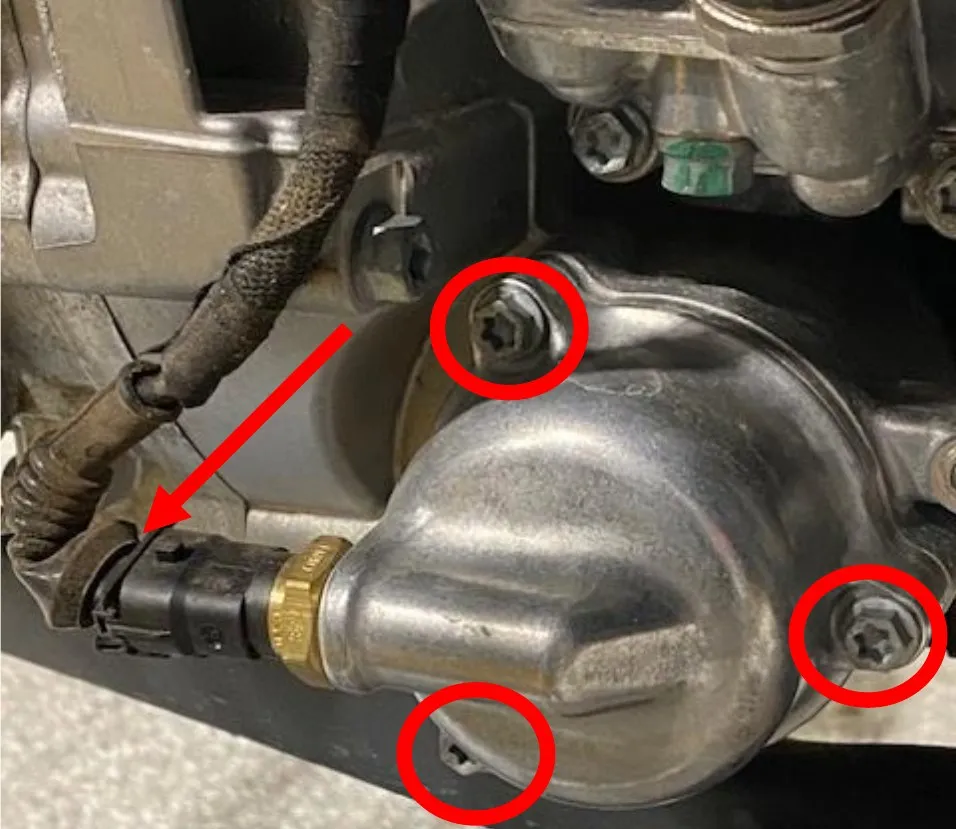
Remove the temperature sensor connector, cut zip tie. With a 8mm or T-30 socket remove (3) oil filter cap screws. Remove oil filter cap and O-ring.
- Step 5
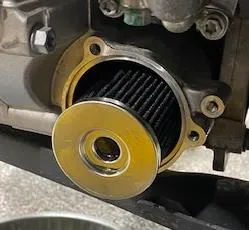
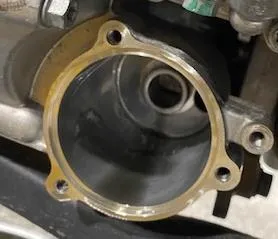
Remove the oil filter. Let the canister drain. Wipe out the inside of the canister with a clean rag.
- Step 6
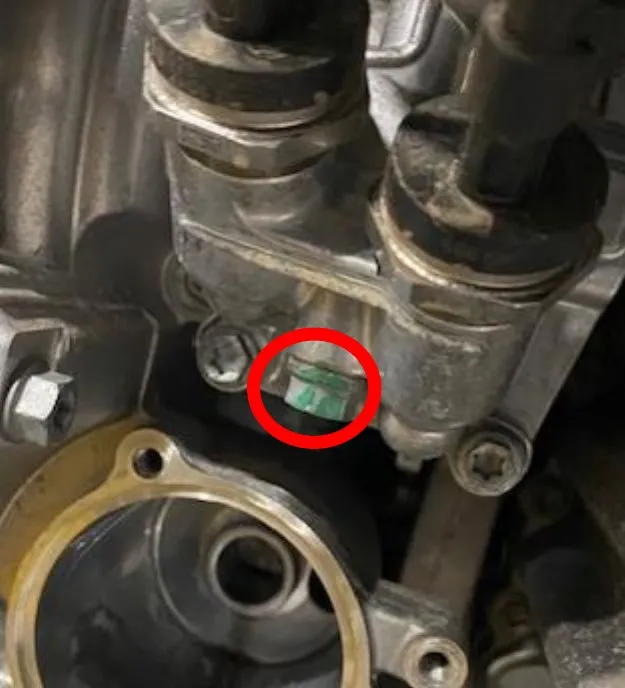
Located above the oil filter is the hydraulic valve cover. Remove the drain bolt and sealing washer with a 10mm socket. This will drain for awhile.
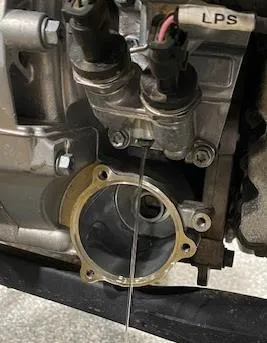
- Step 7
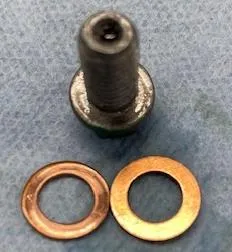
Reinstall the hydraulic drain plug with supplied new sealing ring. Torque to 133 in-lb.
- Step 8
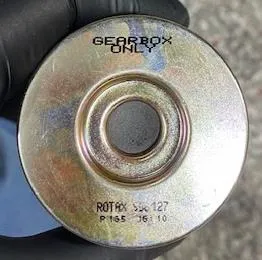
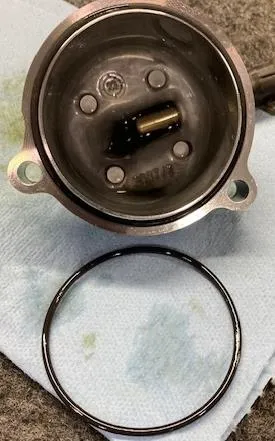
Install the new transmission oil filter. NOTICE the transmission filter has both ends open and labeled “Gearbox Only”. The Engine oil filter has one closed end. Install new O-ring on oil filter cap, apply a small amount of oil to the O-ring.
- Step 9
Install the oil filter cap screws and torque to 97 in-lbs. Reinstall the temperature sensor connector. Install zip tie around the clip.
- Step 10
It is normal to have debris collected onto the transmission magnetic drain plugs. Clean all debris off. Install supplied new O-ring and sealing washers to drain plugs. Reinstall and torque to 22 ft-lb.
- Step 11
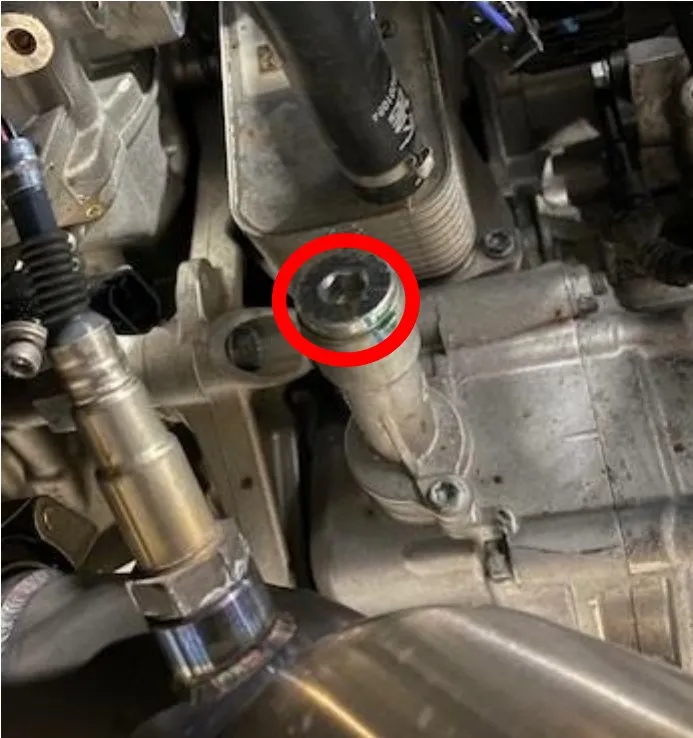
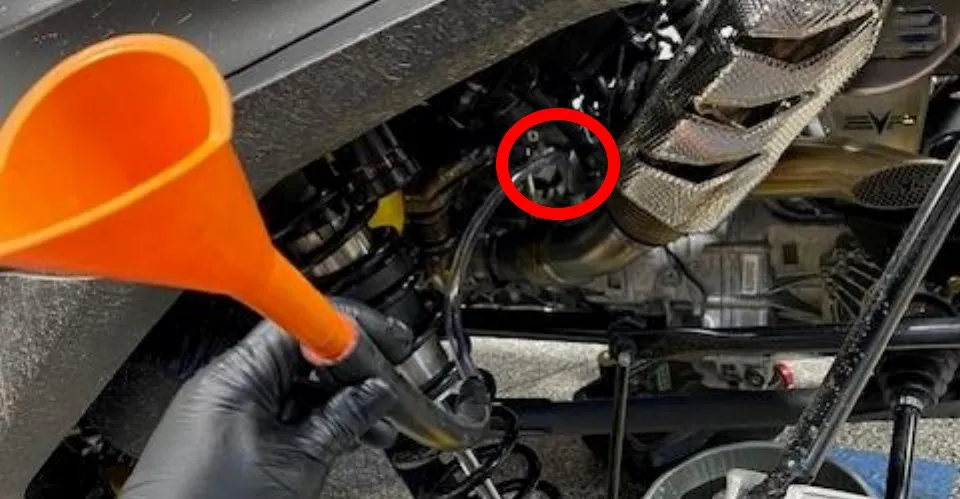
Located between the exhaust downpipe and oil cooler is the transmission fill plug. Remove the fill plug with a 10mm Allen socket. Remove plug and sealing ring.
- Step 12
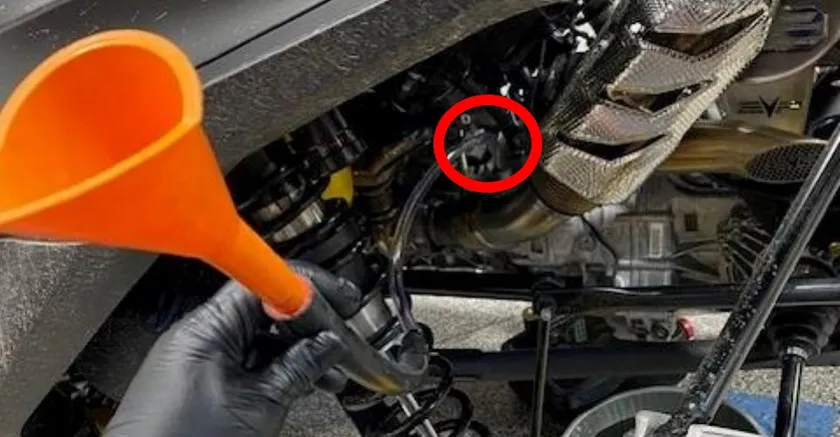
Fill a syringe or funnel to a 1/2" hose and SLOWLY add transmission fluid. The transmission will take 3-3.5 liters. Keep a drain pan underneath the oil level plug hole. Once it starts dripping out install both fill/drain plugs. Start the vehicle and let idle for 1 minute. Remove both plugs and continue adding fluid until oil is at the outermost thread on the oil level hole.
 Note
the vehicle will not consume all 3.0-3.5 liter until you start the vehicle and fill the pressure lines up.
- Step 13
We recommend driving the vehicle for a few minutes and re-checking the transmission fluid one more time. If fluid is still at the outermost thread of the oil level hole, replace supplied O-ring and torque to 44 in-lb. Install new sealing washer to fill plug and torque to 22 ft-lb.
Emissions notice. This product is exempt from the emission standards and related requirements of 40 C.F.R. § 1051 as provided by 40 C.F.R. § 1051.620, and California law [e.g., vehicle code §§ 27156 and 38391]. This product is sold only for use in connection with EPA certified, purpose-built, nonroad vehicles used solely for closed course, nonroad competition/racing and not used for any recreational purpose or on public highways or right of ways maintained by and open to the public. This product is sold only in connection with machines that do not fall under state and/or federal noise or emission standards/regulations. Purchasers who/that purchase this product represent and warrant that the product is purchased only in connection with EPA-certified, emission-regulations-exempt and noise-regulations-exempt competition/racing vehicles as interpreted under applicable state and/or federal law.
Need technical support?
Submit a ticket with your vehicle and what you're seeing, and our support team will get back to you.
