 BUY NOW, PAY LATER. Starting at 0% APR


Can-Am Maverick R C&R Racing Radiator
Installation instructions for the Maverick R C&R Racing Radiator on the Can-Am Maverick R (SKU 804FC0337). Parts, tools, and full procedure.
In the box
Parts and tools
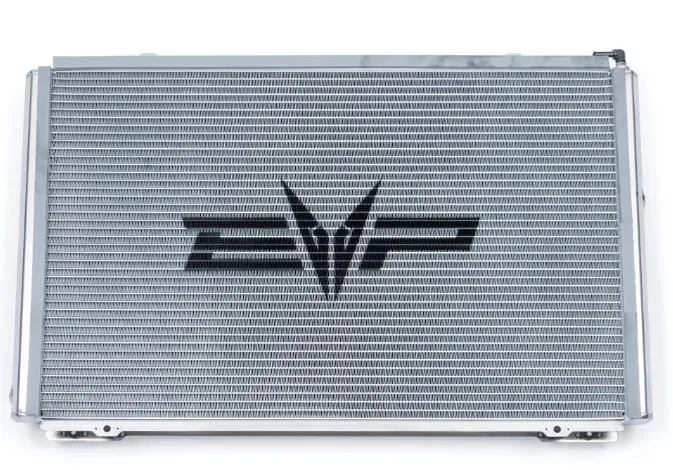
Included parts
- 1Radiator
- 1Hardware Kit
Required tools
- 8, 10mm Socket
- T-30 Socket
- Pinch Clamp Tool
- Rags & Catch Pan
Procedure
Installation
- Step 1
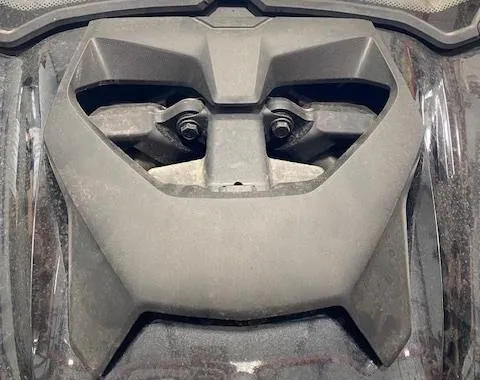
Remove the hood bezel, 4 snap tabs.
- Step 2
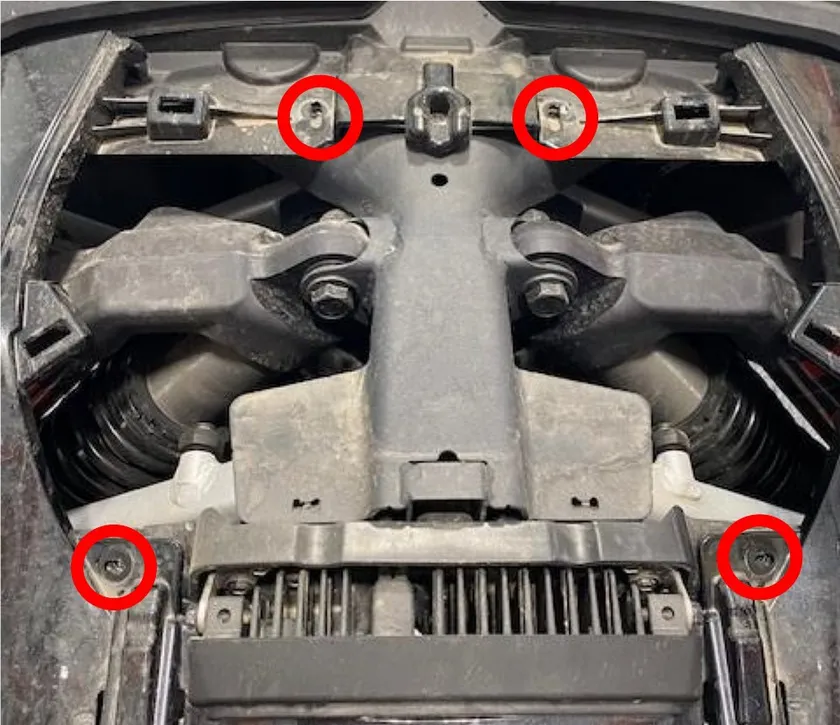
Remove (4) T-30 screws holding the front hood plastic.
- Step 3
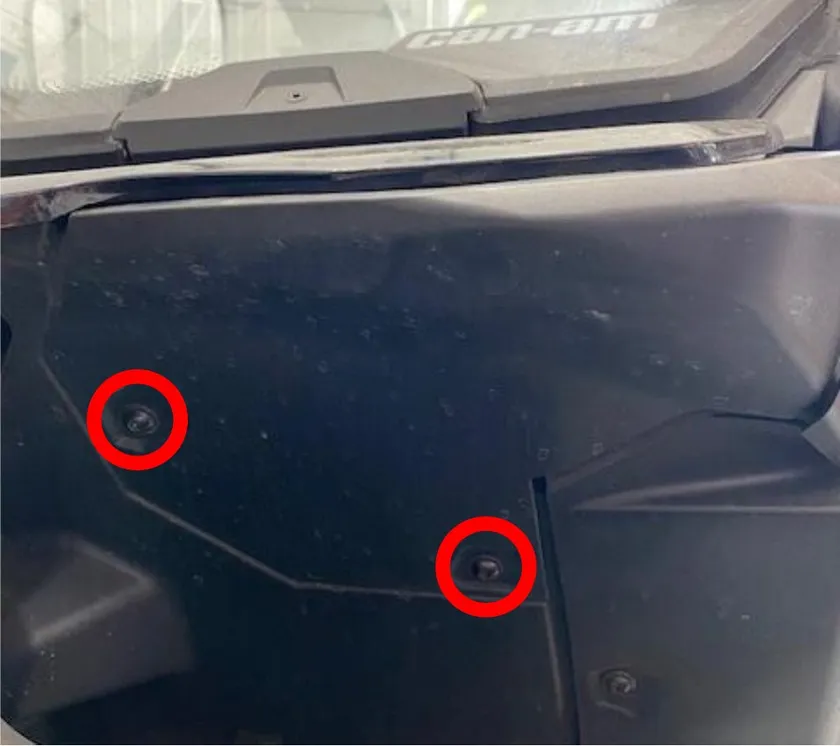
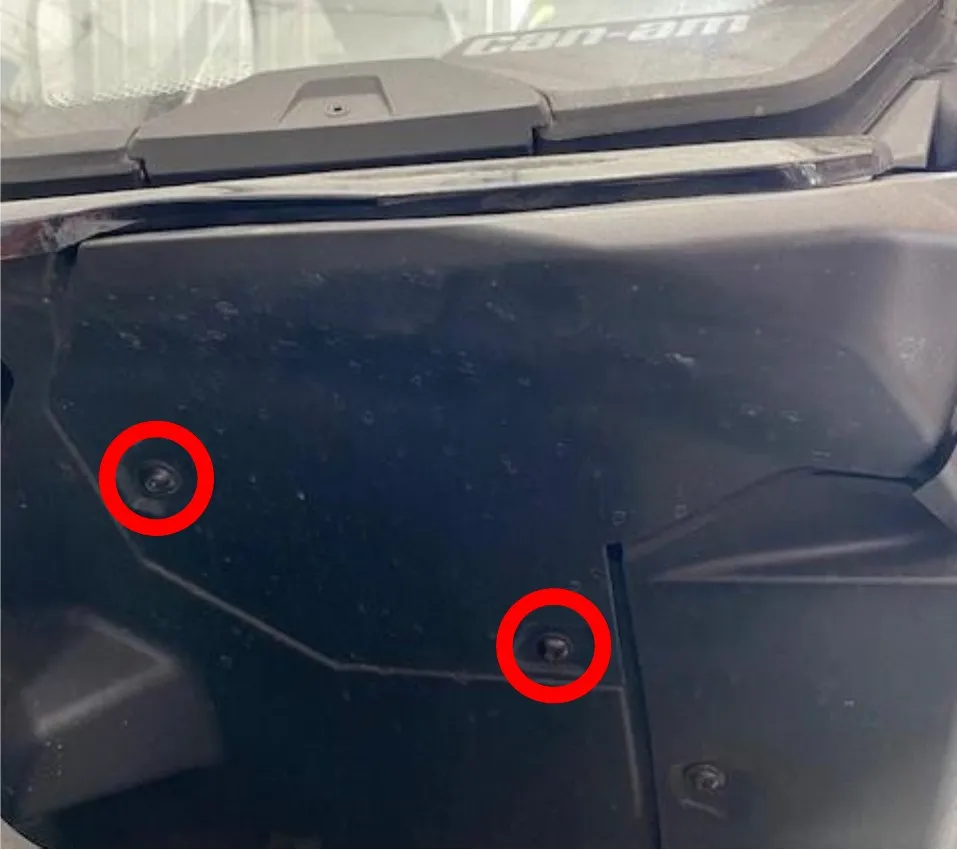
Remove (2) T-30 screws on the upper firewall access panel, on both sides.
- Step 4
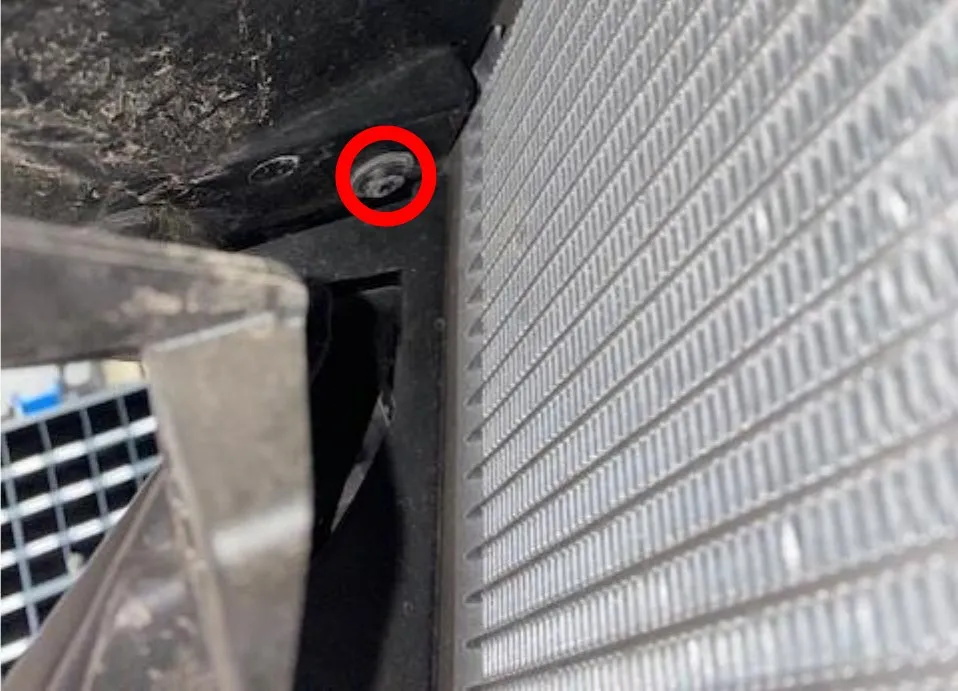
Slightly pull back on the access panel, underneath you will find a 10mm bolt with a large plastic washer. Remove on both sides.
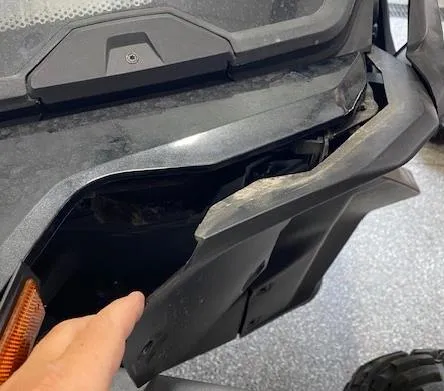
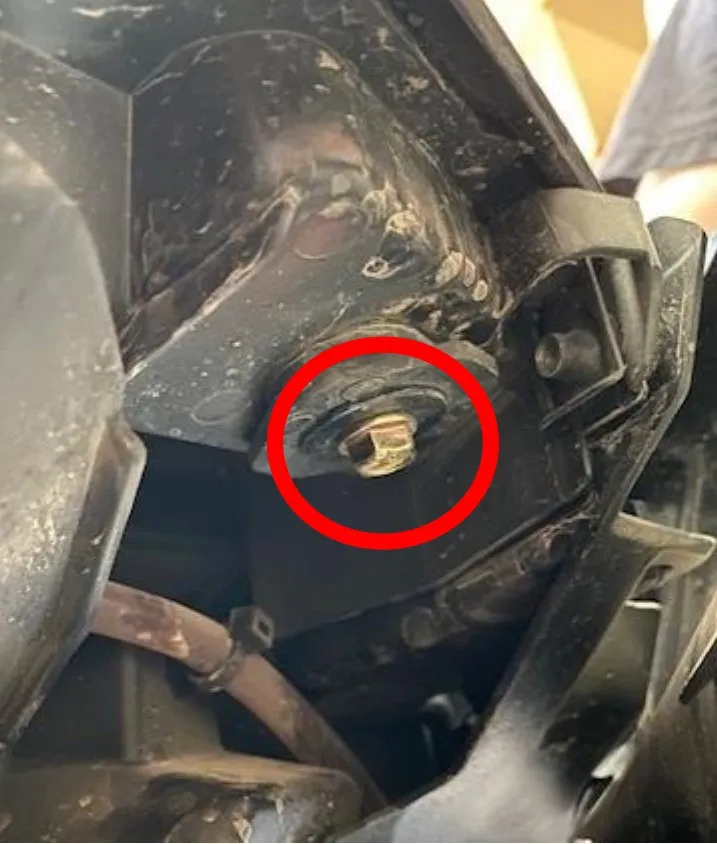
- Step 5
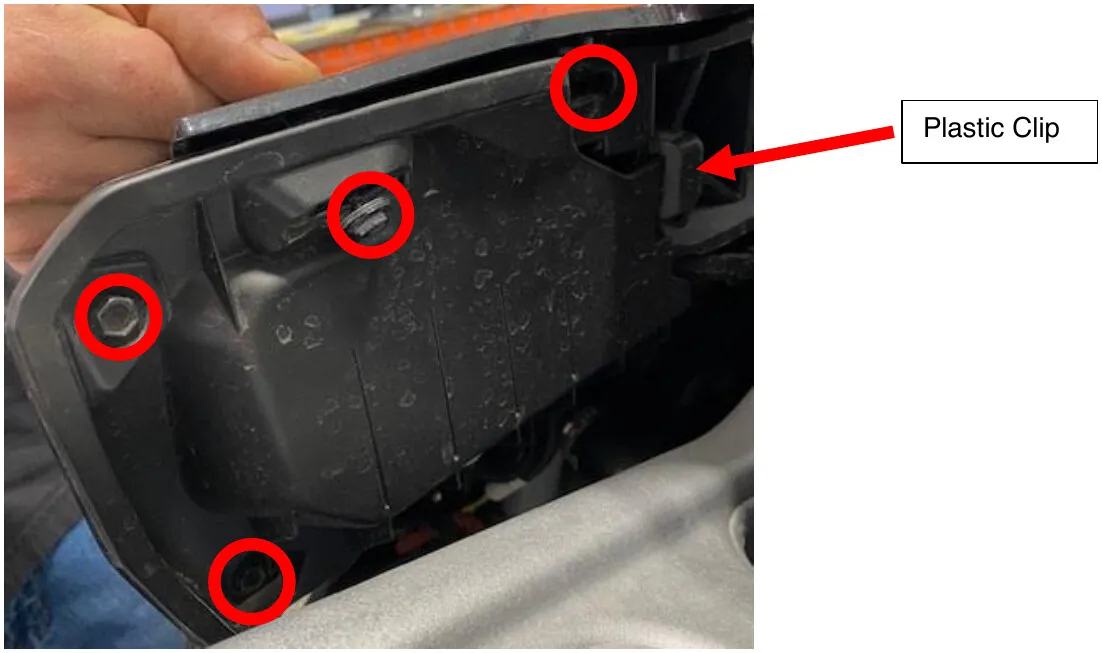
Remove the headlight access panel, (3) 8mm screws, (1) T-30, then unclip the panel from the plastic support, on both sides.
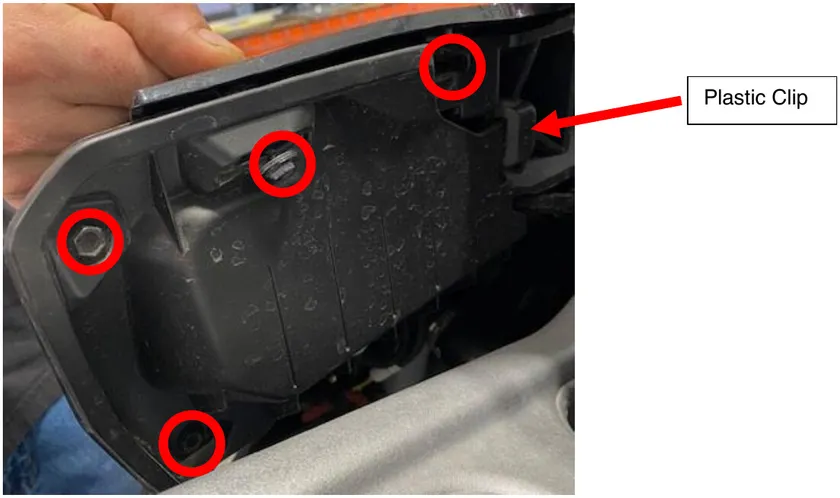
- Step 6
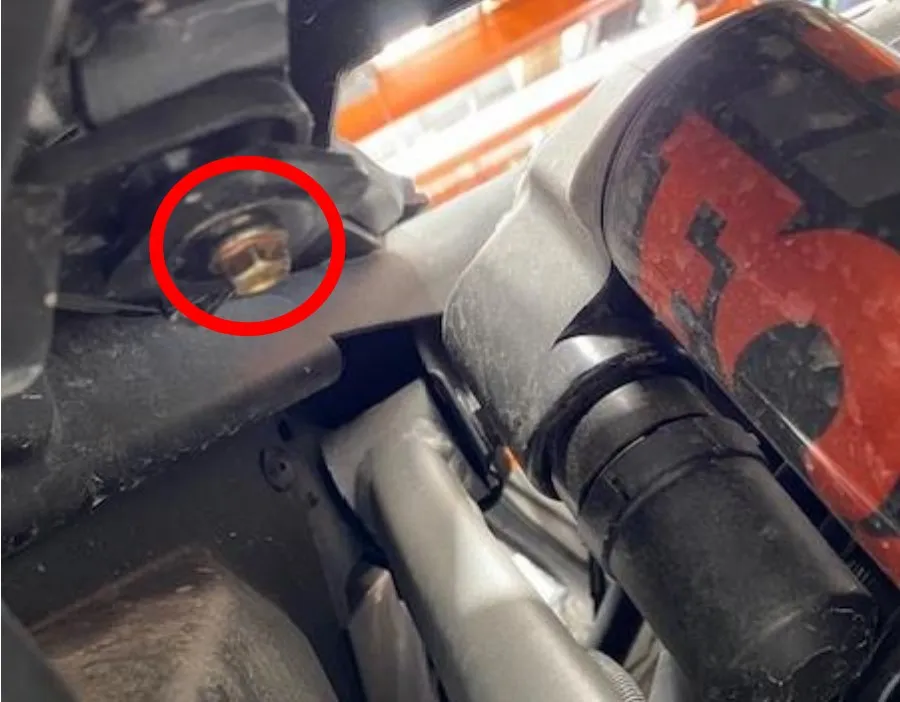
Underneath the hood by the shock, remove (1) 10mm screw with large washer, both sides.
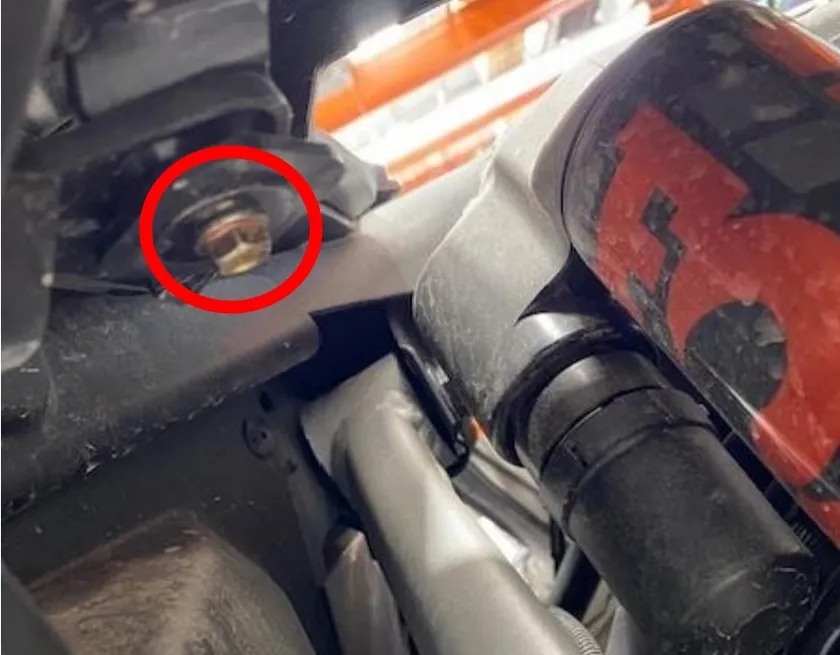
- Step 7
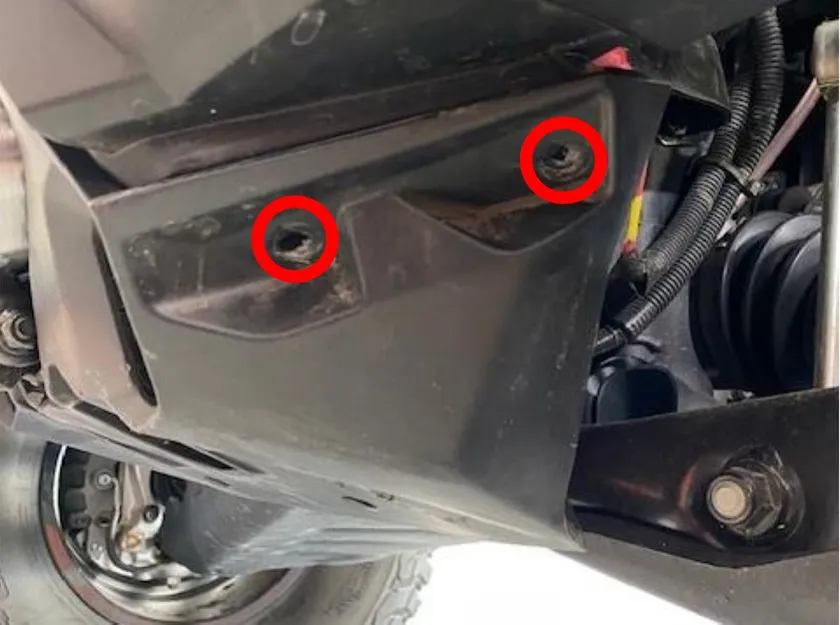
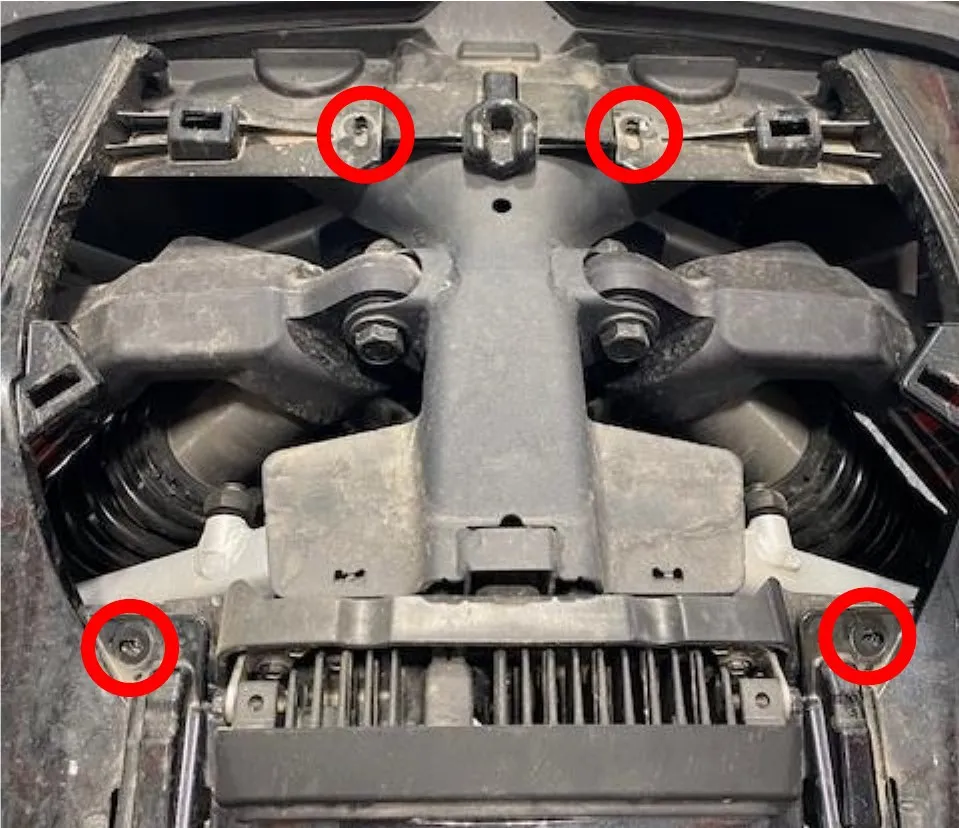
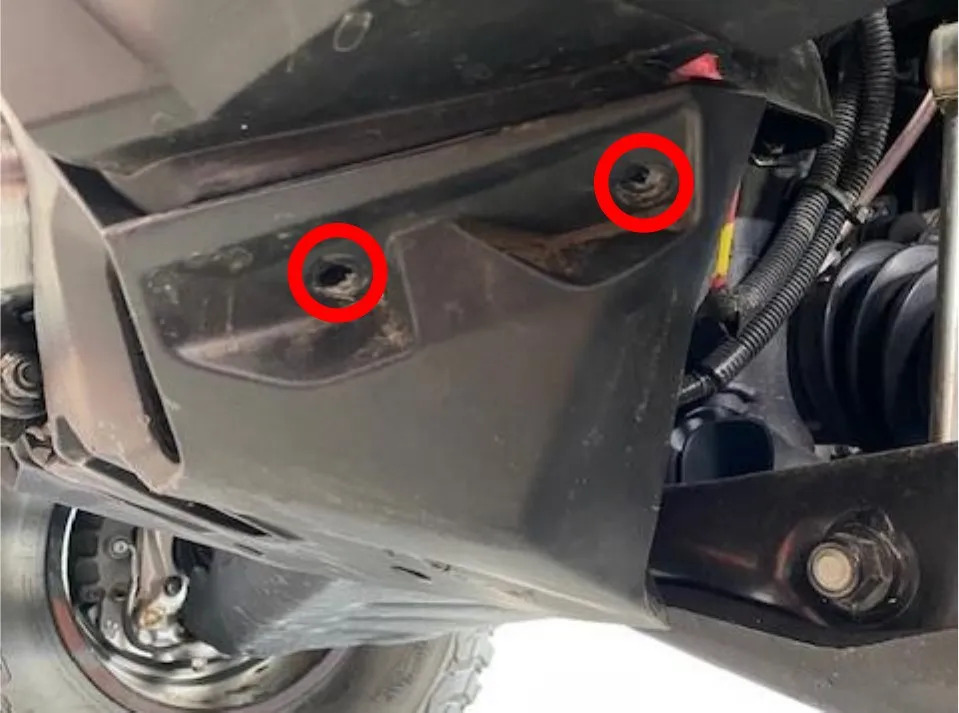
Remove (2) T-30 screws on the lower front valance, on both sides.
- Step 8
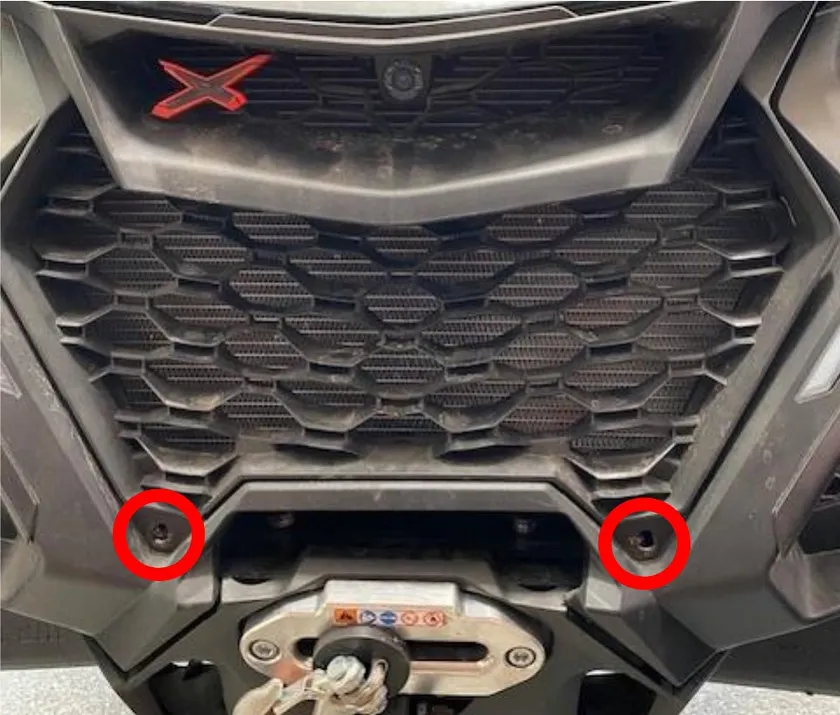
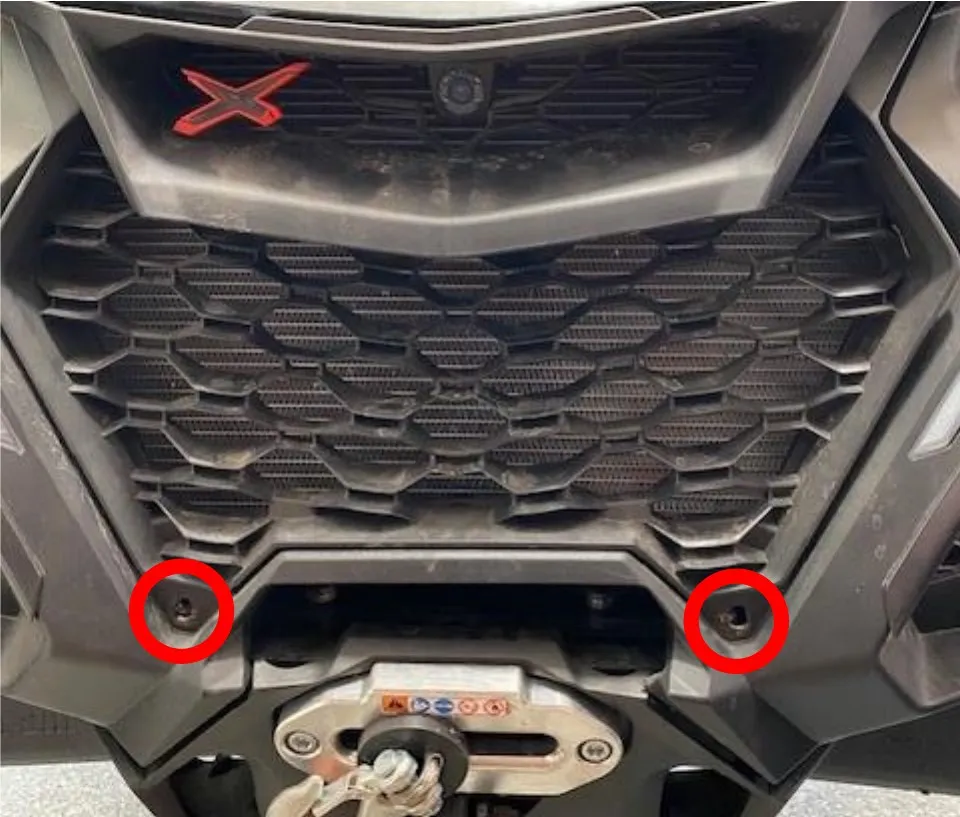
Remove (2) T-30 screws underneath the front grill. Pop the front grill out, held in by (4) clips.
- Step 9
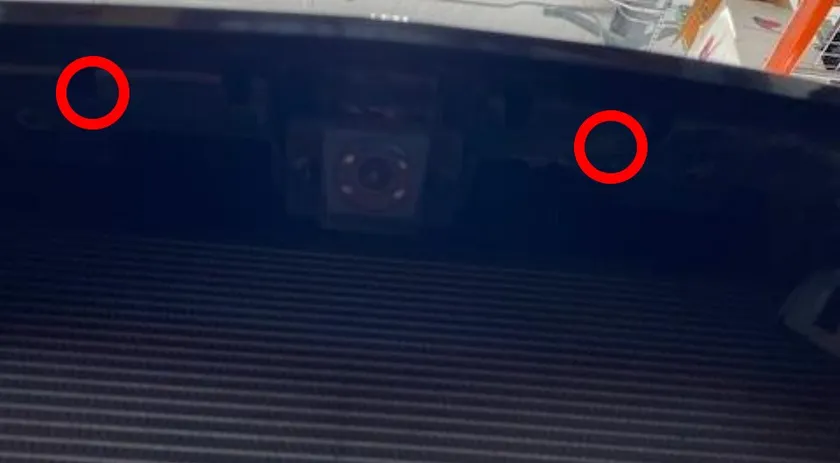
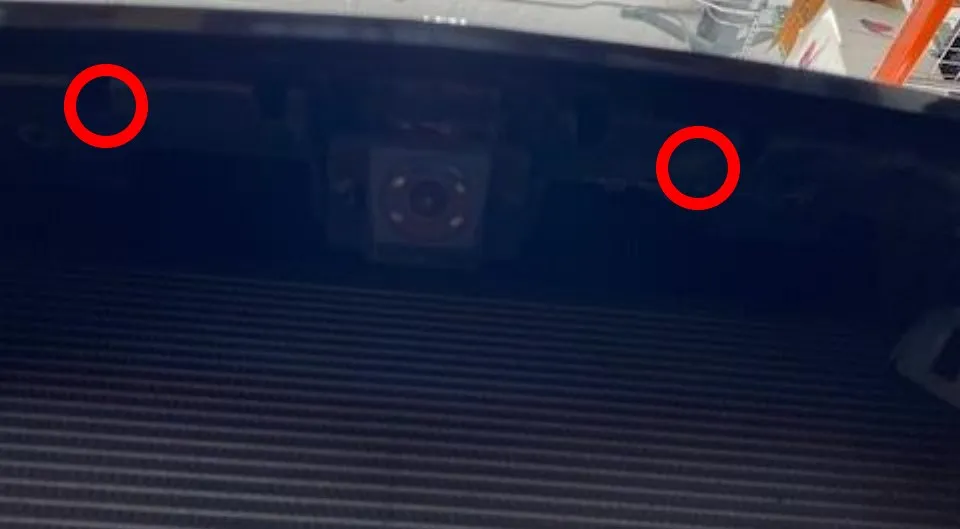
With the grill removed, on top (located by the camera) remove (2) T-30 screws.
- Step 10
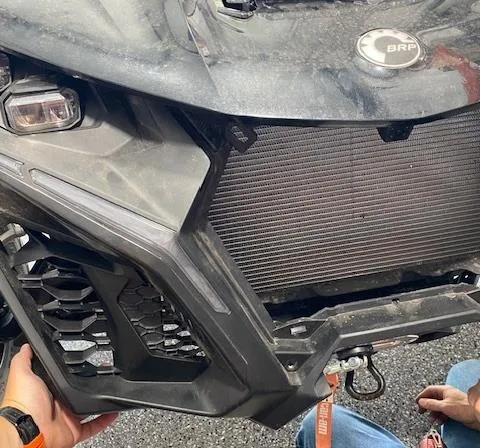
Slightly pry up on the front clip, this will gain you access to (1) T-30 behind the headlight, on both sides. Remove T-30 screw, on both sides.
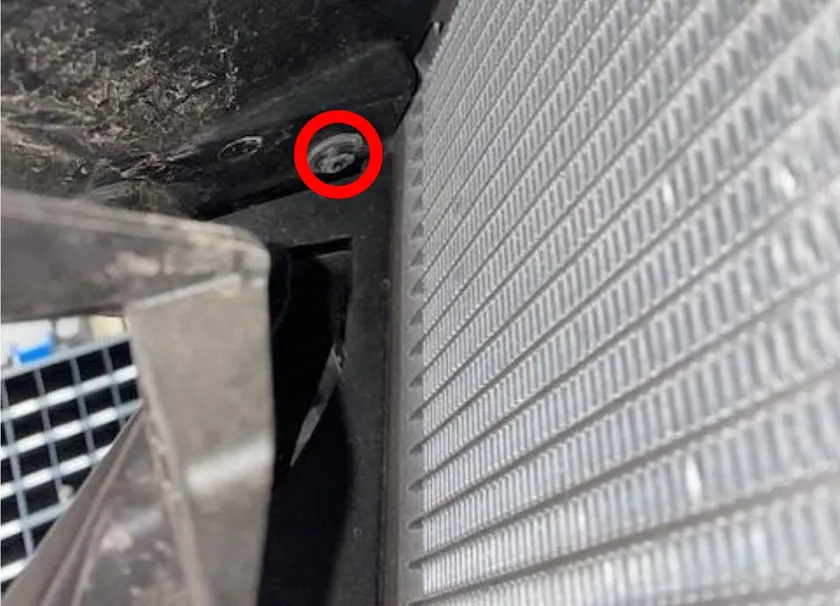
- Step 11
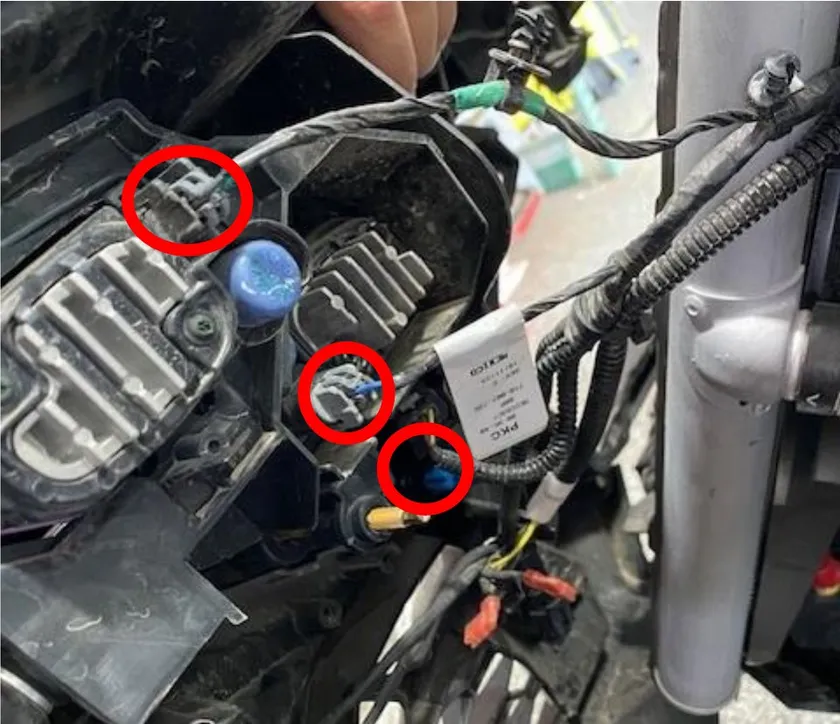
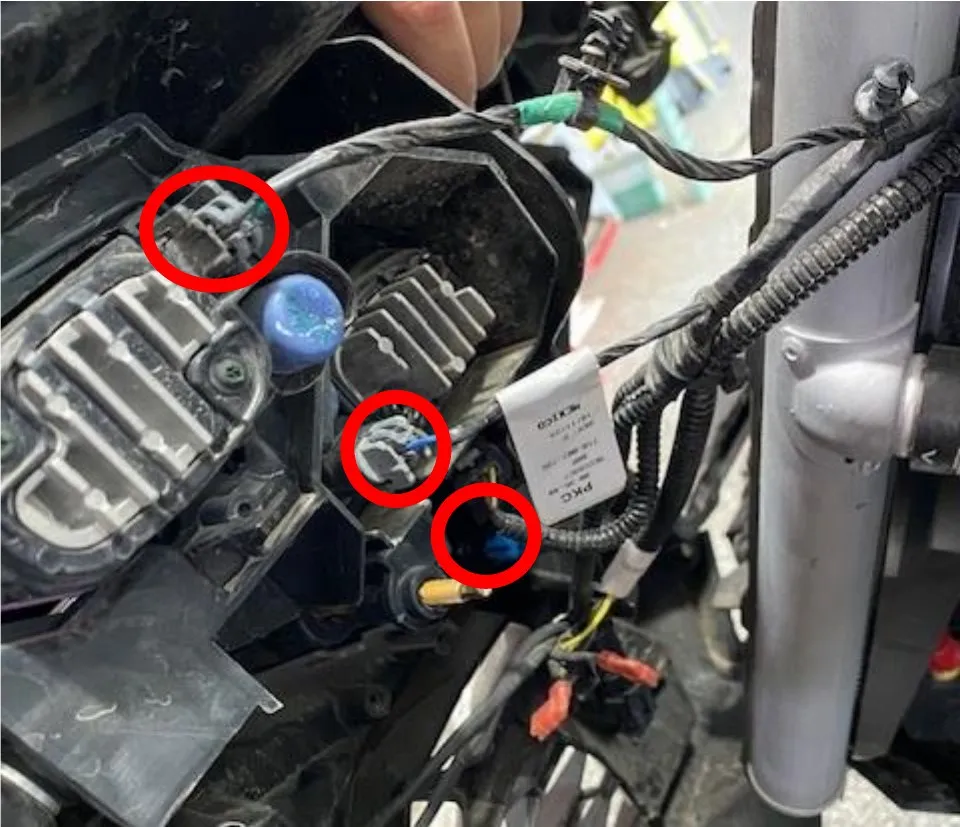
Pull the front clip forward, cut headlight wire harness zip ties. Unplug head light, fang light, and blinker lights (if equipped). On both sides. Remove front clip.
- Step 12
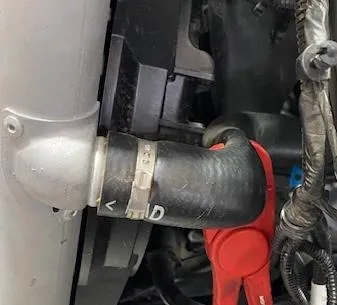
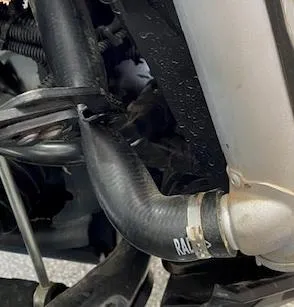
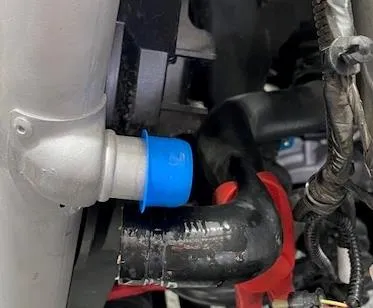
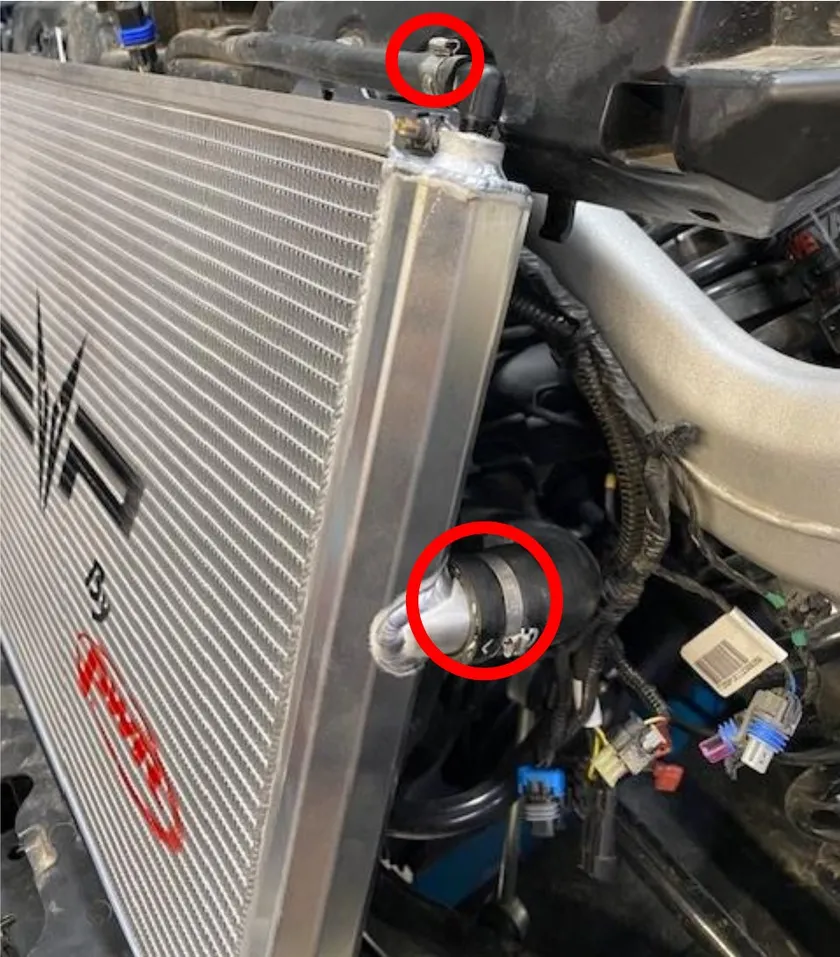
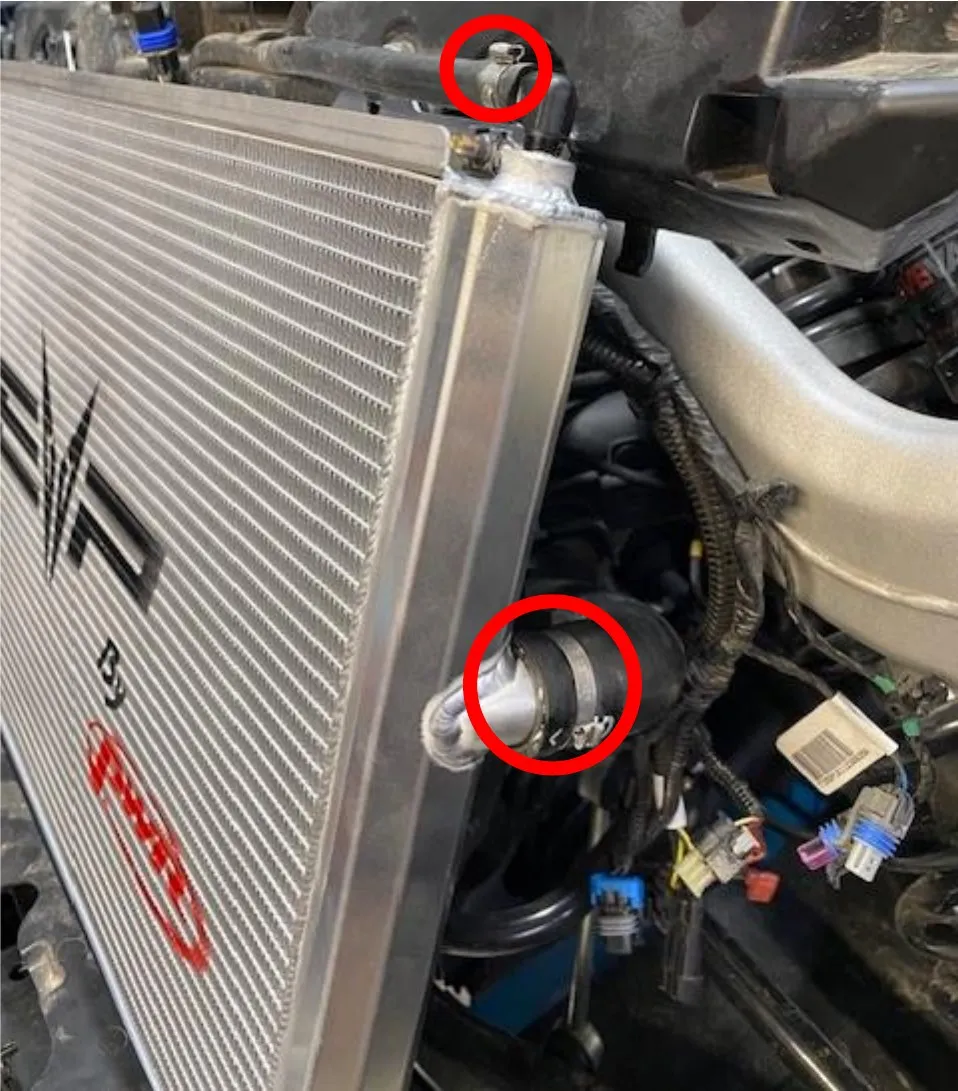
Pinch off both radiator hoses, cut the pinch clamp on the lower hose and remove. Place a drain pan underneath. When done draining, take the caps off the new radiator and place on the OEM radiator.
- Step 13
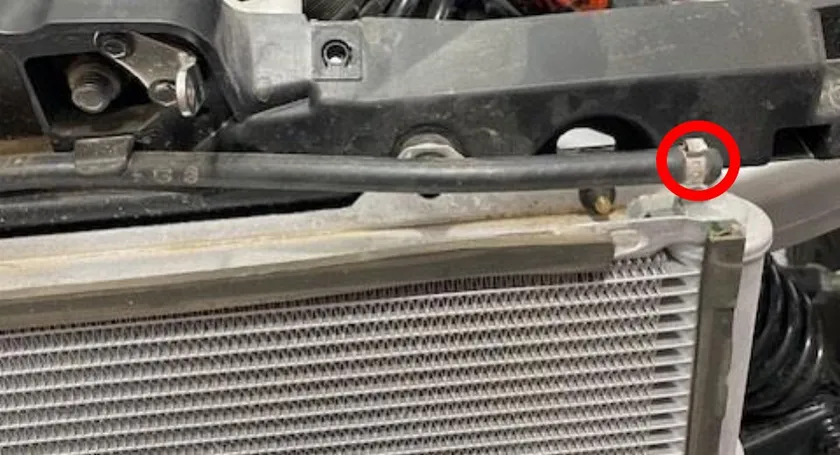
Remove the pinch clamp on the radiator overflow, remove hose.
- Step 14
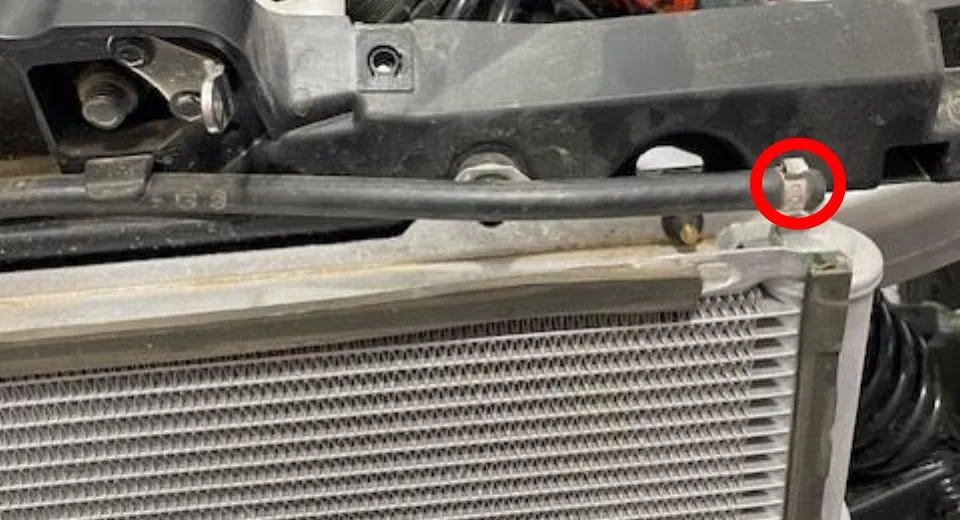
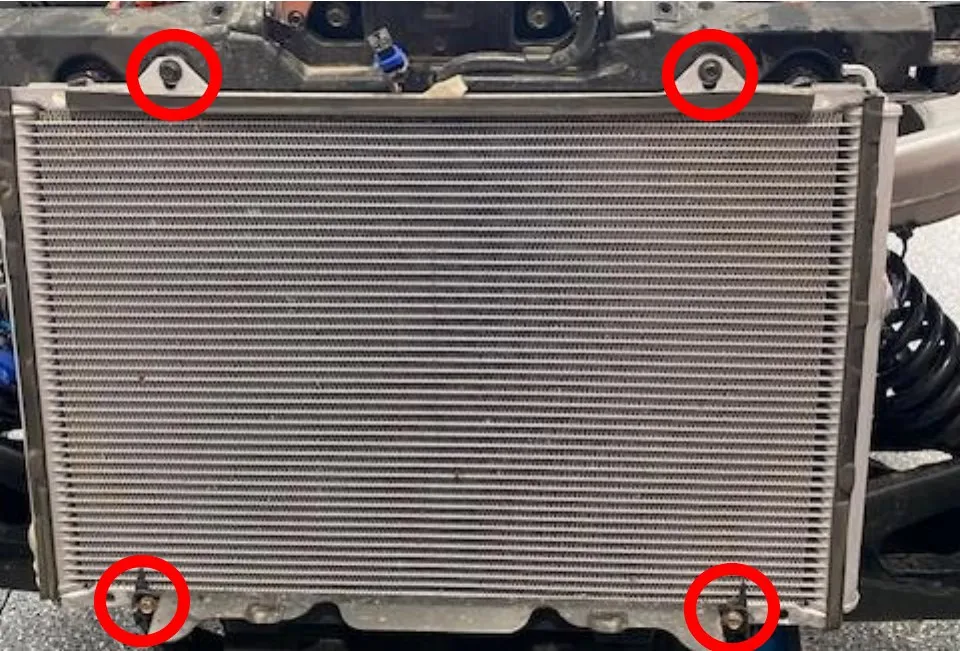
Remove the (4) 10mm bolts holding the radiator to the frame.
 Note
the top (2) bolts have nuts and aluminum spacers. Don’t lose these.
- Step 15
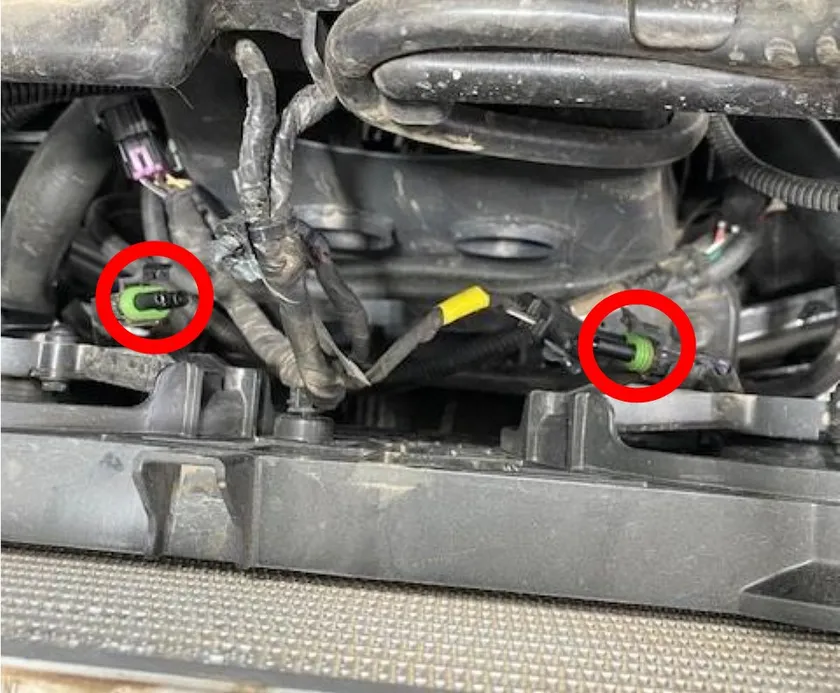
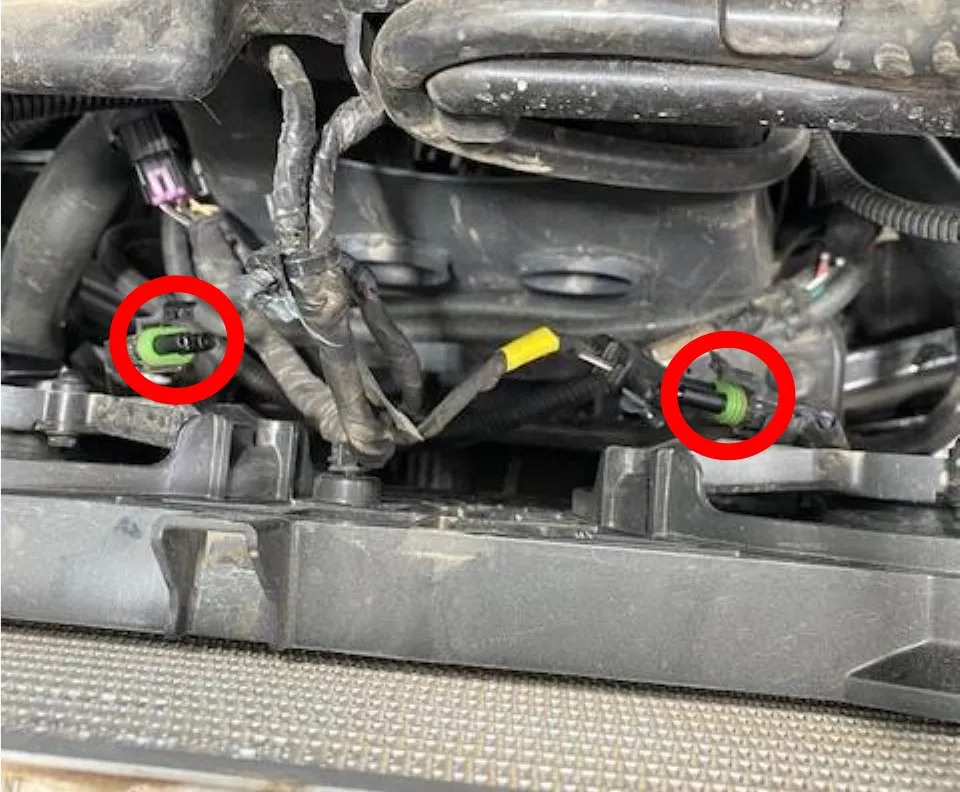
Slightly pull the radiator away from the frame, unplug the fan connectors and push darts holding the harness. Remove the radiator.
- Step 16
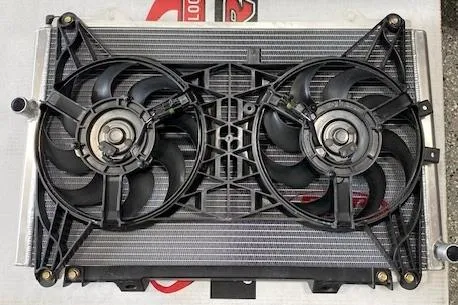
Transfer the lower support and fan shroud over to the new radiator.
- Step 17
Install the new radiator onto the car, use OEM hardware to fasten down. Install the radiator hoses and use supplied 36.1mm pinch clamps on the large hoses and 13.3mm pinch clamp on the overflow hose.
- Step 18
Reinstall all parts in reverse order, fill the coolant reservoir and start the vehicle, let it reach running temperature, add coolant if needed. Check for leaks.
Need technical support?
Submit a ticket with your vehicle and what you're seeing, and our support team will get back to you.
