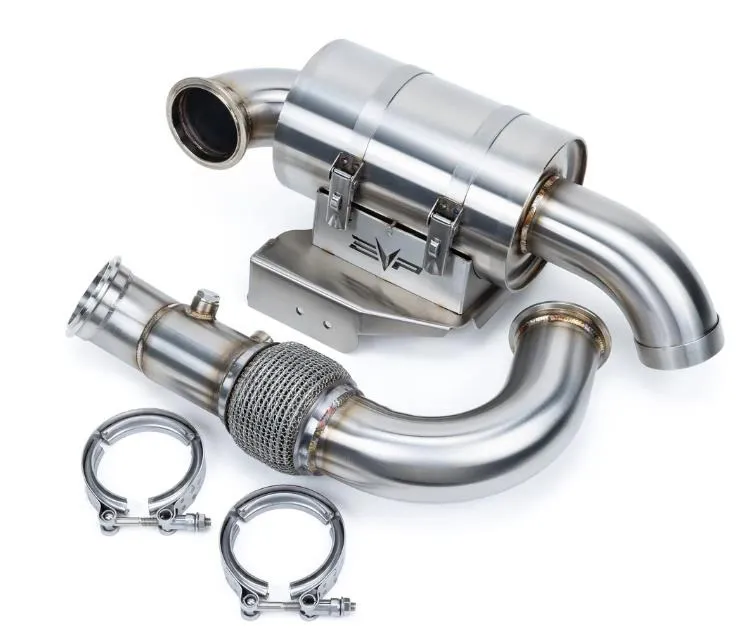
Can-Am Maverick R 3” 930 Series Exhaust System

Installation instructions for the Maverick R 3” 930 Series Exhaust System on the Can-Am Maverick R (SKU 300DC0398). Parts, tools, and full procedure.

Category
Exhaust
Legacy SKU
300DC0398
Revision
REV_080724

In the box

Parts and tools

Maverick R 3” 930 Series Exhaust System

Included parts

  • 13” 930 Downpipe
  • 23” V-band Clamp
  • 1930 Muffler

Required tools

  • Anti seize
  • 10, 11, 13mm Socket
  • 13,22mm Wrench
  • Spring Tool
  • Cleaning Supplies (Alcohol/Windex)

Procedure

Installation

  1. Step 1

    Make sure the vehicle is cold and parked on a flat surface. You can remove the bed but it is not required.

  2. Step 2

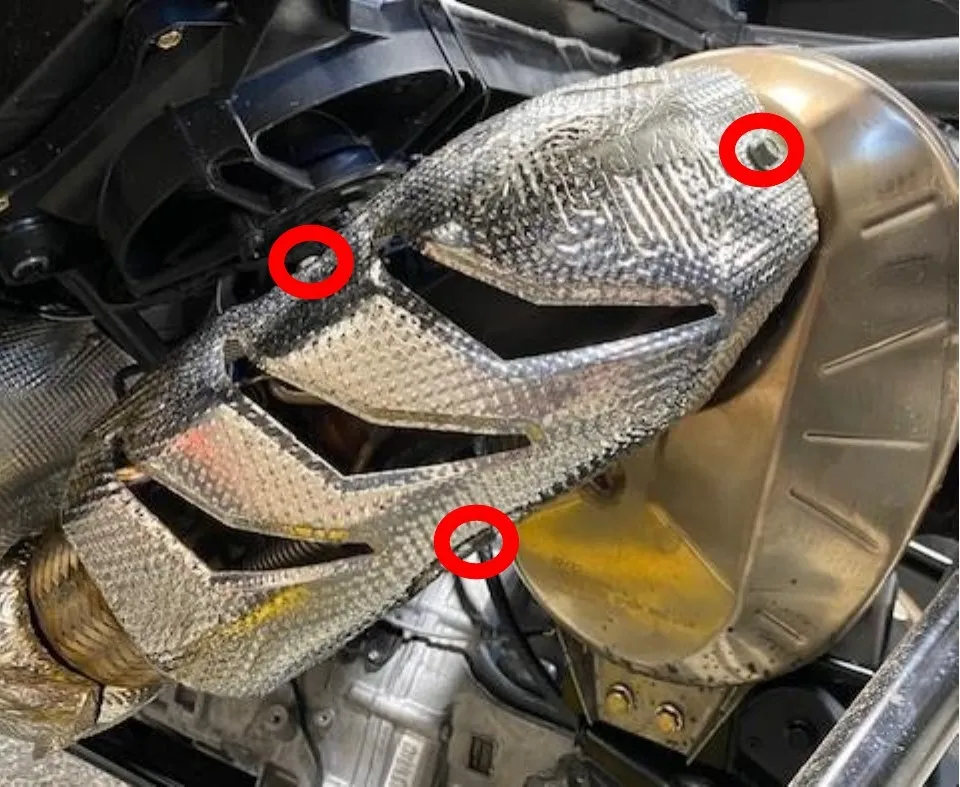
    Remove the muffler joint heatshield by removing (3) 10mm screws.
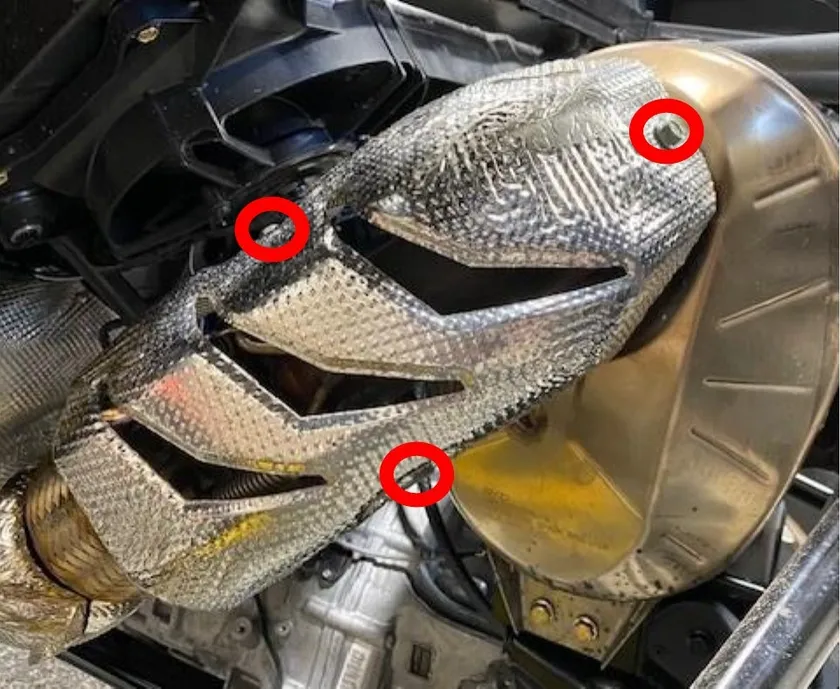
    Remove the muffler joint heatshield by removing (3) 10mm screws.
  3. Step 3

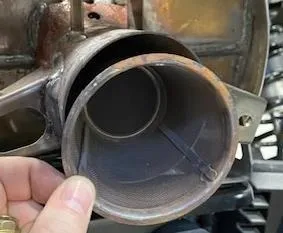
    Remove the (3) 13mm screws holding the OEM tip on. Two are located on the sides and one located on top. Also remove the spark arrestor.
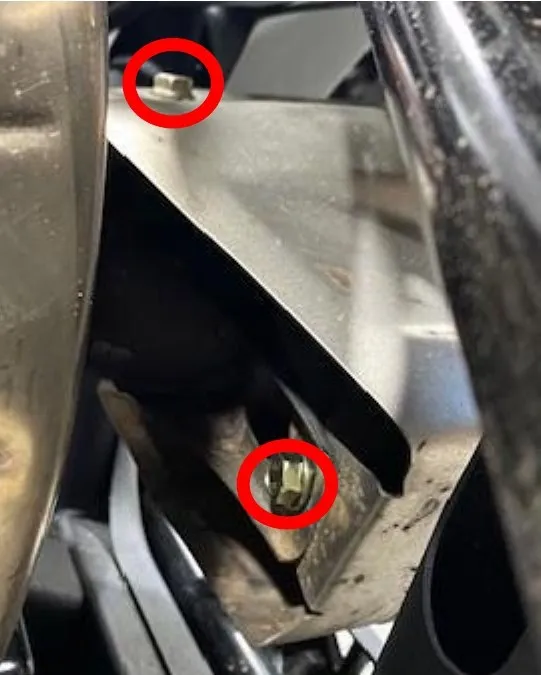
    Remove the (3) 13mm screws holding the OEM tip on.
    Also remove the spark arrestor.
  4. Step 4

    Remove (4) exhaust springs holding the muffler to downpipe. Keep these springs.
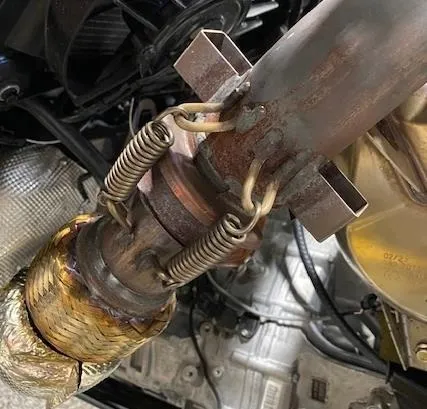
    Remove (4) exhaust springs holding the muffler to downpipe.
  5. Step 5

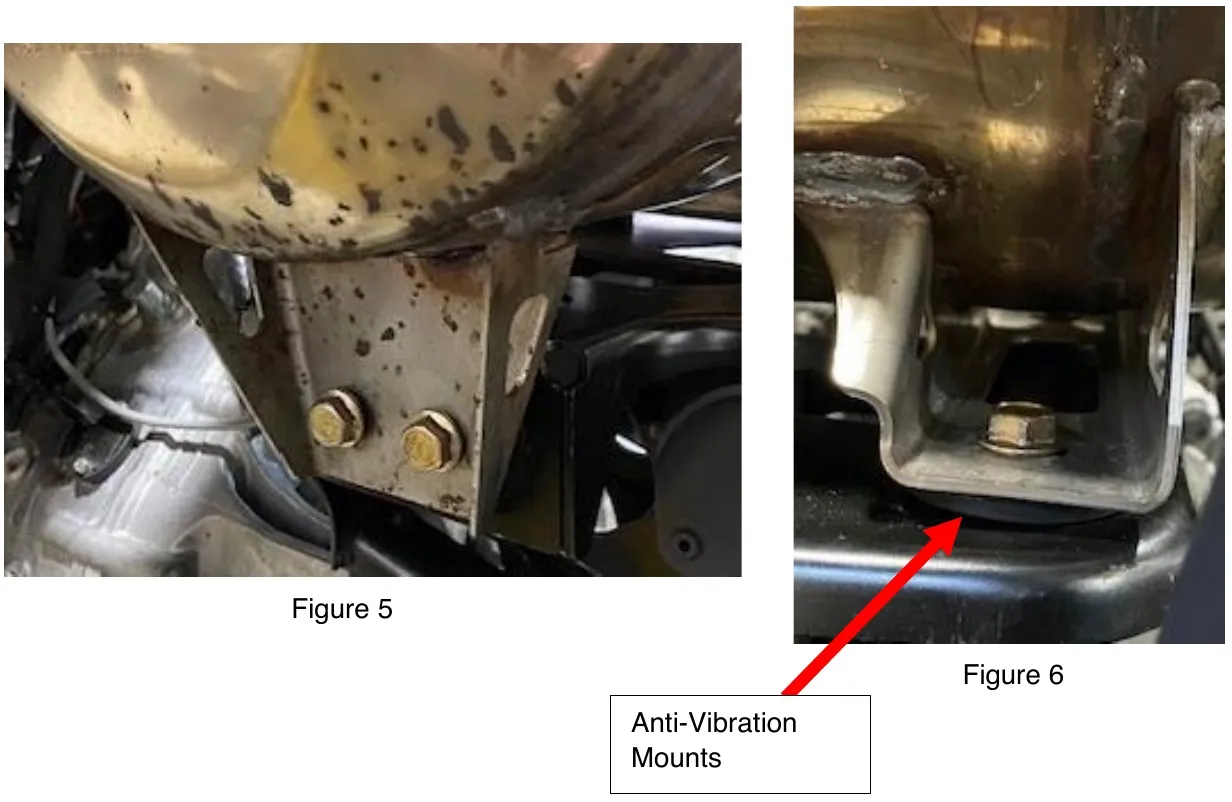
    Remove (4) 13mm bolts with nuts. (2) of the 13mm bolts have anti vibration mounts. Keep these.
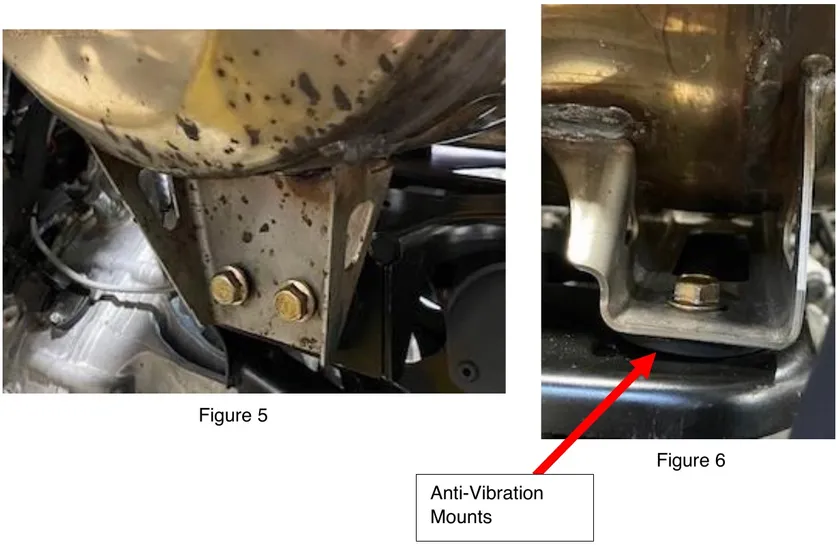
    Remove (4) 13mm bolts with nuts. (2) of the 13mm bolts have anti vibration mounts. Keep these.
  6. Step 6

    Remove the muffler from the rear-right side.
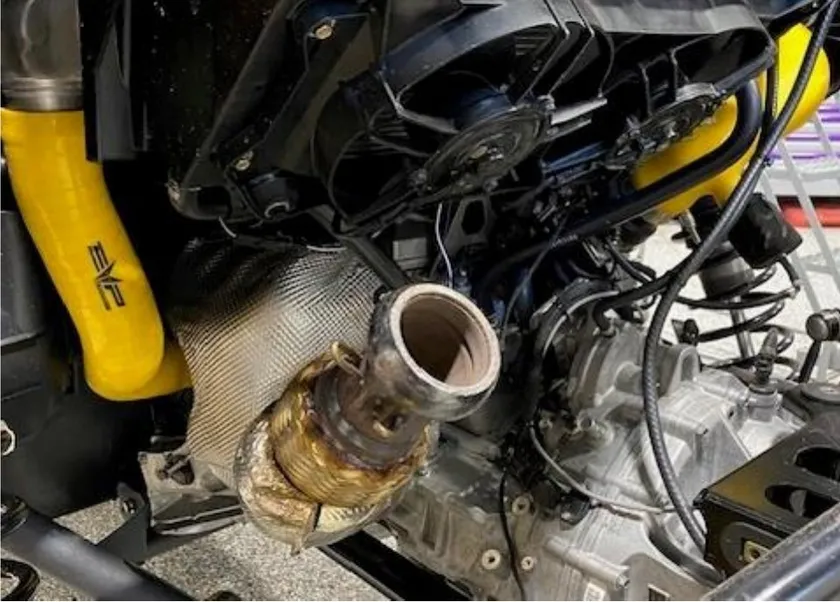
    Remove the muffler from the rear-right side.
  7. Step 7

    Loosen and remove the 02 sensor from the downpipe. Use a 22mm wrench. It works best to unplug the pigtail, don’t damage the wires.

    Loosen and remove the 02 sensor from the downpipe.
  8. Step 8

    Remove the charge tube going from the turbocharger to intercooler. Use an 11mm socket or screwdriver.
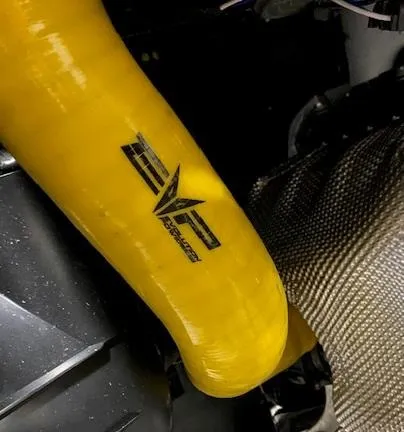
    Remove the charge tube going from the turbocharger to intercooler.
  9. Step 9

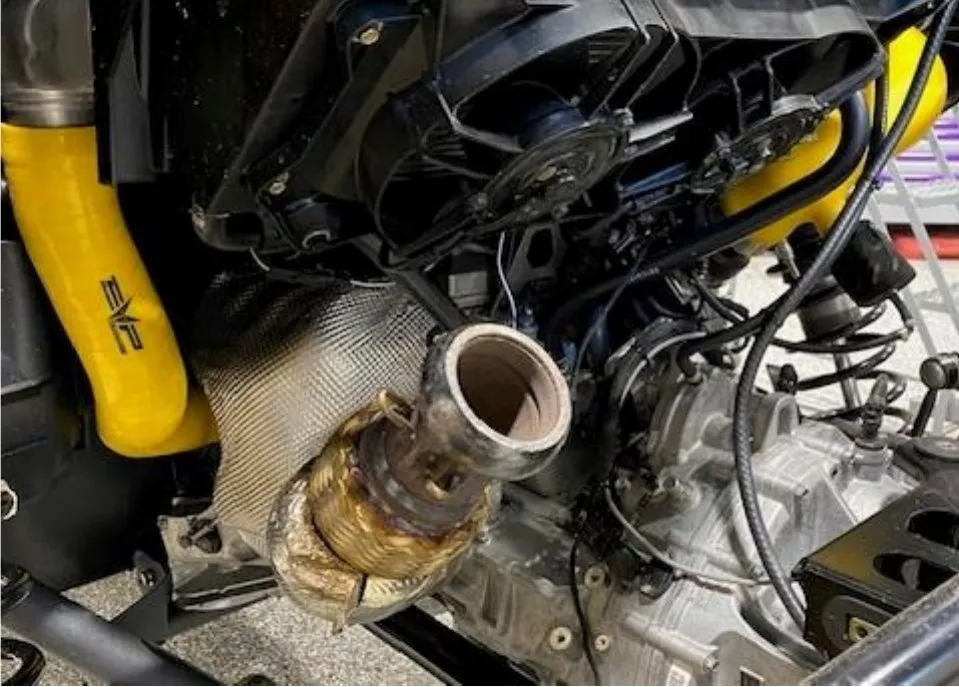
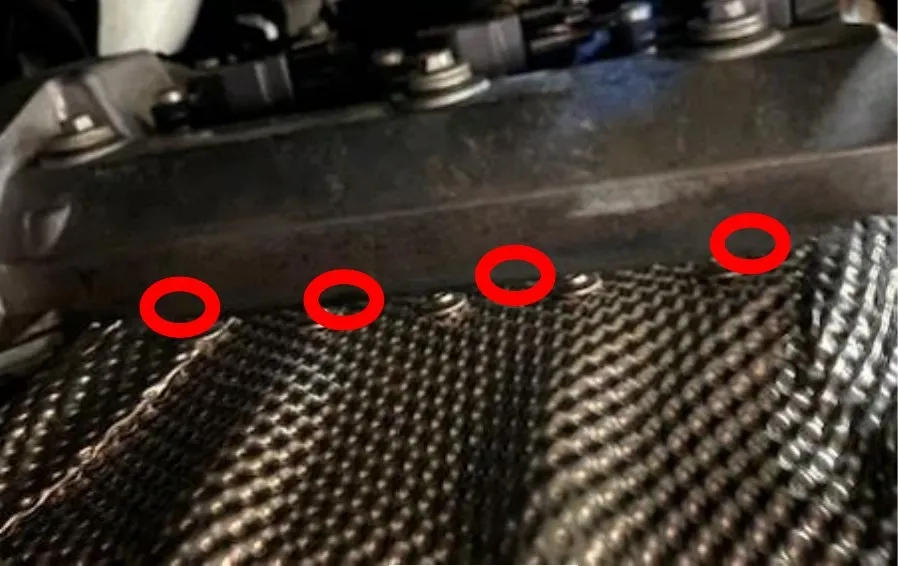
    Remove the heat shields (2 part) around the turbocharger. 1 hose clamp, (2) 10mm screws underneath and (4) on top by the valve cover.
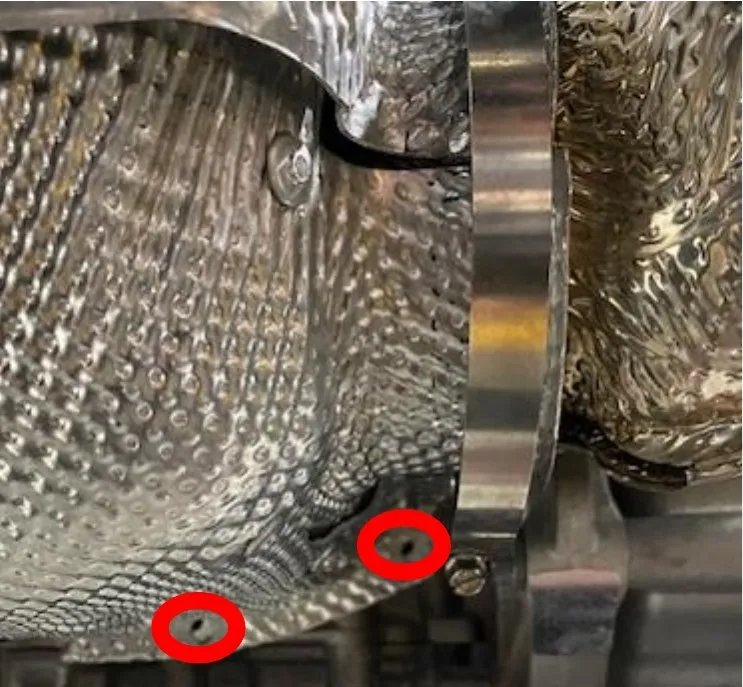
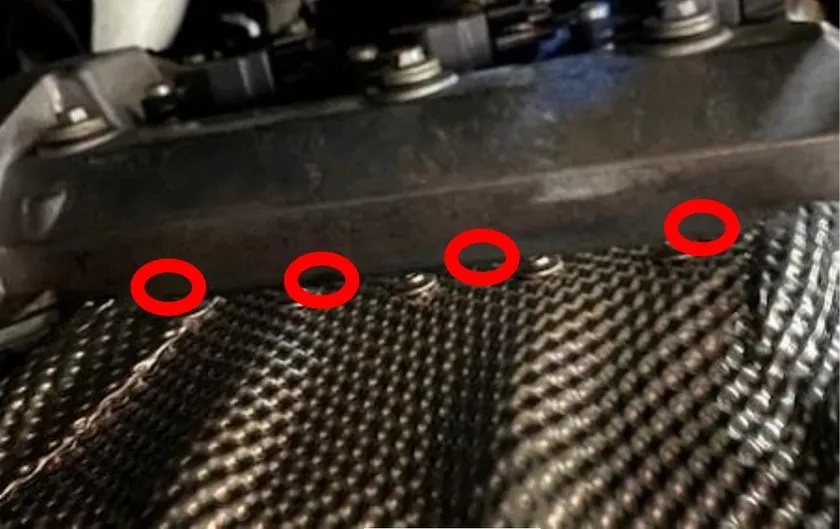
    Remove the heat shields (2 part) around the turbocharger.
    Remove the heat shields (2 part) around the turbocharger.
  10. Step 10

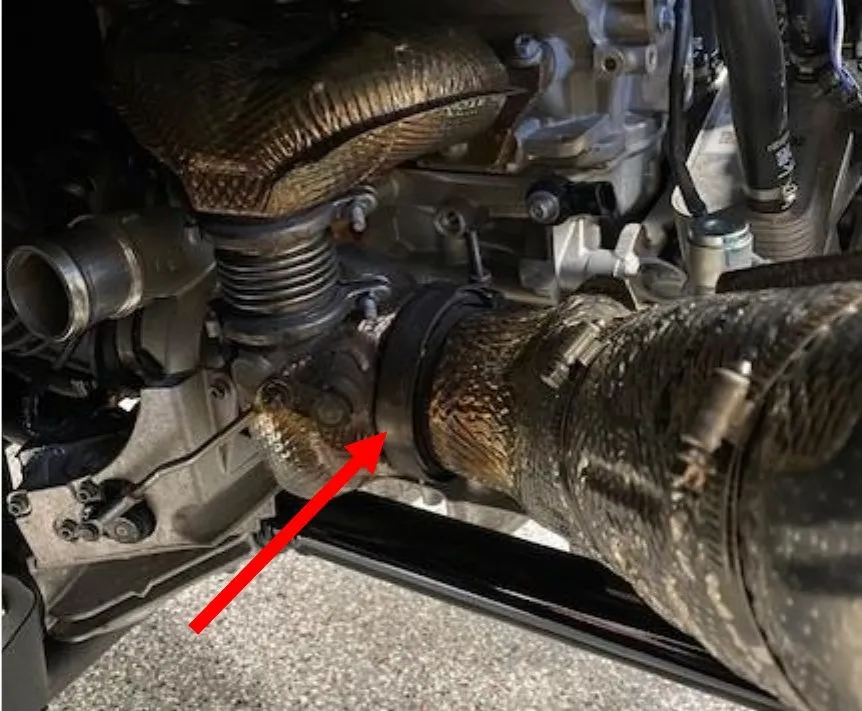
    Remove the OEM V-Band clamp using an 11mm socket.
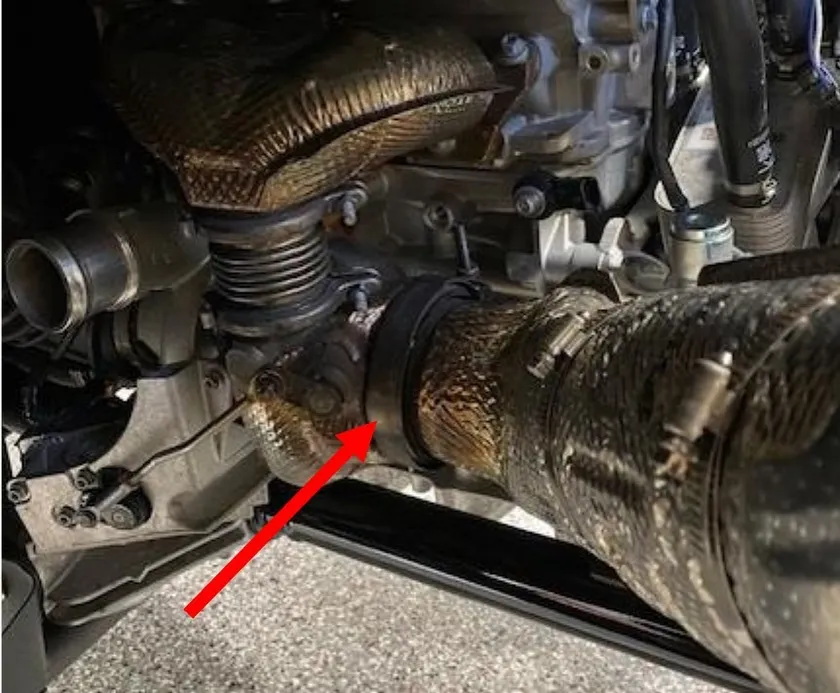
    Remove the OEM V-Band clamp using an 11mm socket.
  11. Step 11

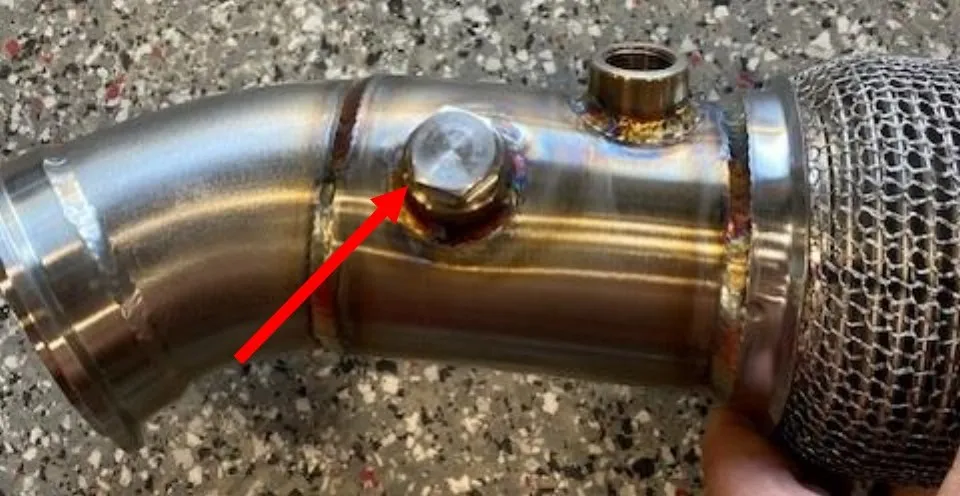
    Install anti seize onto the 02 auxiliary plug, install into the first 02 bung on the downpipe. Tighten with a 22mm wrench.
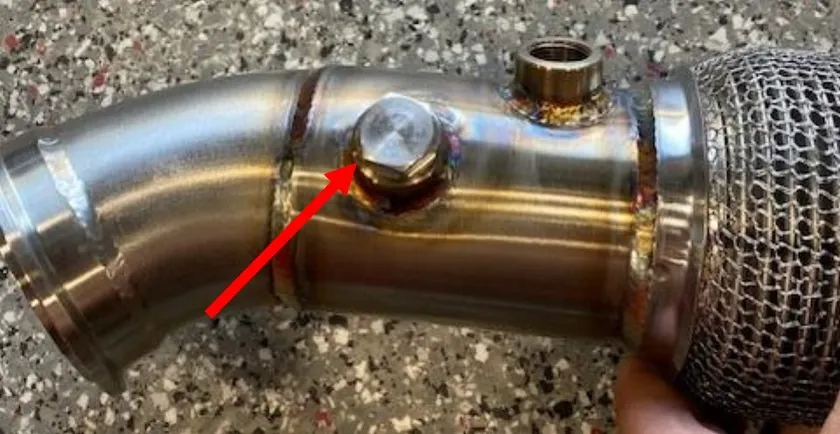
    Install anti seize onto the 02 auxiliary plug, install into the first 02 bung on the downpipe.
  12. Step 12

    Install anti seize onto the threads of both 3.0” V-band clamps.
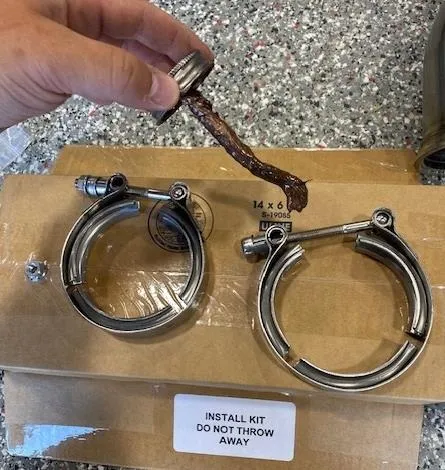
    Install anti seize onto the threads of both 3.0” V-band clamps.
    INSTALL KIT DO NOT THROW AWAY
  13. Step 13

    Install the downpipe with (1) supplied 3.0” V-band clamp, tighten down just enough to hold the downpipe in place. You should be able to move the downpipe still.
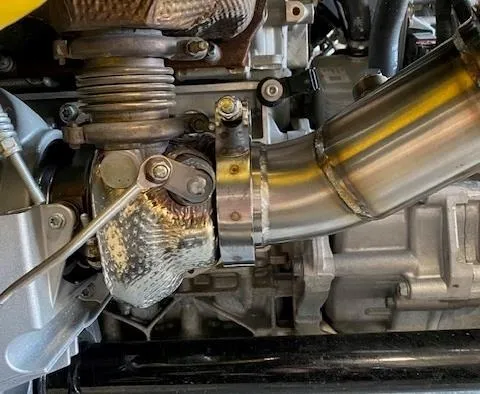
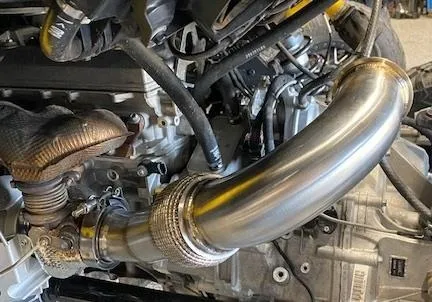
    Install the downpipe with (1) supplied 3.0” V-band clamp, tighten down just enough to hold the downpipe in place.
    Install the downpipe with (1) supplied 3.0” V-band clamp, tighten down just enough to hold the downpipe in place.
  14. Step 14

    Slide the muffler onto the muffler mounting pad, you can either go in through the center of the frame as pictured below or from the passenger side of the vehicle.
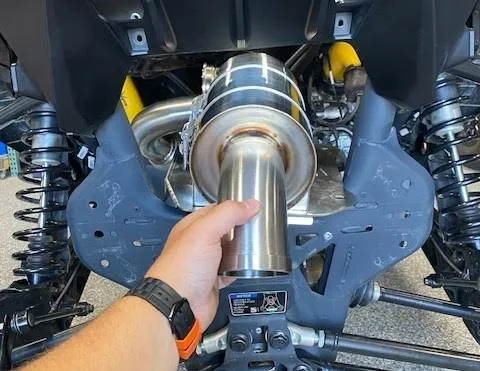
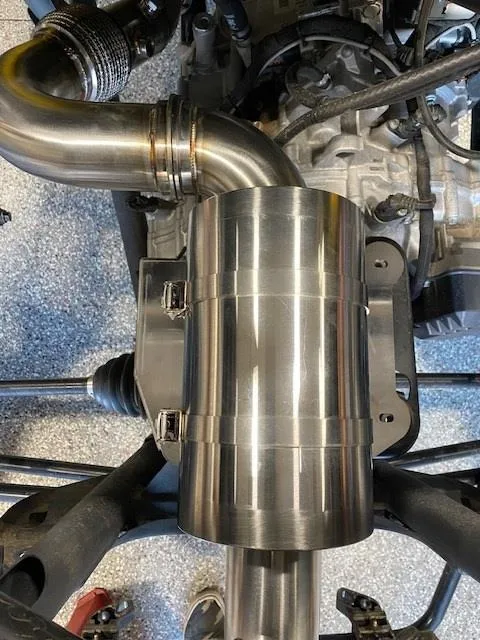
    Slide the muffler onto the muffler mounting pad, you can either go in through the center of the frame as pictured below or from the passenger side of the vehicle.
    Slide the muffler onto the muffler mounting pad, you can either go in through the center of the frame as pictured below or from the passenger side of the vehicle.
  15. Step 15

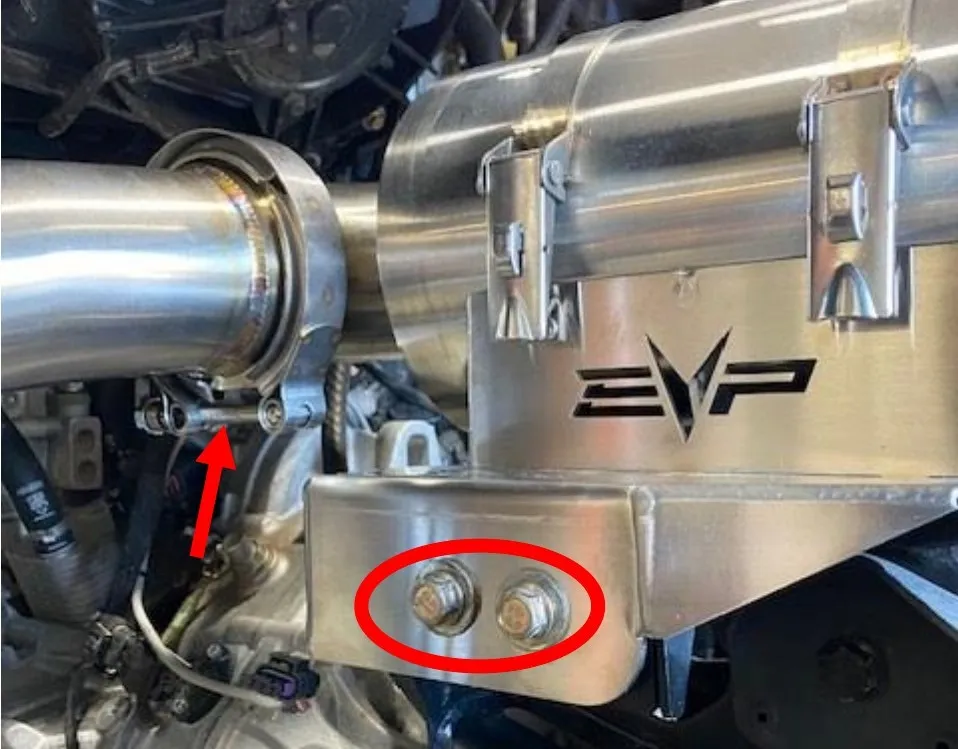
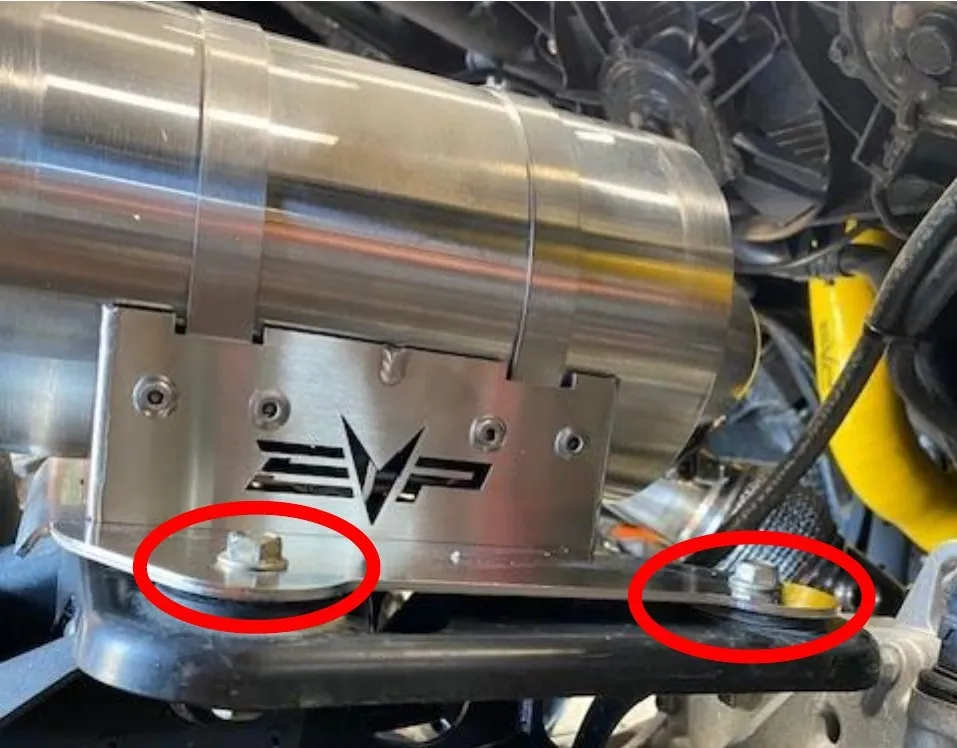
    Loosely install the 3.0” V-Band clamp joining the downpipe and muffler flanges. Loosely install the (4) OEM bolts to the mounting bracket.
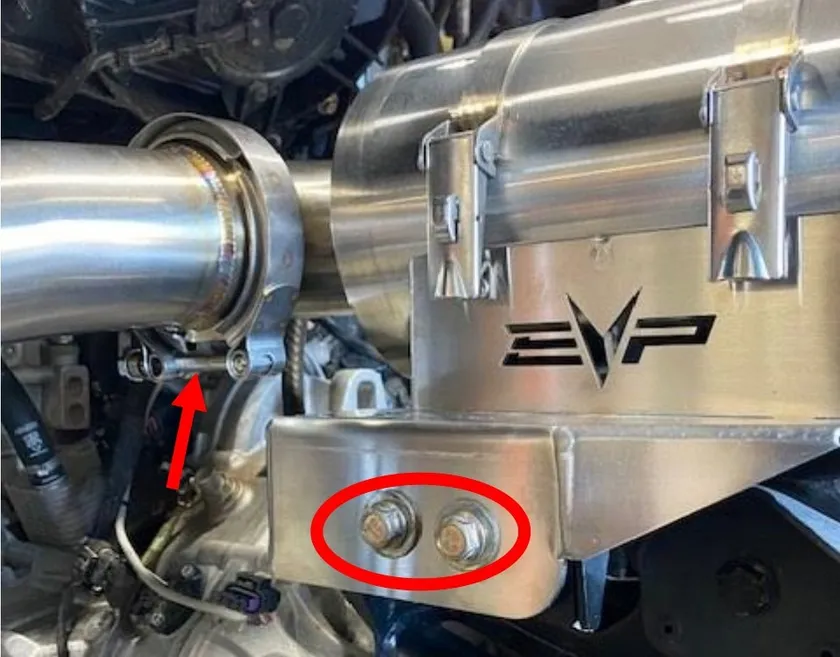
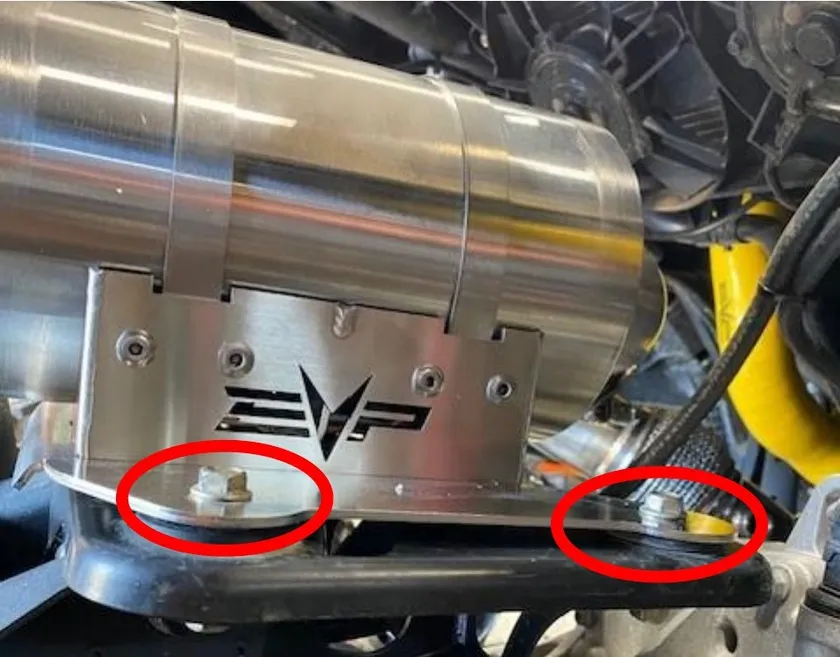
    Loosely install the 3.0” V-Band clamp joining the downpipe and muffler flanges.
    Loosely install the (4) OEM bolts to the mounting bracket.
  16. Step 16

    Apply anti seize on the 02 sensor threads, install into the downpipe and tighten with a 22mm wrench. Reinstall the electrical connector.
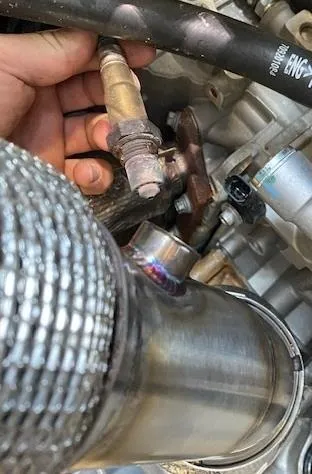
    Apply anti seize on the 02 sensor threads, install into the downpipe and tighten with a 22mm wrench.
  17. Step 17

    Starting at the turbocharger V-Band clamp, tighten everything back to the muffler. Do NOT over tighten the V-Band clamps.

  18. Step 18

    Wipe down the entire exhaust system in this sequence: brake cleaner, Windex, finished off with rubbing alcohol. This will remove all fingerprints during installation.

  19. Step 19

    Reinstall the turbocharger heat shield if desired.
Emissions notice. This product is exempt from the emission standards and related requirements of 40 C.F.R. § 1051 as provided by 40 C.F.R. § 1051.620, and California law [e.g., vehicle code §§ 27156 and 38391]. This product is sold only for use in connection with EPA certified, purpose-built, nonroad vehicles used solely for closed course, nonroad competition/racing and not used for any recreational purpose or on public highways or right of ways maintained by and open to the public. This product is sold only in connection with machines that do not fall under state and/or federal noise or emission standards/regulations. Purchasers who/that purchase this product represent and warrant that the product is purchased only in connection with EPA-certified, emission-regulations-exempt and noise-regulations-exempt competition/racing vehicles as interpreted under applicable state and/or federal law.

Need technical support?

Submit a ticket with your vehicle and what you're seeing, and our support team will get back to you.

Contact Support
We use cookies to improve your experience on our website. Read about how we use cookies in our Privacy Policy. By browsing this website, you agree to our use of cookies. privacy policy
accept

Your cart

×
×