 BUY NOW, PAY LATER. Starting at 0% APR


Maptuner X has many standard and advanced features. Some are included with the price of the device and tuning, and others are optional and must be purchased. Please see our website or call for option pricing.
MAPTUNER X Can Am
Installation instructions for the MAPTUNER X Can Am on the Can-Am (general). Parts, tools, and full procedure.
Before you start
Requirements
- WINDOWS BASED PC WITH WINDOWS 8 OR ABOVE OS
Procedure
Installation
- Step 1
Download and install the MyMaptuner program from: https://maptuner.se/download/ Choose the version that corresponds to your Windows installation (32 or 64 bit). If you are unsure of how many bits it is your operating system is, follow the instructions below:
- Windows 10 users click the Windows button on the lower left of the screen, then choose Settings, then System, then on the left side of the screen, choose about – Look for System Type – it will show 32 or 64 bit.
- Windows 8 users, swipe in from the right edge of the screen, and then tap Search. Or, if you are using a mouse, point to the lower-right corner of the screen, and then click Search. Type system in the search box, and then tap or click Settings. Tap or click System. If you are running a 64-bit version of Windows 8, 64-bit Operating System is displayed in the System type field under the System heading. If you are running a 32-bit version of Windows 8, 32-bit Operating System is displayed in the System type field under the System heading.
- Step 2
Once My Maptuner is installed on your computer, run the program.
- Step 3
Click “New User” on the login screen
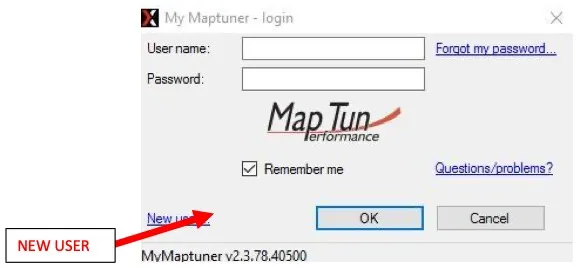
NEW USER - Step 4
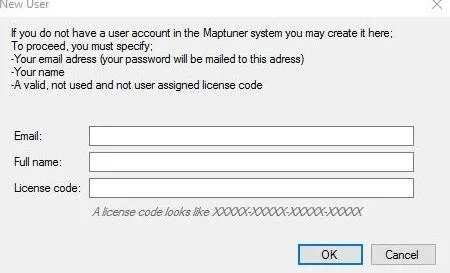
Enter your email address – this will be your username and it is also where your login password is sent, so make sure this is entered correctly! Then enter your first and last name and the license code (in some cases this is emailed to you). Once complete, select OK.
- Step 5
Check your email for the password.
- Step 6
Restart the MyMaptuner program and login using your email and password.
- Step 7
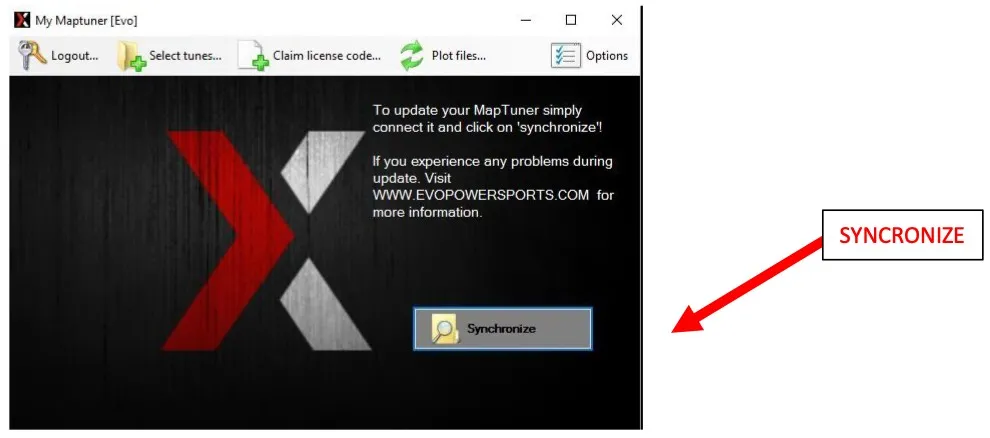
Click “Synchronize”
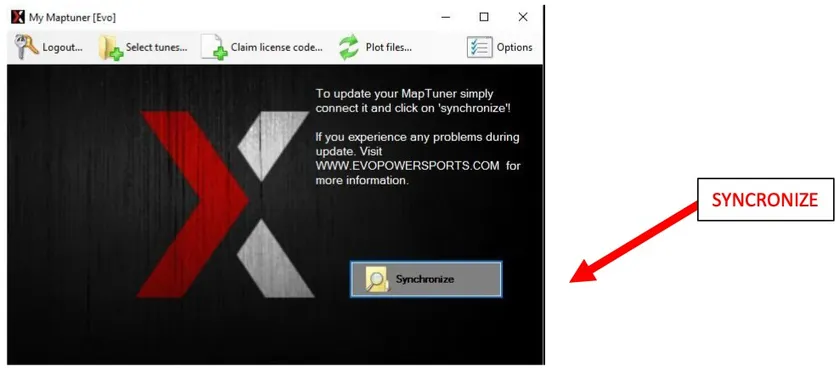
SYNCHRONIZE - Step 8
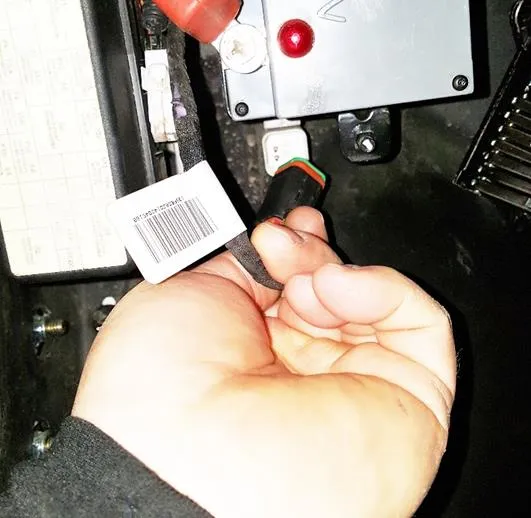
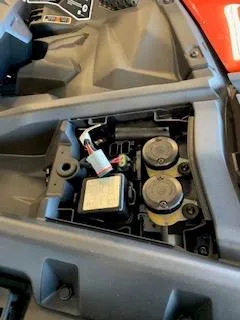
Connect to your Maptuner X to your vehicle using the supplied cable. The cable has an HDMI plug on one end which is inserted into the bottom of the Maptuner. The other end plugs into the diagnostic port on the vehicle. In 2015 & 2016 Mavericks and Maverick Turbos, the diagnostic plug is next to the battery under the dash. In 2017 and 2018 X3’s, the port is located under the glove compartment lid. 2019 and 2020 Can Am X3’s the diagnostic port is located under the center dash panel.
- Step 9
Turn the key to the “ON” position - on X3’s push the start button so the dash lights up, but DO NOT start the vehicle.
- Step 10
The Maptuner screen will power up and have a few icons on the screen. Click the “add vehicle” icon and follow the on-screen instructions. It will take 30 – 60 seconds to fully register the vehicle.
- Step 11
Once complete, disconnect Maptuner from the vehicle and bring it to your computer.
- Step 12
Synchronizing puts your vehicle specifications and vin# on our server – this ensures the correct tuning for your vehicle is selected. MyMaptuner will download a Stage 1 tune by default.
- Step 13
Once synchronization is complete, please email to let us know this has been done. We will then add the rest of the tuning files you have purchased to your account. This is usually done immediately, except for weekends which sometimes may take a few hours. Once you receive the confirmation email from us that the tuning files have been added, sync once more and all of the files will be added.
- Step 14
After step 13 is complete, there is no need for a PC computer anymore unless you are upgrading/updating tunes, adding another vehicle or adding features. In other words, the tuning files are stored on your Maptuner and your vehicle can be flashed anytime or anywhere without internet or a PC. If you have multiple vehicles, they can also be flashed in this same manner.
- Step 15
You may now program your vehicle by connecting your Maptuner to the diagnostic port again. Switch the key to the “ON” position or press “START” momentarily on the X3 to light up the dash – DO NOT START THE VEHICLE! On the Maptuner display, press the “PROGRAMMING” button and follow the on-screen instructions.
Setup
Maptuner Tune Upgrade
- If you want to purchase upgraded tuning or add features to your Maptuner for your vehicle (same vin #), please call our sales department. Our sales staff can help you with the purchase including any other hardware that may be required.
- Once the invoice for the upgrade has been paid, we will immediately enable the tuning and/or features under your account. Please resync and the correct tuning files and/or features will be added to your account. You can then program your vehicle in the same manner as step 15 above.
Setup
Maptuner Multiple Vehicle Options
- Maptuner has the unique ability to be used across a range of vehicles and manufacturers using the same device!
- If you want to tune another vehicle, you will need to purchase another tune from us. Please call our sales department and they can help you with this purchase. Upon completion of your purchase, another license code will be provided.
- You will then add the new vehicle by connecting to the diagnostic port in the same manner as before.
- Once the vehicle is added, connect to your computer and run the MyMaptuner program.
- During sync, a screen will pop up prompting you to choose the tuning file and enter the license code.
- Once synchronization is complete, please email to let us know this has been done. We will then add the rest of the tuning files you have purchased to your account. This is usually done immediately, except for nights weekends which sometimes may take a few hours. Once you receive the confirmation email from us that the tuning files have been added, sync once more and all the files will be added.
Setup
Maptuner Advanced Features
Setup
Monitoring Steps
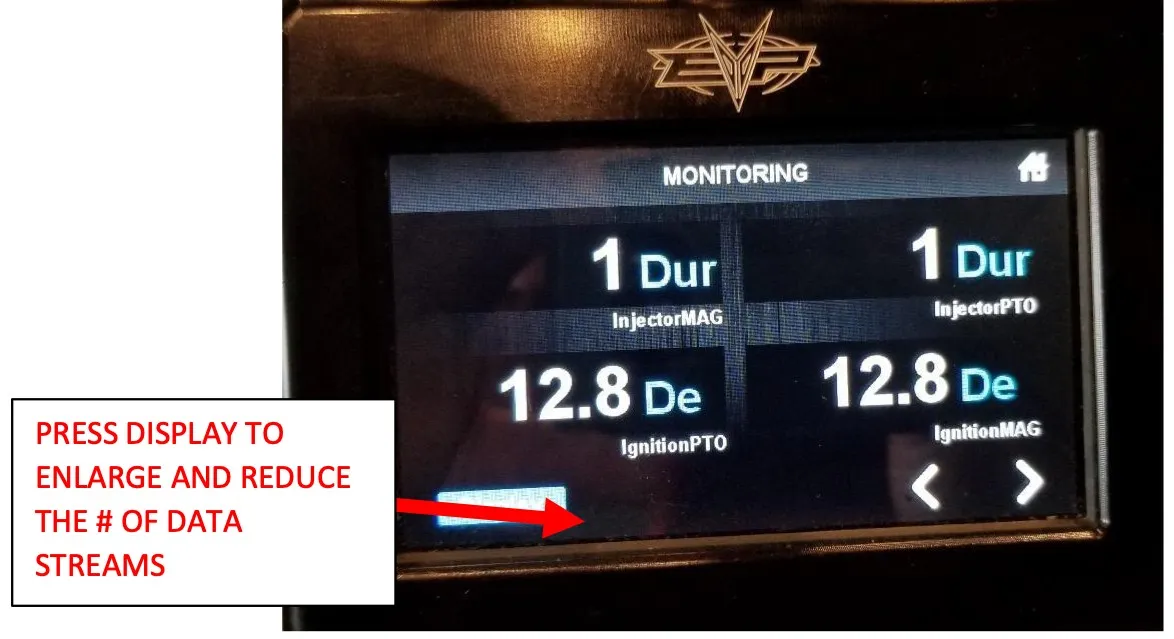
- Data monitoring is available by selecting the “MONITORING” app and allows the display of various live ecu can bus data.
- You can choose the units (SAE or Metric) by selecting the “INFORMATION” button on the home screen and selecting the “UNITS” tab.
- You can line up the data you want to display by pressing displayed value. When a data value is pressed, it will automatically display in the upper left-hand corner. When another data stream is pressed, it will display under the previously selected data. Up to 6 streams can be displayed on the screen at once. There are multiple tabs of data that can be scrolled through, but each time the data stream is pressed it will add it to the first screen successively. The data can be enlarged by successively pushing the “DISPLAY” button but will lessen the number of streams that can be displayed at one time.
Setup
Datalogging Steps
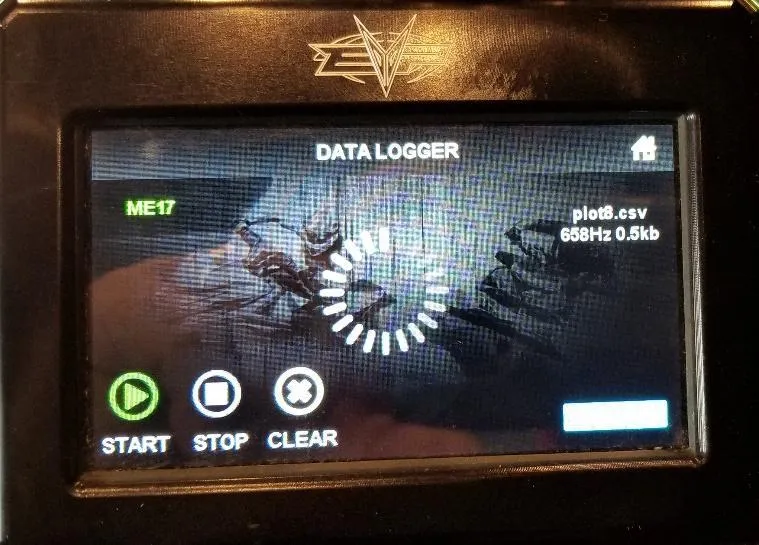
- Datalogging is accomplished by selecting the “DATA LOGGER” app.
- Once the datalogger app is open, press the “START” button when you want to start logging. Press the “STOP” button when you complete your test. When the stop button is pressed, a file is created and saved on Maptuner – the date, time, vin and tuning file will all be displayed in the saved file name. Starting a new run will create a new file with a different time stamp.
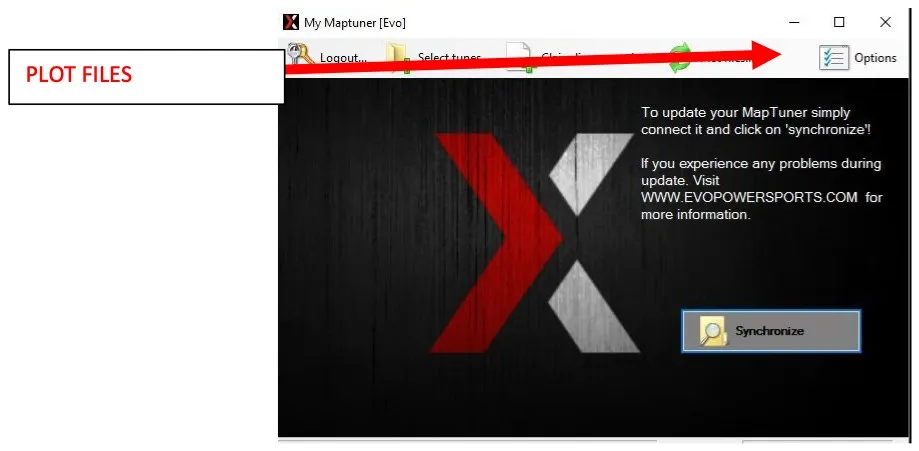
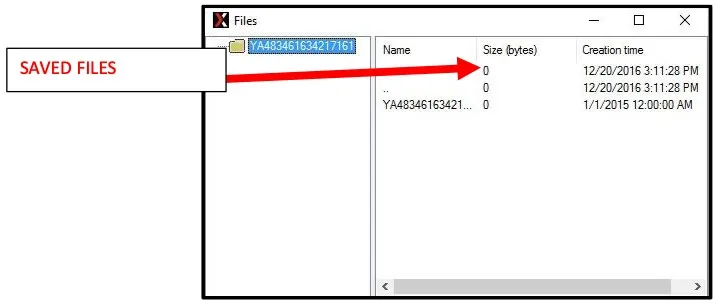
- To view the saved log file, connect your Maptuner to your computer and open the MyMaptuner software. Click the “PLOT FILES” button at the top of the screen. This will open a folder which will have your saved datalog files.
- Right click on the file you want to view and click “SAVE” and save the file to the folder of your choosing. You can then open the file to view the data with Excel or similar programs.
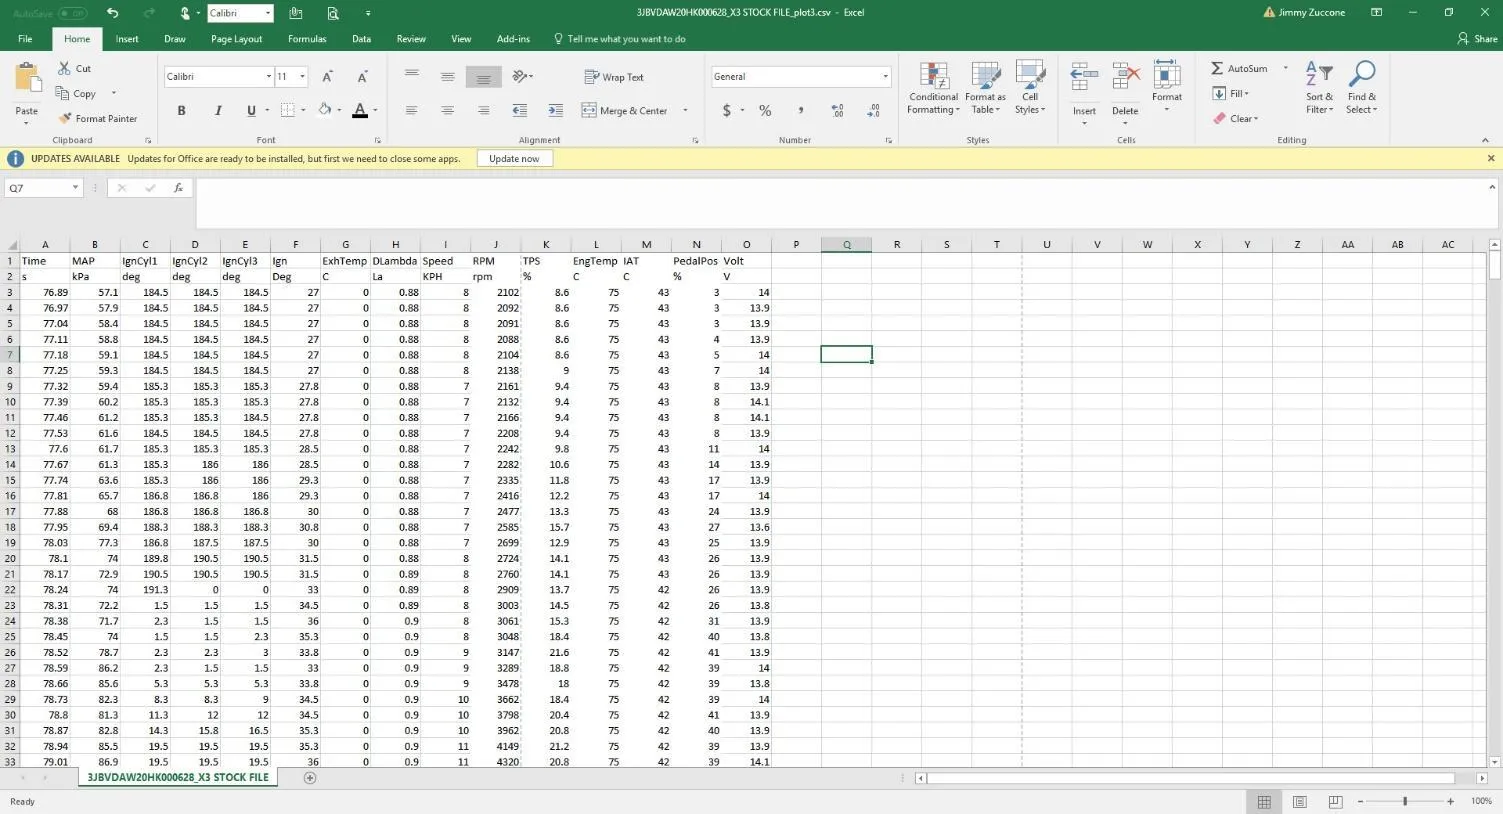
- View of the datalog file opened in Excel is below.
Emissions notice. This product is exempt from the emission standards and related requirements of 40 C.F.R. § 1051 as provided by 40 C.F.R. § 1051.620, and California law [e.g., vehicle code §§ 27156 and 38391]. This product is sold only for use in connection with EPA certified, purpose-built, nonroad vehicles used solely for closed course, nonroad competition/racing and not used for any recreational purpose or on public highways or right of ways maintained by and open to the public. This product is sold only in connection with machines that do not fall under state and/or federal noise or emission standards/regulations. Purchasers who/that purchase this product represent and warrant that the product is purchased only in connection with EPA-certified, emission-regulations-exempt and noise-regulations-exempt competition/racing vehicles as interpreted under applicable state and/or federal law.
Need technical support?
Submit a ticket with your vehicle and what you're seeing, and our support team will get back to you.
