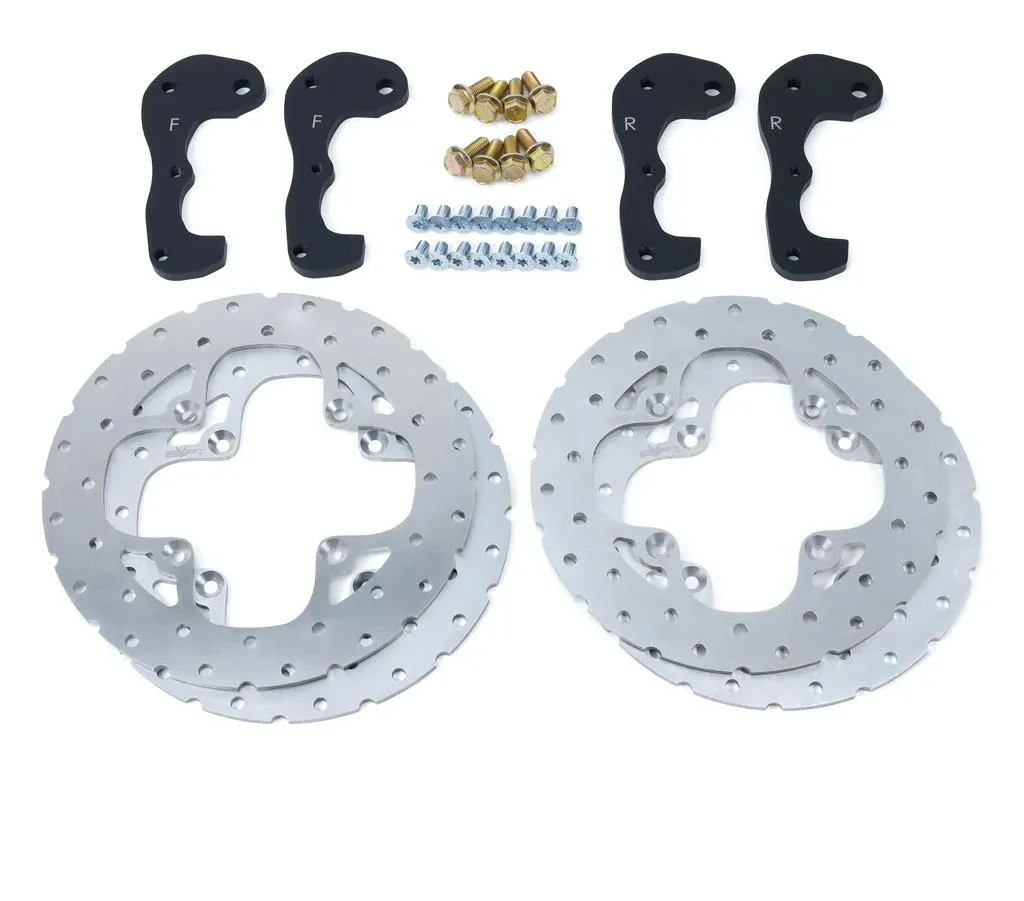
EVP Big Rotor Brake Kit for Can-Am Defender, Commander &

EVP Big Rotor Brake Kit for Can-Am Defender, Commander & Maverick Sport/Trail

Category
Brakes
SKU
3901010007, 3901010008, 6001990282, 6001990283, 3901010005, 3901010006
Legacy SKU
902FC0012, 902FC0013, 953RU0561, 953RU0562, 902FC0010, 902FC0011
Revision
REV_041726

In the box

Parts and tools

EVP Big Rotor Brake Kit for Can-Am Defender, Commander & Maverick Sport/Trail

Included parts

  • 1Hardware Kit
  • 4Front and rear rotors
  • 4Caliper adapter brackets

Required tools

  • Screwdriver(s)
  • Ratchet
  • Torque wrench
  • Small torch
  • sockets

Procedure

Installation

  1. Step 1

    Remove tire with 17mm socket.

    Remove tire with 17mm socket.
  2. Step 2

    Using T-30 remove brake pad pins
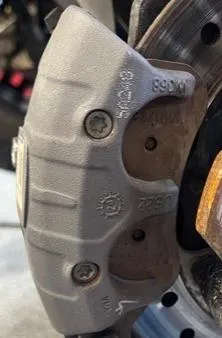
    Using T-30 remove brake pad pins
  3. Step 3

    Remove brake caliper using 15mm socket
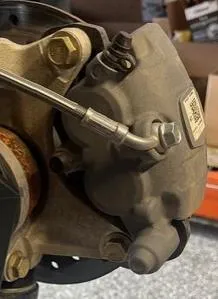
    Remove brake caliper using 15mm socket
  4. Step 4

    Removed brake pads and slide mounting bracket out of caliper
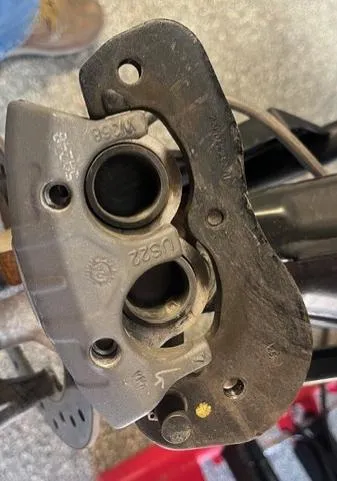
    Removed brake pads and slide mounting bracket out of caliper
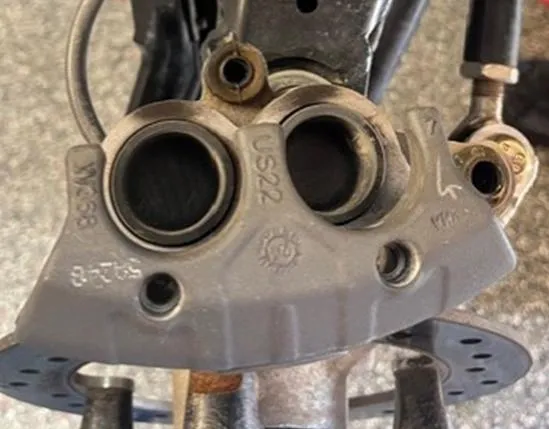
    Removed brake pads and slide mounting bracket out of caliper
  5. Step 5

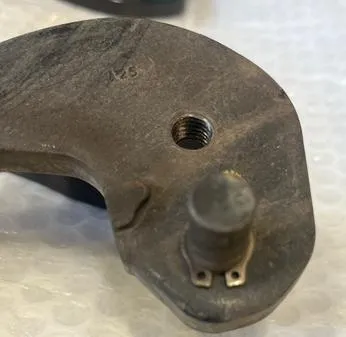
    Match old bracket up with new bracket that you will be transferring the pins to.
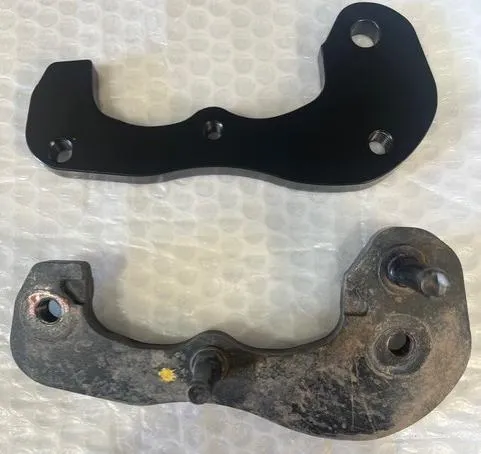
    Match old bracket up with new bracket that you will be transferring the pins to.
  6. Step 6

    Remove clip from oem bracket

    Remove clip from oem bracket
    Fig. 7
  7. Step 7

    Set bracket in vice “or press if available” heat bracket with small torch and pound pin out from the side you removed clip from
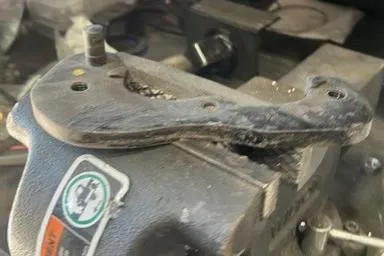
    Set bracket in vice “or press if available” heat bracket with small torch and pound pin out from the side you removed clip from
  8. Step 8

    Set pin into new bracket and tap into place, you can slide a socket over pin to pound on if more force is needed. Reinstall c-clip to pin. Figure 7
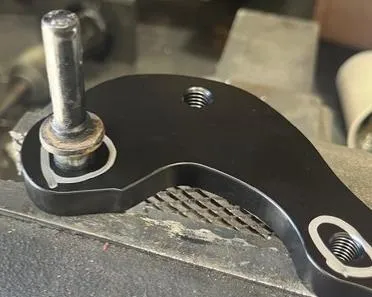
    Set pin into new bracket and tap into place, you can slide a socket over pin to pound on if more force is needed.
    Set pin into new bracket and tap into place, you can slide a socket over pin to pound on if more force is needed.
  9. Step 9

    Remove threaded pin, use Loctite install pin into new bracket, don’t lose the washer under pin.
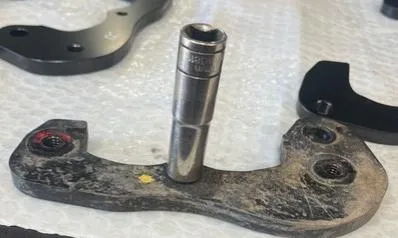
    Remove threaded pin, use Loctite install pin into new bracket, don’t lose the washer under pin.
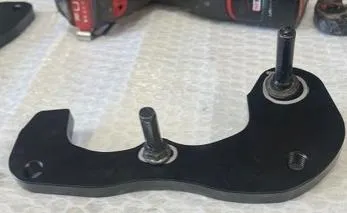
    Remove threaded pin, use Loctite install pin into new bracket, don’t lose the washer under pin.
  10. Step 10

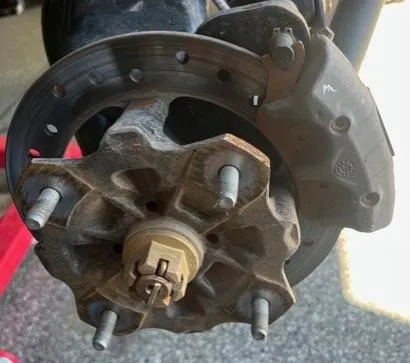
    Remove cv axle nut (24mm), remove hub and rotor and set on bench and remove 4 torx bolts (T-40), heat will be needed Loctite is on bolts
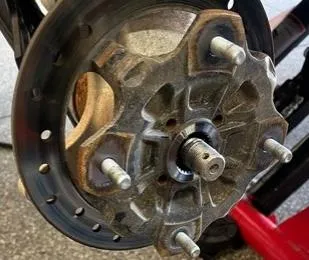
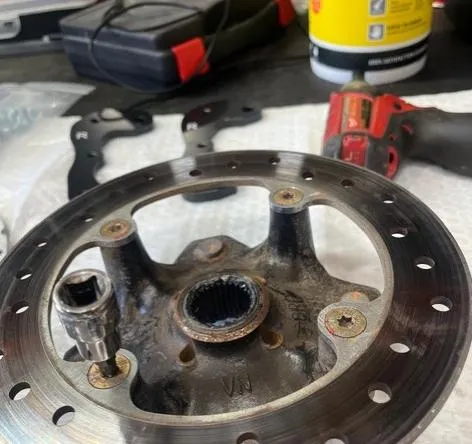
    Remove cv axle nut (24mm), remove hub and rotor and set on bench and remove 4 torx bolts (T-40), heat will be needed Loctite is on bolts
    Remove cv axle nut (24mm), remove hub and rotor and set on bench and remove 4 torx bolts (T-40), heat will be needed Loctite is on bolts
  11. Step 11

    Install new rotor (larger marked with f) with new hardware, use red Loctite and torque to 25ft/lbs
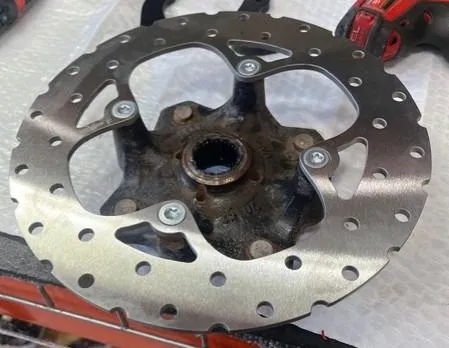
    Install new rotor (larger marked with f) with new hardware, use red Loctite and torque to 25ft/lbs
  12. Step 12

    Reinstall hub, hand tighten nut, Install new caliper mount on caliper, install brake pads mount caliper and torque to 37 ft/lbs, hold brakes and torque axle nut to 184 ft/lbs
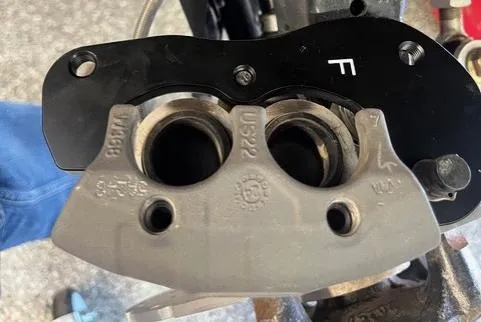
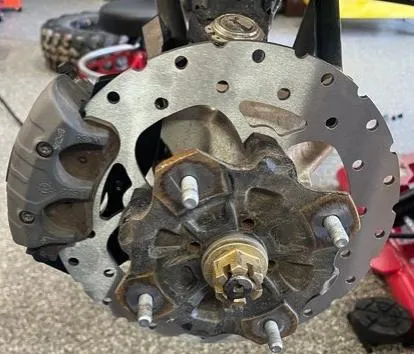
    Reinstall hub, hand tighten nut, Install new caliper mount on caliper, install brake pads mount caliper and torque to 37 ft/lbs, hold brakes and torque axle nut to 184 ft/lbs
    Reinstall hub, hand tighten nut, Install new caliper mount on caliper, install brake pads mount caliper and torque to 37 ft/lbs, hold brakes and torque axle nut to 184 ft/lbs
  13. Step 13

    repeat process on opposite side, when moving to the rear the steps will be the same except the hubs will have Loctite holding them to axle, you will need to heat and use a 3 jaw puller to remove hub.
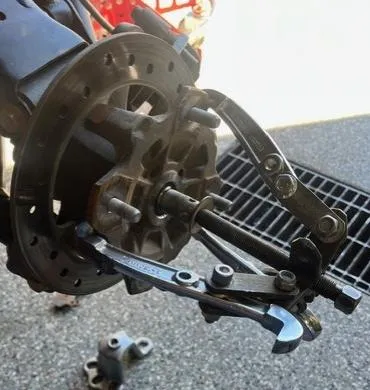
    repeat process on opposite side, when moving to the rear the steps will be the same except the hubs will have Loctite holding them to axle, you will need to heat and use a 3 jaw puller to remove hub.
    repeat process on opposite side, when moving to the rear the steps will be the same except the hubs will have Loctite holding them to axle, you will need to heat and use a 3 jaw puller to remove hub.
Emissions notice. This product is exempt from the emission standards and related requirements of 40 C.F.R. § 1051 as provided by 40 C.F.R. § 1051.620, and California law [e.g., vehicle code §§ 27156 and 38391]. This product is sold only for use in connection with EPA certified, purpose-built, nonroad vehicles used solely for closed course, nonroad competition/racing and not used for any recreational purpose or on public highways or right of ways maintained by and open to the public. This product is sold only in connection with machines that do not fall under state and/or federal noise or emission standards/regulations. Purchasers who/that purchase this product represent and warrant that the product is purchased only in connection with EPA-certified, emission-regulations-exempt and noise-regulations-exempt competition/racing vehicles as interpreted under applicable state and/or federal law.

Need technical support?

Submit a ticket with your vehicle and what you're seeing, and our support team will get back to you.

Contact Support
We use cookies to improve your experience on our website. Read about how we use cookies in our Privacy Policy. By browsing this website, you agree to our use of cookies. privacy policy
accept

Your cart

×
×