 BUY NOW, PAY LATER. Starting at 0% APR


Operating RPM: 7300-7500
Can-Am Defender DT-130 Shift-Tek Clutch Kit
Installation instructions for the Defender DT-130 Shift-Tek Clutch Kit on the Can-Am Defender (SKU 402FC0082). Parts, tools, and full procedure.
In the box
Parts and tools

Included parts
- Weight Kit
- Helix
- Helix Tools
Required tools
- Screwdriver(s)
- T-25 Torx
- Metric Sockets
- Magnet
- 8mm Socket
Procedure
Installation
- Step 1
Remove clutch cover and drive belt. It is easier to have the bed in the upward position. You do NOT need to remove the clutch, but you can for more room.
- Step 2
Setup your clutch weights to the corresponding tune calibration. Use Loctite on all set screws.
Can Am Defender Non XMR Turbocharger (401FC0015)
| Year | Model | Tune | Clutch Weights | 1 Weight in Grams |
|---|---|---|---|---|
| 2020+ | Non XMR | Turbo Tuned | (4) Adjustable (2) Non-Adjustable | Adjustable 37.8g Non-Adjust 32.4g |
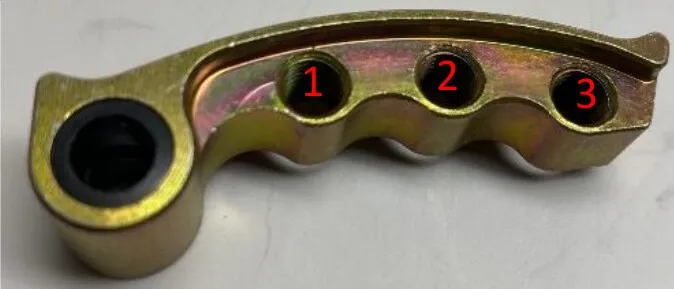
Adjustable Weights
| 1 Weight | 3/16 | 1/4 | 3/8 |
|---|---|---|---|
| 37.8g | .6g | .8g | 1.5g |
| Tune | Hole 1 | Hole 2 | Hole 3 |
|---|---|---|---|
| 2 Seat | (2)1/4 ss | (2)1/4 ss | (2)1/4 ss |
| (2)1/4 ss | (2)1/4 ss | (2)1/4 ss | |
| 4 Seat | (2)1/4 ss | (2)1/4 ss | (2) 3/16 ss |
| (2)1/4 ss | (2)1/4 ss | (2) 3/16 ss |
- Step 3
For the OEM cam arm removal, use a T25 Torx on the head and a 8mm socket for the nut. Remove the nut and roller pin.
- Step 4
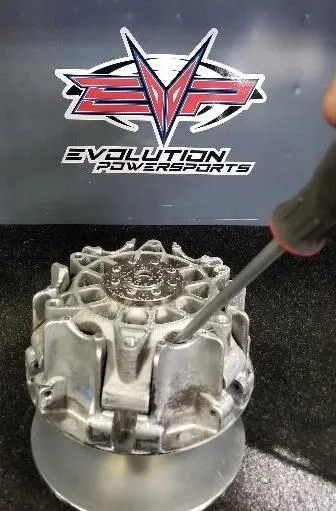
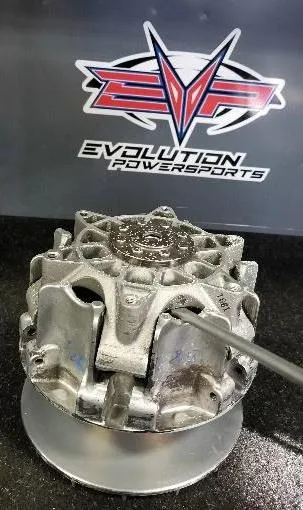
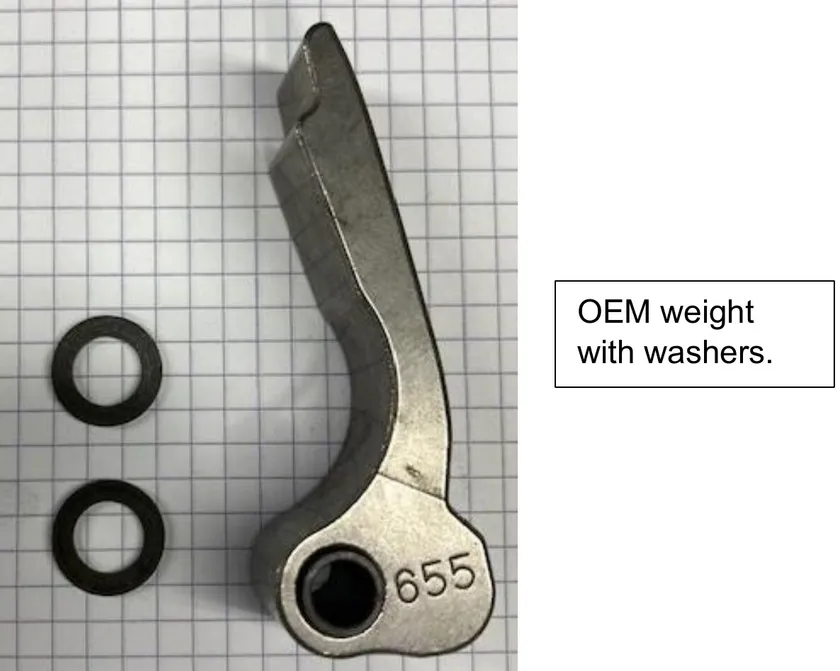
Use a screwdriver to open the sheaves and a magnet to retrieve the cam arm SEE PICTURES BELOW– be careful to save the washers that are installed on both sides of the arm – these will be needed to run EVP weights.
- Step 5
Install the EVP weights and bushings into the clutch as shown below. Tighten up roller pin nut, make sure the weights still move freely.
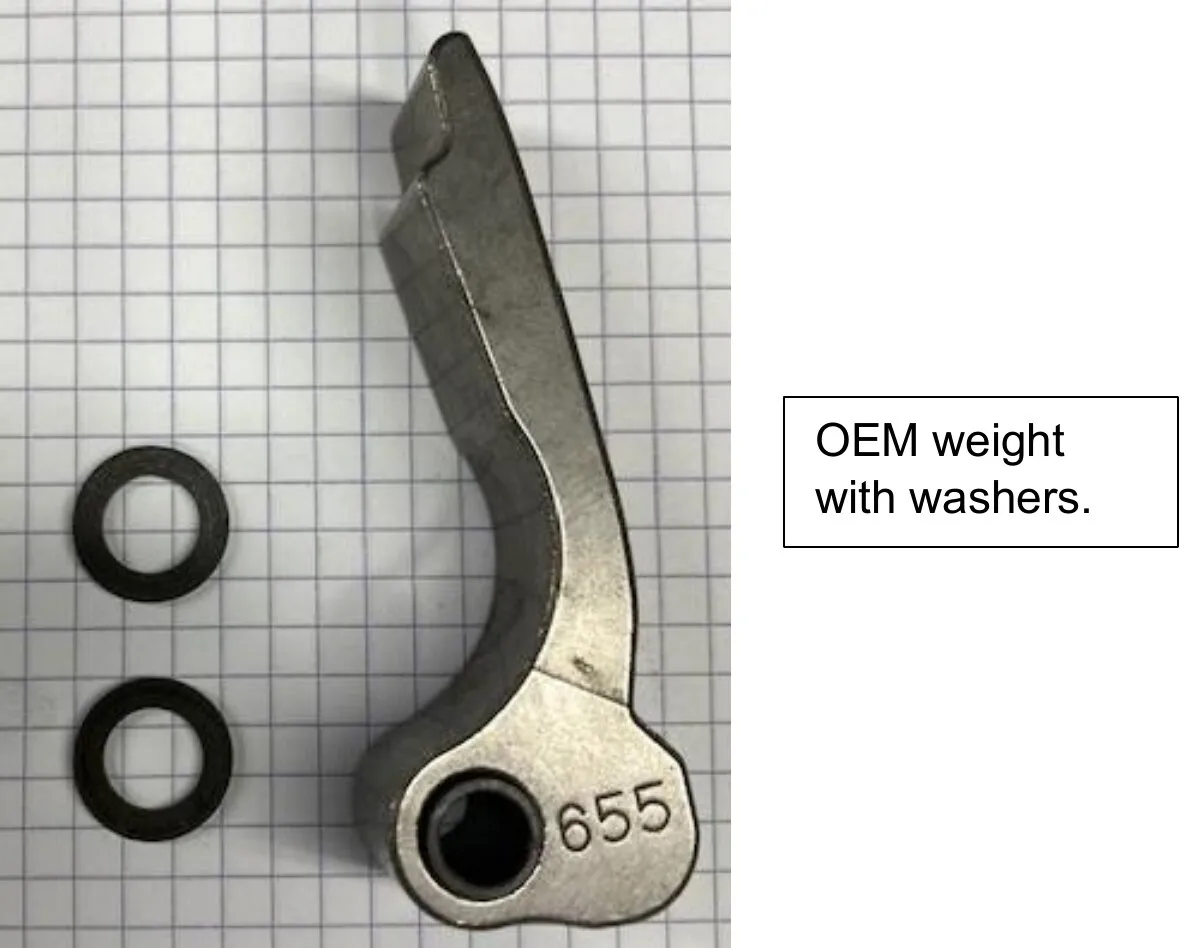
FOR EXAMPLE:
DT-130
- 2 Non-Adjustable, 4 Adjustable
- The EVP cam arms need to be staged as 1 non-adjustable, 2 adjustable, 1 non-adjustable, 2 adjustable
Procedure
Installation of the Helix and Spring
- Step 1
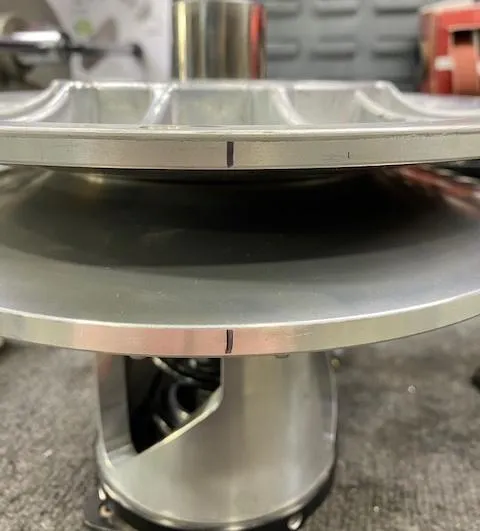
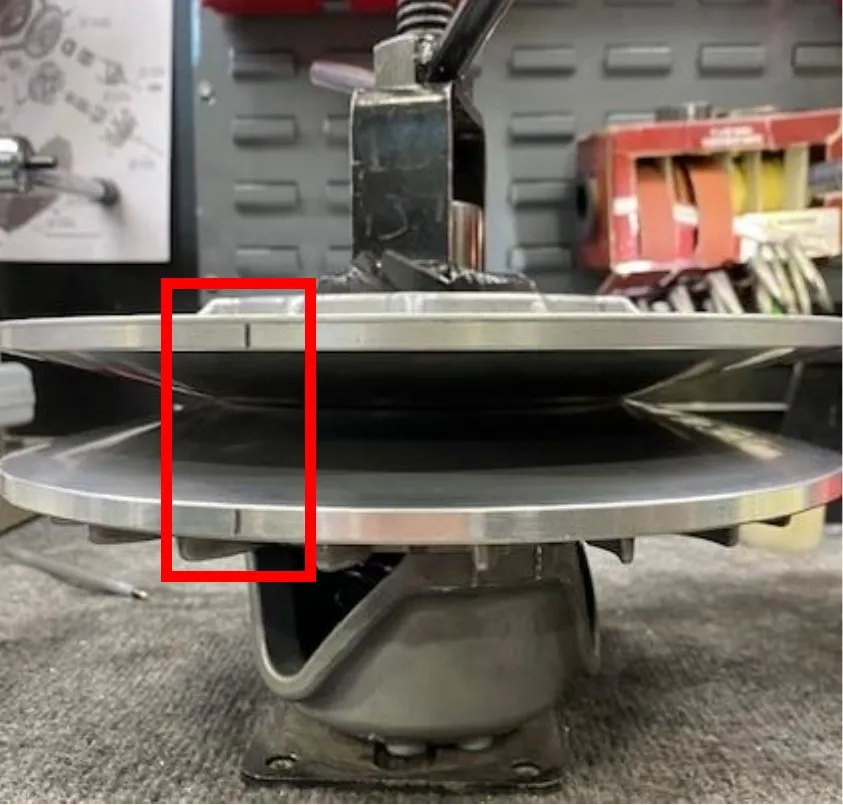
Remove the secondary clutch with a 17mm socket and impact, mount it into a clutch compression tool. With a sharpie make alignment marks on both sheaves. (Figure 4)
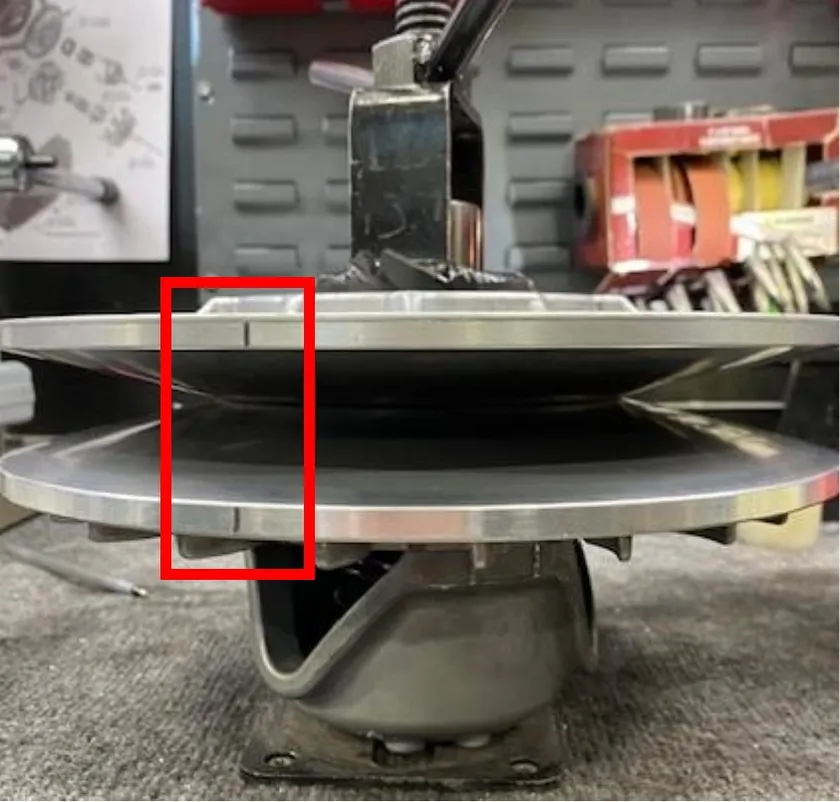
Fig. 4 - Step 2
Use 13mm socket to take 3 fasteners out of the helix and carefully loosen the spring compression tool to remove tension. (Figure 5)
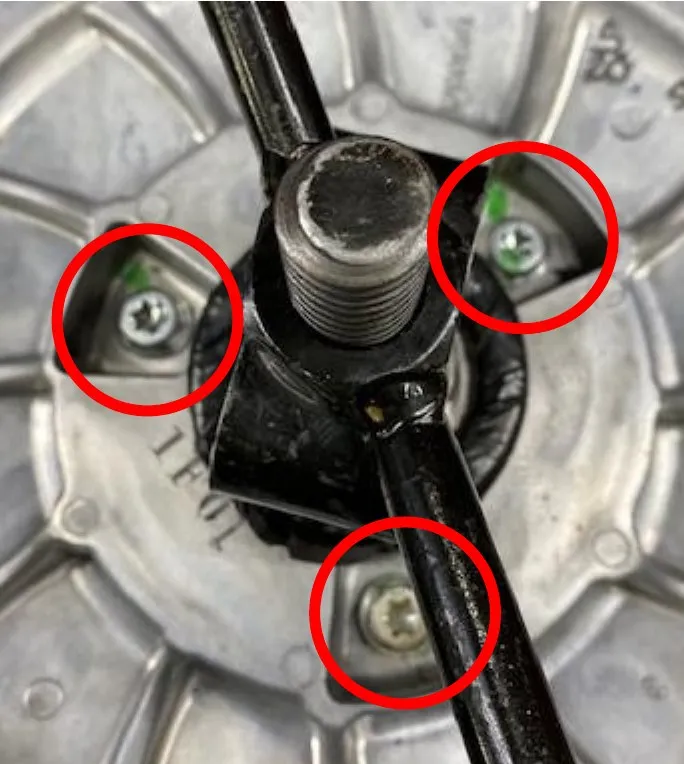
Fig. 5 - Step 3
Remove both sheaves, remove spring cup and spring from the OEM helix.
- Step 4
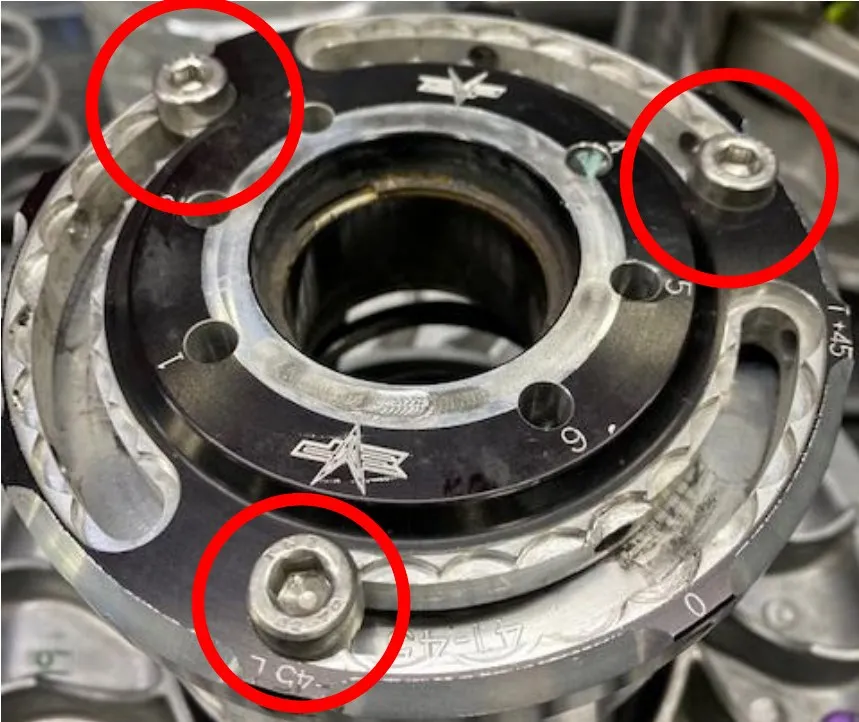
Grab the new helix, make sure the helix cap is adjusted to -45 degrees, if not loosen (3) Allen screws and clock the helix cap. Tighten the (3) Allen screws back down.
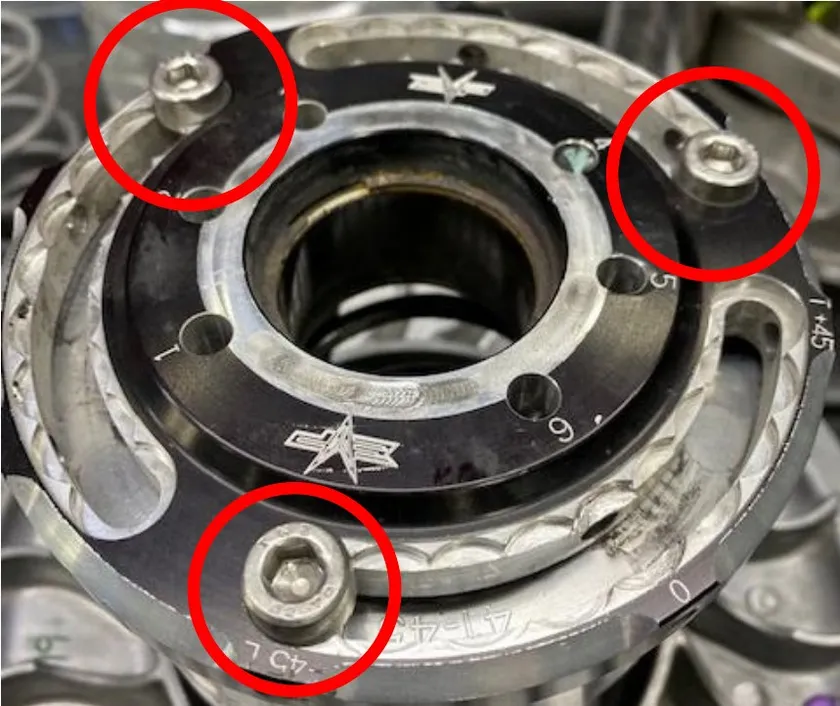
- Step 5
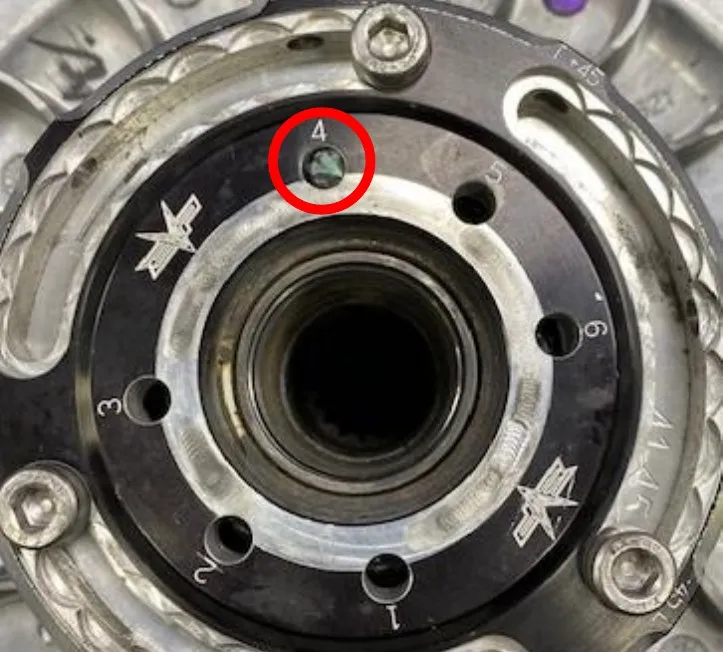
Reassemble the secondary clutch on the clutch compression tool in this order: Helix assembly, stock spring in hole 4 (EVP Purple Spring hole 3 or 5 depending on clutch setup sheet), spring cap, both sheaves in alignment. When compressing make sure the rollers are in line with the helix ramps. You may need to adjust with your hands while compressing.
- Step 6
Apply Red Loctite onto the threads of the (3) 13mm bolts holding the helix to the sheaves.
- Step 7
Reinstall the clutch on the vehicle and torque secondary bolt to 52 ft-lbs.
- Step 8
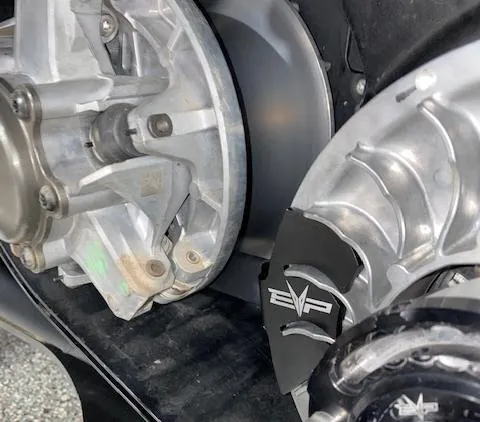
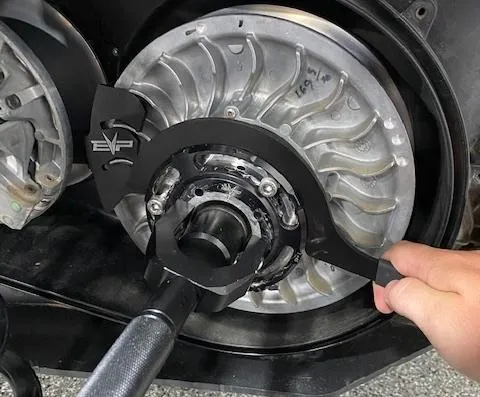
Install the secondary holding tool onto the secondary, align the tool in between the fins. Allow the handle to rest against the primary bearing.
- Step 9
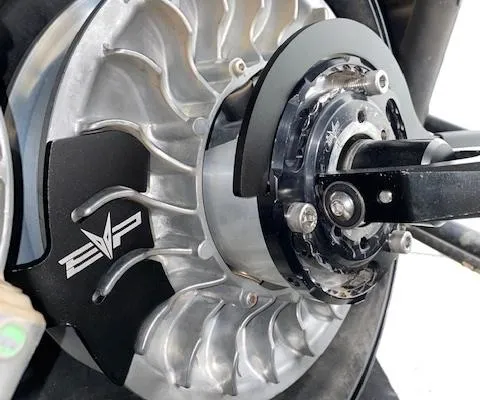
Install the helix wrench into a slot around the Shift-Tek helix cap.
- Step 10
Loosen all (3) M6 Allen head cap screws (do not remove). Apply pressure onto the helix wrench. You can now turn the helix cap to add or subtract torsion pressure on the spring. Set to 0 degrees. Once complete tighten the (3) M6 Allen head cap screws.
- Step 11
Remove the helix wrench and secondary holder. Install the belt back onto the clutches. Remove the belt changing tool and spin the secondary a total of 5 times.
Emissions notice. This product is exempt from the emission standards and related requirements of 40 C.F.R. § 1051 as provided by 40 C.F.R. § 1051.620, and California law [e.g., vehicle code §§ 27156 and 38391]. This product is sold only for use in connection with EPA certified, purpose-built, nonroad vehicles used solely for closed course, nonroad competition/racing and not used for any recreational purpose or on public highways or right of ways maintained by and open to the public. This product is sold only in connection with machines that do not fall under state and/or federal noise or emission standards/regulations. Purchasers who/that purchase this product represent and warrant that the product is purchased only in connection with EPA-certified, emission-regulations-exempt and noise-regulations-exempt competition/racing vehicles as interpreted under applicable state and/or federal law.
Need technical support?
Submit a ticket with your vehicle and what you're seeing, and our support team will get back to you.
