 BUY NOW, PAY LATER. Starting at 0% APR


Can Am Shift-Tek Helix & Spring
Installation instructions for the Can Am Shift-Tek Helix & Spring on the Can-Am (general). Parts, tools, and full procedure.
In the box
Parts and tools
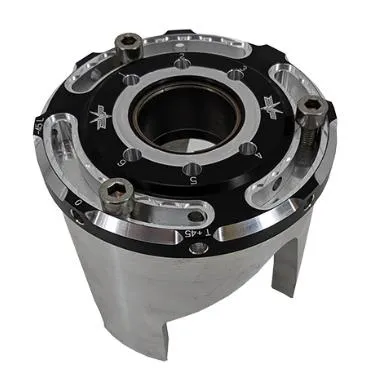
Included parts
- Shift-Tek Helix Assembly
- (Optional): Spring
- Helix Wrench
- Secondary Holder
Required tools
- Belt Changing Tool
- M6 Allen Socket
- Ratchet
- Clutch Compression Tool
- 17mm Socket
- Torque Wrench
- Red Loctite
Procedure
Installation of the Helix and Spring
- Step 1
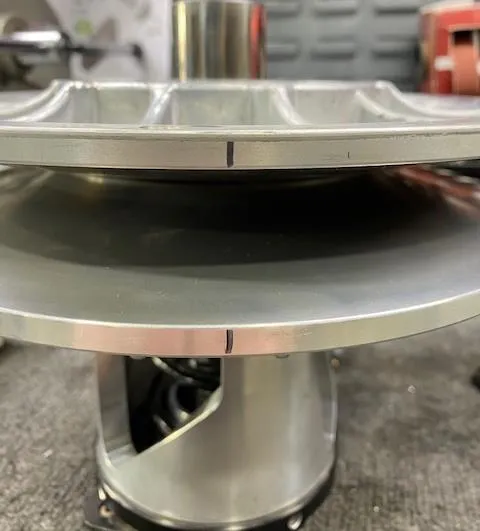
Remove the secondary clutch with a 17mm socket and impact, mount it into a clutch compression tool. With a sharpie make alignment marks on both sheaves. (Figure 1)
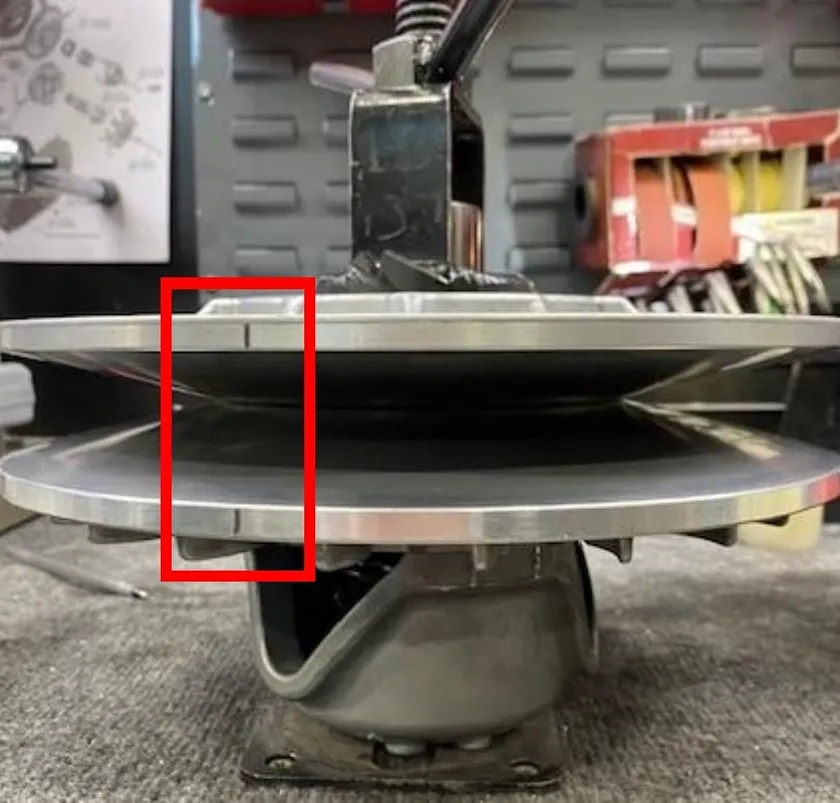
Fig. 1 - Step 2
Use 13mm socket to take 3 fasteners out of the helix and carefully loosen the spring compression tool to remove tension. (Figure 2)
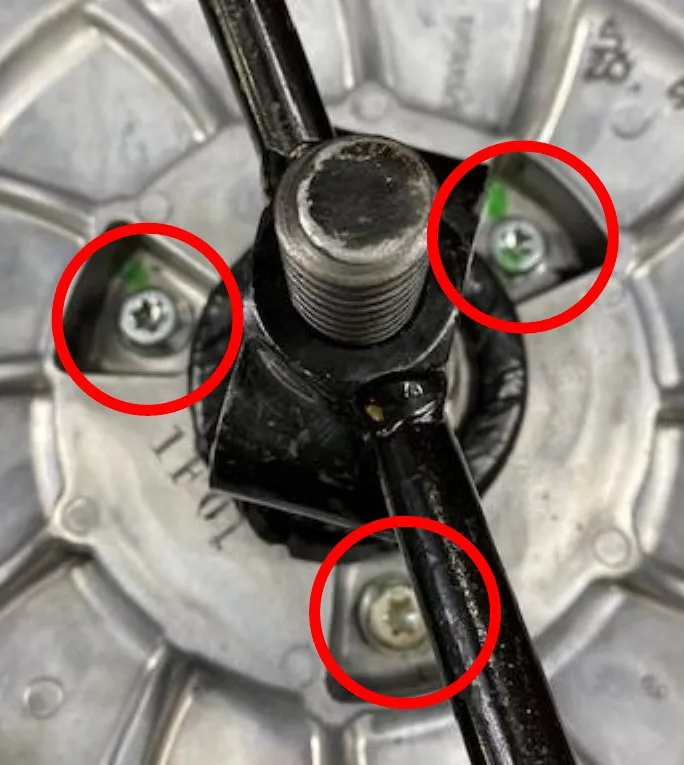
Fig. 2 - Step 3
Pull off both sheaves, remove spring cup and spring from the OEM helix.
- Step 4
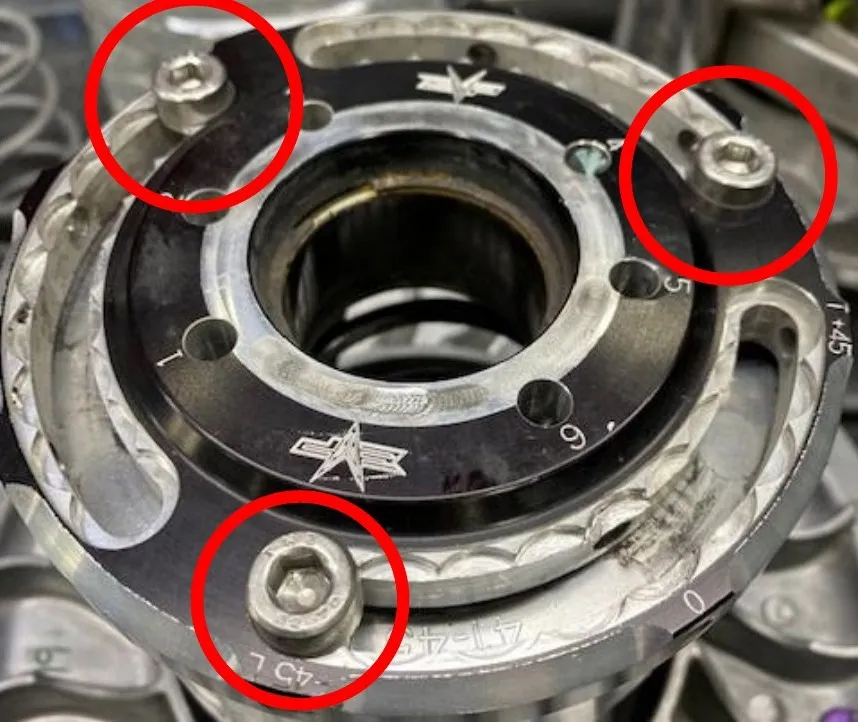
Grab the new helix, make sure the helix cap is adjusted to -45 degrees, if not loosen (3) Allen screws and clock the helix cap. Tighten the (3) Allen screws back down.
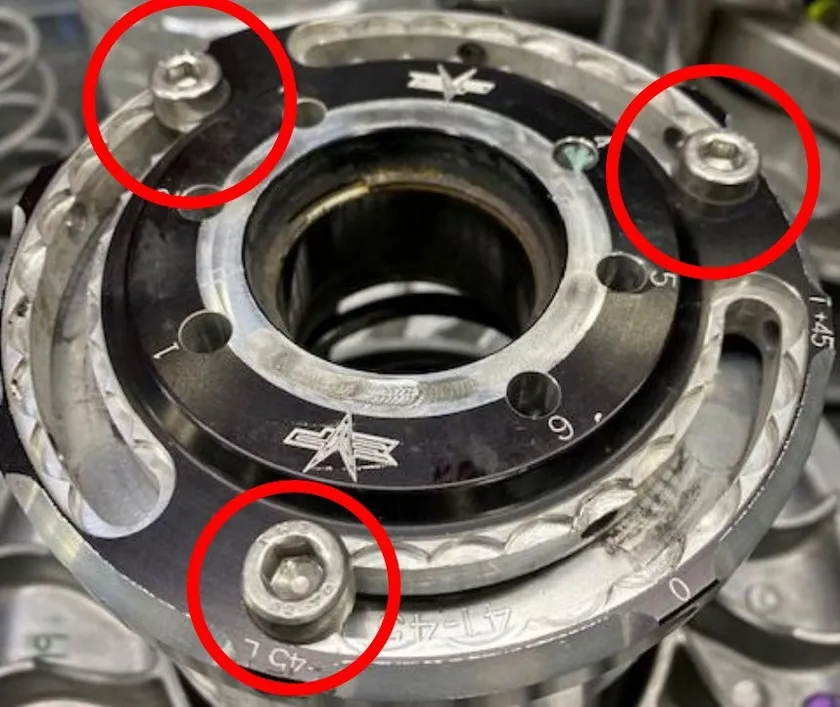
- Step 5
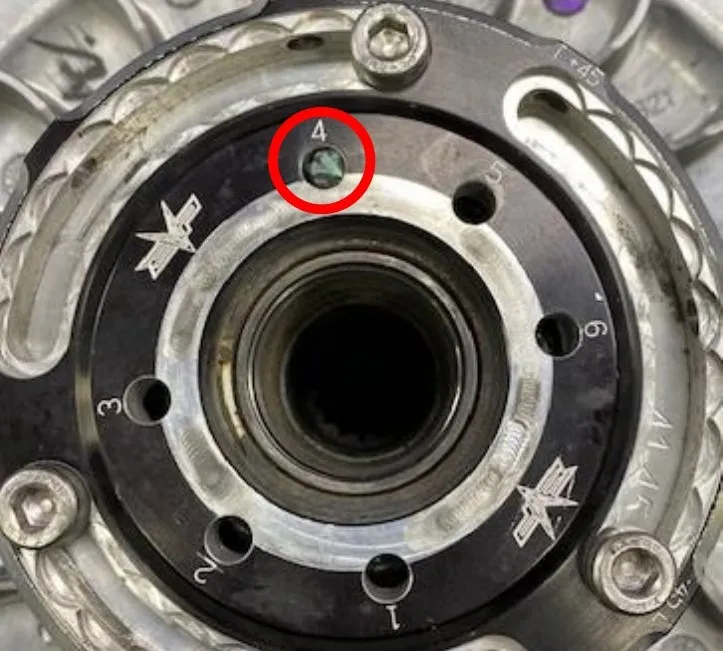
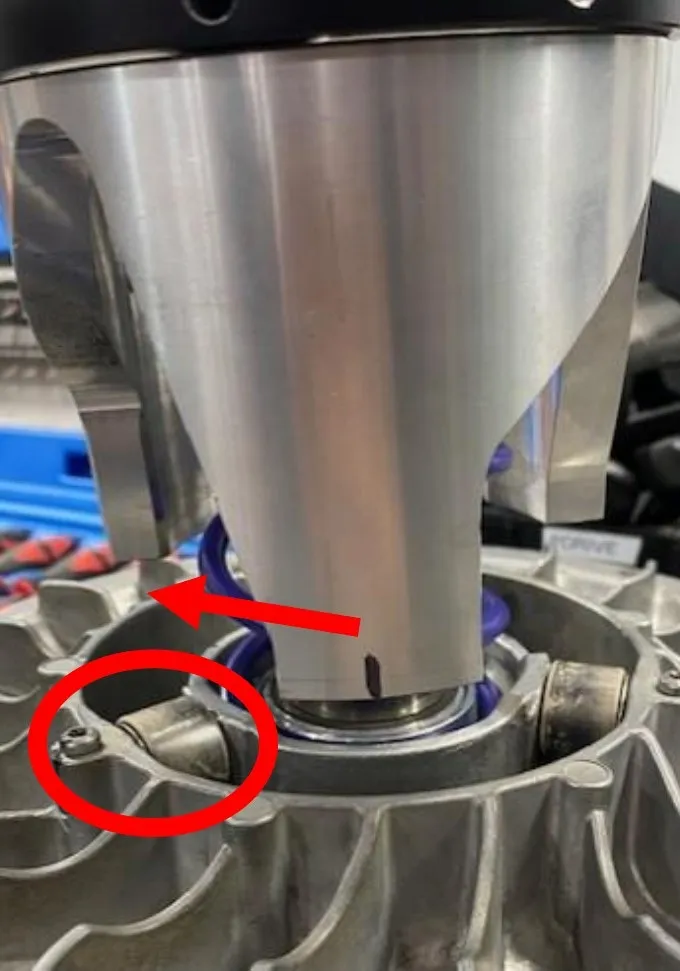
Reassemble the secondary clutch on the clutch compression tool in this order: Helix assembly, stock spring in hole 4 (EVP Purple Spring hole 5), spring cap, both sheaves in alignment. When compressing make sure the rollers are in line with the helix ramps. You may need to adjust with your hands while compressing.
- Step 6
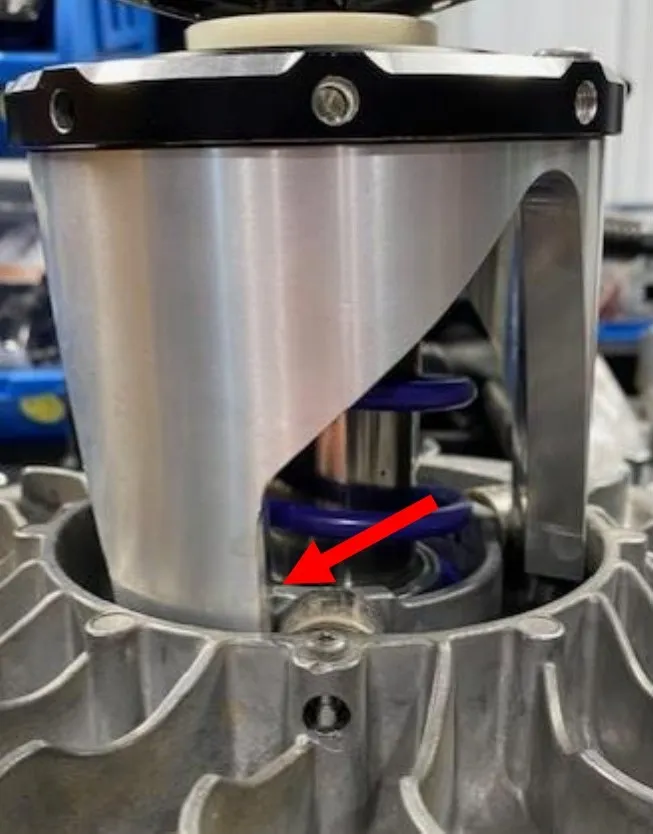
You want the helix fingers in between the rollers as shown. As you compress the spring you want to rotate the helix clockwise, so the finger of the helix is on the roller. This sets torsion on the spring.
- Step 7
Apply Red Loctite onto the threads of the (3) 13mm bolts holding the helix to the sheaves.
- Step 8
Reinstall the clutch on the vehicle and torque secondary bolt to 52 ft-lbs.
- Step 9
Install the secondary holding tool onto the secondary, align the tool in between the fins. Allow the handle to rest against the primary bearing.
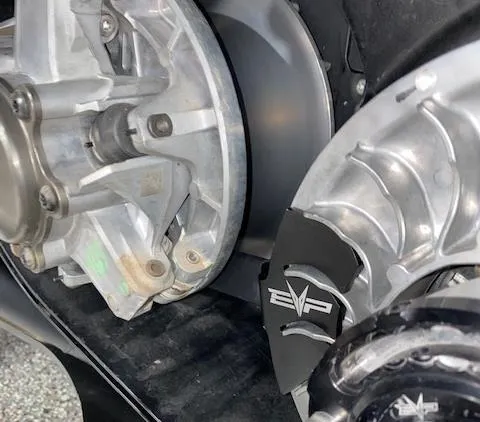
- Step 10
Install the helix wrench into a slot around the Shift-Tek helix cap.
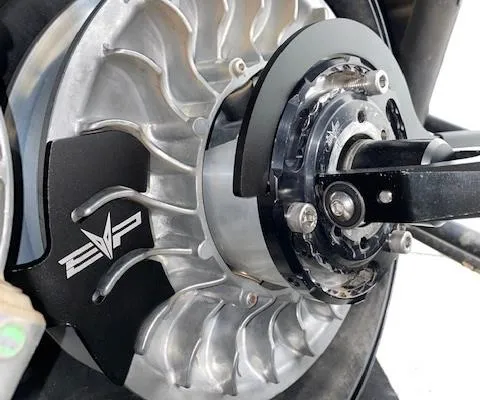
- Step 11
Loosen all (3) M6 Allen head cap screws (do not remove). Apply pressure onto the helix wrench. You can now turn the helix cap to add or subtract torsion pressure on the spring. Once complete tighten the (3) M6 Allen head cap screws.
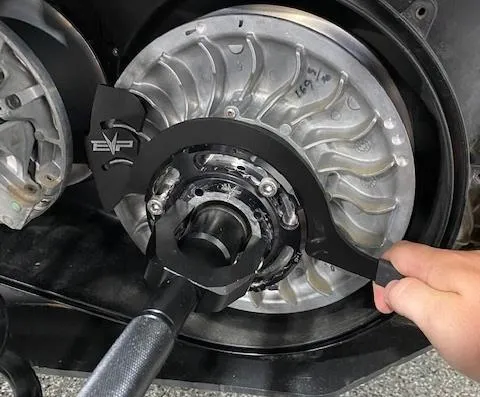
- Step 12
Remove the helix wrench and secondary holder. Install the belt back onto the clutches. Remove the belt changing tool and spin the secondary a total of 5 times.
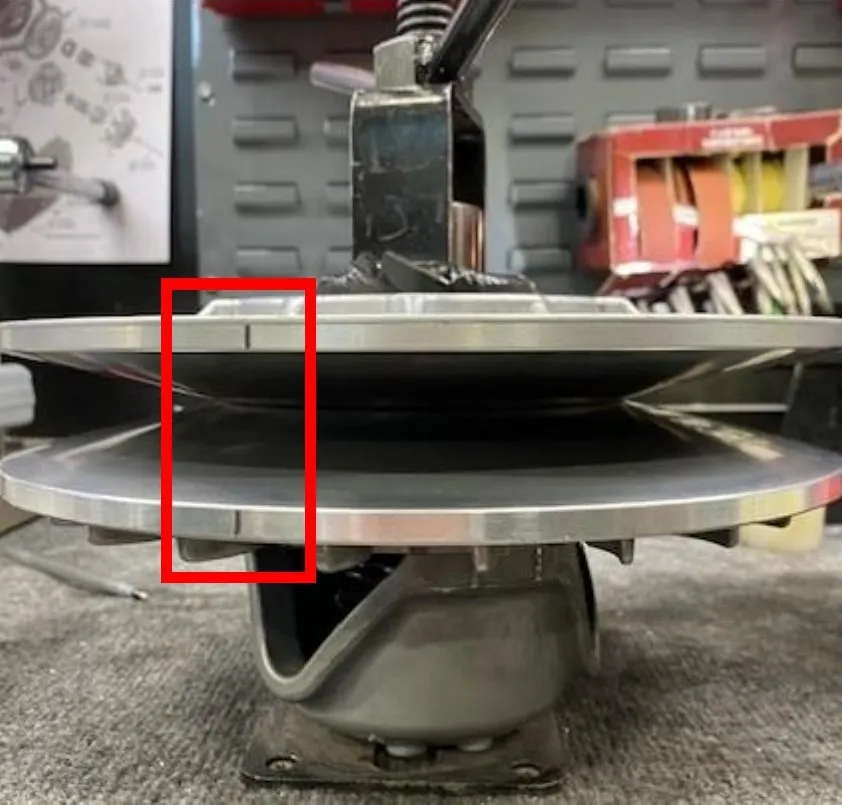
Need technical support?
Submit a ticket with your vehicle and what you're seeing, and our support team will get back to you.
