 BUY NOW, PAY LATER. Starting at 0% APR


Carefully box up your turbo and ECU. WRAP YOUR TURBO IN A PLASTIC BAG, LINE THE BOTTOM OF THE BOX WITH A LARGE AMOUNT OF PADDING. VERIFY THE TURBO WILL NOT BOUNCE AROUND. PACK THE ECU IN A PLASTIC BAG AND PAD WELL. PACK THE REST OF THE BOX WITH PADDING SO NOTHING MOVES AROUND. Your turbo and ECU must be in serviceable condition to qualify for the exchange
Arctic Cat 9000/1100T Super Chute Turbo
Installation instructions for the EVP 9000/1100T Super Chute Turbo on Arctic Cat snowmobiles — turbo removal, core exchange, install, fuel pump, and break-in.
Before you start
AGREEMENT
By purchasing and installing this kit, you understand and agree to the following:
- THIS IS A HIGH PERFORMANCE UPGRADE!!!! ALTHOUGH WE HAVE GONE THROUGH GREAT LENGTHS TO BUILD SAFETY INTO THIS TURBO KIT, THE FACT IS THE NEW DEFAULT BOOST LEVEL IS 15LBS – NOT 7 LIKE THE FACTORY TURBO. POOR FUEL, IMPROPER SETUP OR ANY NUMBER OF THINGS THAT ARE DONE INCORRECTLY WILL DAMAGE YOUR MOTOR
- YOU HAVE LIKELY VOIDED THE WARRANTEE OF YOUR ARCTIC CAT SNOWMOBILE
- YOU HAVE LIKELY VOIDED THE SOUND AND EXHAUST EMISSION STANDARDS OF YOUR COUNTRY
- THIS IS A PERFORMANCE UPGRADE WHICH MAY SHORTEN THE LIFE OF YOUR ENGINE, ESPECIALLY IF INSTALLED INCORRECTLY OR OPERATED WITHOUT REGARD TO YOUR INSTRUMENTS
- THE FUEL REQUIREMENTS MUST BE ADHERED TO – 93 OCTANE KITS ARE 93 OCT, NOT 91 WITH OCTANE BOOST. TO MAKE 93 OCTANE FROM 91, YOU MUST MIX 2.5 GALLONS OF 100 LL AVAIATION FUEL WITH 8 GALLONS OF PURE 91 TO FILL YOUR TANK. IF MIXING 110 WITH 91, YOU NEED 1.5 GALLONS OF 110 TO 9.0 GALLONS OF PURE 91. IF UNSURE OF YOUR RATIO OR FUEL QUALITY, USE MORE OF THE HIGHER OCTANE!!! POOR FUEL CAN DESTROY A MOTOR IN SECONDS!!!
- YOU HAVE INSTRUMENTS ON YOUR SLED THAT WILL ALLOW YOU TO PERIODICALLY MONITOR AT A MINIMUM BOOST PRESSURE (ONLY DO THIS WHEN IT IS SAFE TO DO SO!!!! – YOUR FIRST OBLIGATION IS TO PAY ATTENTION TO WHERE YOU ARE GOING!!!)
- EVOLUTION POWERSPORTS BEARS NO RESPONSIBILITY FOR DAMAGE CAUSED TO YOUR SNOWMOBILE BY THE INSTALLATION OF OUR PRODUCTS. THE WARRANTEE ON OUR PARTS IS 90 DAYS FROM 1st USE. EVOLUTION POWERSPORTS, AT ITS DISCRETION WILL DETERMINE WHETHER A PART MEETS THE WARRANTEE REQUIREMENTS. IN NO CASE IS THERE ANY WARRANTEE FROM EVOLUTION POWERSPORTS FOR YOUR SNOWMOBILE
- THE INSTALLATION OF THIS KIT IS TECHNICAL AND MECHANICAL IN NATURE WITH MANY OPPORTUNITIES TO MAKE MISTAKES – MISTAKES THAT CAN BE VERY COSTLY!!! IF YOU ARE NOT QUALIFIED TO INSTALL THIS KIT, DON’T DO IT!! BRING IT TO SOMEONE WHO IS QUALIFIED TO DO THE INSTALLATION.
- THIS KIT WILL MAKE YOUR SNOWMOBILE FASTER, CLIMB HIGHER AND ACCELERATE MORE QUICKLY THAN STOCK. IF YOU ARE NOT CAPABLE OF CONTROLLING THE SNOWMOBILE WITH THE ADDED PERFORMANCE, DO NOT INSTALL THE KIT.
Procedure
Turbo Removal, Packing and Shipping
- Step 1
Remove hood & side panels
- Step 2
Remove the plastic turbo cover on the left side of the sled (it is the plastic cover that covers the intake elbow)
- Step 3
Label all of the vacuum hoses connected with the turbo, intercooler and boost control
- Step 4
Loosen clamp securing the intake elbow.
- Step 5
Loosen clamp securing the rubber boot to the turbo inlet
- Step 6
Loosen intercooler boost hose clamps (upper and lower) and disconnect hoses from intercooler end tanks.
- Step 7
Disconnect the 2 smaller hoses from the top of the intercooler end tank
- Step 8
Remove rearward intercooler brackets
- Step 9
Remove intercooler (do not remove front intercooler brackets – intercooler can be removed with these brackets attached)
- Step 10
Place a catch pan under the snowmobile for this next step - Remove the rubber water line that goes from the tank to the top of the turbo.
- Step 11
Remove the 5 screws that hold on the lower heat shield
- Step 12
Remove the 3 bolts that hold in the cross brace that holds the upper heat shield on. You will need to drill out the two rivets on the main spar that hold the heat shield to the main spar. You will also need to drill out the rivets that hold the very top heat shield which wraps around the main spar
- Step 13
Remove the cross brace
- Step 14
Remove the 10 mm bolt on the bottom of the turbo that holds the heat shield to the turbo.
- Step 15
Remove the muffler
- Step 16
Spray a good penetrating oil on ALL of the exhaust nuts – header pipe to engine, header pipe to turbo, down pipe, and turbo support brackets. Let it sit for an hour.
- Step 17
Remove the turbo downpipe nuts and washers (outlet pipe that connects to the turbo) The upper back one can be accessed from the right side of the sled with some ratchet extensions and a universal joint. Remember how these bolts and retainers are stacked. Save all items as you will reuse them
- Step 18
Remove the turbo support bracket – the one behind the steering column is very difficult to remove. Although we do not recommend this, this job is made far easier by removing the steering column. If you have the vertical steering modification from Arctic Cat, you can use their instructions for the removal and reinstallation of the column.
- Step 19
Remove the nuts and washers holding the header pipe on
- Step 20
Using a 14 MM socket, remove the oil line from the top of the turbo. Save the bolt and two washers and be careful not to damage them!
- Step 21
Remove the nuts and washers holding the turbo to the header
- Step 22
Looking at the right side of the turbo (clutch side of the engine), you will see the turbo oil drain line – it is a rubber hose coming from the bottom of the engine. Using a long needle nose pliers, slide the hose clamp down, then using a screw driver, push the rubber oil drain line off of the turbo oil drain line.
- Step 23
Using a long needle nose pliers and coming from the clutch side, slide the hose clamp that holds the bottom water line on the turbo so you can remove the line from the turbo.
- Step 24
Remove the header and turbo
- Step 25
REMOVE THE HARD WATER LINES AND OIL DRAIN LINE FROM THE TURBO – SAVE THE OIL DRAIN LINE AS YOU WILL REUSE IT ON THE SUPER CHUTE TURBO THE WASTEGATE ACTUATOR AND ALL ITEMS ASSOCIATED WITH THE WASTEGATE MUST BE INCLUDED WHEN YOU SEND YOUR TURBO TO US AS A CORE
- Step 26
WITH TAPE AND A MAGIC MARKER, PLEASE WRITE YOUR NAME ON THE TURBO AND ECU. ALSO, PLEASE WRITE INCLUDE THE FOLLOWING IN THE BOX-
- Name:
- Address:
- Phone #
- Email address:
- Kit ordered:
- Fuel Requirement: (91,93 or 100 octane)
- Year, Make and Model of sled:
- Sled Modifications:
- Any previous ECU modifications:
Procedure
Turbo Install
PUMP 91,93 OCTANE/100 OCTANE
Caution
SPARK PLUG RECCOMENDATION FOR ALL SUPER CHUTE KITS: NGK CR9EB GAPPED TO .020
Turbo Prep
- Step 1
It is best to put a clean paper towel into the intake side and intake outlet side of the turbo to prevent debris from entering the turbo inlet and outlet – make sure you remove them before final hose connections are made. Do NOT adjust the waste gate – it has been set by us and should not be changed
- Step 2
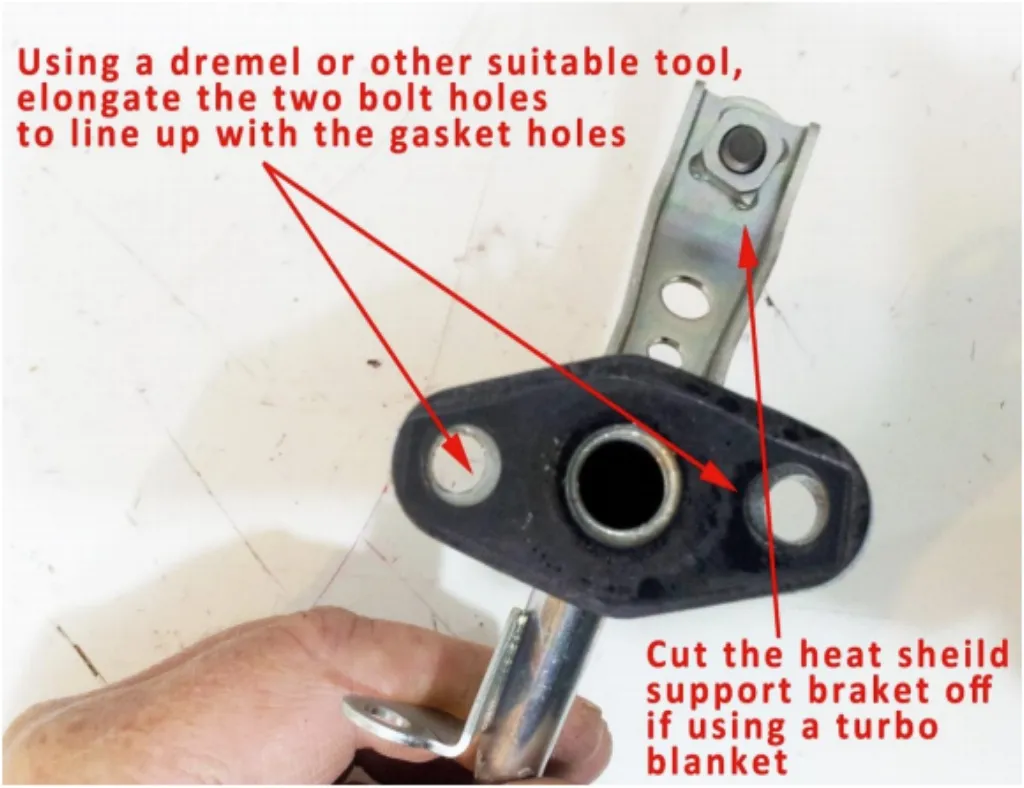
Oil drain line – you will reuse the drain line that came off the stock turbo. It will need to be modified to work with the Super Chute turbo. Using the supplied new oil drain gasket as a template, line up the drain hole in the gasket with the factory drain hole. The bolt holes in the factory drain line will not line up completely with the gasket. Use a magic market to draw on the bottom of the factory drain line flange – you will need to elongate the holes in the flange so the drain line will bolt up to the Super Chute turbo.
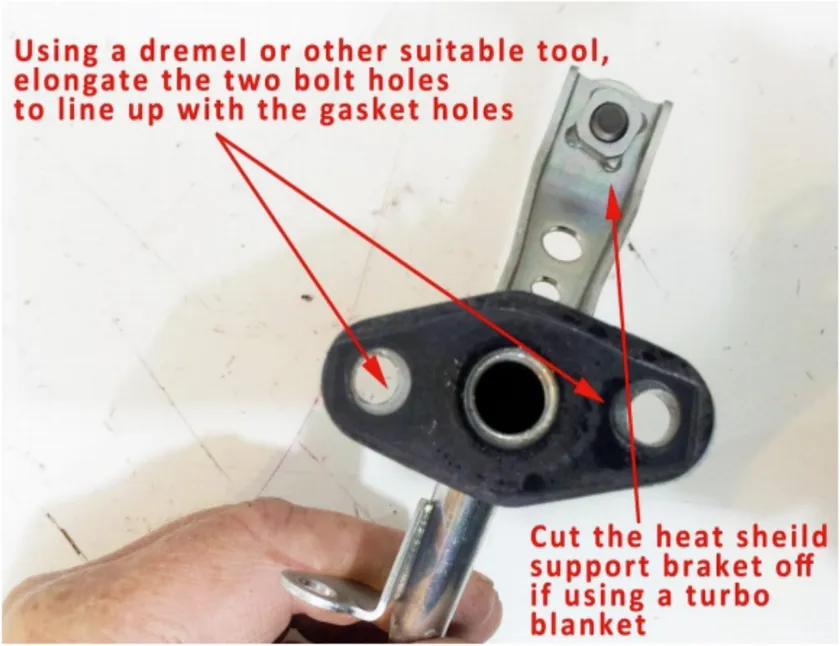
Using a dremel or other suitable tool, elongate the two bolt holes to line up with the gasket holes. Cut the heat shield support braket off if using a turbo blanket - Step 3
Install the supplied oil drain gasket under the modified factory oil drain line short 20mm x 8mm bolts Tighten to 10 ft lbs.
- Step 4
Install the EVO supplied oil restrictor/adaptor into the threaded hole on the top of the turbo. The domed side of the fitting faces up.
Engine Prep
- Step 5
Remove the factory U shaped water line from behind the oil filter and replace with the EVO supplied molded hose. Install end of the supplied molded hose so that the curve of the supplied molded hose matches the curve of the factory U shaped hose. The hose may be difficult to slide over the barb - if so, spray brake cleaner into the end of the hose to make it slide onto the barb easier. Reuse factory constant tension clamp from the original factory hose to secure the hose onto the barb.
- Step 6
Remove the factory hard oil line from the engine. Save the banjo bolt and washers. Install the EVO supplied oil line to the engine. Reuse the same banjo bolt and washers.(DO NOT USE THE BANJO BOLT FROM THE FACTORY TURBO!) Make a washer is placed on both sides of the banjo fitting when installing the banjo bolt. Tighten bolt to 10 ft lbs.
- Step 7
The turbo install is made far easier by removing the chassis round spars and steering spar cap. We do not recommend this, but if you choose to do this, make sure you refer to the shop manual for proper reinstallation after the kit is installed.
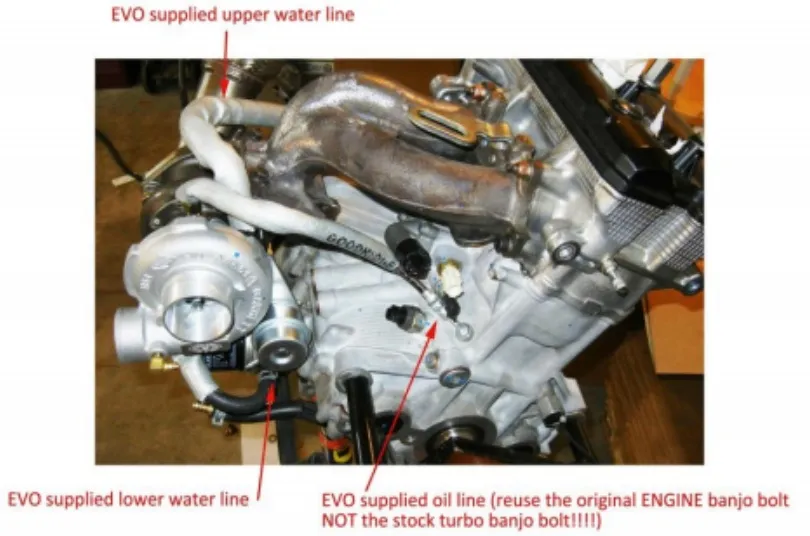
Test Fitting and Aligning Brackets
- Step 8
Modify the factory turbo support bracket with a grinder or belt sander. See picture below.
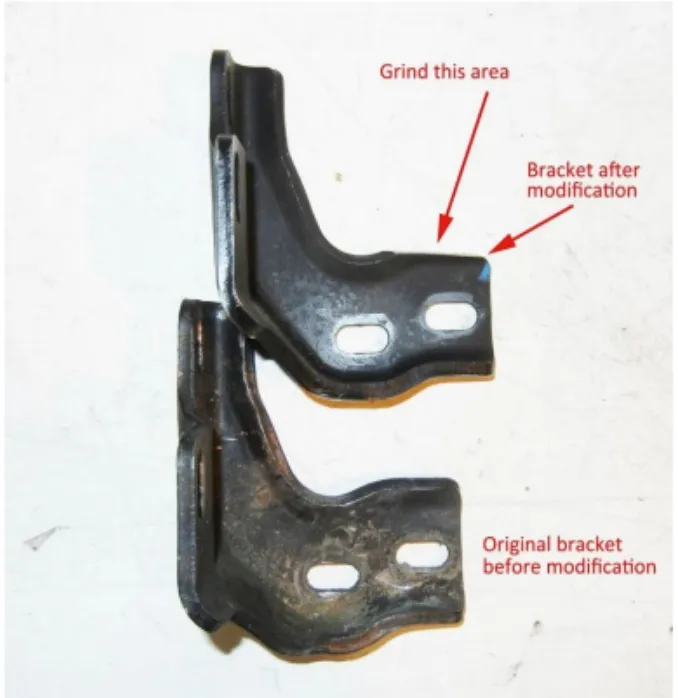
Grind this area - Step 9
Install the SC exhaust gasket and up pipe onto the turbo outlet flange. Install the supplied all stud into the top middle threaded hole on the exhaust flange of the turbo. Install the 30mm bolt & washer into the rearward threaded hole and the two 45mm bolts and washers into the front and bottom holes. Use one of the supplied 10mm x 1.25 copper nuts and washer on the stud. Tighten all nuts and bolts.
- Step 10
Install the Evo supplied ¼” steel turbo support bracket onto the 45mm bolts that are sticking through the turbo outlet flange. Using the supplied M10 x 1.25 copper nuts, secure the bracket onto the turbo. Refer to the picture in step 13 for bracket orientation.
- Step 11
With the header removed, rest the turbo/up pipe in the chassis area in the approximate location where it will sit. Test fit the header onto the turbo, tighten header onto the engine. Align the holes of the factory support bracket with the holes of the supplied support bracket by moving the factory bracket up or down on its slotted holes. Also verify clearance between the factory support bracket and the SC outlet flange. Once clearance is verified and holes are aligned, install bridge centering bracket and tighten the most accessible nut of the factory turbo support bracket. Also, check the compressor outlet clocking – make sure there is ample room between the chassis where the lower charge tube connects to the turbo and the chassis. If it is too tight, you can rotate the compressor cover by inserting a wooden dowel into the compressor outlet to rotate it for clearance. If it will not move this way, you can remove the snap ring on the compressor cover and re clock. Remove the header/turbo and tighten the remaining factory turbo support bracket nuts. See picture below.
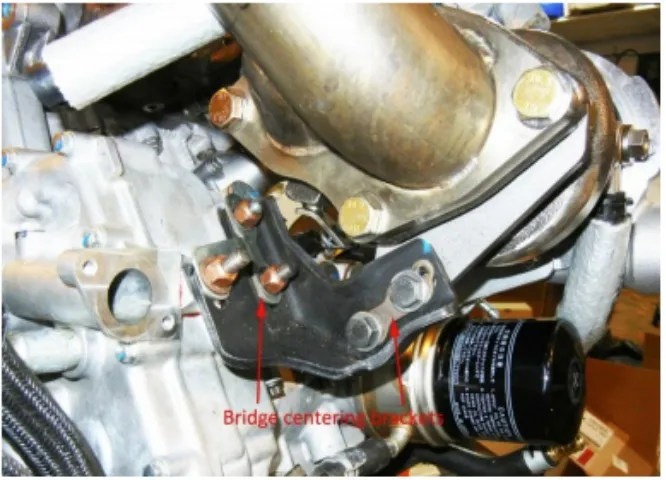
- Step 12
Use the supplied M8 Black bolts and thick washers for the header to turbo flange.
- Step 13
Through bolt the factory turbo support bracket to the Evo supplied support bracket using the supplied 8mm x 1.25 x 30mm bolts and washers – Reuse the factory nuts and bridge centering bracket. Take up the space between the two brackets by using the supplied stainless steel spacer washers. When all brackets are tightened, they should not induce any torque on the turbo/header/engine. See picture below.
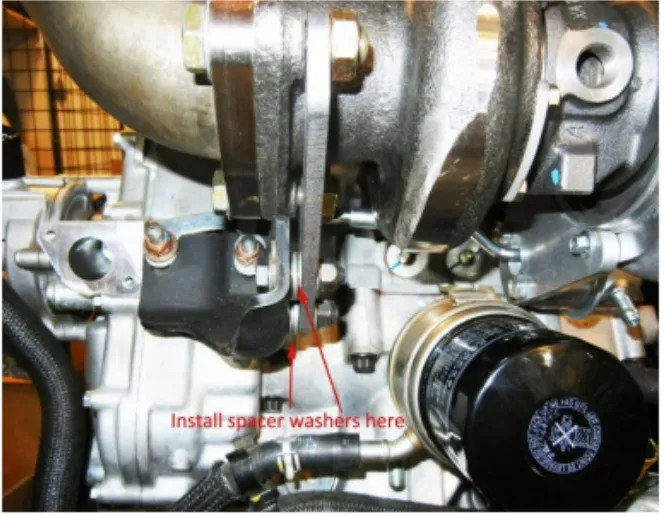
Install spacer washers here - Step 14
Connect the oil drain line to the factory oil drain line (it is the ½” line that comes up from the bottom of the engine) Reuse the factory constant tension clamp to secure the factory drain line to the supplied drain line.
- Step 15
Install the EVO supplied water banjo all the way into the free end of molded rubber hose installed in step 5. Use a supplied constant tension clamp to secure the hose onto the banjo barb.
- Step 16
Install a supplied copper washer on each side of the banjo and slide a supplied banjo bolt through the washers and banjo into the threaded front water inlet of the SC turbo and tighten to 10 ft lbs. Do not cross thread!
- Step 17
Install the remaining banjo by placing a supplied copper washer on each side of the banjo and slide the supplied banjo bolt through the washers and banjo. Orient the banjo so the barb is facing up and away from the flange of the exhaust header. Insert the banjo bolt into the threaded rear water outlet of the SC turbo and tighten to 10 ft lbs. Do not cross thread! Insert the short end of the remaining water line onto the banjo barb. Slide the water line onto the banjo as far as possible and secure with a supplied constant tension clamp. Slide the fire sleeve so it completely covers the water line and constant tension clamp on the banjo. Refer to the picture in step 9.
- Step 18
Connect the free end of the water line installed in the previous step to the coolant overflow tank. You will need to spray brake cleaner into the end of the hose in order to slide it onto the factory coolant tank barb. Reuse the factory constant tension clamp. Refer to the picture in step 9.
- Step 19
Install the free end of the new oil line onto the oil restrictor fitting on the top of the turbo. Slide the fire sleeve so it completely covers the fitting where it bolts onto the turbo.
- Step 20
Reinstall the vacuum line from the boost control solenoid onto the ¼” barbed turbo outlet port. Reuse the factory constant tension clamp.
- Step 21
Reassemble the heat shields and chassis braces. If using the EVO header/turbo/up pipe blankets, install them now.
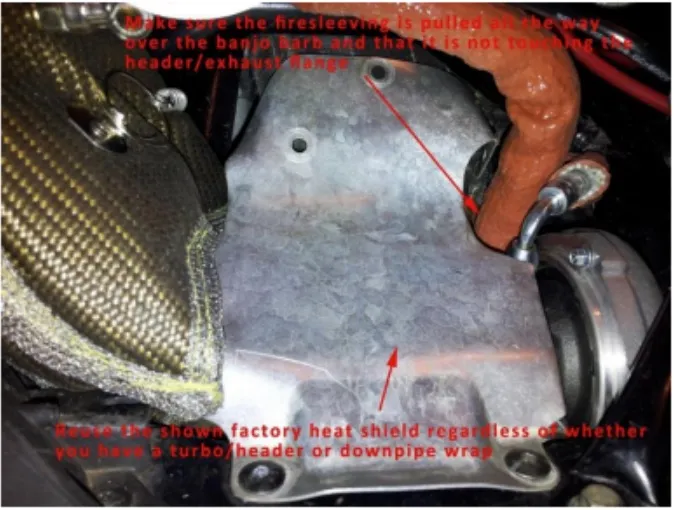
Make sure the firesleeving is pulled all the way over the banjo barb and that it is not touching the header/exhaust flange. Reuse the shown factory heat shield regardless of whether you have a turbo/header or downpipe wrap - Step 22
Reinstall the intercooler and remaining vacuum lines.
PUMP GAS KITS SKIP TO STEP 23 BELOW
100 OCTANE KITS – FUEL PUMP INSTALLATION
Fuel pump installation: (FIRE HAZARD – it is best to do this job when the tank is empty to minimize fire risk) Have a fire extinguisher handy.
- Remove cowl that covers the fuel tank. There are two torx screws on the top side and a ring around the fuel filler neck that must be removed to remove the cowl.
- The fuel pump is located in the fuel tank. The access to the pump is on the top of the fuel tank on the right hand side. It is the 4” circular access cover with six torx screws arranged in a circular pattern. Disconnect the connector that has wires that go into the access cover. Disconnect the fuel line fitting which is connected to the access cover. You can do this by using a needle nose pliers or circlip pliers to expand the plastic retainer. Once they are expanded, you can push the fuel line off. Remove the six torx screws and remove the entire fuel pump and fuel pickup assembly.
- TAKE A PICTURE OF THE ORIENTATION OF THE LINES AND PICKUP TO AID IN REASSEMBLY!
- Cut the clamp that holds the fuel line to the bottom of the fuel pump and discard.
- Cut the wire tie that holds the fuel line to the bracket and set aside fuel line and fuel pickups.
- Using a flat blade screwdriver, pry up the retainer that locks the upper and lower halves of the fuel pump holder and rotate in the direction of the open slot. When the retainer clip is pushed up, the two halves will rotate freely, so don’t force it.
- Pull pump down out of the upper half and remove wires from pump
- Remove short section of hose that is on the top of the factory fuel pump and install this on the new pump.
- Using a die grinder, grind enough material off of the fuel pump hanger bracket (metal bracket that has the fuel gauge float assembly attached to it) to allow the new fuel pump aluminum inlet to fit in the hanger. See Picture series below
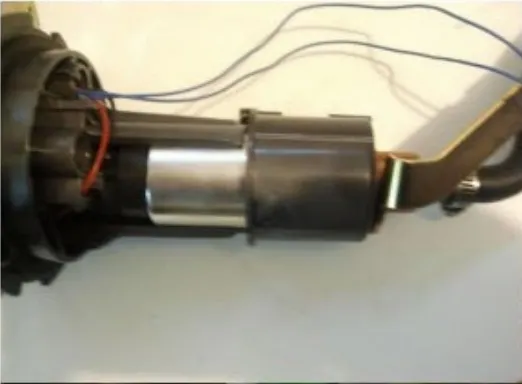
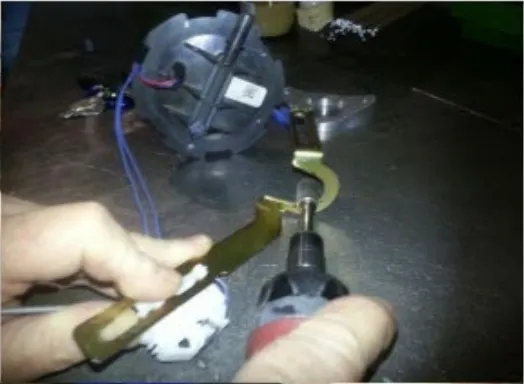
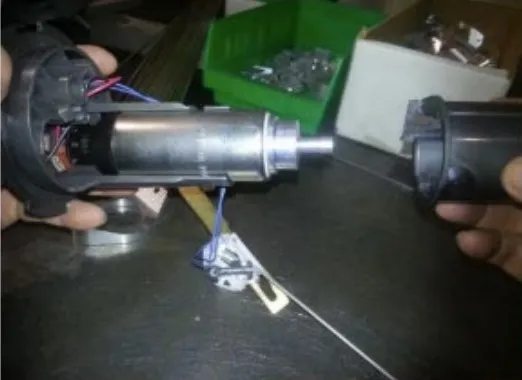
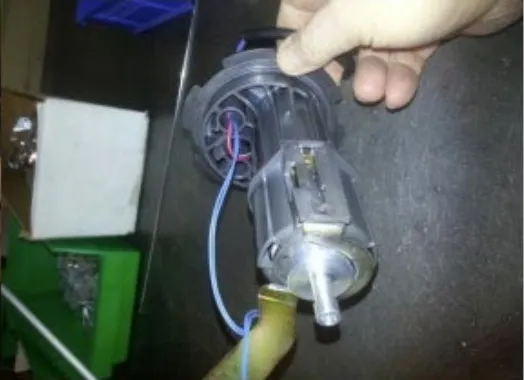
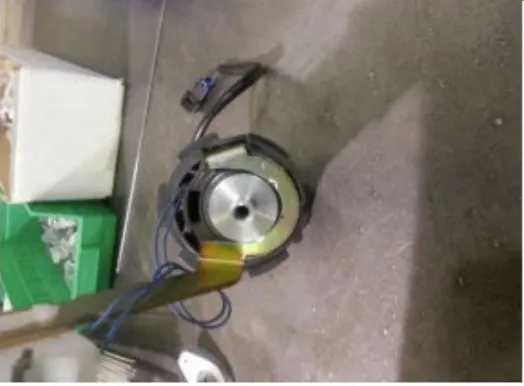
- Install new plug for fuel pump. These wires should be soldered and shrink wrapped. Plug in to top of pump.
- Reassemble pump holder halves.
- Reconnect fuel line and pickup assembly – install supplied clamp on the hose barb at the bottom of the fuel pump
- Install a new zip tie on the fuel line as it was before.
- Reinstall pump assembly into tank. This is tricky. You will know that it is in correctly when you can install everything and there is no resistance when you rest the fuel pump access cover onto the tank – in other words, everything will fit and the cover will not be pushing up. The two rear pickups have specific places where they need to be. If they are not in these spots, the assembly will have resistance. It is easier to get them in the right spot when the fuel tank is empty.
- Reinstall the six torx screws and reconnect the electric connector.
- Switch the key to the “on” position and turn the kill switch “off” you should hear the fuel pump come on for about 2 seconds, then shut off. This is normal. If you don’t hear the fuel pump, there is a problem and double check your work.
- Switch key “off”
- Take the fuel return line out of the top left side of the tank. Cut the clamp that secures the fuel line to the plastic elbow.
- Remove fuel line from elbow and rubber grommet from plastic elbow.
- Place elbow in a vise with the larger end facing up. Using an 11/64 drill bit, using a marker, mark from the point of the drill 26mm down. Drill the plastic elbow from the top of the larger opening that is facing up exactly to your line on the drill bit (26mm down). (DO NOT DRILL TOO FAR OR YOUR BIT WILL COME OUT OF THE ELBOW AND RUIN THE ELBOW) The purpose of this is to drill out the restrictor in the elbow to accommodate the larger fuel pump.
- Reinstall the elbow into the return line. Secure with supplied clamp and put rubber grommet back on. Reinstall in fuel tank.
- Continue with step 24 below
- Step 23
Add 50/50 coolant to the overflow tank until full – leave the cap off of the tank for now.
- Step 24
Loosely Install the hood so it can be moved around for access to the engine coolant bleed screw on the and the coolant fill tank cap and reconnect the wiring enough so the engine can be started.
- Step 25
Do not install the side panels at this time
- Step 26
Install the EVO reflashed ECU.
- Step 27
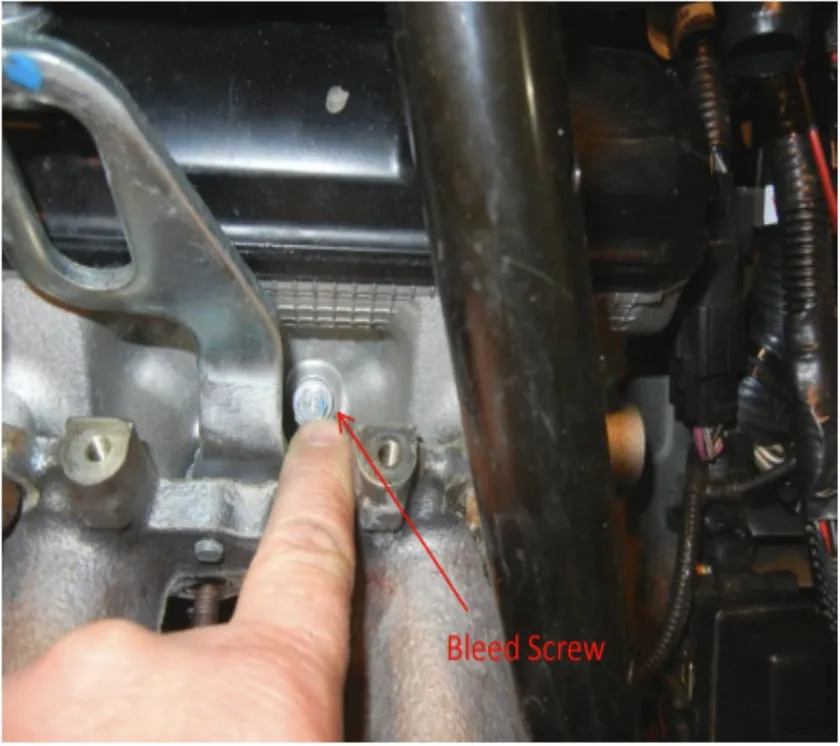
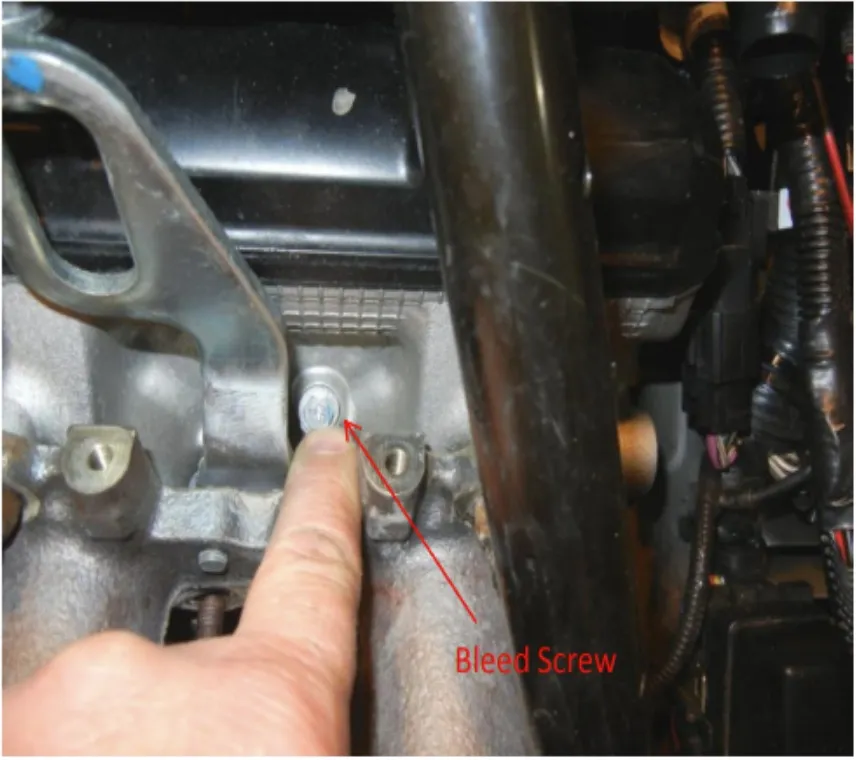
Raise the front of the sled so the engine bleed screw (See the picture below) is higher than the rear heat exchanger.
- Step 28
Start the engine for 15 seconds and shut off - check for leaks. If no leaks are detected, proceed to next step.
- Step 29
Add more 50/50 coolant to the overflow tank and replace tank cap.
- Step 30
Start the engine. Crack the bleed screw so a small very small amount of antifreeze can be seen coming out. Let the motor idle until you can feel the rear heat exchanger getting hot. Tighten the coolant bleed screw on the engine and shut the motor off. See picture below.
- Step 31
Let the engine completely cool down. Refill the coolant tank to the top.
- Step 32
Start engine again, verify that the rear heat exchanger gets hot after idling for 5-7 minutes.
- Step 33
Install the hood and side panels and all other items removed and/or loosened.
Procedure
Initial Ride
- Step 34
Fuel requirements are crucial. If you have a pump gas kit, good 93 Octane, non-oxygenated pump gas is REQUIRED. If only 91 Octane fuel is available, mix in 2.5 gallons 100LL aviation fuel per tankful. If running a race gas kit, the Octane required is 100. This is standard 100LL aviation fuel.
- Step 35
If you have a Sno Pro with the deluxe gauge, you can monitor coolant temperatures by switching the key on and kill sw off so the display is illuminated. Push in and hold the two left hand buttons for 10 seconds. You will see the voltage appear on the bottom of the screen. Push the upper button until you see a “3” on the bottom left. Just to the right of the “3”, the water temperature will be displayed. Monitor this as you ride. If the snow conditions are decent, it should NEVER exceed 200 deg F. If it does, the cooling system is airlocked. Do NOT ride the snowmobile!!! Re bleed the system. If temperature remains constant and below 195, proceed riding. Check periodically for leaks.
- Step 36
If you do not have a snow pro, periodically check the rear heat exchanger. It should be very warm to the touch. Monitor the gauges for the temperature light to come on. Once you have ridden a few miles with no codes, stop and check for leaks. If no leaks are detected, proceed.
- Step 37
It is assumed that your sled has a Mechanical boost gauge and an AFR gauge. These instruments are necessary for high performance aftermarket modifications. They will also help us to diagnose problems if you have any.
Emissions notice. This product is exempt from the emission standards and related requirements of 40 C.F.R. § 1051 as provided by 40 C.F.R. § 1051.620, and California law [e.g., vehicle code §§ 27156 and 38391]. This product is sold only for use in connection with EPA certified, purpose-built, nonroad vehicles used solely for closed course, nonroad competition/racing and not used for any recreational purpose or on public highways or right of ways maintained by and open to the public. This product is sold only in connection with machines that do not fall under state and/or federal noise or emission standards/regulations. Purchasers who/that purchase this product represent and warrant that the product is purchased only in connection with EPA-certified, emission-regulations-exempt and noise-regulations-exempt competition/racing vehicles as interpreted under applicable state and/or federal law.
Need technical support?
Submit a ticket with your vehicle and what you're seeing, and our support team will get back to you.
