 BUY NOW, PAY LATER. Starting at 0% APR


Background: Due to a vendor quality issue with the check valves that we used on our 2013-2013 Boost Recirculation Valve Kits, we are providing a free update for all customers with the old style Kynar (plastic) check valve. The new check valve is a brass piston spring type with Viton seals. This provides much more reliability than the plastic valve which when defective caused inconsistent performance. We are also providing a section of new hose which allows the connection to the fuel pressure regulator to be looped rather than bent down. This eliminates the possibility of a kink forming in the line.
Arctic Cat 9000/1100T Boost Recirculation Valve (BOV) Kit
EVP install guide for the Arctic Cat 9000/1100T Boost Recirculation Valve (BOV) Kit: brass check valve update, hose routing, and BRV solenoid setup.
Before you start
In the box
Parts and tools
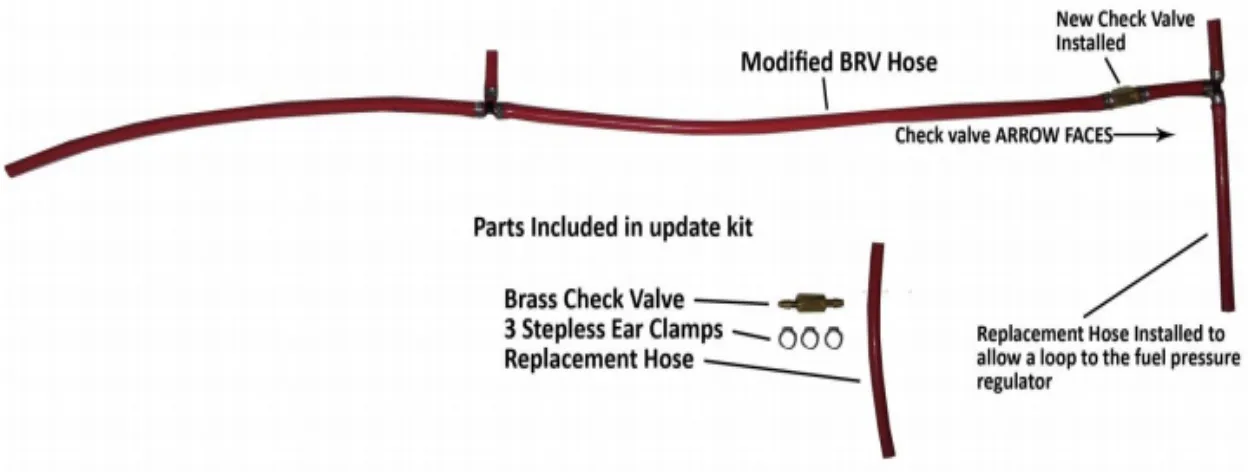
Parts Included in update kit
- Brass Check Valve
- 3Stepless Ear Clamps
- Replacement Hose

Procedure
Instructions
- Step 1
Remove the clamps that hold the existing plastic check valve or cut the lines right at the existing valve. Remove plastic valve.
- Step 2
Install the new brass check valve by first sliding the stepless ear clamps onto the hose, then push the new check valve onto the hose ends where the old plastic check valve was. Make sure the arrow is pointing towards the fuel pressure regulator/manifold hose ends (toward the rear of the sled)
- Step 3
Slide clamps over the hose where the barbs of the check valve are and using a nippers or other suitable tool, squeeze the ear of the clamp so it closes on the hose and becomes tight. You should not be able to pull the hose off the barb or move the clamp when done properly.
- Step 4
For those customers who have the short fuel pressure regulator hose - remove the clamp from the short section of silicone hose that previously went to the fuel pressure regulator. Then remove the hose. Add the longer supplied hose and use the remaining clamp in the same fashion as in step 3.
- Step 5
Re run your BRV hose according to the diagrams below – you will want to make a loop in the line that goes to the fuel pressure regulator – this is to keep the line from kinking. Loop line to the fuel pressure regulator as shown in the picture below
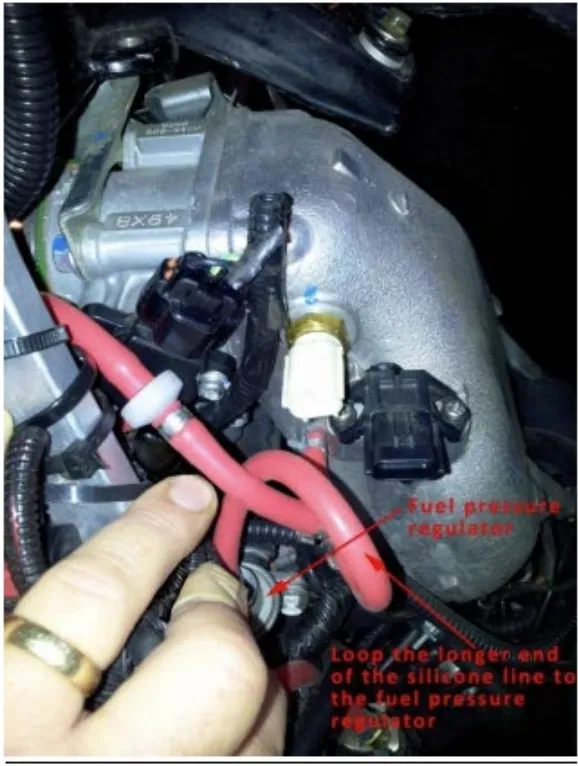
Loop the longer end of the silicone line to the fuel pressure regulator 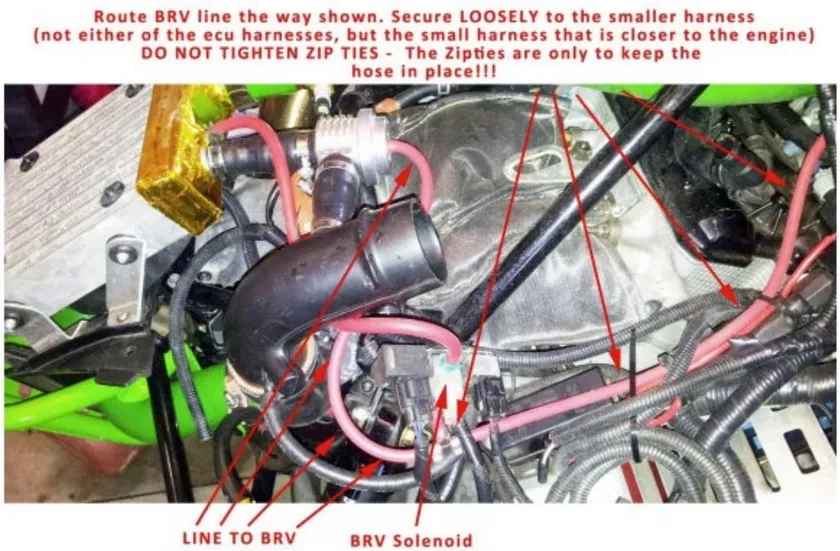
Route BRV line the way shown. Secure loosely to the smaller harness (not either of the ECU harnesses, but the small harness that is closer to the engine) DO NOT TIGHTEN ZIP TIES - The Zipties are only to keep the hose in place!!! NoteThe picture shows the old style check valve
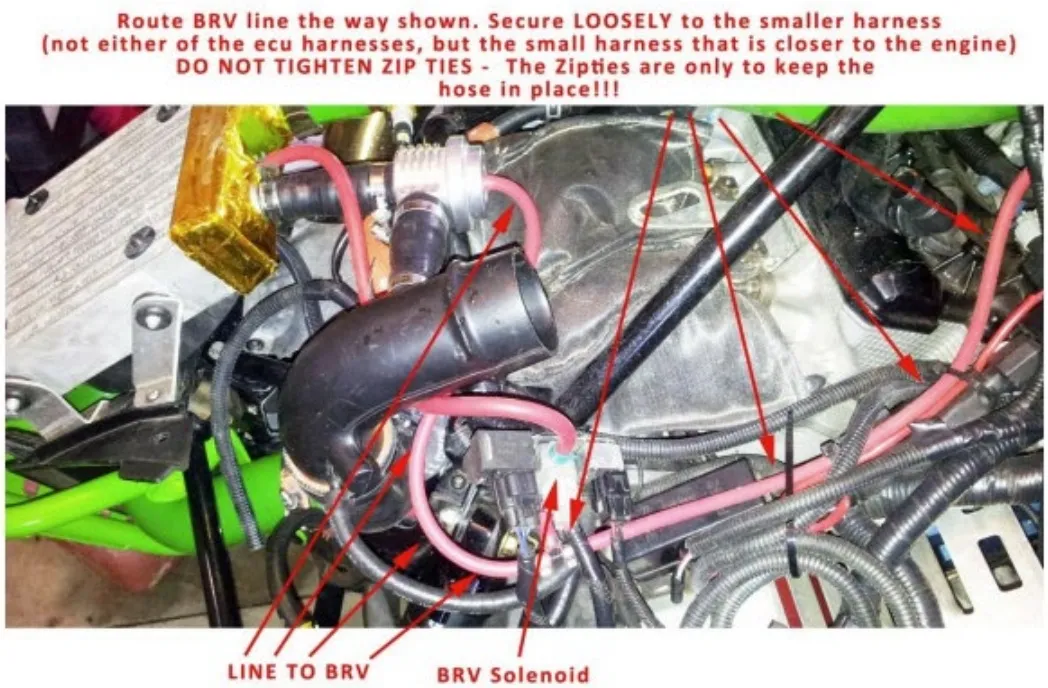
The short end of the preassembled BRV hose (bottom of the “t”) goes to the middle port of the BRV solenoid. Run the factory existing vacuum line from the intercooler to the top of the BRV solenoid. The routing must be as shown to retain the factory boost dump protection. See the picture below for further reference. Very important – the bottom barb of the BRV solenoid should not have any hoses attached to it
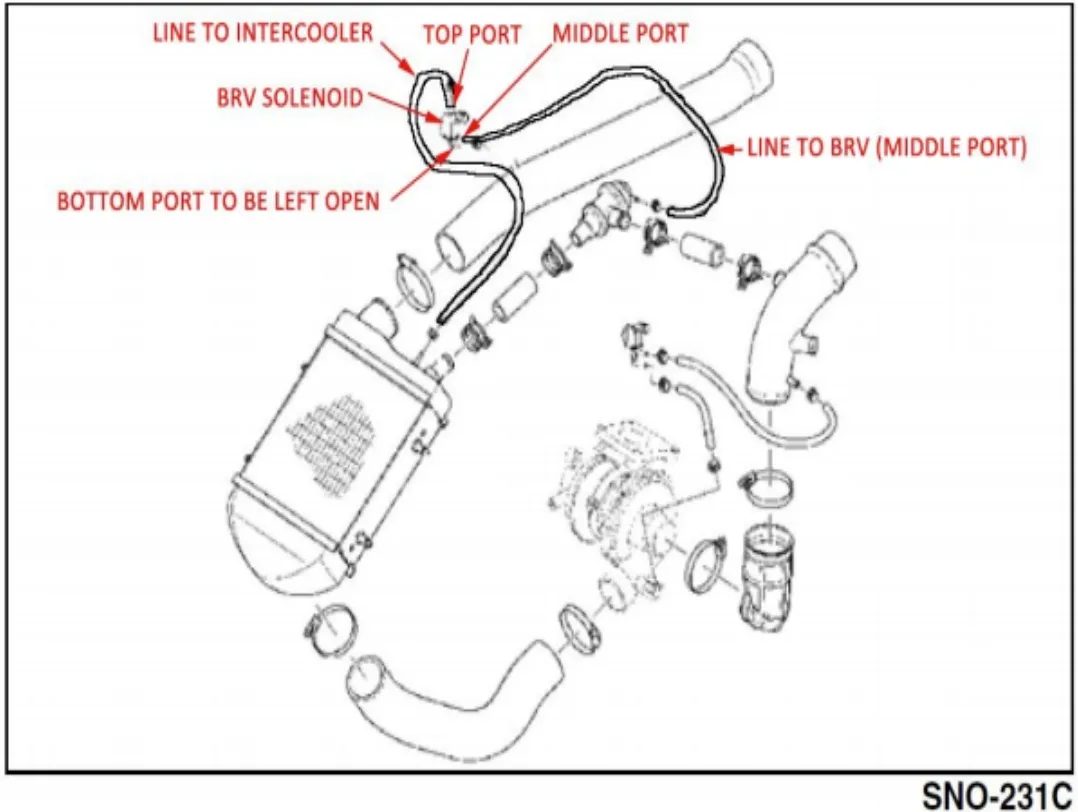
Procedure
Installation
- Step 1
Route the longer free end of the preassembled hose to the EVO BRV – make sure it is routed as in the picture above. Secure hose to BRV with the included green constant tension clamp
- Step 2
Make sure the hose will not rest on the factory heat shields!!!! – if necessary, shorten the hose going to the EVO BRV or loosely zip tie it to the factory elbow. Do not kink the hose
- Step 3
Double check routing and connections
- Step 4
Double check that the BRV cap is on tight (the cap is the part of the valve that the vacuum hose attaches to) periodically check to make sure the cap has not loosened.
Emissions notice. This product is exempt from the emission standards and related requirements of 40 C.F.R. § 1051 as provided by 40 C.F.R. § 1051.620, and California law [e.g., vehicle code §§ 27156 and 38391]. This product is sold only for use in connection with EPA certified, purpose-built, nonroad vehicles used solely for closed course, nonroad competition/racing and not used for any recreational purpose or on public highways or right of ways maintained by and open to the public. This product is sold only in connection with machines that do not fall under state and/or federal noise or emission standards/regulations. Purchasers who/that purchase this product represent and warrant that the product is purchased only in connection with EPA-certified, emission-regulations-exempt and noise-regulations-exempt competition/racing vehicles as interpreted under applicable state and/or federal law.
Need technical support?
Submit a ticket with your vehicle and what you're seeing, and our support team will get back to you.
