 BUY NOW, PAY LATER. Starting at 0% APR


Polaris 2020 Pro XP High Pressure Fuel Pump Kit
Installation instructions for the 2020 Pro XP High Pressure Fuel Pump Kit on the 2020 Polaris Pro XP (RZR) (SKU 500FP0015). Parts, tools, and full procedure.
In the box
Parts and tools
Included parts
- 1AEM All Fuel Compatible High Flow Fuel Pump.
- 1AEM Pump Pre-Filter
- 212mm hose clamps
- 1130mm Corrugated Hose
Required tools
- Heat Gun
- Small flat blade screwdriver
- (Optional) Polaris service tool PU-50326 and 1/2” ratchet.
- Safety glasses
- Rubber gloves
- Flashlight
Procedure
Removal Instructions
- Step 1
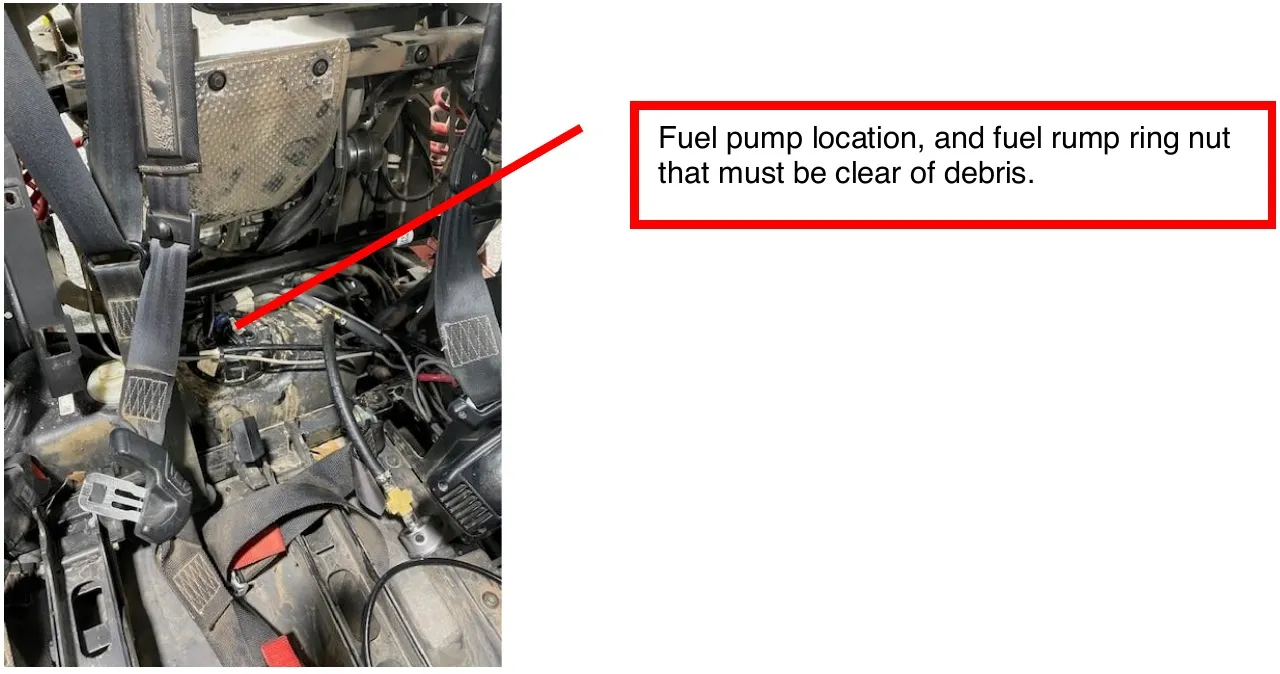
Remove passenger seat and access cover by lifting on tab, to access fuel pump. With a damp rag or shop vacuum, clean the top of the fuel tank where the fuel pump nut ring is located. Failure to do so may result in foreign debris dropping into the tank, causing premature failure of the AEM High Flow Fuel Pump.
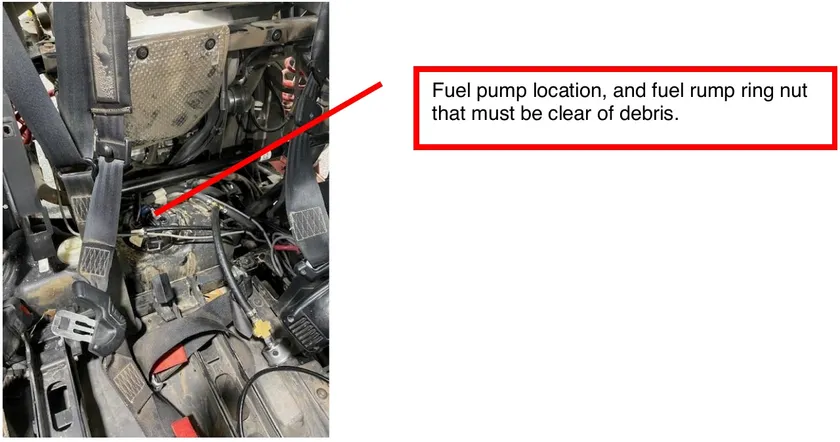
Fuel pump location, and fuel rump ring nut that must be clear of debris. - Step 2
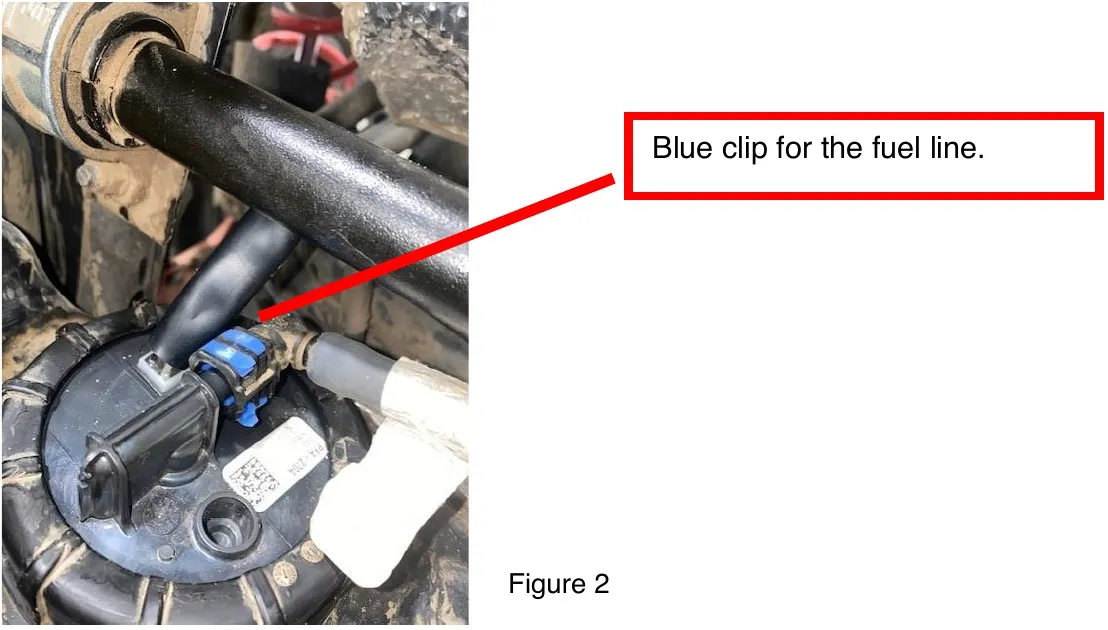
Put your safety glasses and rubber gloves on at this point. Unplug 4 pin sending unit and disconnect fuel line. Slide the blue clip towards the passenger side of the vehicle to release the fuel line. You can then pull fuel line off.
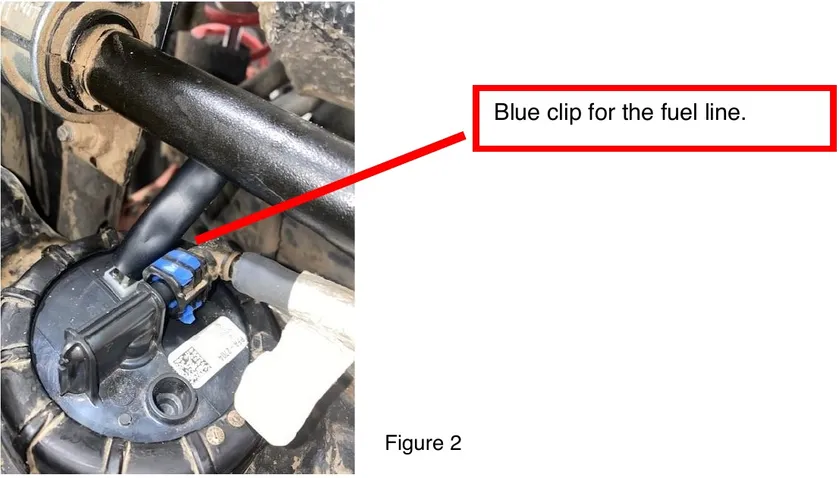
Blue clip for the fuel line. - Step 3
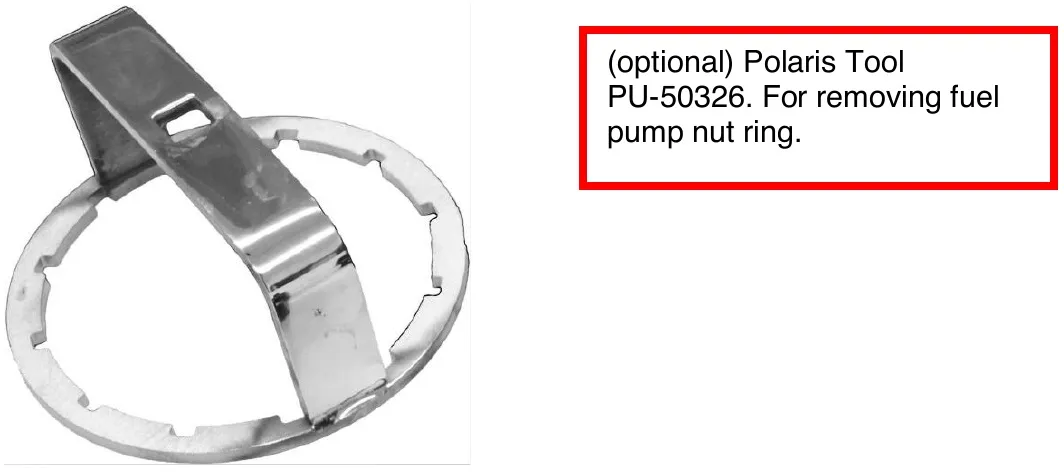
Unscrew the fuel pump nut ring. We recommend buying the Polaris Tool, so no damage is done to the fuel pump nut ring.
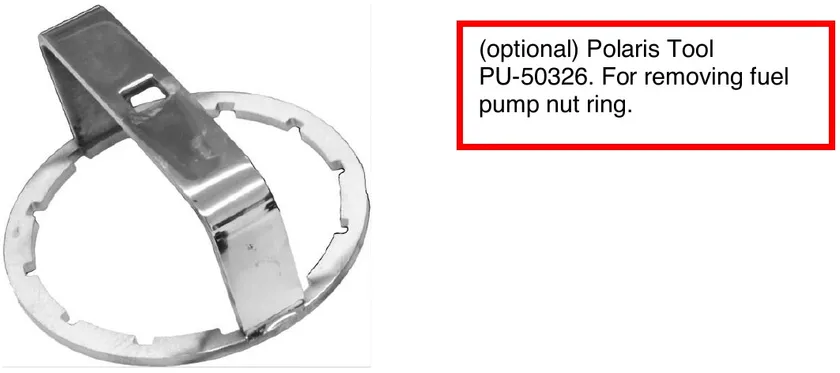
(optional) Polaris Tool PU-50326. For removing fuel pump nut ring. - Step 4
Genteelly remove the entire fuel pump assembly. Turning the pump at a 90-degree angle will help not damage the float and pre pump filter while removing.
- Step 5
Once the fuel pump assembly is removed, place it on a clean dry surface. Next step is pushing in the two black tabs on the pump, letting the pump pull out of the white cylinder housing. (Figure 4)
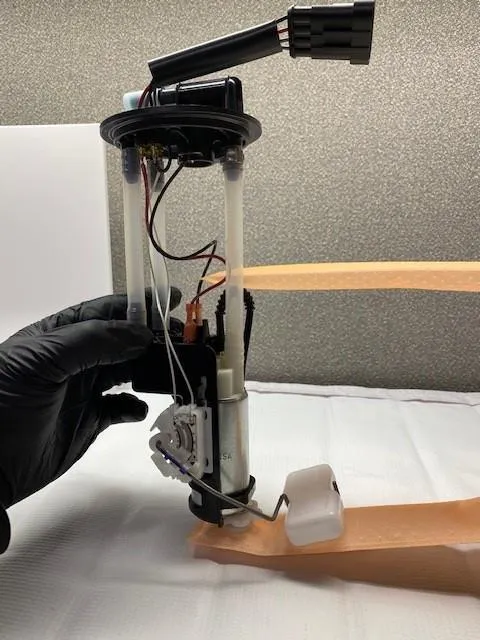
Fig. 4 - Step 6
Once the pump is released unplug both the Red (+) and Black (-) electrical terminals on the fuel pump. Note that both terminals are different sizes so they cannot be installed on the AEM pump incorrectly. Also remove the pre filter by prying on the plastic ring with a small screwdriver.
- Step 7
Remove the long pre-filter from the bottom of the fuel pump, using a flat blade screwdriver.
- Step 8
Cut the zip tie holding the small 3mm surge hose to the black housing.
- Step 9
With a razor blade cut directly down the OEM fuel hose on both barbs. One on the OEM fuel pump and one barb on the top of the housing. (See Figure 5)
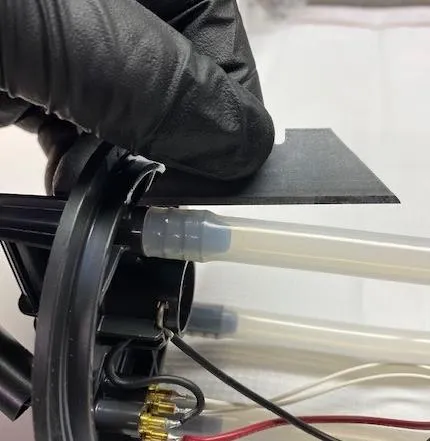
Fig. 5 - Step 10
Spread the black housing with your thumbs and push the fuel pump out of the housing with your fingers. (Figure 6)
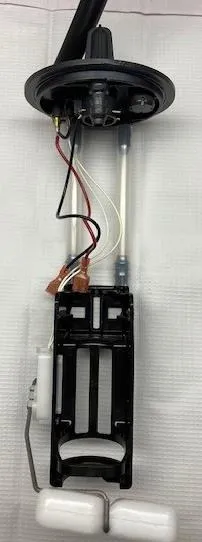
Fig. 6 - Step 11
Now the fuel pump housing stands alone. Grab the AEM high flow fuel pump and install one end of the 5” corrugated hose. Heat up the corrugated hose with a heat gun until it looks like the plastic is “sweating”. Slide it on the fuel pump fitting while its still hot. Pinch clamp it.
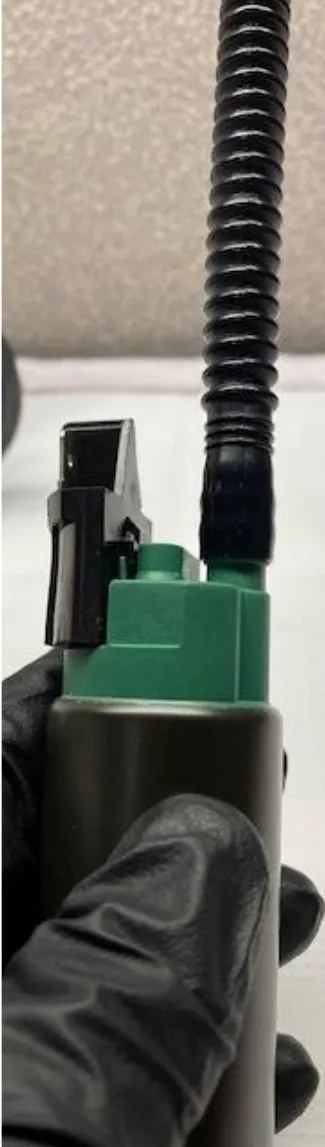
Fig. 7 Cautiondo not overheat the corrugated hose. (Figure7)
- Step 12
Install the AEM fuel pump into the OEM black housing. Push the bottom in the housing first, then push the top in until it snaps into place.
- Step 13
Heat up the other end of the corrugated hose and till the plastic starts to sweat, slide it onto the top fitting on the fuel pump housing. Pinch clamp it.
- Step 14
Reconnect both positive (+) and negative (-) terminals to the AEM fuel pump.
- Step 15
Install the new pre-filter to the bottom of the AEM fuel pump. Make sure it is all the way seated.
- Step 16
The fuel pump assembly is ready to be reinstalled into the car. (Figure 8)
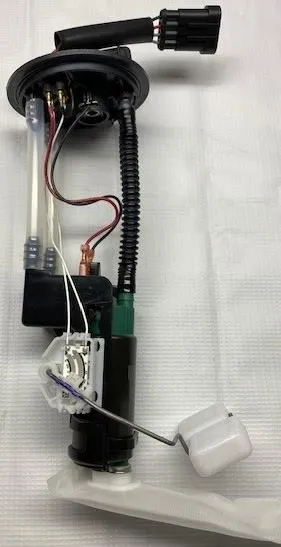
Fig. 8 - Step 17
Slide the rest of the assembly into the tank. Make sure the O-ring is sitting flush on top of the fuel tank. Place fuel pump nut ring on the fuel tank threads and torque to 70 ft/lbs. Verify that the fuel line connections are free of debris. Connect the fuel line onto the pump module. Slide the blue clip towards the driver’s side of the vehicle to lock it into place. Re-connect the 4-pin sending unit.
- Step 18
Test the fuel pump by turning on the key and listen for the pump to activate. Do this several times to prime the fuel system. Check for leaks. If there are no leaks, re-install the access cover and passenger seat.
Need technical support?
Submit a ticket with your vehicle and what you're seeing, and our support team will get back to you.
