 BUY NOW, PAY LATER. Starting at 0% APR


Can-Am 2017-2019 X3 V-Flow Intake Kit
Installation instructions for the 2017-2019 X3 V-Flow Intake Kit on the 2017-2019 Can-Am Maverick X3 (SKU 203FC0004). Parts, tools, and full procedure.
In the box
Parts and tools
Included parts
- 1EVP Billet Intake
- 1EVP Silicone Connector Hose
- 11/16” NPT Hose Barb
- 150-70mm Pinch Clamp
- 10.5mm Pinch Clamp
- 13/4"-3/4” Nylon Hose Adaptor
- 1Foam Gasket
Required tools
- Sawzall
- Pliers
- Rubber Blow Mallet
- Sockets
- Flat Blade Screwdriver
- Side Cutters
- Teflon Tape
- Fine Grit Sandpaper
Procedure
Installation Steps
- Step 1
Remove engine access cover between the seats (between rear seats on 4-seater when released)
- Step 2
Loosen the clamp on the turbocharger that holds the rubber accordion style intake connector hose. Remove the small hose that goes from the boost control solenoid to the OEM filter canister end cap – cut the hose very close to the end cap side with a dykes or other suitable cutter.
- Step 3
Remove the OEM air filter canister – 1st loosen the inlet hose clamp, then remove the two bolts located behind the driver seat (behind the left rear seat on 4-seater) that secures the filter canister to the vehicle
- Step 4
Open the filter canister by twisting the end cap counterclockwise and remove filter
- Step 5
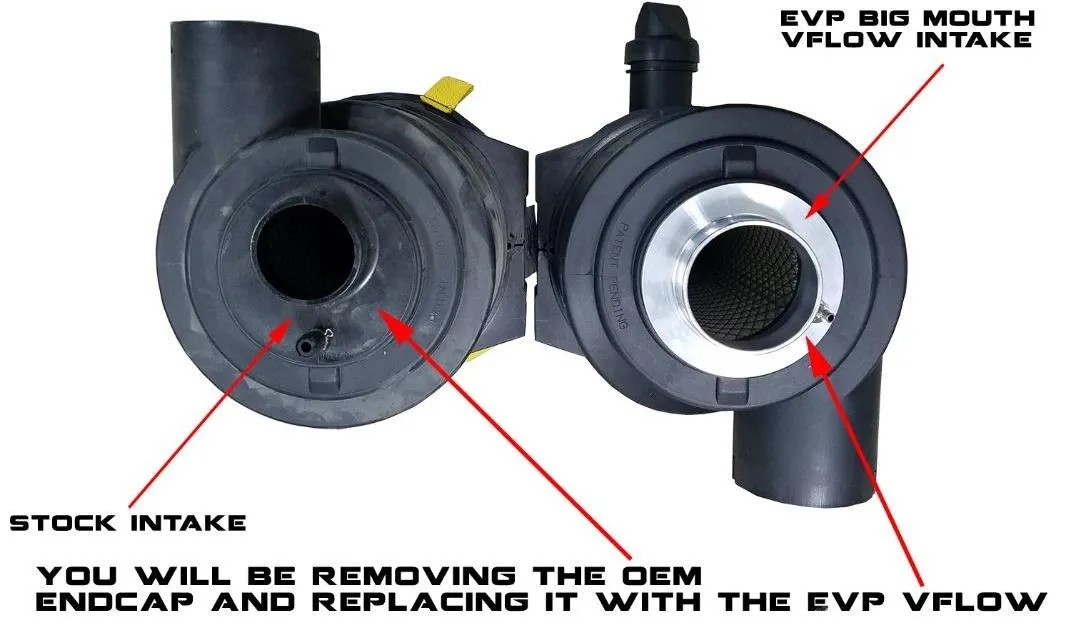
Remove the OEM end cap on the filter canister – see pictures below
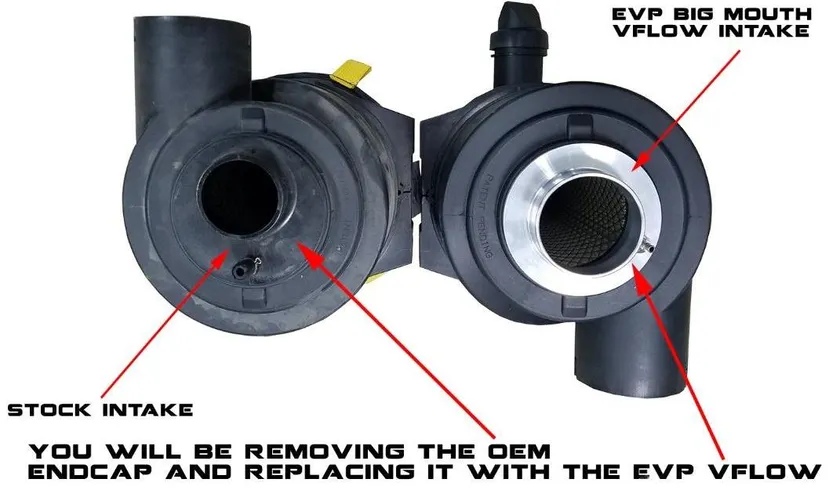
YOU WILL BE REMOVING THE OEM ENDCAP AND REPLACING IT WITH THE EVP VFLOW 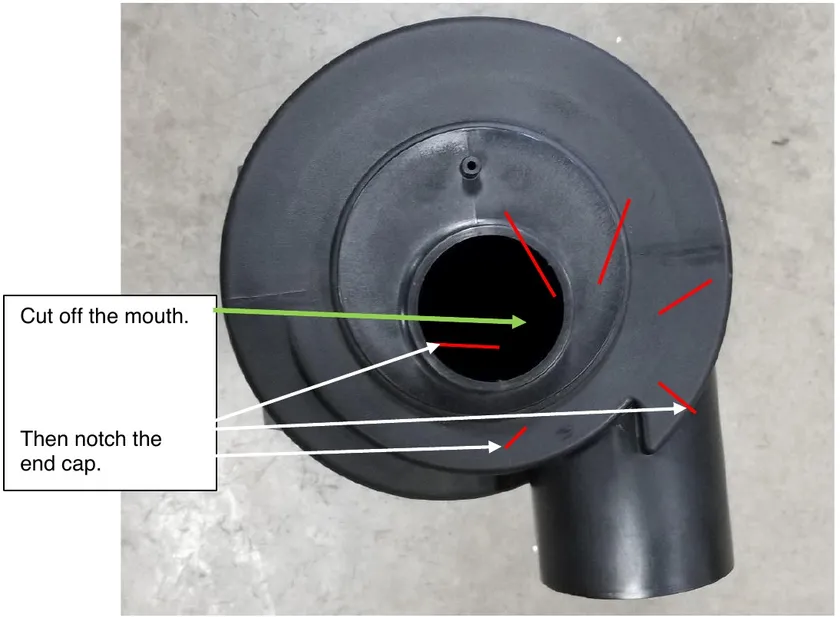
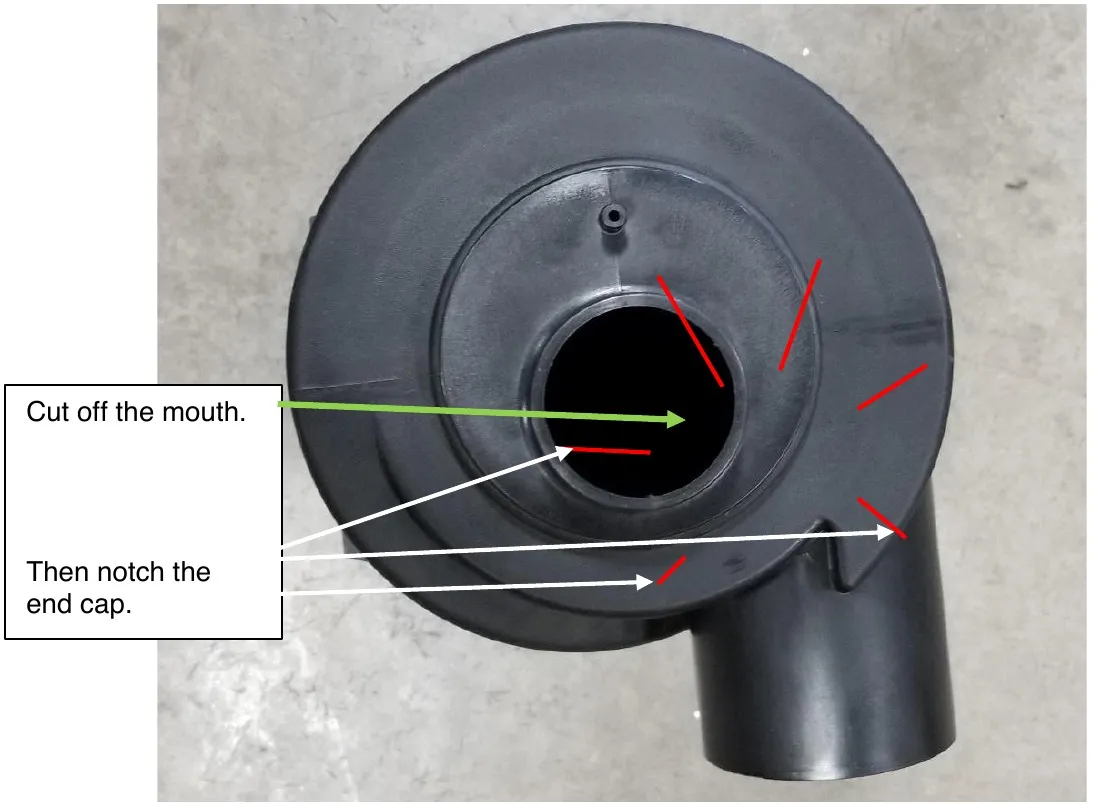
Cut off the mouth. Then notch the end cap. - Step 6
Using a Sawzall or similar tool, cut off the existing mouth of the OEM airbox.
- Step 7
Carefully notch the end cap taking care not to cut the body of the airbox.
- Step 8
Once the end cap is notched, you can break the end cap off in pieces.
- Step 9
The interior plastic sleeve that the OEM filter connects to may remain even after the end cap is removed. This sleeve also needs to be removed. Carefully notch this piece and remove. (See picture below)

- Step 10
Once the end cap is removed, use fine grit sandpaper to smooth any ridges and roughen up the surface. Slide the included foam gasket up against the flange of the V Flow Intake – this will seal the area between the V Flow Intake and the OEM filter canister.
- Step 11
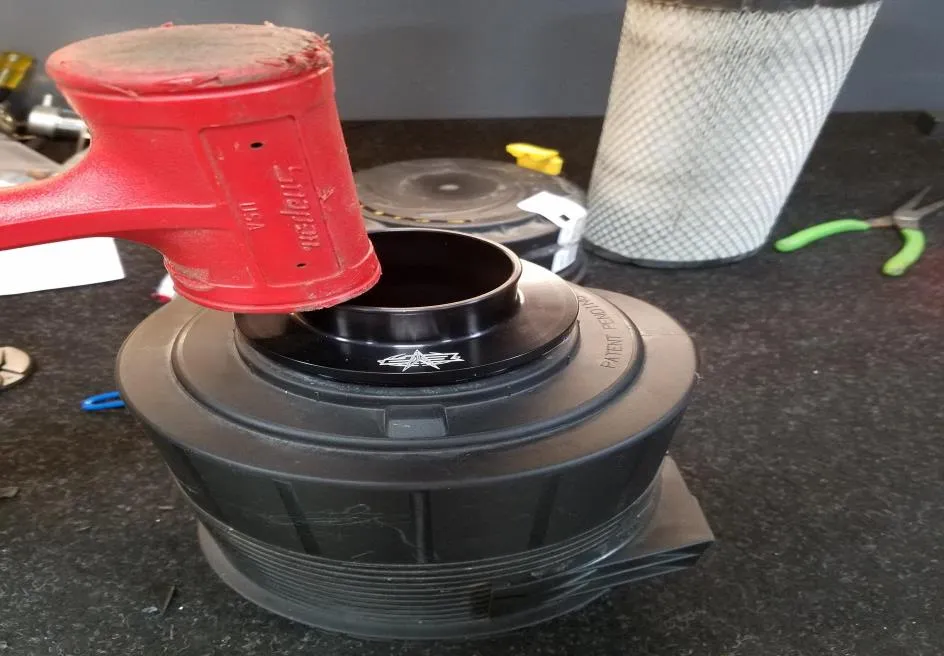
Align the EVP V-Flow intake as shown below.

- Step 12
Using a rubber mallet or soft blow hammer, gently tap the EVP V-Flow intake into place.
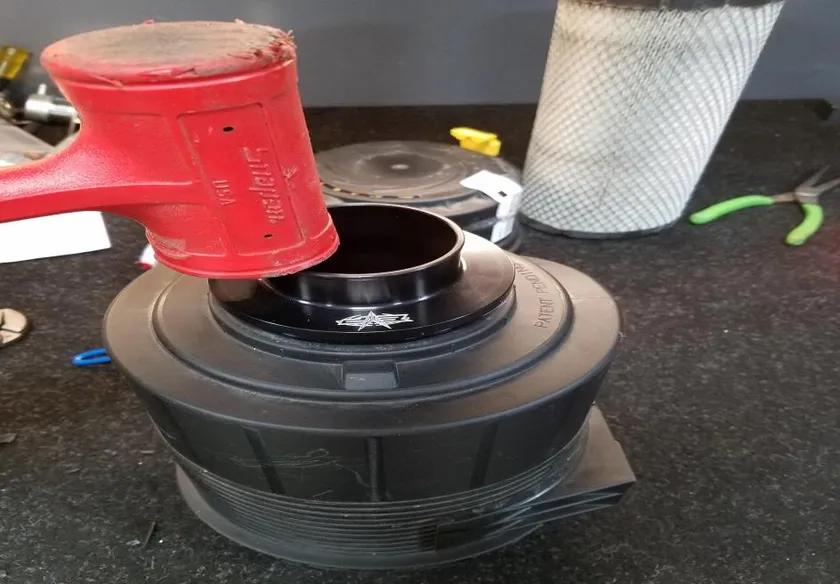
- Step 13
Once the EVP V-Flow intake is properly seated and locked into place with the original tabs that held in place the OEM end cap, reinstall the air filter canister back into the machine. It is easiest if the OEM canister intake hose is installed first. Then reinstall the bolts to hold the canister in place – do not fully tighten.
- Step 14
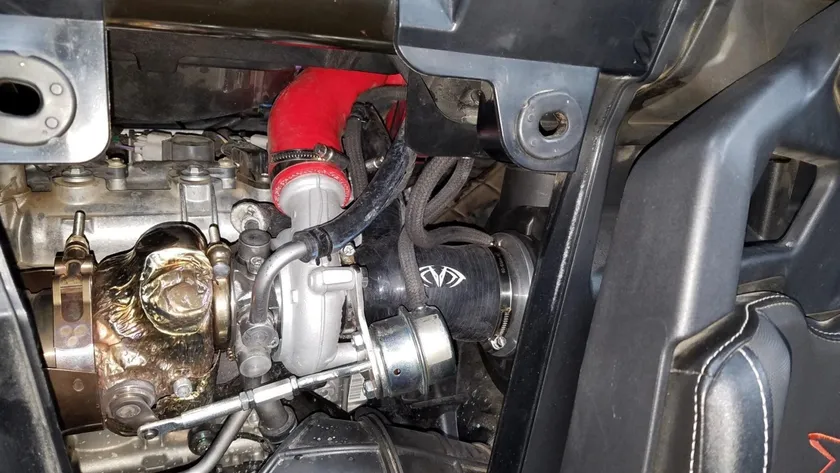
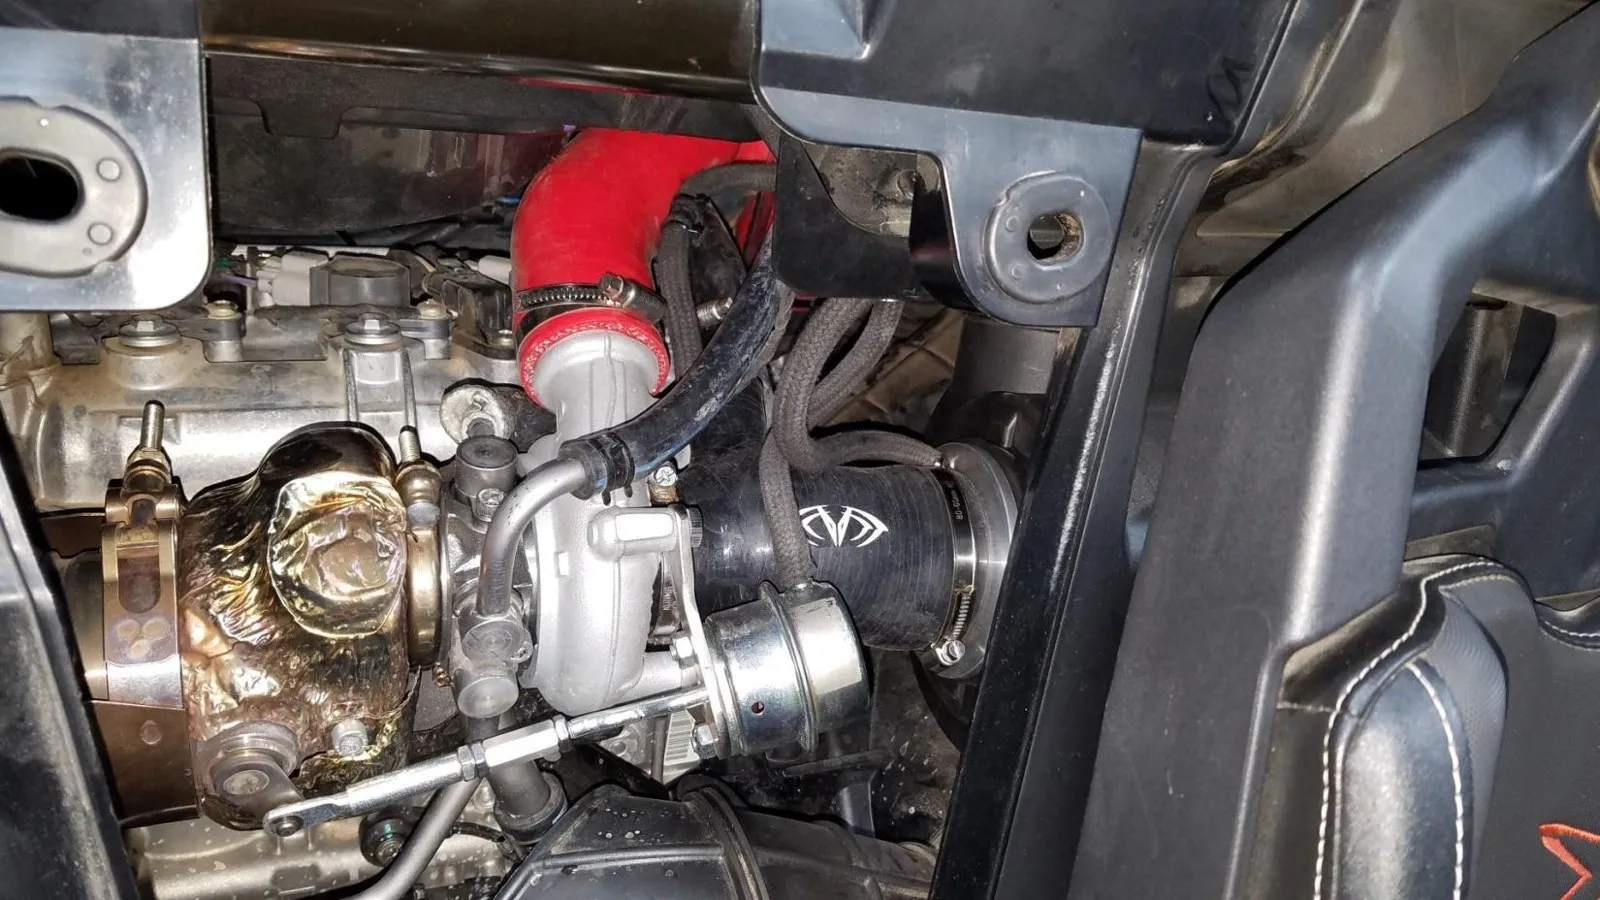
Install the supplied EVP silicone connector hose onto the factory turbo inlet and to the EVP V-Flow intake. Orient the breather port toward the rear of the machine. Install the included 3/4-3/4 hose adaptor into the breather port. Shorten the OEM breather hose as necessary so it is not kinked and is routed properly. Reuse OEM clamp to secure the breather hose onto the supplied hose barb. Reuse the OEM clamp on the turbo inlet and use the supplied 50-70mm clamp on the canister side – make sure the clamps are tight!
- Step 15
Install the OEM boost control solenoid hose onto the EVP V-Flow intake 3/16 hose barb. Use the supplied 10.5 mm pinch clamp to secure the hose onto the barb
- Step 16
Tighten canister bolts
- Step 17
Reinstall OEM filter
- Step 18
Reinstall OEM end cap – orient it the way it came off originally. Slide the filter band onto the seam of the filter canister.
- Step 19
Double check that all clamps are tight.
Need technical support?
Submit a ticket with your vehicle and what you're seeing, and our support team will get back to you.
