 BUY NOW, PAY LATER. Starting at 0% APR


Can-Am X3 Rhino Solid Secondary Clutch Roller Kit
X3 Rhino Solid Secondary Clutch Roller Kit
Before you start
If you do not have a secondary clutch roller pin puller EVP sells them. SKU:875FC0002
In the box
Parts and tools
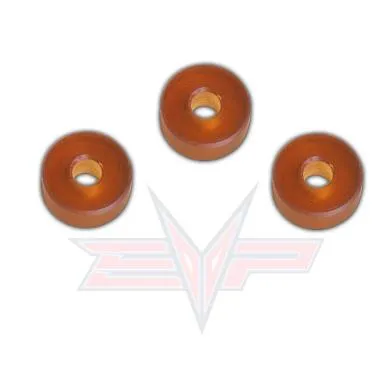
Included parts
- 3Solid Clutch Rollers
Required tools
- Torque Wrench
- Can Am Secondary Clutch Puller
- Secondary Clutch Compression Tool
- X3 Belt Removal Tool
- 13,17,22mm Sockets
- T-20 Torx
- Clutch Roller Pin Removal Tool
- Red & Blue Loctite
- 19mm Open End Wrenches
- Hammer
Procedure
Installation Steps
- Step 1
Remove belt box cover.
- Step 2
Remove CVT drive belt.
- Step 3
Remove secondary clutch off the machine.
- Step 4
Place secondary clutch into clutch compression tool. Mark with a sharpie your alignment arrows on both sheaves. (See figure 1).
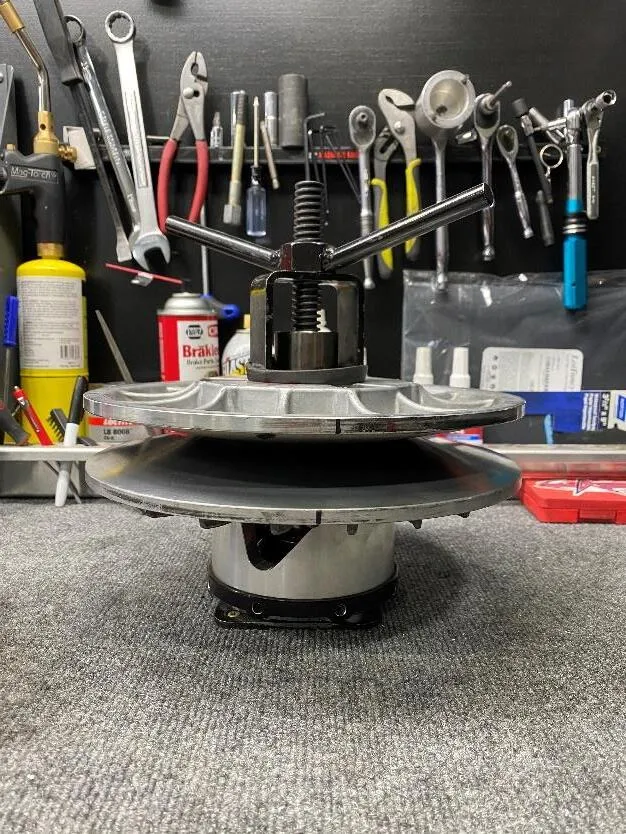
Fig. 1 - Step 5
Loosen (3) 13mm bolts on top of clutch, release pressure and pull all pieces apart: sheave, spring, springs support, and helix.
- Step 6
Place the sheave with rollers back into the compression tool.
- Step 7
With the T-20 Torx, remove (3) roller pin set screws.
- Step 8
Place your clutch pin puller into the first pin. (See figure 2)

Fig. 2 NoteDo not let the pin puller nut go into the threaded hole.
- Step 9
With your (2) 19mm wrenches, start tightening the pin puller, this will cause your roller pin to back out. Only back the pin out enough to pull the roller out. Do Not pull the pin all the way out.
- Step 10
Remove OEM roller, loosen the 19mm jam nut and back it out so there is no pressure.
- Step 11
Place the new roller so it is lined up with the pin and tap the pin until it is just passed the set screw threads. DO NOT bottom the pin out, just enough so the T-20 Torx set screw can be placed back. (See figures 3-5).

Fig. 3 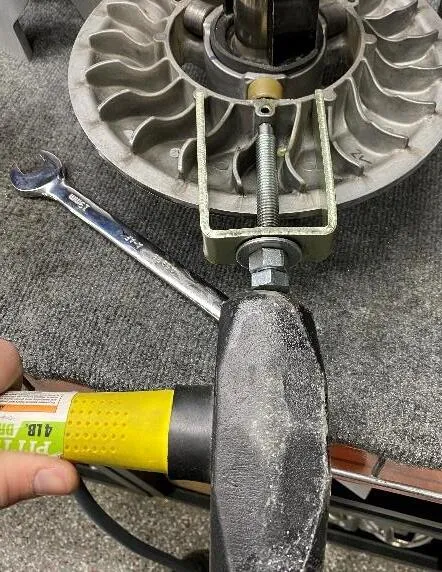
Fig. 4 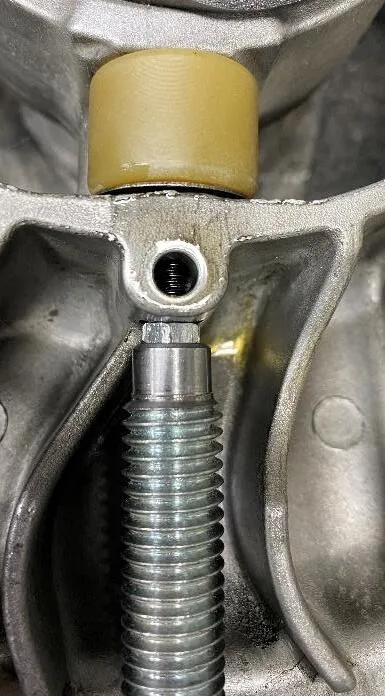
Fig. 5 Noteyou can spray lubricant on roller, but you must clean it when finished.
- Step 12
Continue steps 8-11 for the last two roller pins.
- Step 13
Place blue Loctite on the (3) pin set screws. (See figure 6)
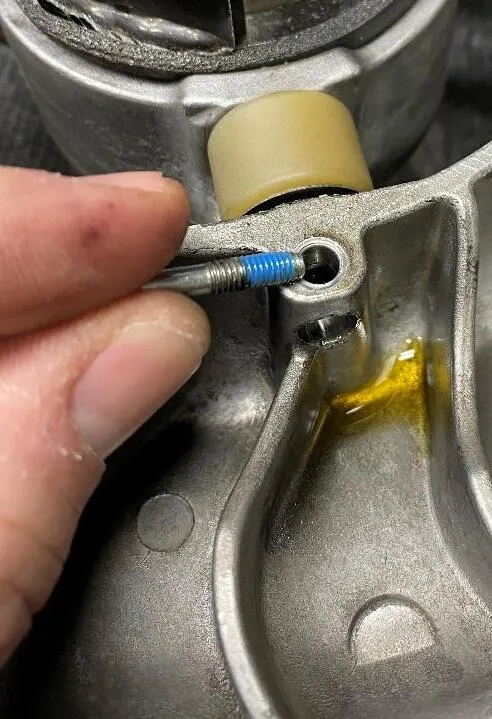
Fig. 6 - Step 14
Once all three solid rollers and set screws are installed. Clean up any excess lubricant.
- Step 15
Reassemble both clutch sheaves followed by the spring support, spring, and helix. Make sure to lock the spring back into the original position on the helix.
- Step 16
Place the assembly back into the secondary clutch compression tool and compress down.
NoteMake sure both sheaves are lined up with the marks.
- Step 17
Red Loctite (3) 13mm head bolts and torque to 45 ft lbs. (See figure 7).

Fig. 7 - Step 18
Reinstall the secondary clutch into the machine. Torque to 52 ft lbs. Reinstall CVT drive belt and belt box cover.
Need technical support?
Submit a ticket with your vehicle and what you're seeing, and our support team will get back to you.
