Polaris Pro R Aluminum Coolant Tank/ECU Removal

Tuning & programming for the Pro R Aluminum Coolant Tank/ECU Removal on the Polaris Pro R (RZR). Parts, tools, and full procedure.

Vehicles
Polaris RZR
Revision
Rev_100623

Procedure

Installation

  1. Step 1

    Located behind the passenger seat (if a 4 seater the rear passenger seat), remove the (4) push darts holding the sound dampener in.

  2. Step 2

    Located behind is the ECU. Remove the black clip. Remove the (4) T15 screws holding the ECU in place. Unclip the ECU connectors, left before the right.
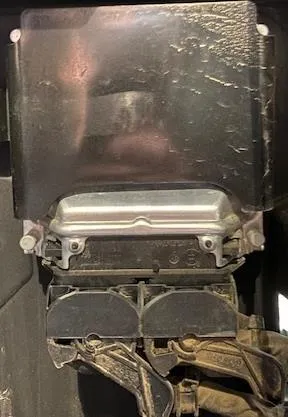
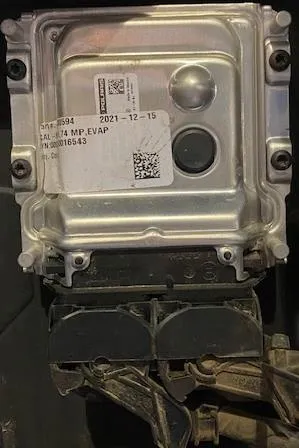
    Located behind is the ECU.
    Remove the (4) T15 screws holding the ECU in place.
  3. Step 3

    Remove the bed to CVT ducting, (2) worm drive clamps.

  4. Step 4

    Freely hold up the coolant reservoir tank, keeping the flat lip on the right side of the tank inline with the plastic edge. (Figure 71).
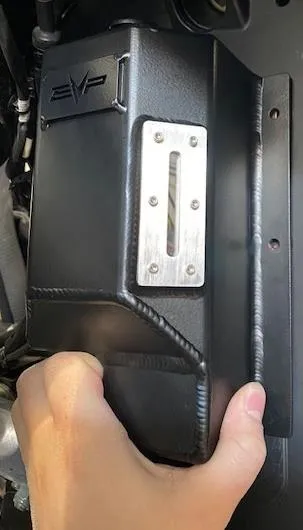
    Freely hold up the coolant reservoir tank, keeping the flat lip on the right side of the tank inline with the plastic edge.
  5. Step 5

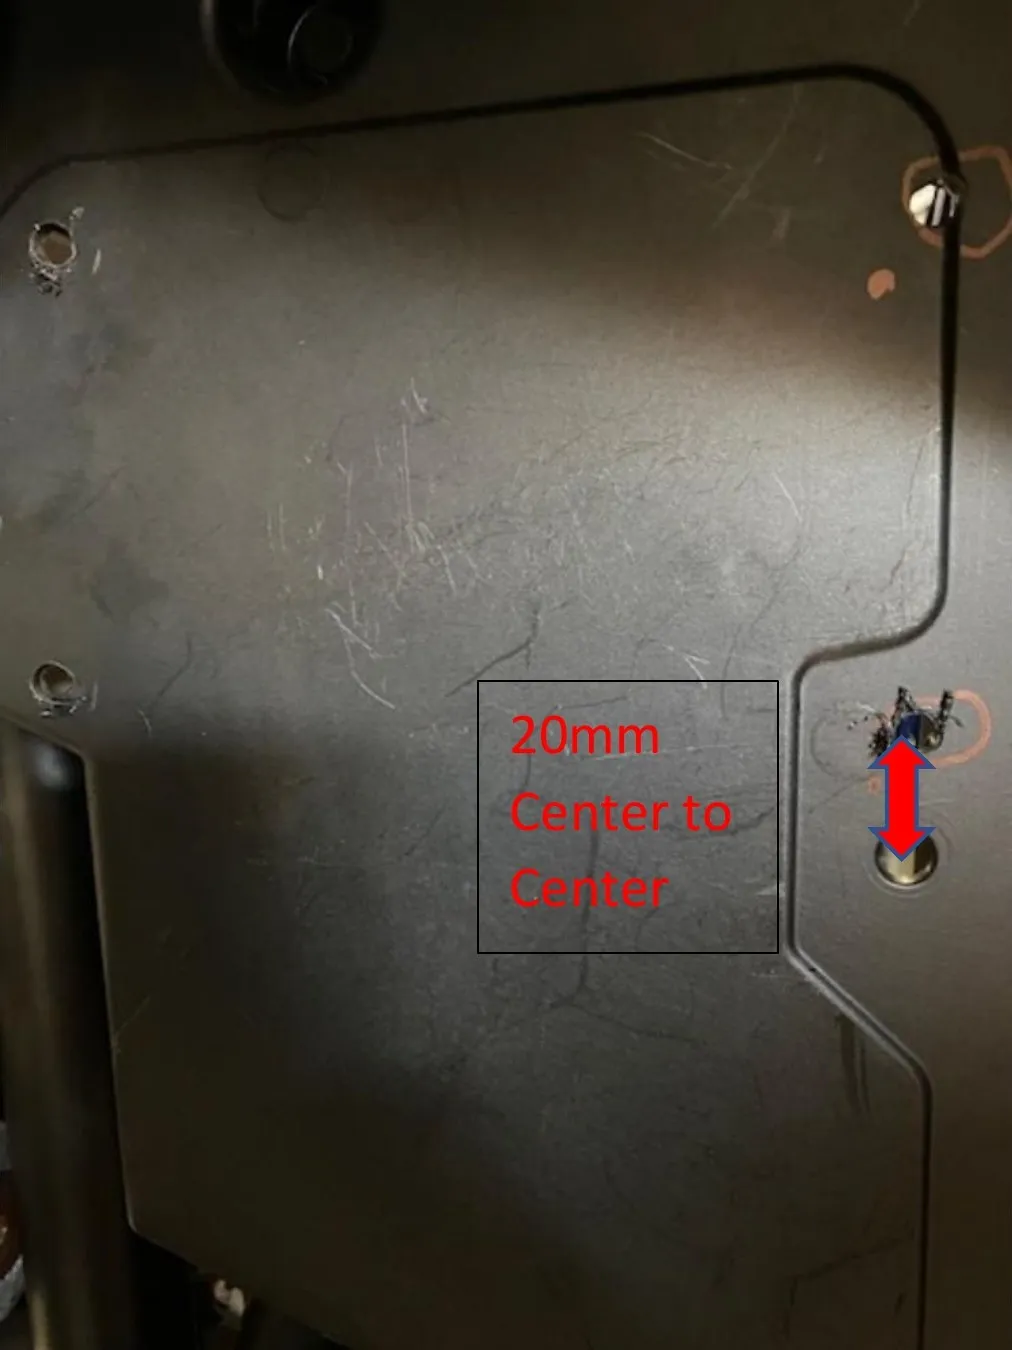
    Freely hold the supplied template up to the firewall. The bottom right hole should be 20mm center to center above the template. (Figure 72). Mark the (4) holes out with a sharpie. Cut the holes out with a 1/4" drill bit.
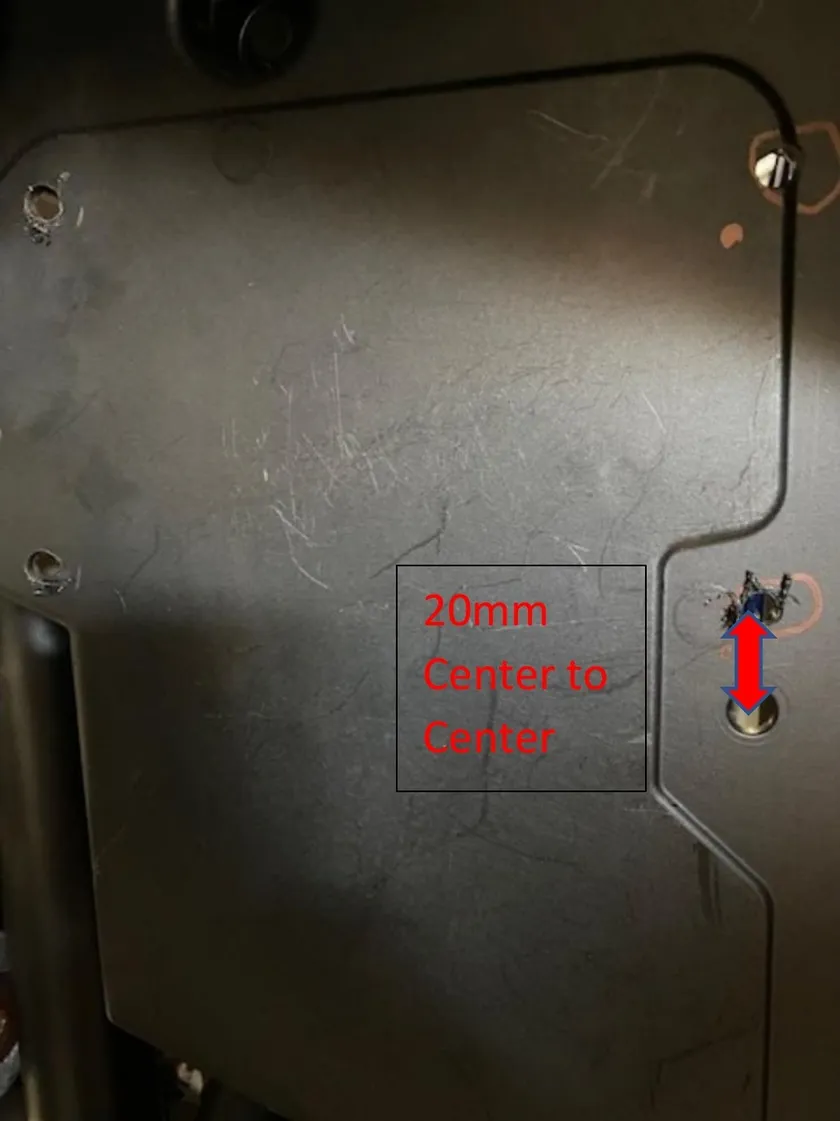
    The bottom right hole should be 20mm center to center above the template.
  6. Step 6

    Install the coolant reservoir tank with supplied (4) M6x16 screws and (4) locknuts after we install all the hoses.

  7. Step 7

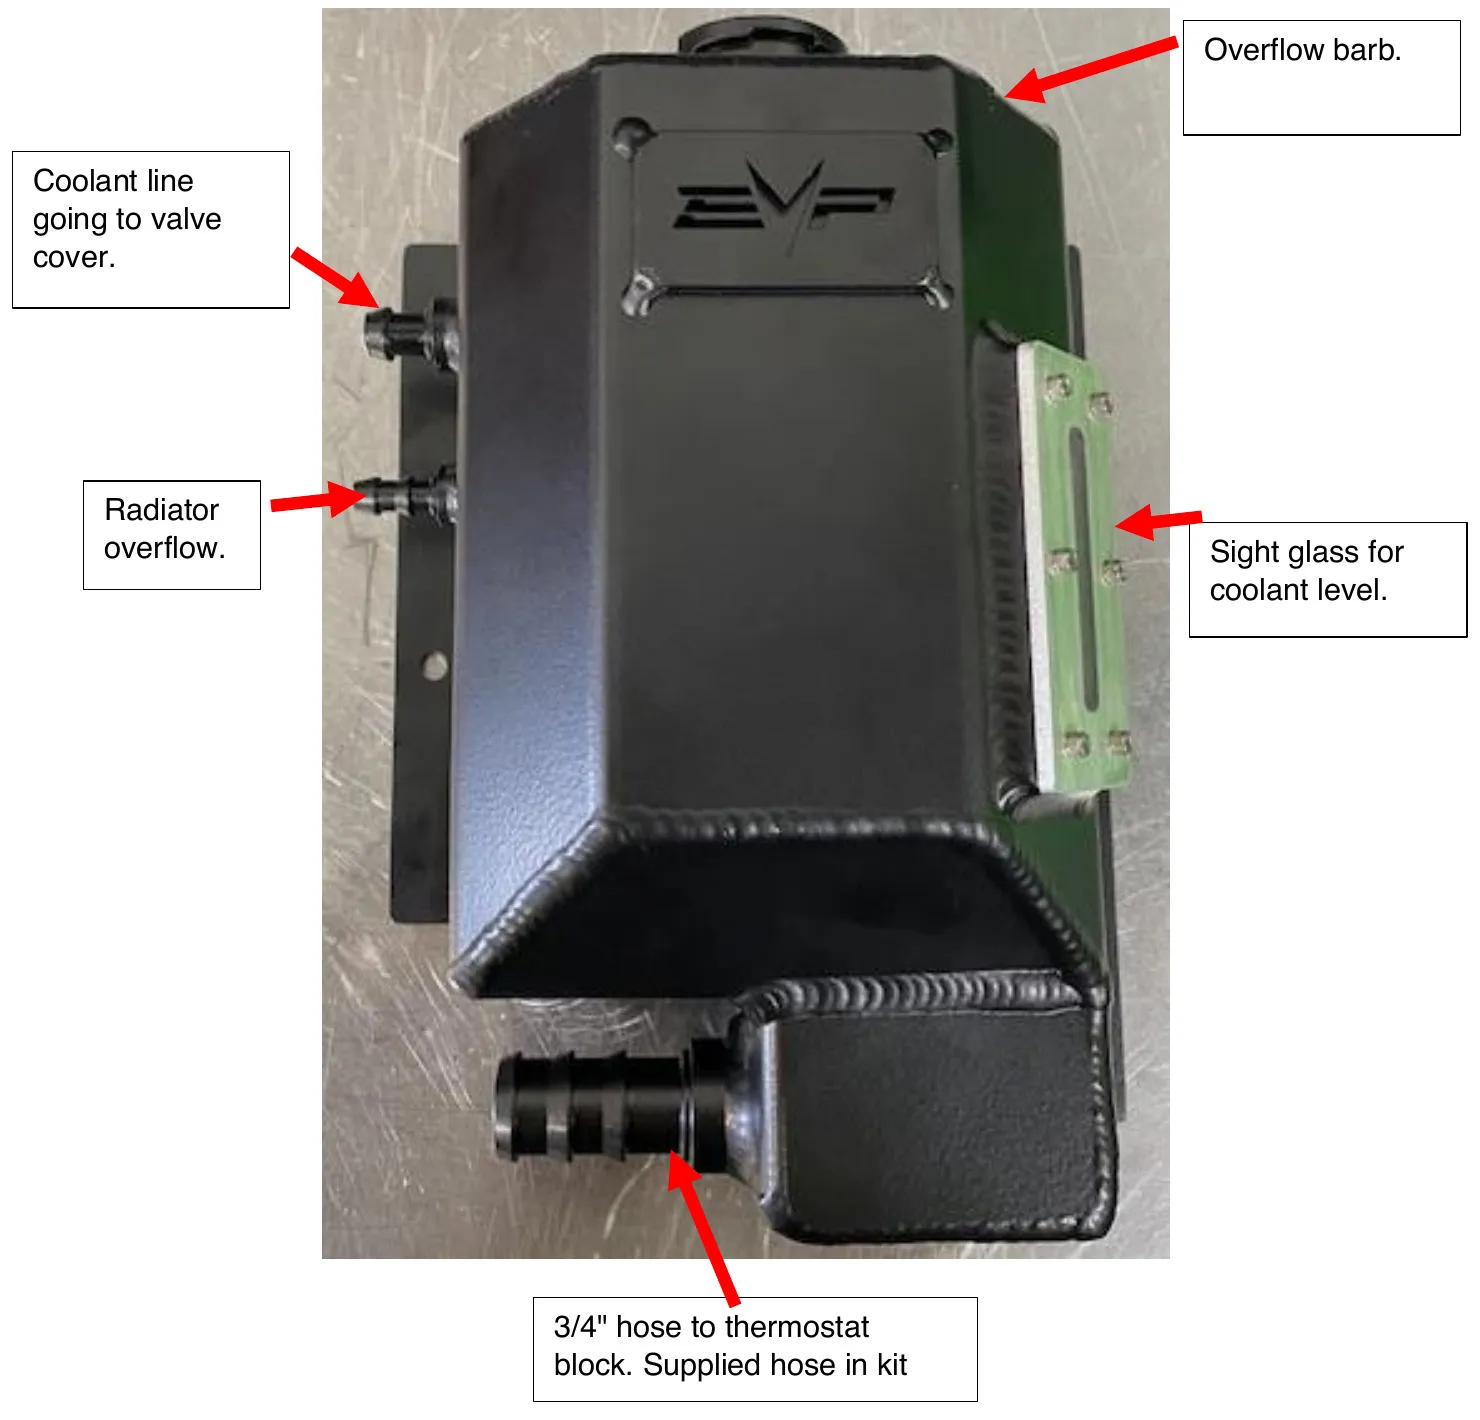
    Coolant reservoir layout below:
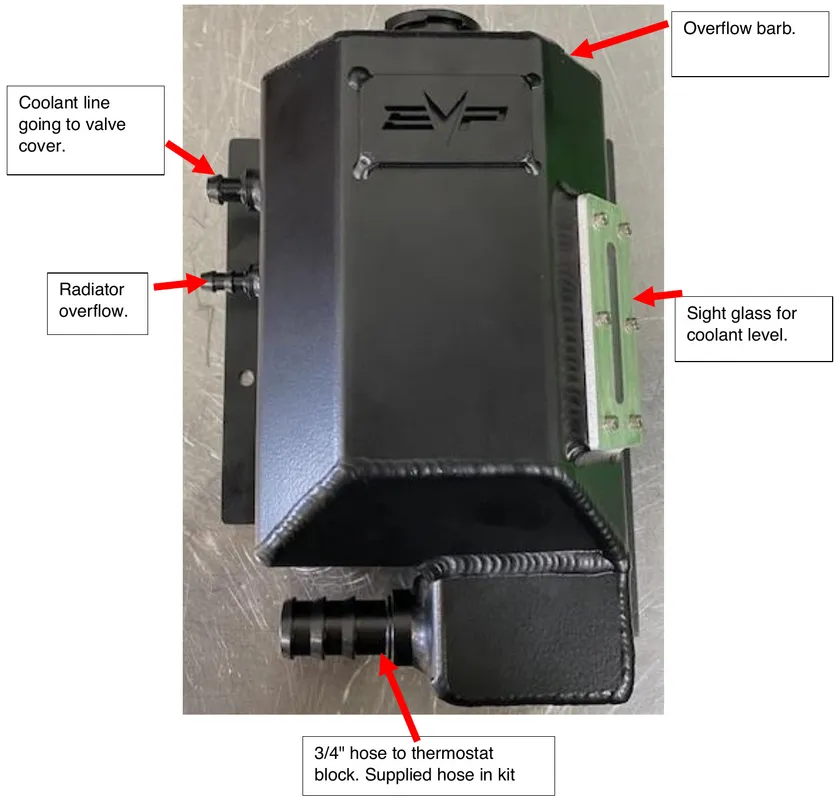
    Coolant reservoir layout
  1. Step 8

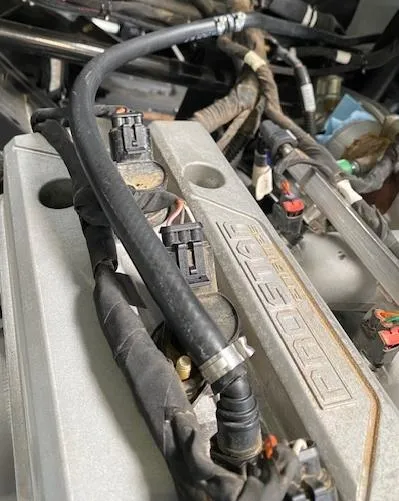
    Install the OEM radiator overflow onto the coolant tank. Use 15.7mm pinch clamp. Install the OEM valve cover hose onto the top barb. Use 18.5mm pinch clamp. Cut the pinch clamp holding the valve cover fitting on, install the 1/2" coupler and 1/2" hose. Use pinch clamps to fasten down. Reinstall the OEM fitting onto the end of this hose. See photos.
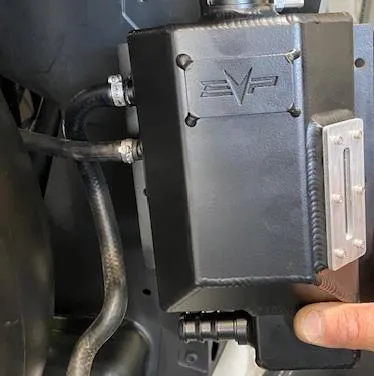
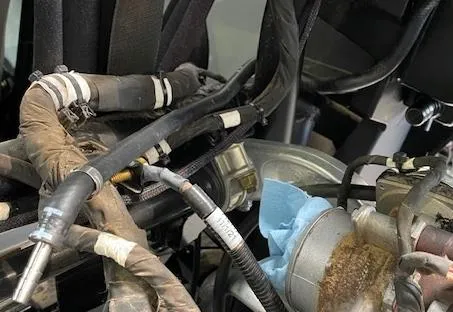
    Install the OEM radiator overflow onto the coolant tank.
    Cut the pinch clamp holding the valve cover fitting on, install the 1/2" coupler and 1/2" hose.
    Reinstall the OEM fitting onto the end of this hose.
  2. Step 9

    Install the overflow, 6mm ID hose using a 1/2" P-clamp to hold the hose onto the firewall.

    Install the overflow, 6mm ID hose using a 1/2" P-clamp to hold the hose onto the firewall.
  3. Step 10

    Install the supplied hose from the large barb on the coolant tank to the thermostat block. Reuse (2) self-tightening OEM clamps.
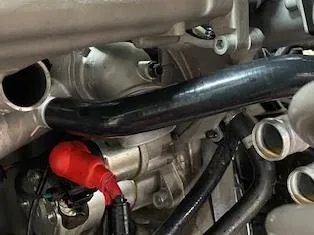
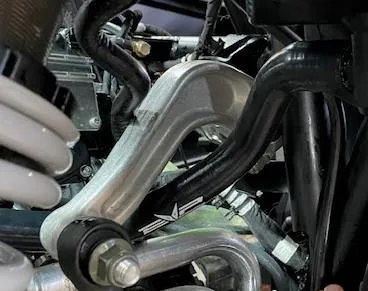
    Install the supplied hose from the large barb on the coolant tank to the thermostat block.
    Install the supplied hose from the large barb on the coolant tank to the thermostat block.
Emissions notice. This product is exempt from the emission standards and related requirements of 40 C.F.R. § 1051 as provided by 40 C.F.R. § 1051.620, and California law [e.g., vehicle code §§ 27156 and 38391]. This product is sold only for use in connection with EPA certified, purpose-built, nonroad vehicles used solely for closed course, nonroad competition/racing and not used for any recreational purpose or on public highways or right of ways maintained by and open to the public. This product is sold only in connection with machines that do not fall under state and/or federal noise or emission standards/regulations. Purchasers who/that purchase this product represent and warrant that the product is purchased only in connection with EPA-certified, emission-regulations-exempt and noise-regulations-exempt competition/racing vehicles as interpreted under applicable state and/or federal law.

Need technical support?

Submit a ticket with your vehicle and what you're seeing, and our support team will get back to you.

Contact Support
We use cookies to improve your experience on our website. Read about how we use cookies in our Privacy Policy. By browsing this website, you agree to our use of cookies. privacy policy
accept

Your cart

×
×