 BUY NOW, PAY LATER. Starting at 0% APR


Can-Am 2020+ X3 Race Intercooler
Installation instructions for the 2020+ X3 Race Intercooler on the 2020 Can-Am Maverick X3 (SKU 102FC0001). Parts, tools, and full procedure.
In the box
Parts and tools
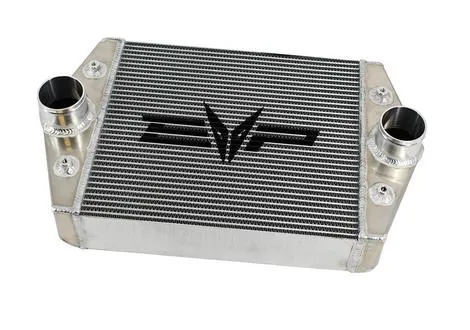
Included parts
- 1Race Intercooler
Required tools
- Philips Screwdriver
- Sharp Side Cutters or Dremel
- Metric Sockets
Procedure
Installation
- Step 1
Remove plastic shroud off the OEM intercooler and air box.
- Step 2
Unplug the electrical plug from the intercooler fan and the vehicle.
- Step 3
With a 11mm socket loosen both clamps on the charge tubes. Remove from intercooler.
- Step 4
With a 10mm socket, loosen (2) bolts on the back side of the intercooler.
- Step 5
Pop the access panel out of the firewall from the inside of the car
- Step 6
With a 10mm socket, loosen (2) bolts on the front side of the intercooler.
Notemay need a shallow socket for the bolt behind the passenger seat.
- Step 7
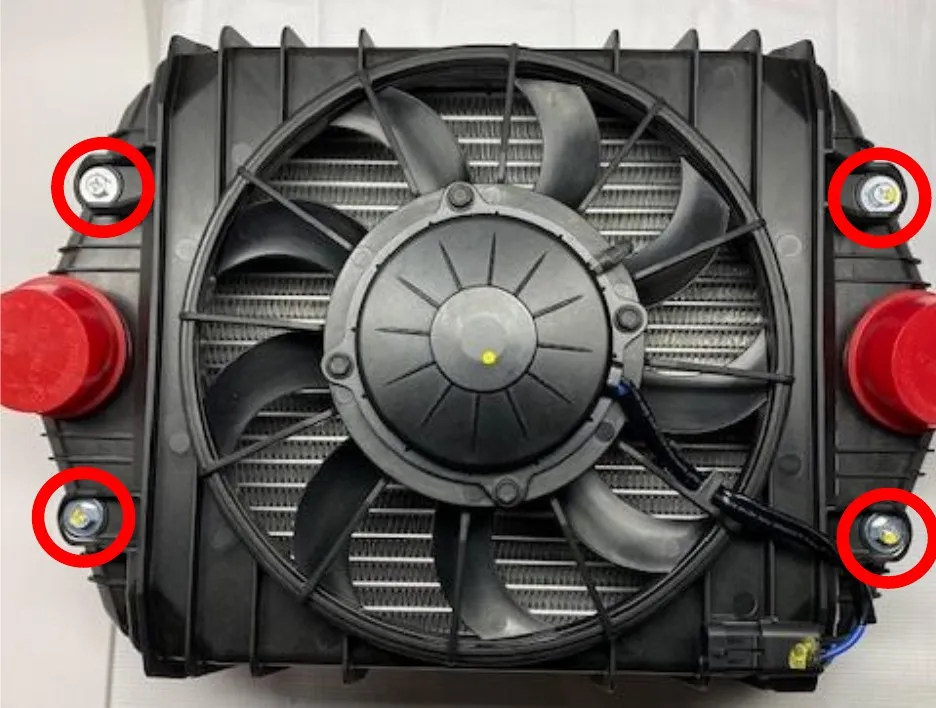
With a screwdriver, remove the OEM fan off the OEM intercooler. (Figure 1)
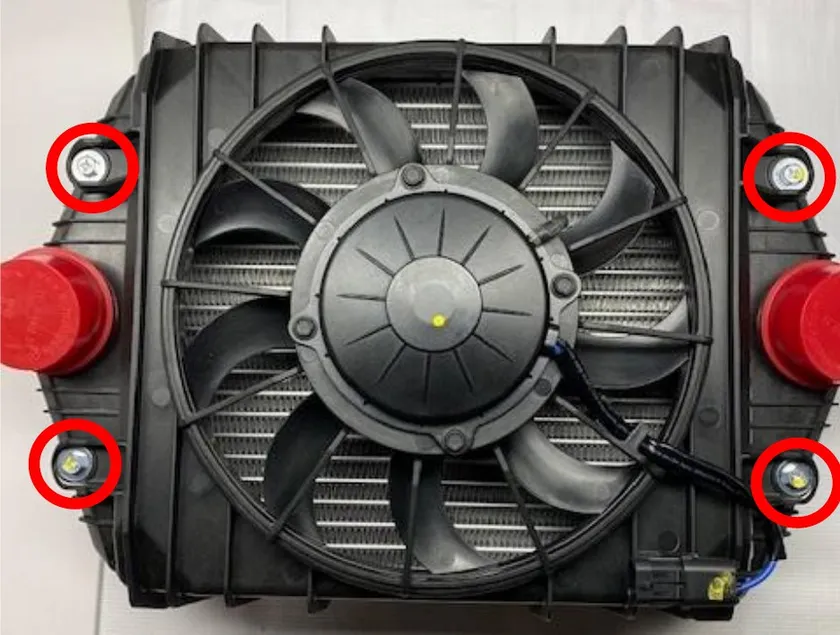
Fig. 1 - Step 8
Flip the OEM intercooler fan upside down, there will be small modifications needed.
- Step 9
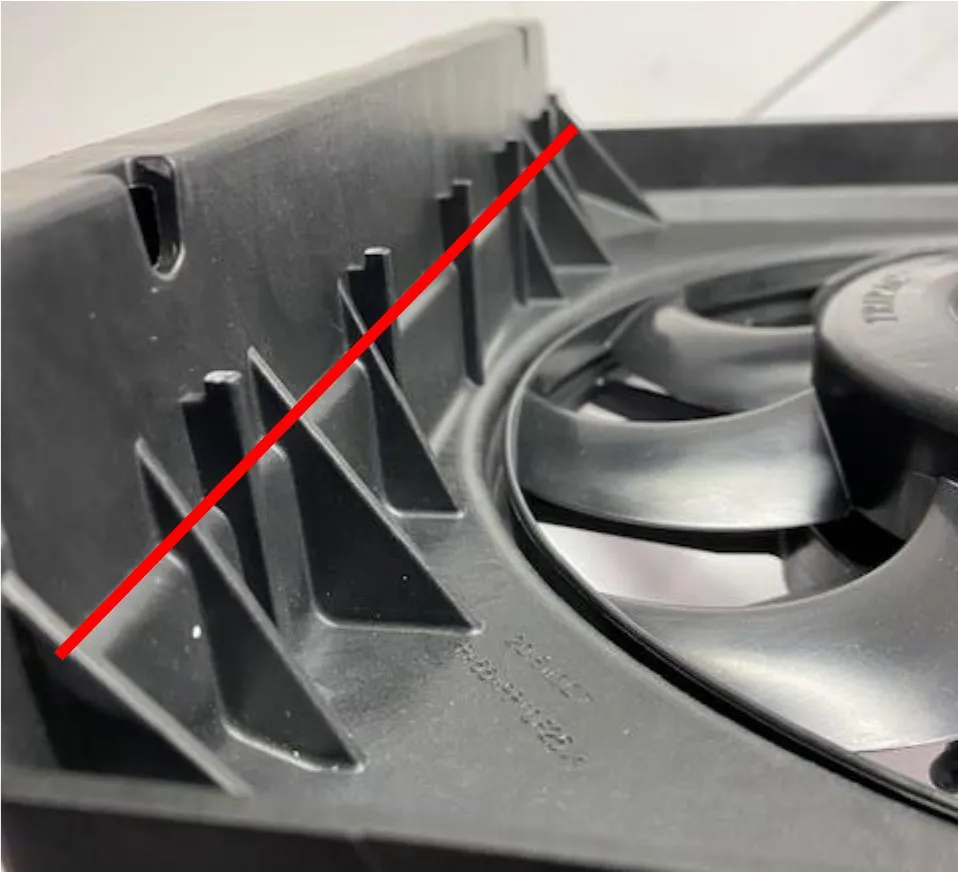
With a sharp side cutter or Dremel tool, the tabs on the OEM intercooler need to be taken off to fit on the EVP intercooler. (See figure 2-3)
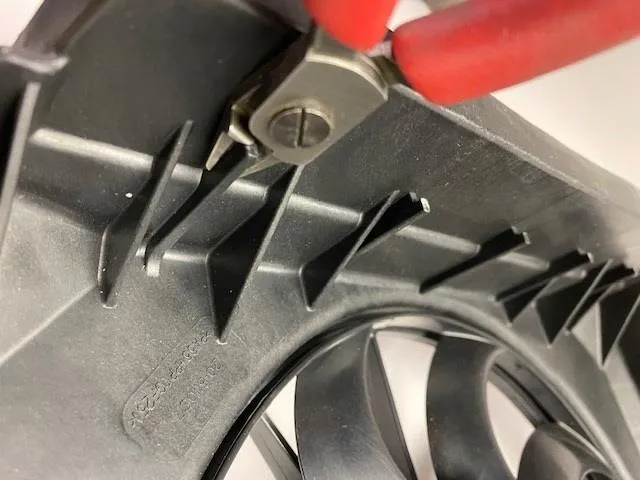
Fig. 2 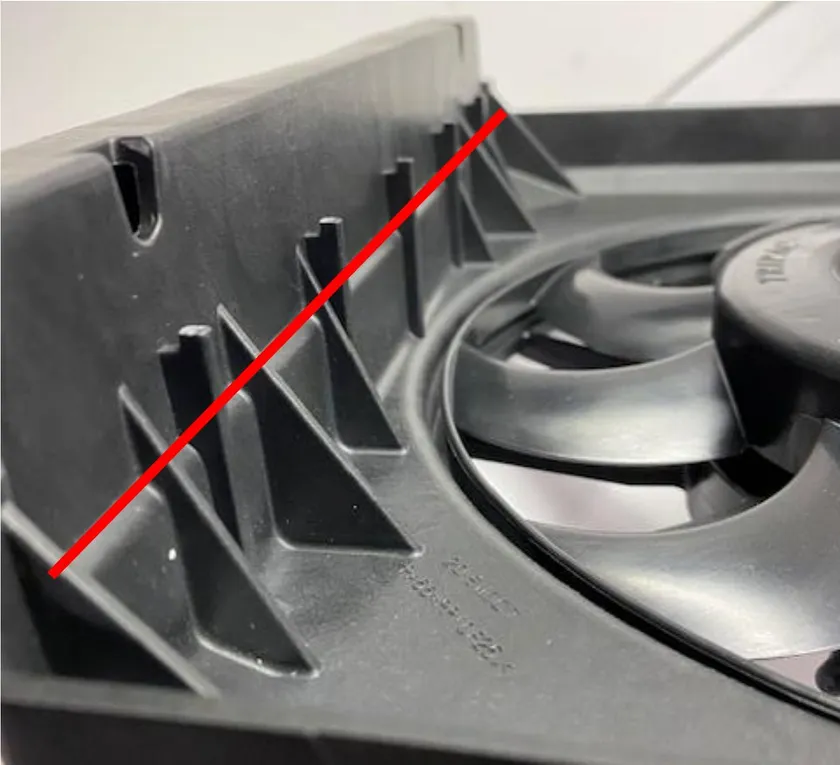
Fig. 3 NoteAll the tabs on both sides of the intercooler fan shroud need to be ground down to the lip or where the red line is located.
- Step 10
Mount the OEM intercooler fan onto the EVP intercooler. Tighten down (4) Philips screws with a screwdriver.
- Step 11
Install the intercooler and connect the charge tubes to the new intercooler. Tighten down charge tube clamps with a 11mm socket.
- Step 12
Replace (4) bolts holding the intercooler into place, use a 10mm socket.
- Step 13
Reconnect the plug from the fan to vehicle connection.
- Step 14
Reconnect air intake and intercooler shroud to the vehicle.
Need technical support?
Submit a ticket with your vehicle and what you're seeing, and our support team will get back to you.
