 BUY NOW, PAY LATER. Starting at 0% APR


Parts Included in Spark Turbo Upgrade System
2014+ Sea Doo Spark Turbocharger Kit
2014+ Sea Doo Spark Turbocharger Kit
In the box
Parts and tools
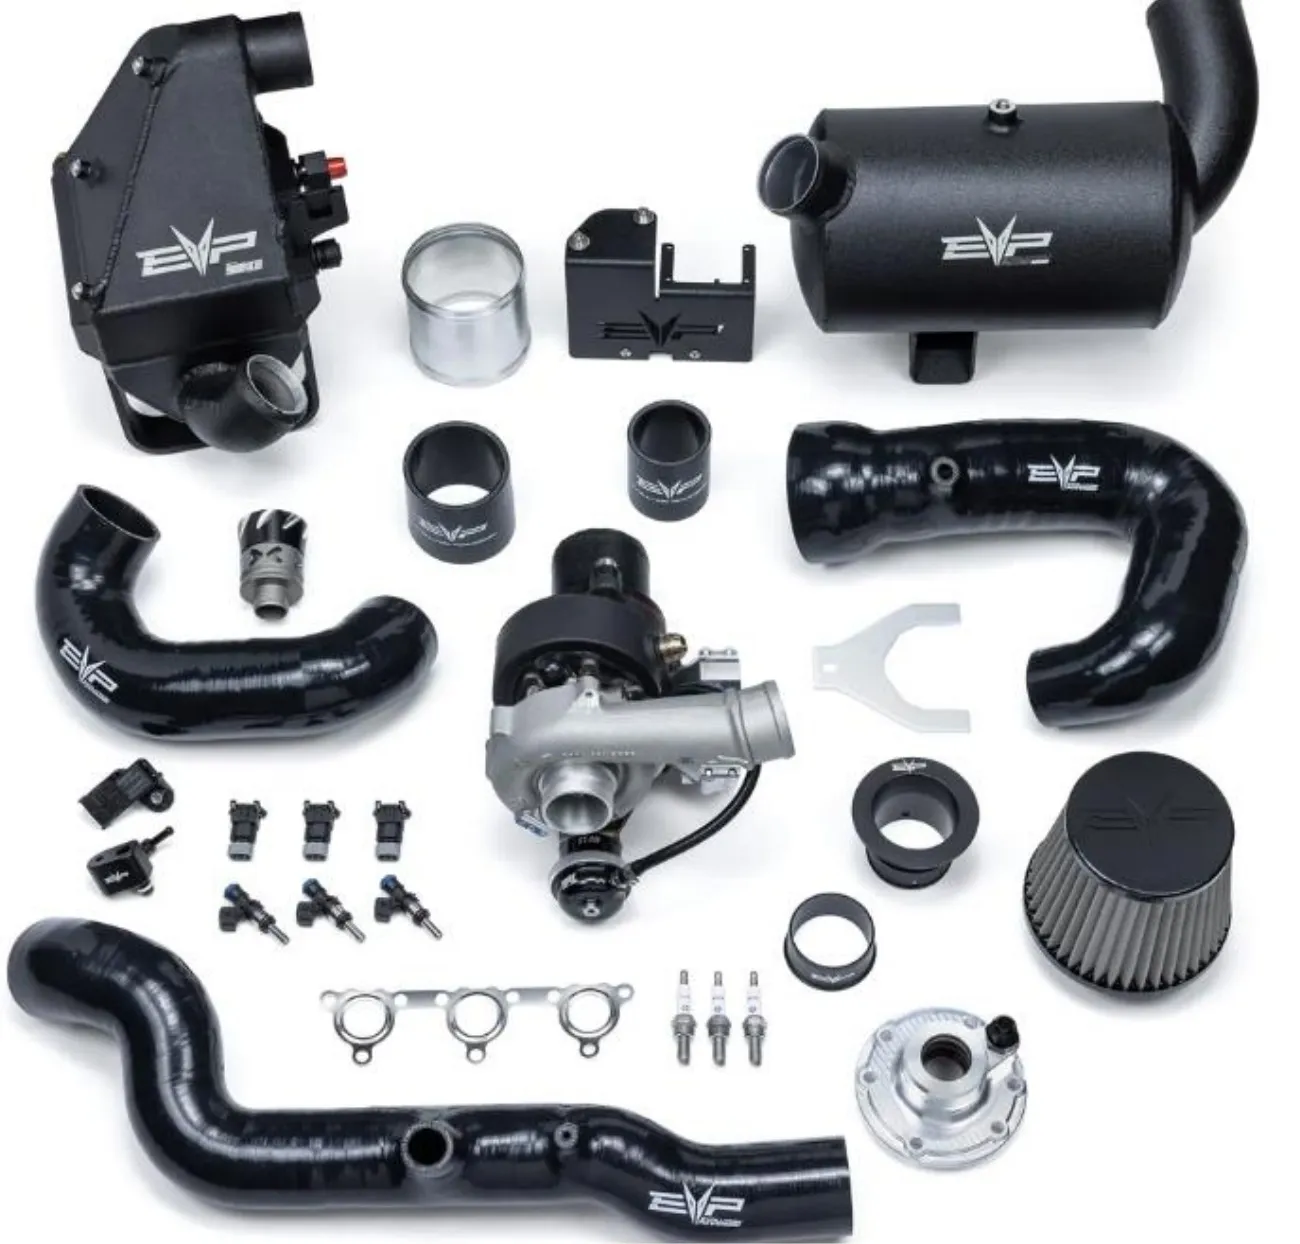
| 903FS0048 | 2014-2021 Sea Doo Spark PTO Cover Assembly |
| 903FS0049 | 2022+ Sea Doo Spark PTO Cover Assembly |
| 903FS0050 | Sea Doo Spark Turbocharger Install Kit |
| 500FC0011 | 2020 X3 Fuel Injector Adaptors |
| 903FS0051 | Sea Doo Spark Charge Tube Kit |
| 903FS0052 | Sea Doo Spark Turbo Exhaust Kit |
| 903FS0053 | Sea Doo Spark Turbo Air Intake kit |
| 903FS0031 | Sea Doo Spark Ribbon Delete |
| 903FS0054 | Sea Doo Spark Turbo MAP Sensor Kit |
| 903FS0055 | Sea Doo Spark Turbocharger Assembly |
| 903FS0056 | Sea Doo Spark Turbo Blow Off Valve Kit |
| 903FS0057 | Sea Doo Spark Turbo Injector, set of 3 |
| 903FS0065 | Sea Doo Spark Turbo Spark Plug, Set of 3 |
| 903FS0066 | Can Am Diagnostic Port Cap |
| 708FU0016 | (OPTIONAL) CodeShooter ECU Flashing Device |
| 705RU0015 | (OPTONAL) CodeShooter DESS Key, CS-BRP-1 |
Parts Included Spark Turbocharger Install Kit
| 804FC0099 | X3 OEM Exhaust Gasket | 1 |
| 953RU0023 | Zip Tie | 10 |
| 953RU0606 | 16-27mm Worm Drive Clamp | 4 |
| 903FS0058 | Spark Raw Water to Intercooler Hose | 1 |
| 903FS0059 | Spark Intercooler to Turbocharger Hose | 1 |
| 903FS0060 | Spark Turbocharger to Hull Exit Hose | 1 |
| 903FS0061 | Spark Oil Feed Hose | 1 |
| 903FS0062 | Spark Oil Drain Hose | 1 |
| 903FS0063 | Spark Exhaust Manifold to Turbo Hot Hose | 1 |
| 903FS0064 | Spark Turbo Hot to Water Box Hose | 1 |
| Level | Tunes | Max Boost (psi) | Spark Plug Gap | Spring | Waste Gate (psi) | Engine HP |
|---|---|---|---|---|---|---|
| Stage 1 | 91 | 8.5psi | .016 - .018 | 165 |
Procedure
Installation
- Step 1
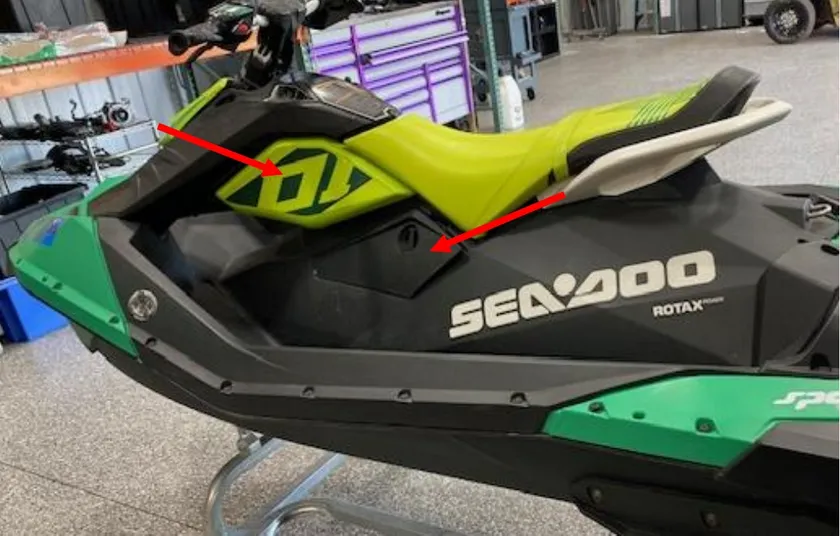
Remove engine access panel and knee panel on the left side of the hull.
- Step 2
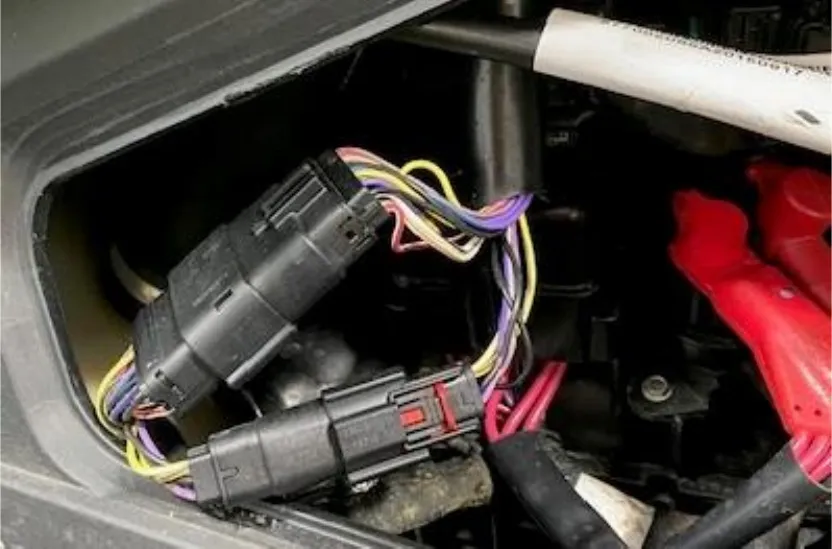
Through the engine access panel, disconnect the steering control (20 pin) plug and if equipped IBR (6 pin) plug. Do not use a screwdriver to pry off.
- Step 3
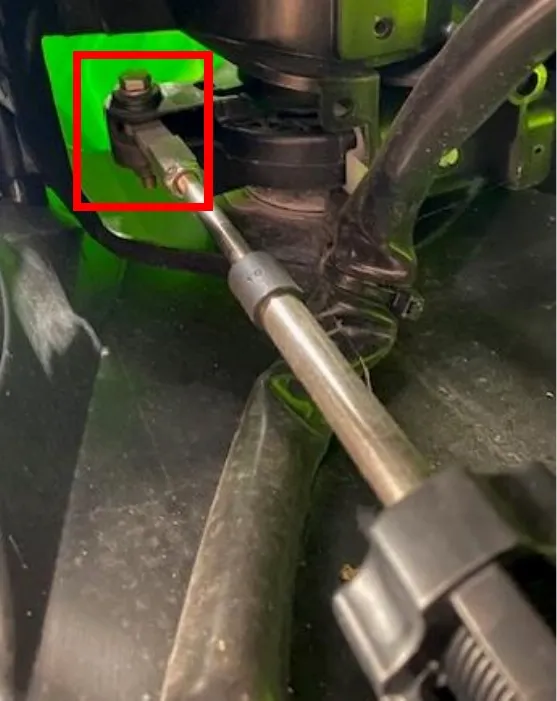
Underneath the handlebars, through the knee panel you will locate the steering linkage. Remove the linkage with (2) 10mm sockets. Remove the steering linkage brace by removing (2) T30 head screws.
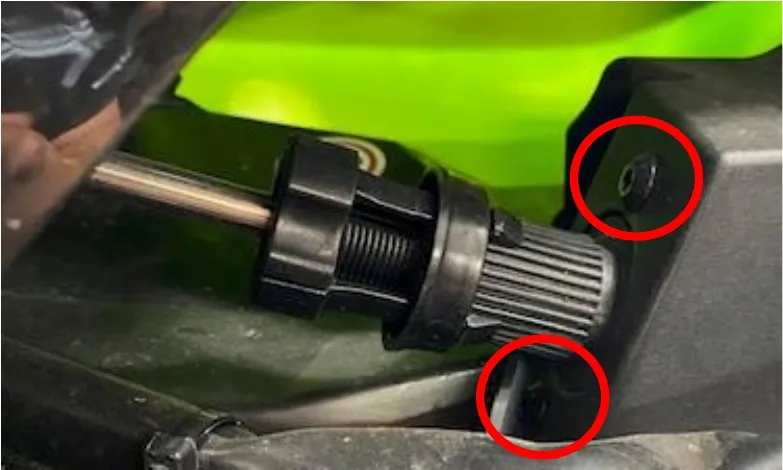
- Step 4
Once the steering linkage is loose, push it into the engine bay.
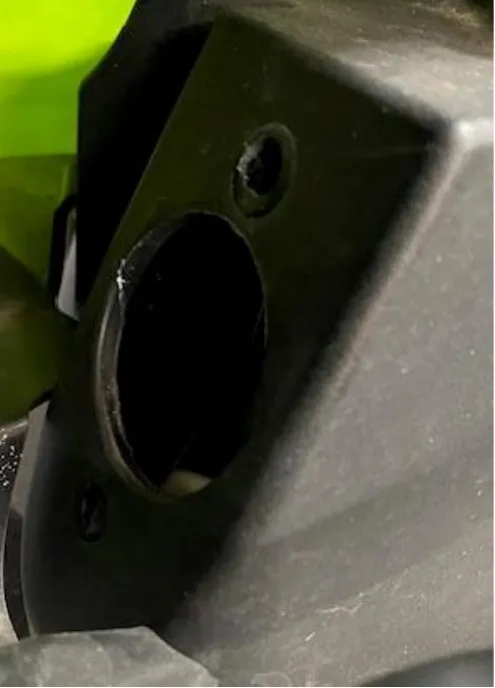
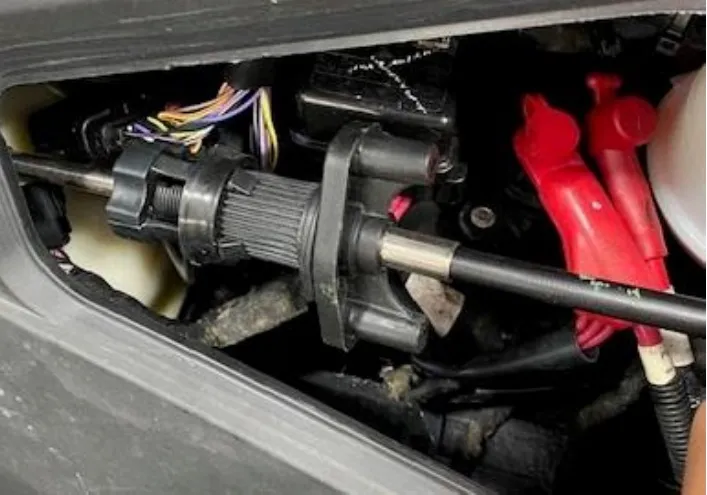
- Step 5
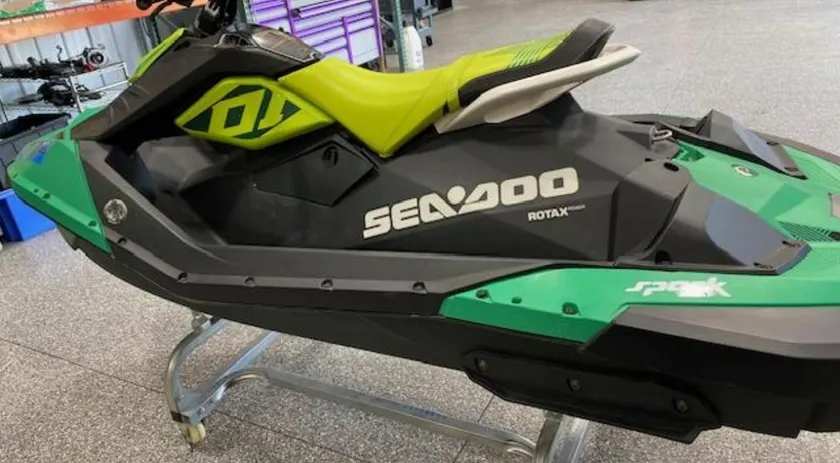
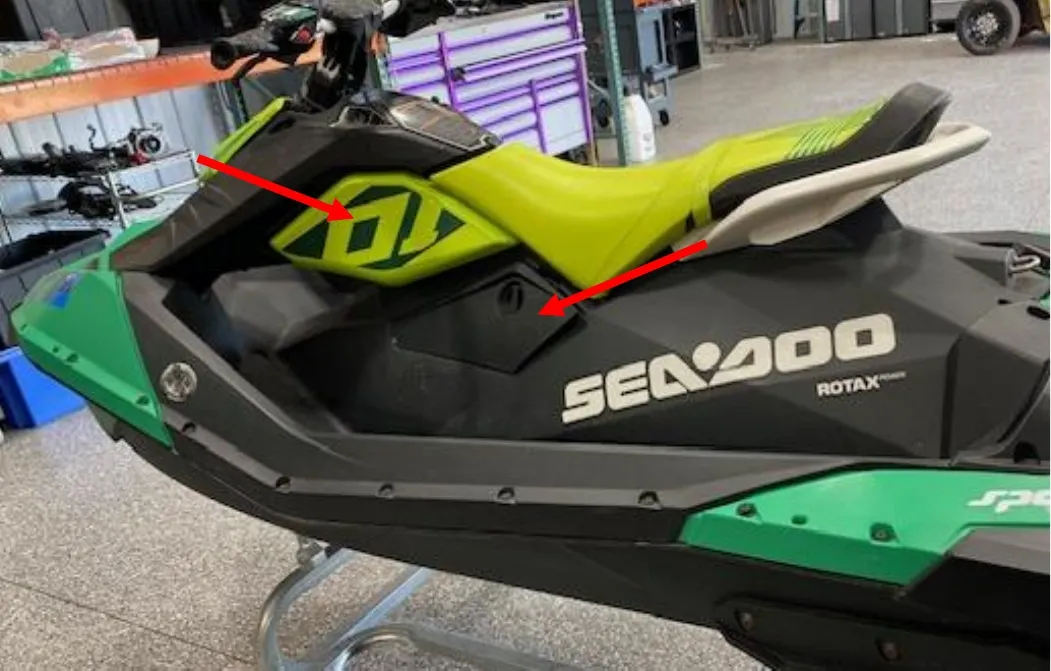
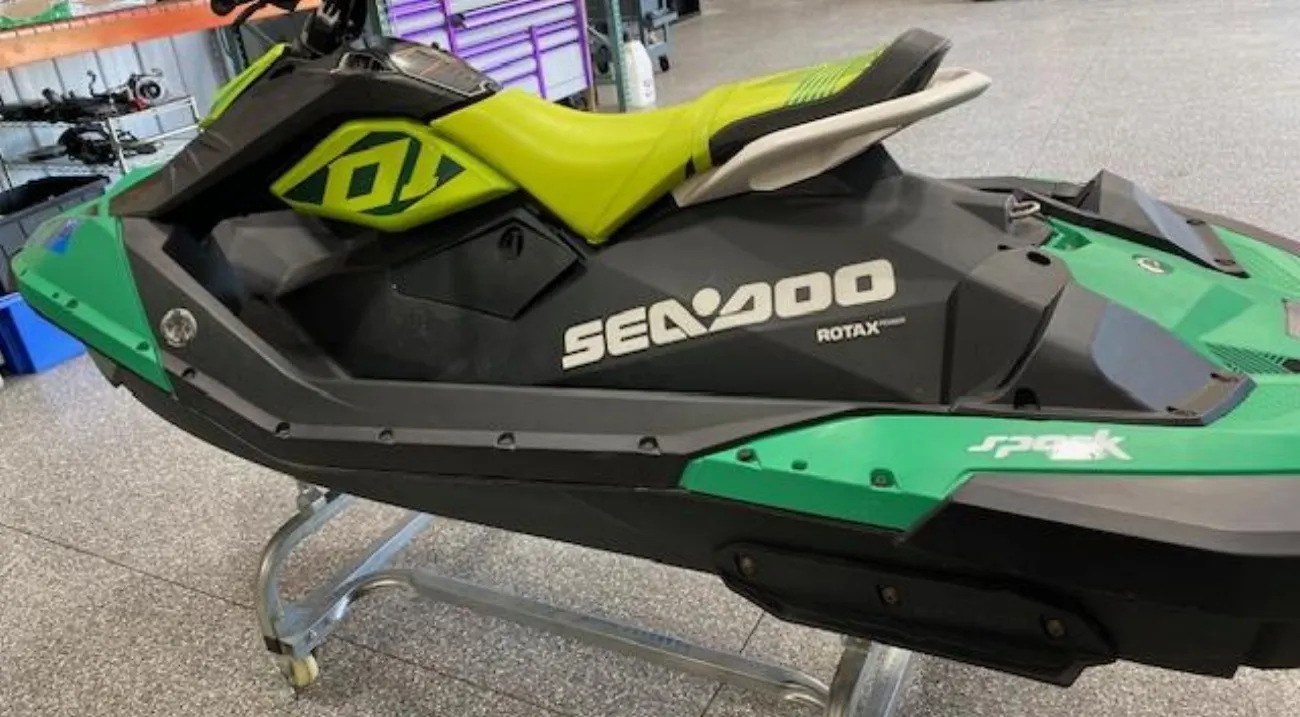
Remove the seat. Remove the (3) T30 screws around the fuel fill. Leave cap on.
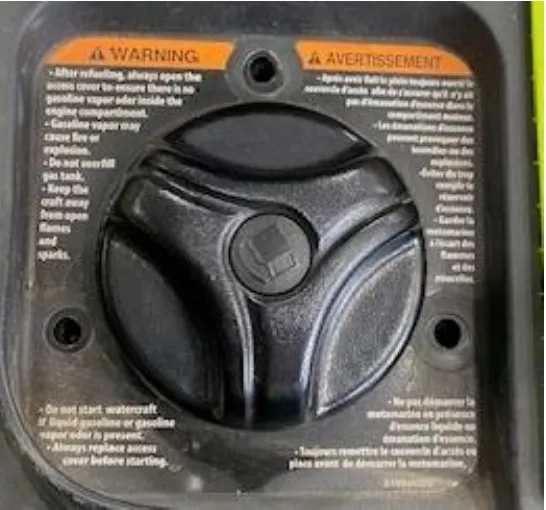
- Step 6
With a T30 socket, remove 23 screws holding the upper hull (black portion) on. (10) screws have a locknut underneath the lower hull. Use a 10mm socket.
Procedure
Spark Removal of OEM Parts
- Step 1
Make sure the battery terminals are disconnected.
- Step 2
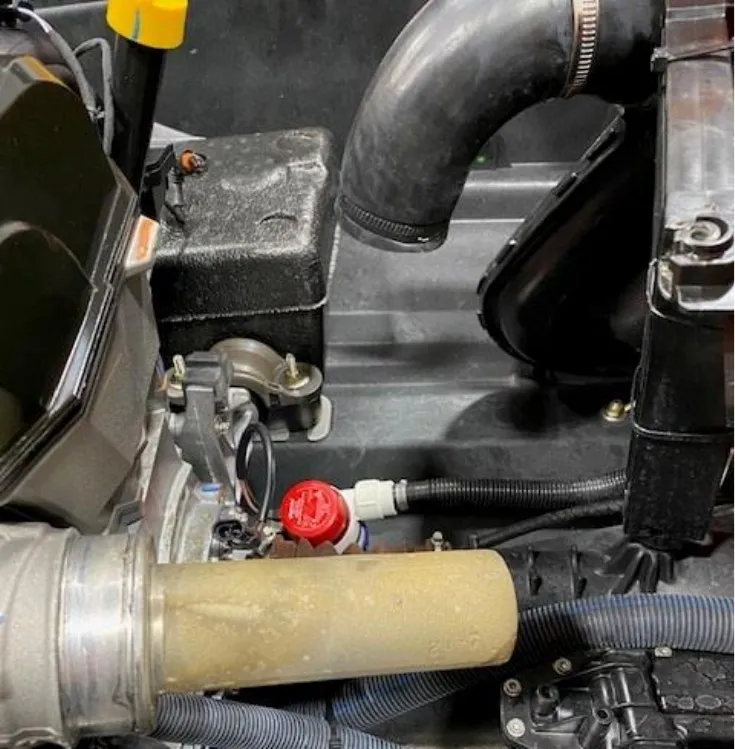
Remove the water box, (2) worm drive clamps and coupler from exhaust manifold to water box, (1) worm drive from water box to “J” pipe, (1) connector for exhaust temperature sensor, (1) zip tie holding the bilge pump connector.

- Step 3
Remove the exhaust manifold. Loosen (2) worm drives for water in/out and (9) manifold screws using an E10 socket.
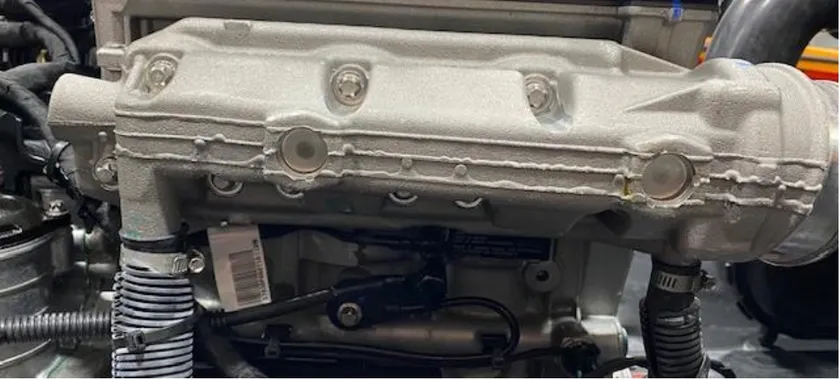
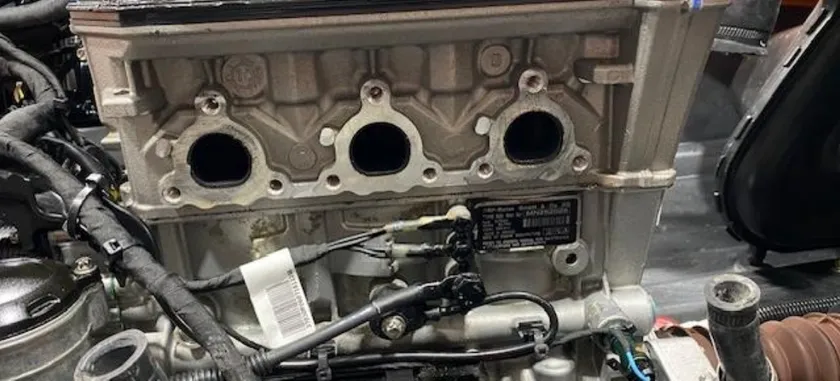
- Step 4
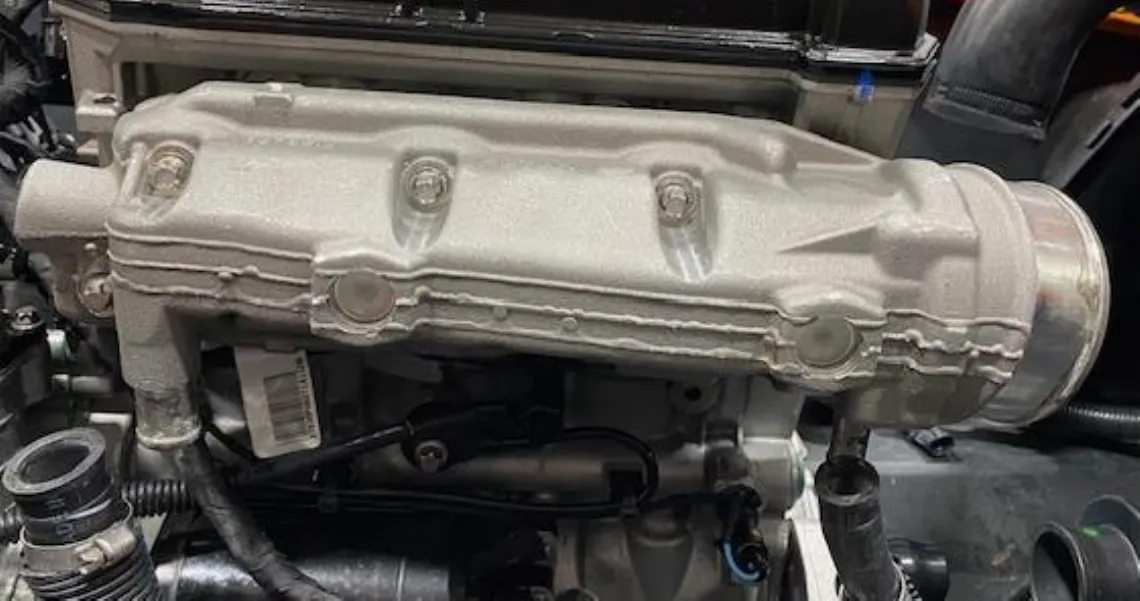
Place the exhaust manifold in a vice. Cut the 2.0” steel pipe off at the lip. See marking. Next file/sand the lip completely off. Test fitment in the turbocharger billet connector.
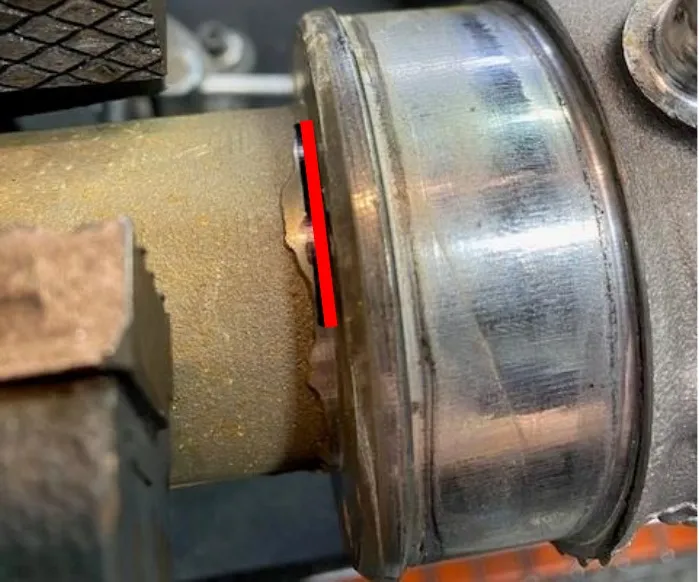
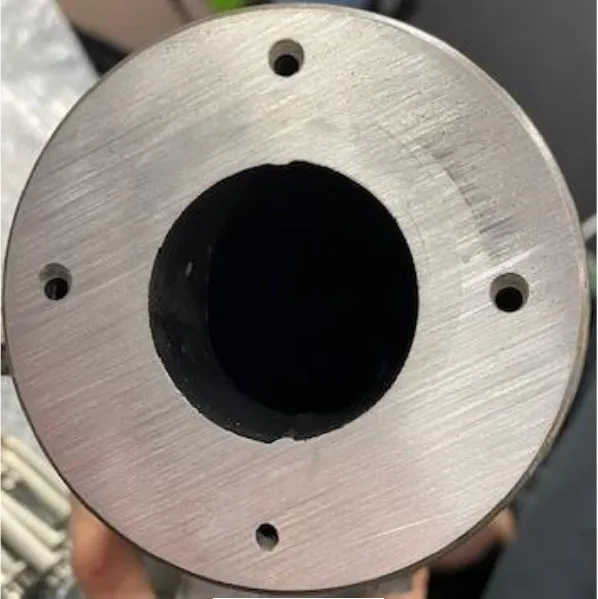
- Step 5
Reinstall the exhaust manifold with supplied gasket. Torque bolts to 17 ft lbs.
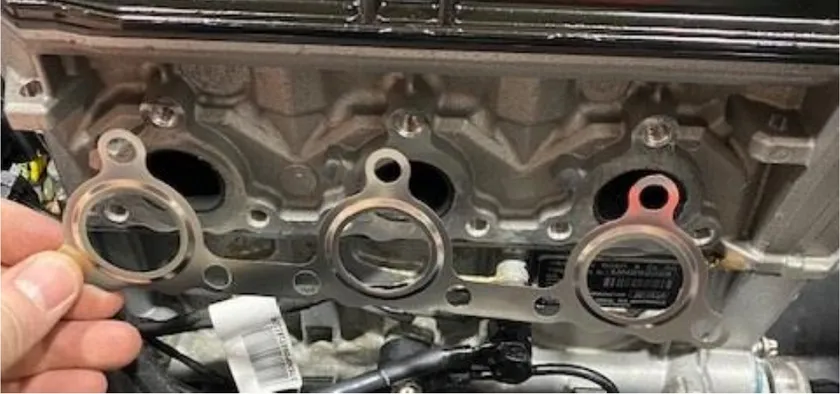
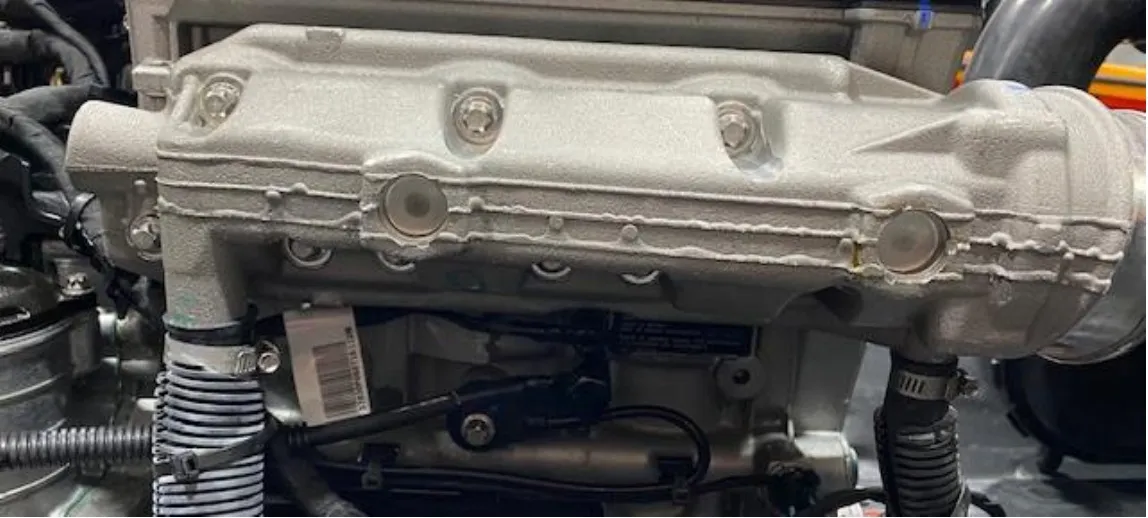
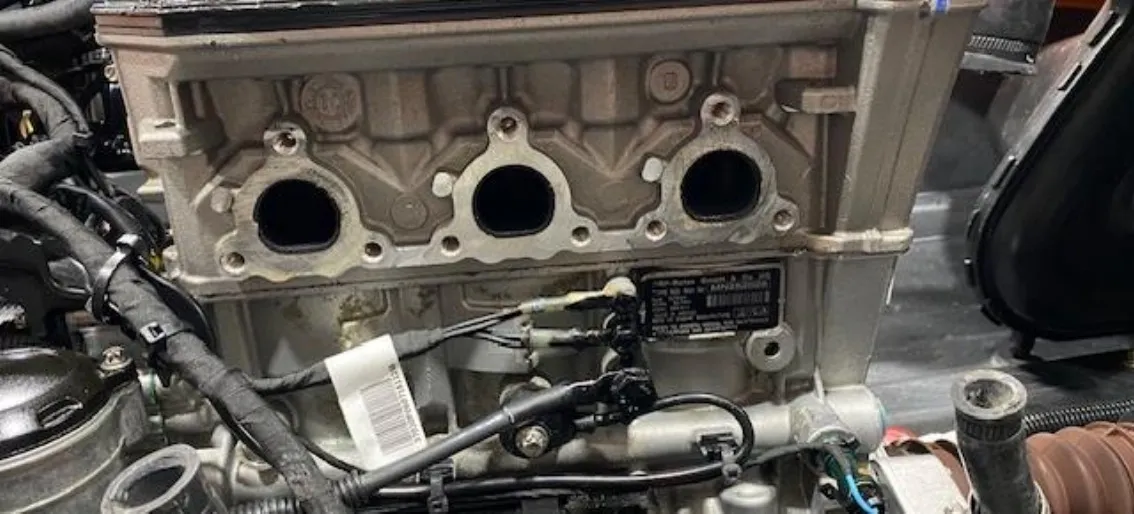
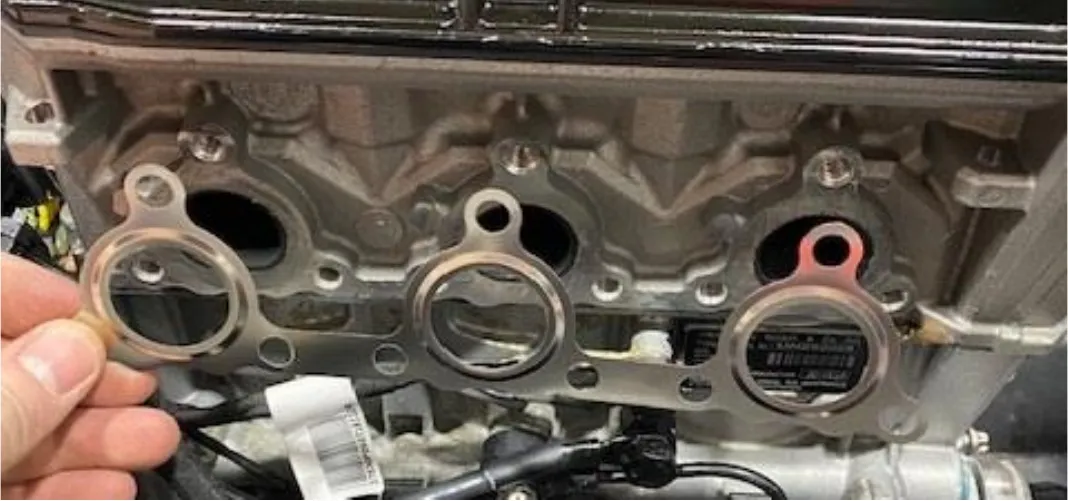
Leave water lines disconnected for now.
- Step 6
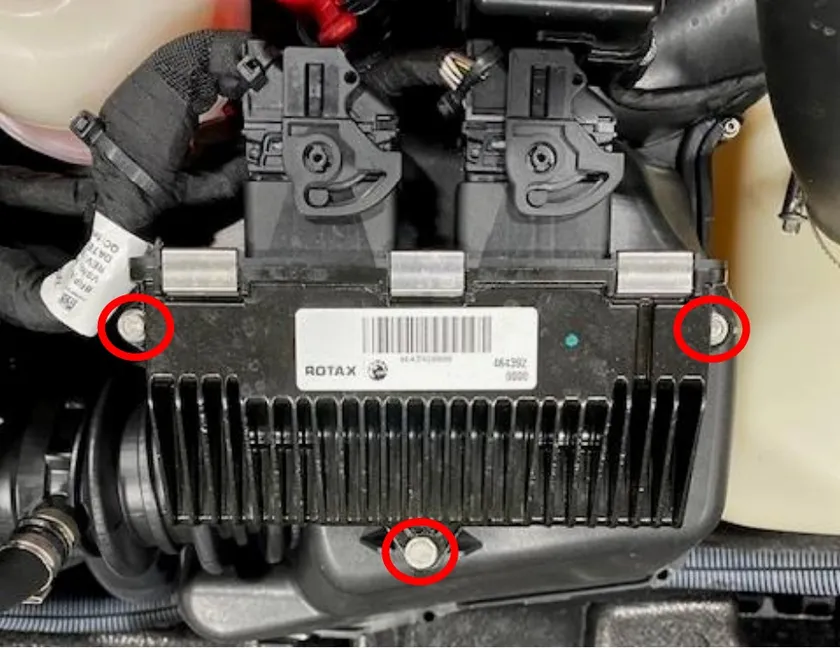
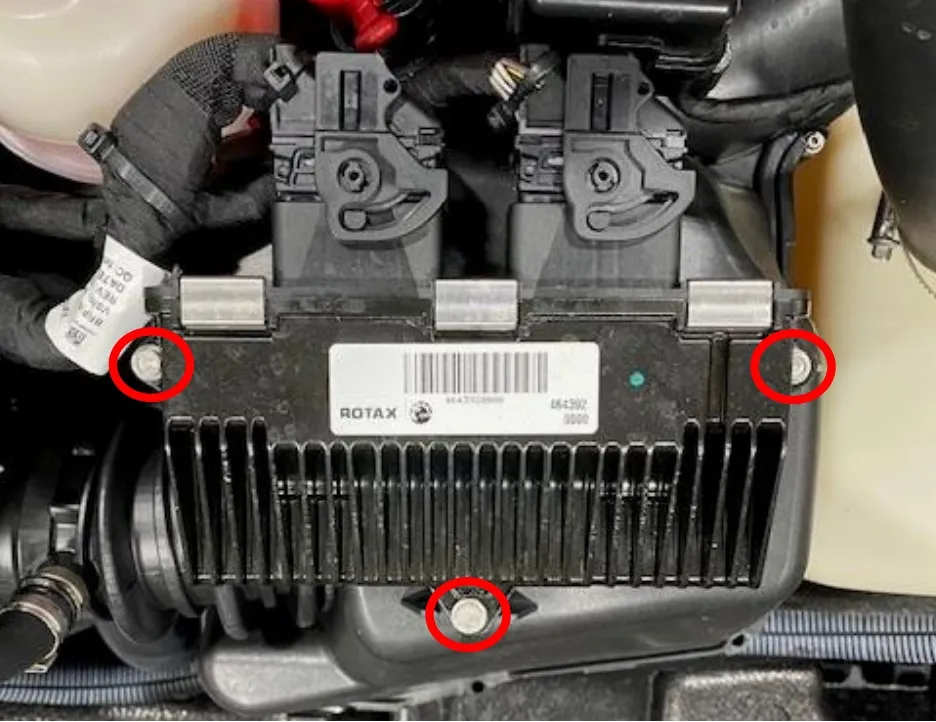
Remove the ECU, (3) 7mm screws and (2) ECU header connectors.
- Step 7
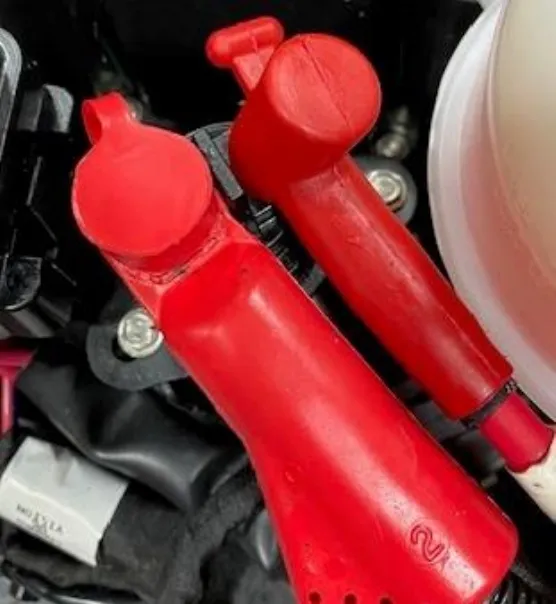
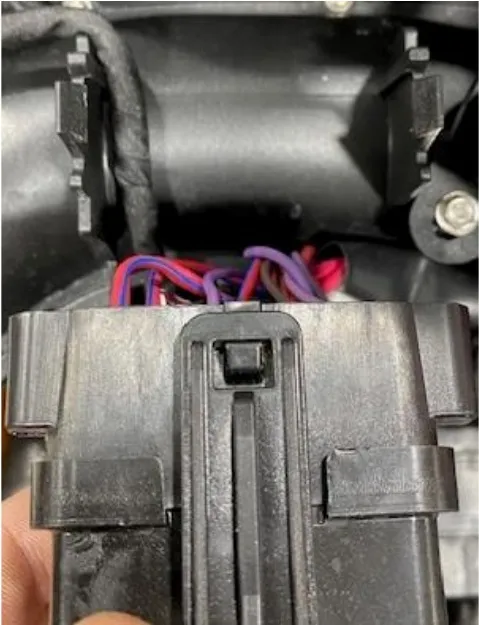
Remove the starter solenoid by removing (2) 7mm screws. Remove the fuse block by squeezing (2) clips together.
- Step 8
Remove the coolant reservoir by removing (1) 7mm screw and (1) clip on backside.
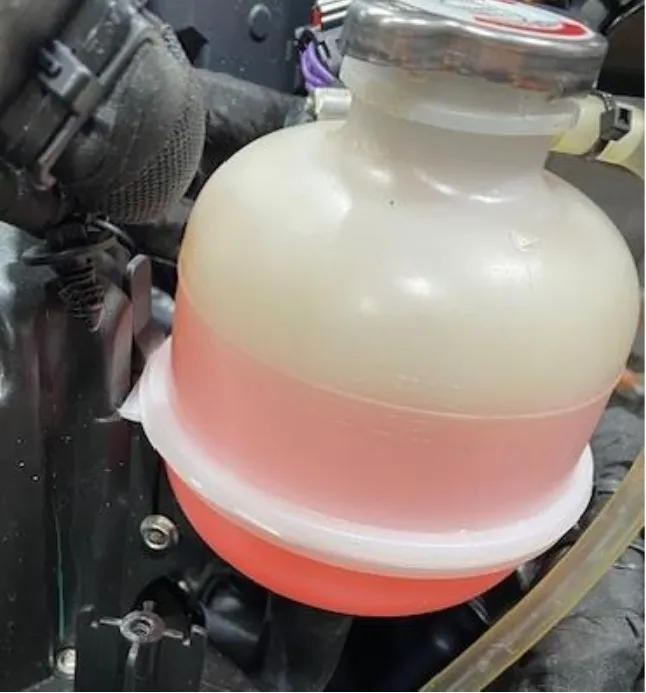
- Step 9
Remove the T-30 screw holding the valve cover fitting on. Reinstall the T30 screw loosely.
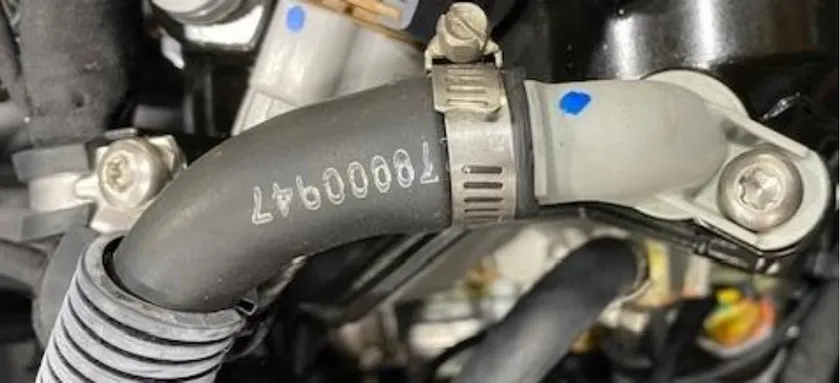
- Step 10
Remove the worm drive holding the intake boot onto the throttle body.
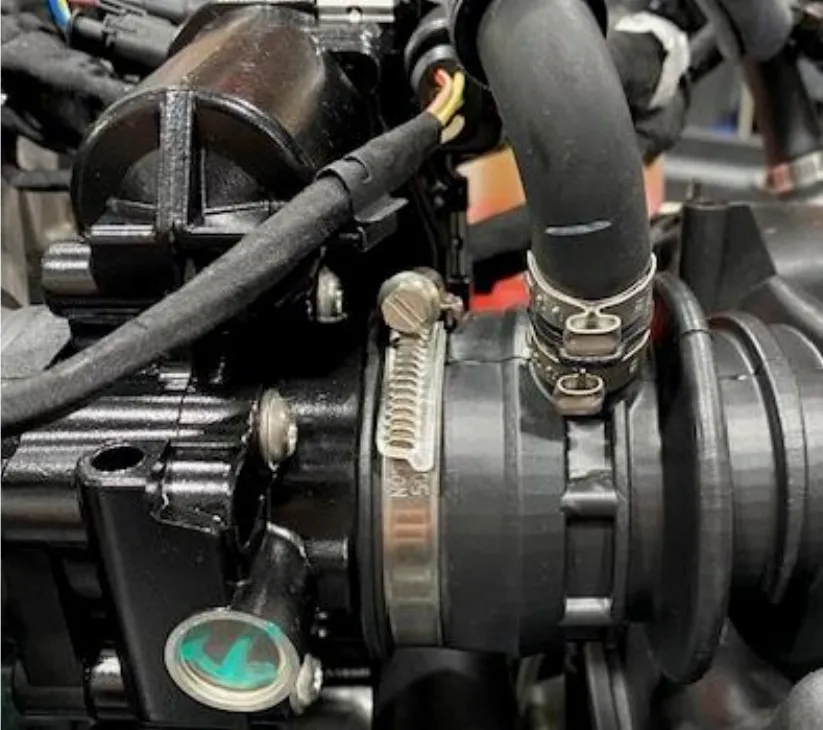
- Step 11
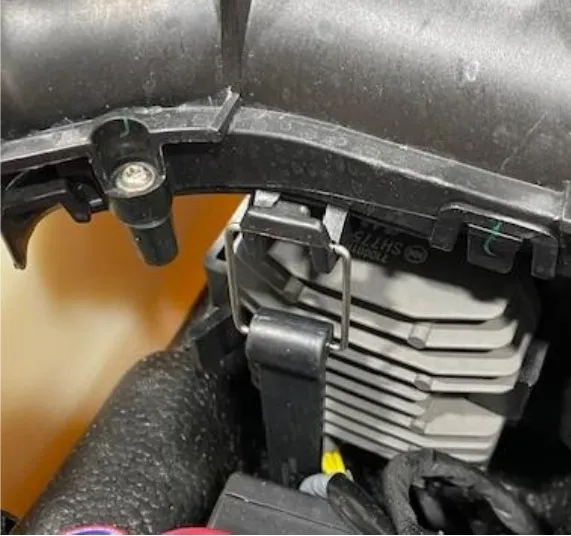
Remove (2) airbox straps, one of each side.
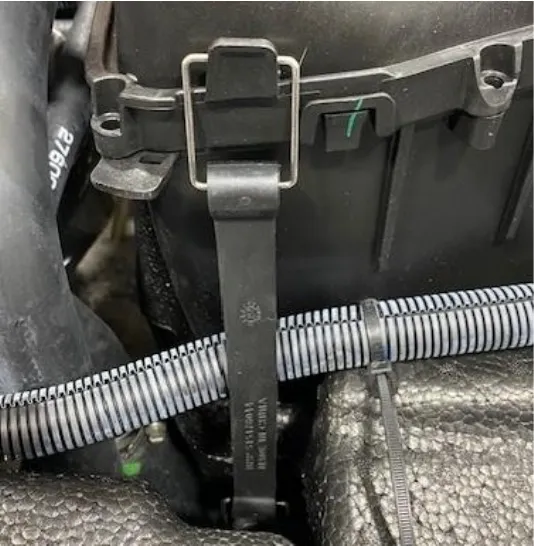
- Step 12
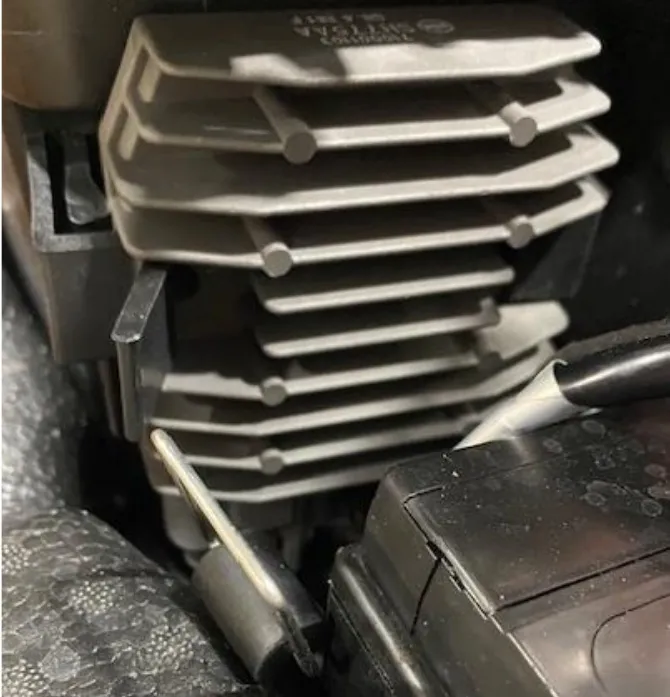
Remove the voltage regulator by pressing down on the clip. Unplug both black and grey connectors from the voltage regulator. Place to the side for now.
- Step 13
Remove the diagnostic port and let dangle for now.

- Step 14
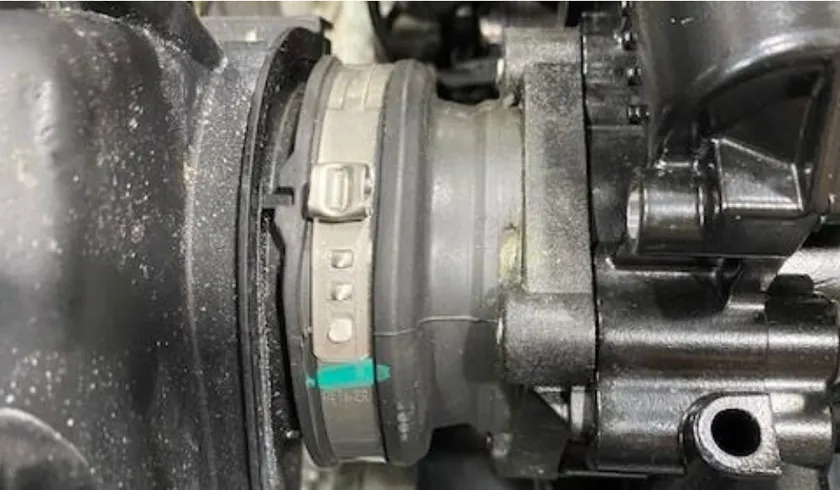
Remove the pinch clamp from the throttle body boot to plenum. Discard.
- Step 15
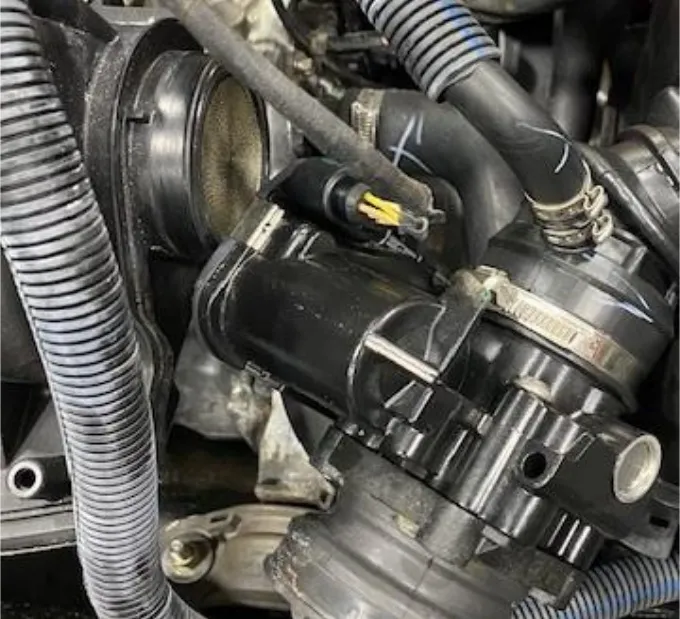
Pull the throttle body boot off the plenum. Located in the plenum is the flame arrestor.
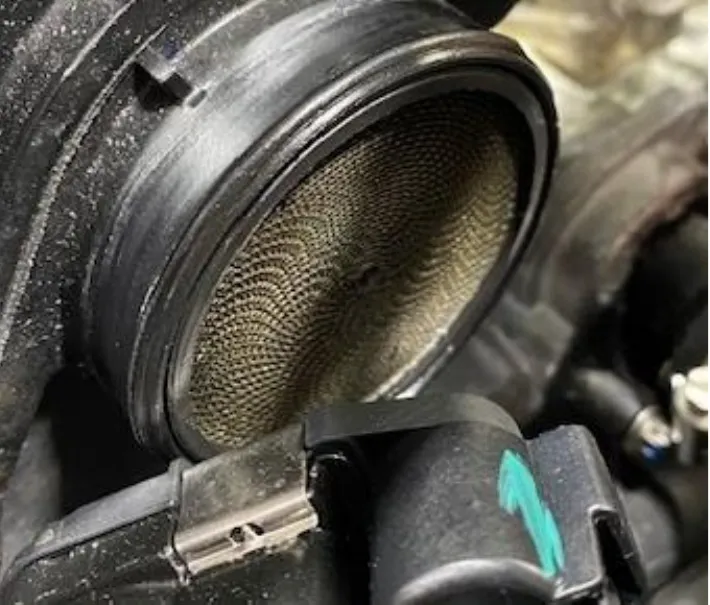
- Step 16
Remove the flame arrestor and seal.
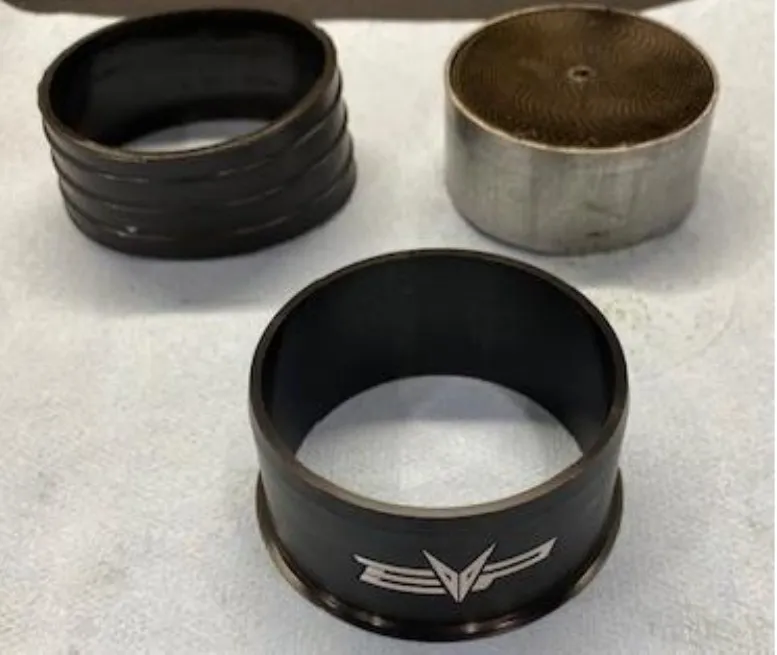
- Step 17
Install the ribbon delete into the plenum until it bottoms out. Reinstall the throttle body boot and supplied clamp. No seal, use supplied 60-80 worm drive clamp. Install (2) zip ties holding the fuel hose to plenum.
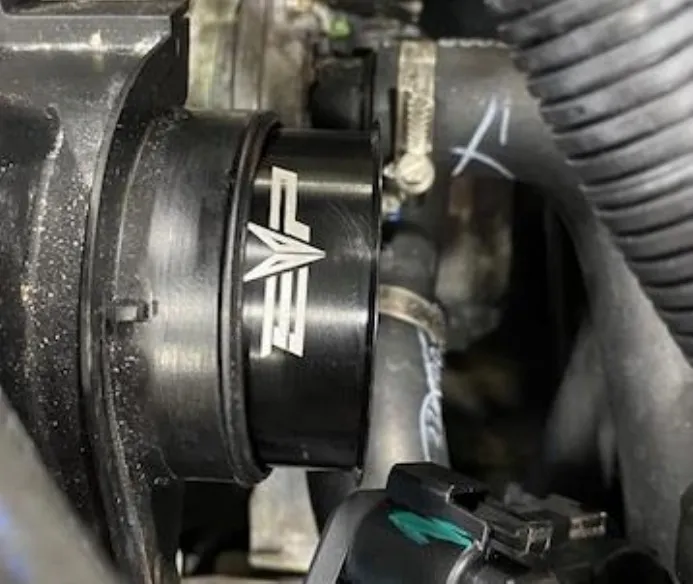
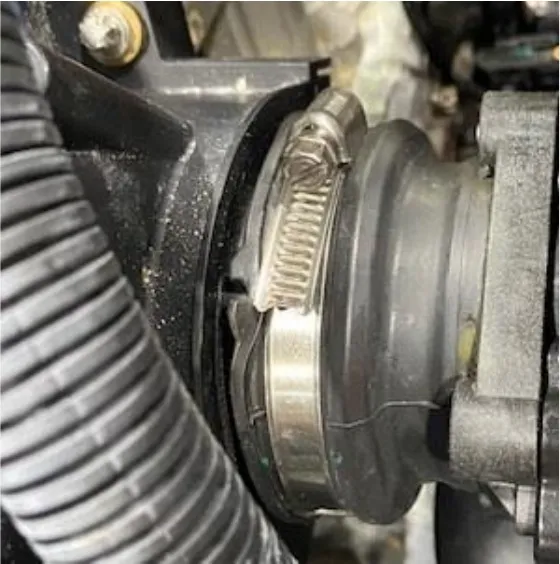
- Step 18
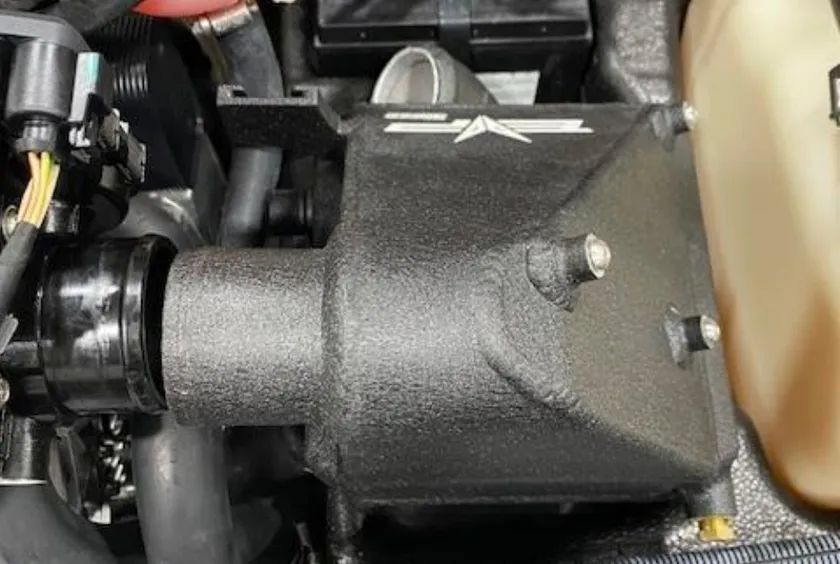
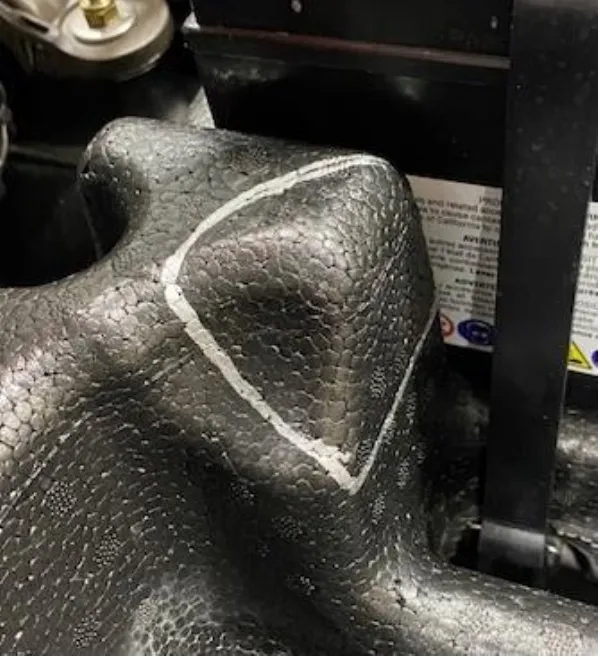
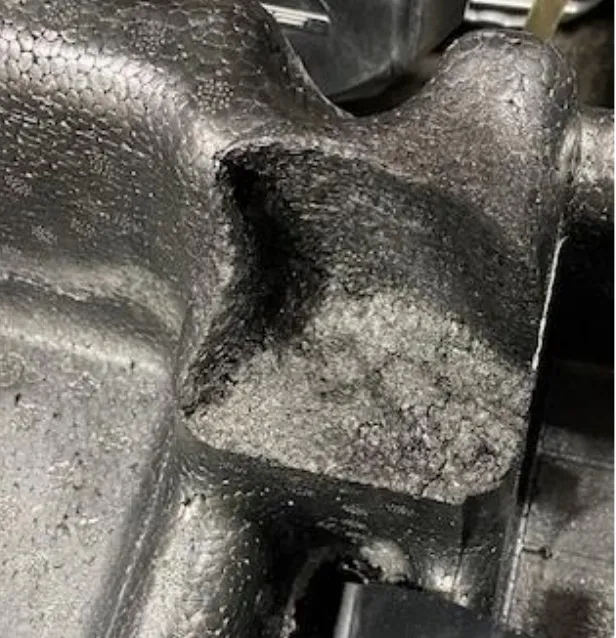
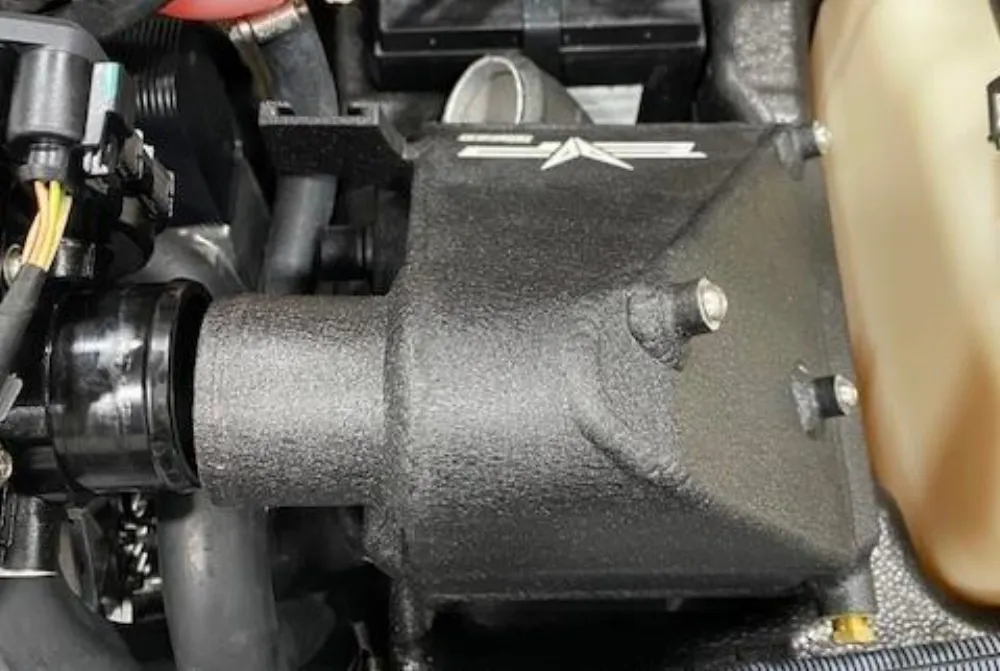
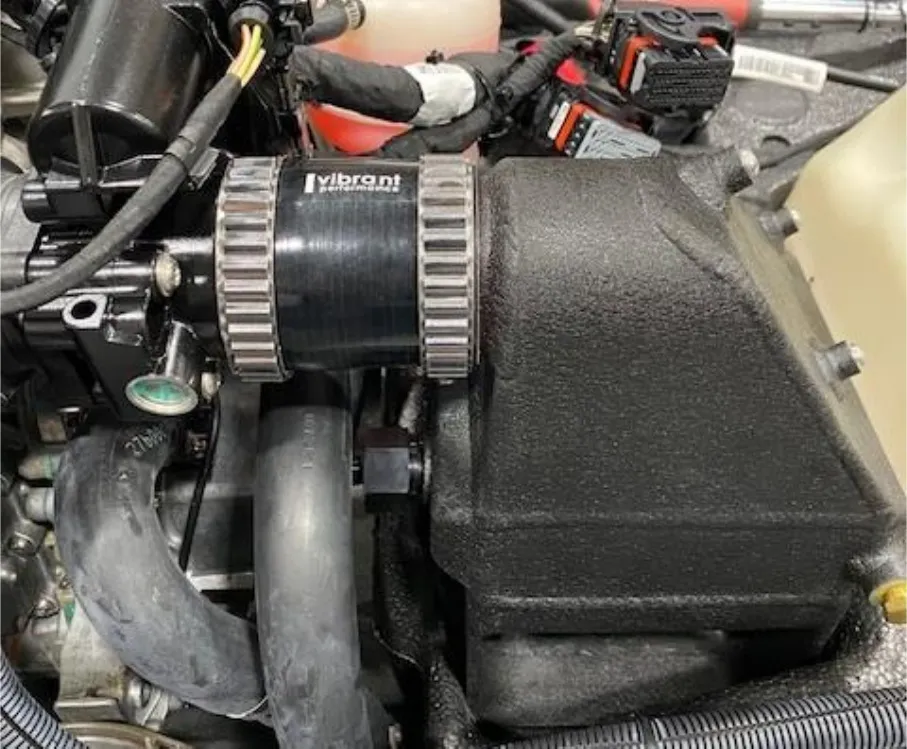
Install the intercooler where the airbox was located, make a mark around the inlet pipe because this foam will need to be tripped. Make it large enough for silicone and a clamp.
 Note
it is best to cut foam with a hot knife.
- Step 19
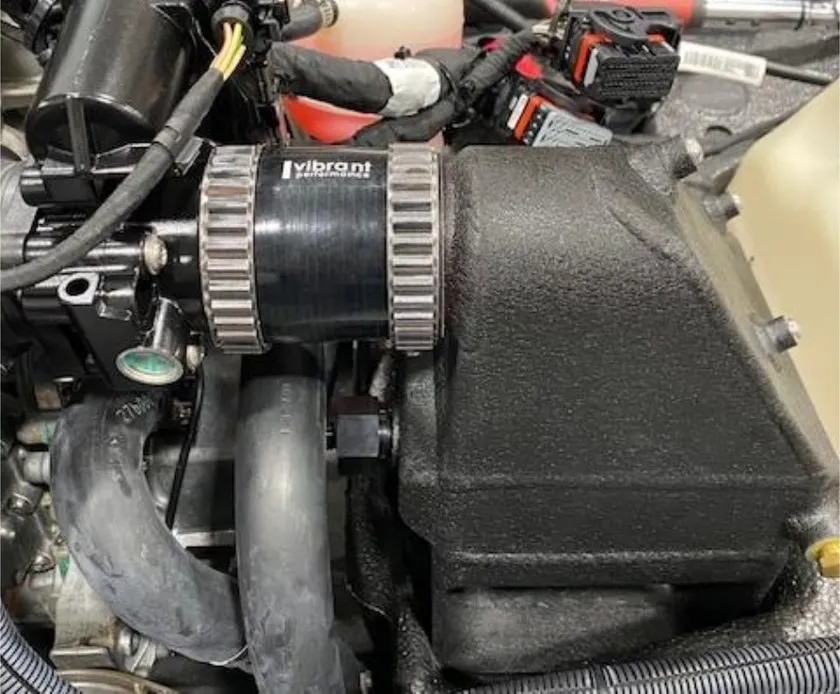
Install the 2.25” x 3.0” coupler between the intercooler exit and throttle body. Use (2) 32 constant tension clamps.
- Step 20
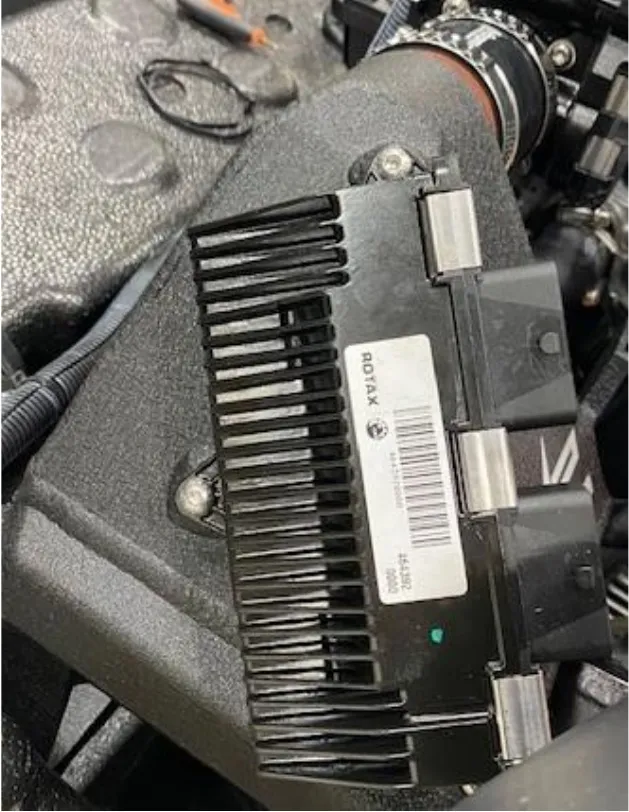
Install the ECU onto the front of the intercooler, use supplied M6 screws. Cut the zip tie holding the two ECU connectors together. Connect to ECU.

- Step 21
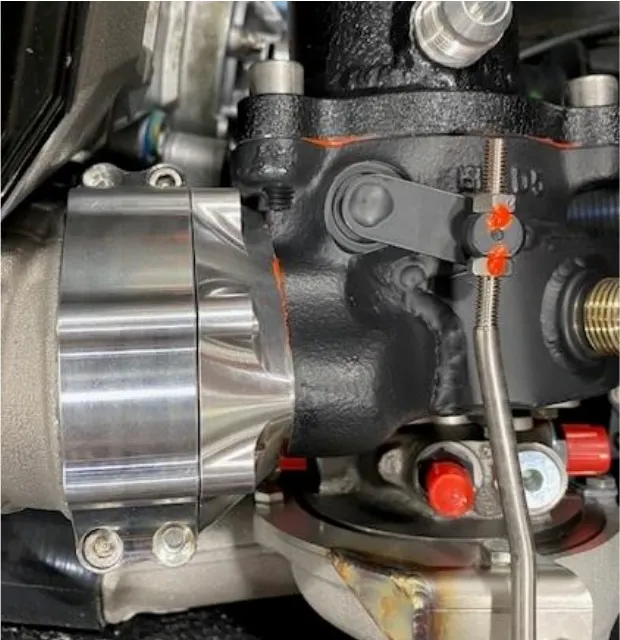
Loosely mount the turbocharger to the exhaust manifold. You can see the compressor housing will touch the foam.
- Step 22
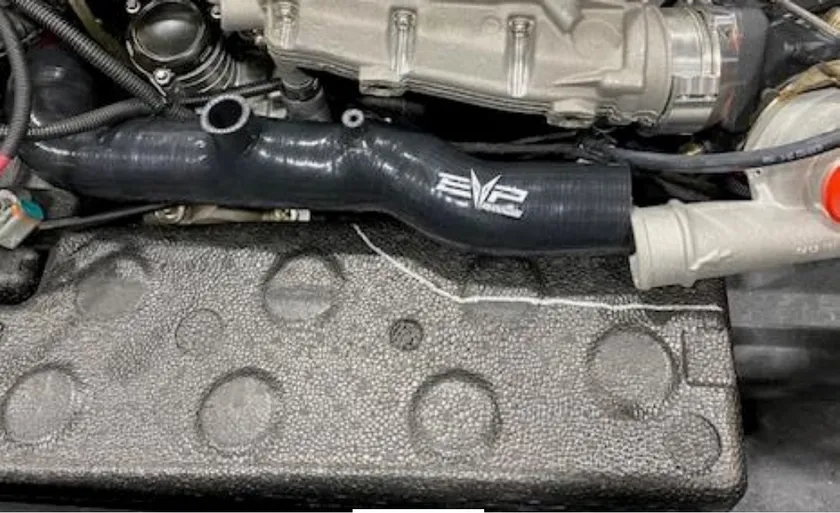
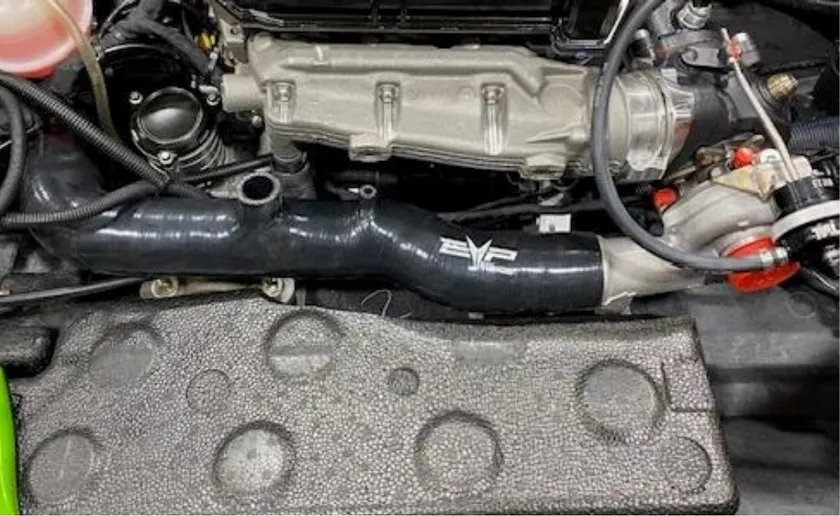
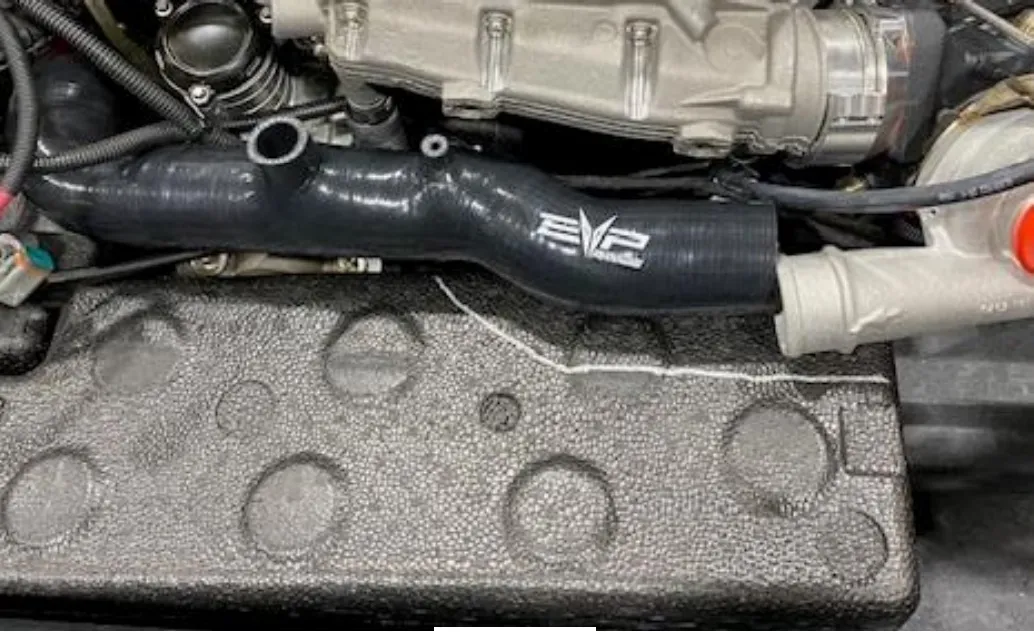
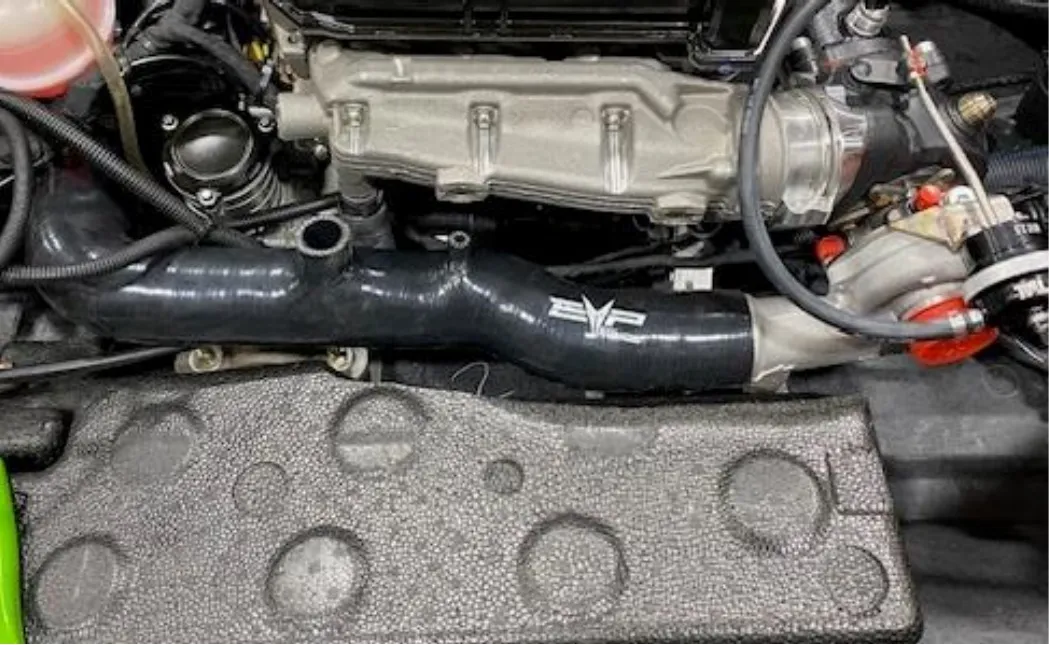
Install the charge tube from the intercooler to turbocharger. They won’t align perfectly. With a sharpie outline the turbocharger and charge tube. Cut the foam at a 45-degree angle. Test fit as you go.
- Step 23
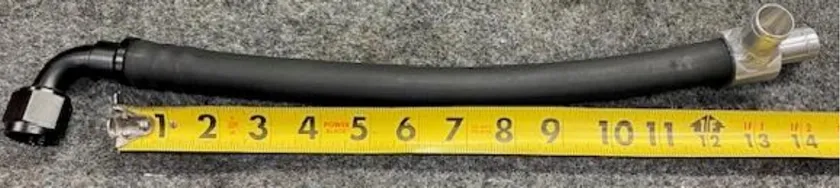
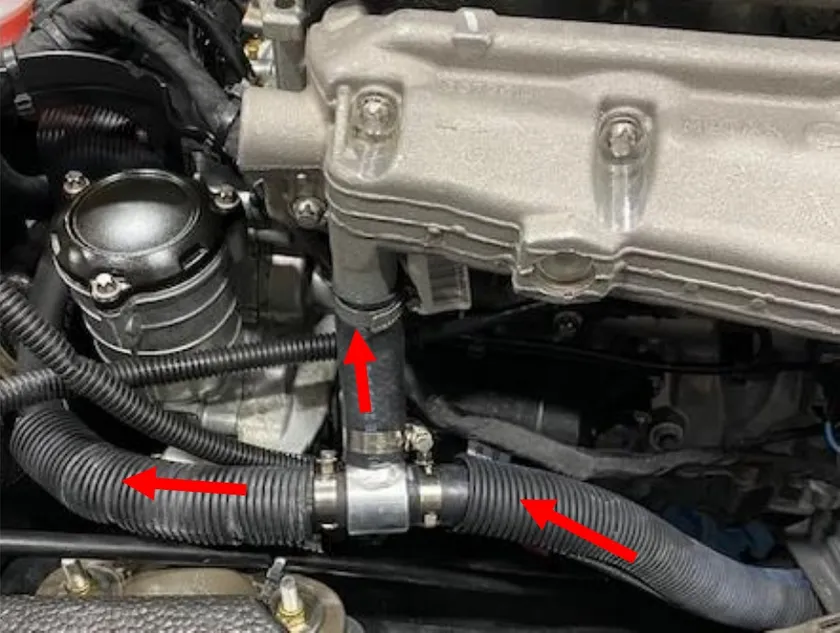
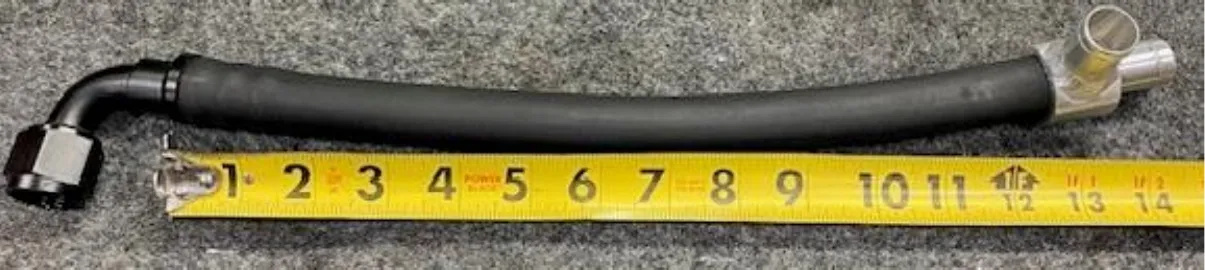
Locate the water pickup to intercooler hose, (1) 10AN 90 degree fitting and (1) “T”.
- Step 24
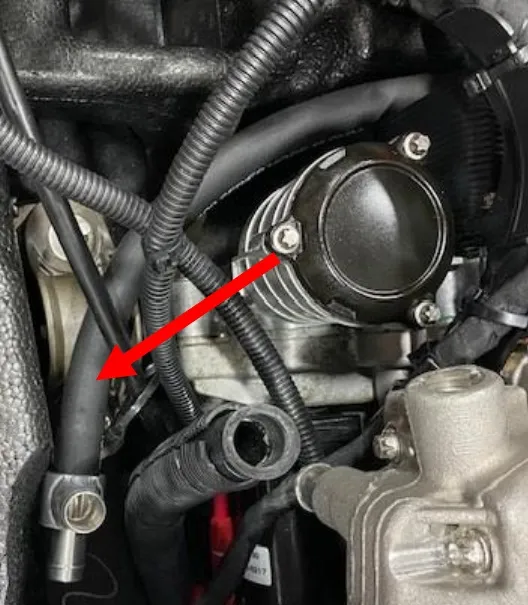
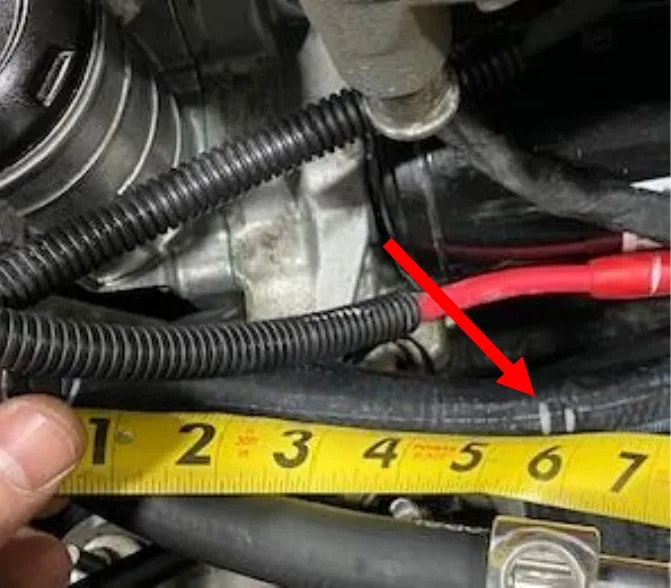
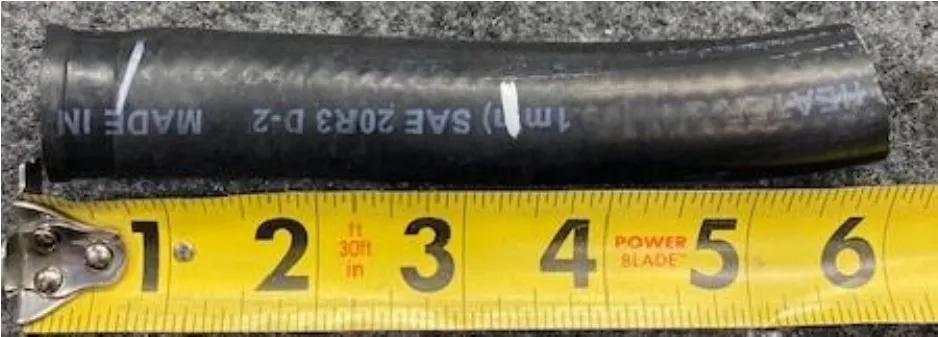
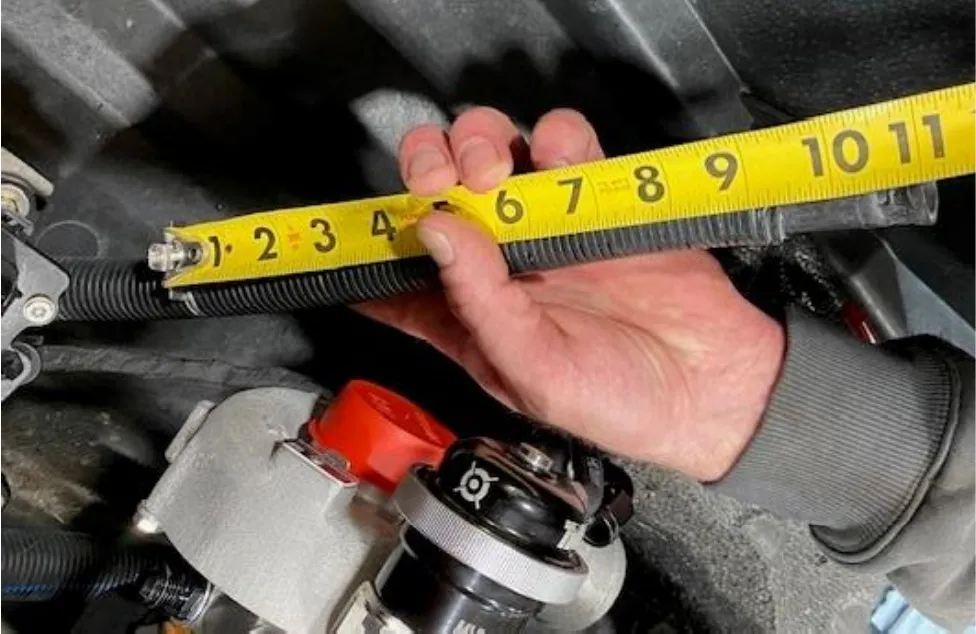
Install the 10AN 90 degree fitting onto the intercooler, route the “T” around the oil filter housing towards the exhaust manifold. Locate the water pickup hose that was connected to the exhaust manifold (left side). Cut 5-3/4” off the hose. Cut 7.0” of sleeving off.
- Step 25
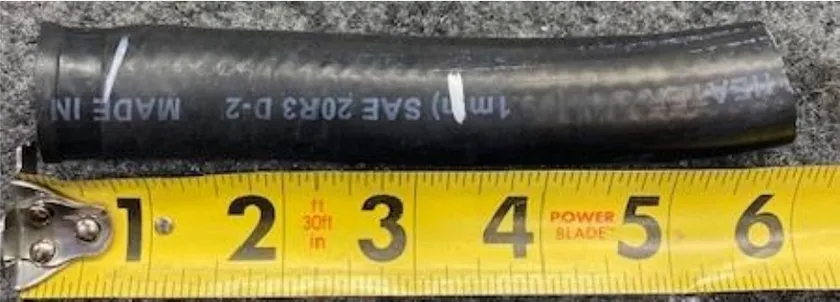
The hose you just cut, cut it down to 3-1/2” in length.
- Step 26
Install the water pick up hose to the right side of the “T” fitting. Install the 3-1/2” hose to the top of the “T” fitting. Install the 7.0” of sleeving onto the hose going to the intercooler. Clamp all hoses to the “T” with supplied 16-25mm worm drive. Clamp the top hose to the exhaust manifold reusing the OEM worm drive.
- Step 27
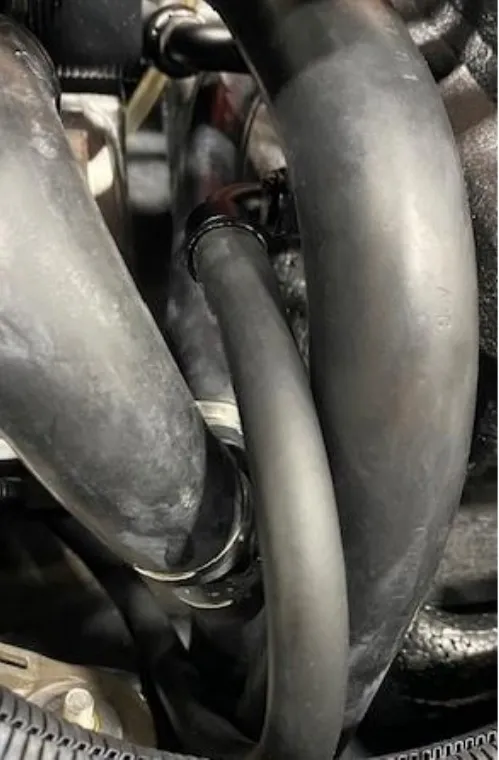
Locate the intercooler exit to turbocharger hose, 41” in length, (2) 6AN 90 Degree fittings. Install one fitting onto the intercooler exit and run underneath the engine back towards the turbocharger.
- Step 28
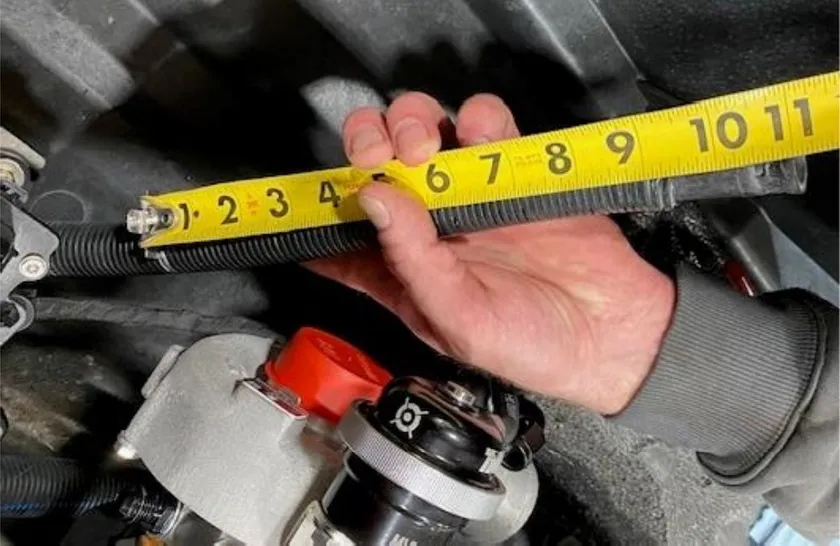
Locate the exhaust manifold exit hose, cut 11.00” of hose off and 9.0” of sleeving off.
- Step 29
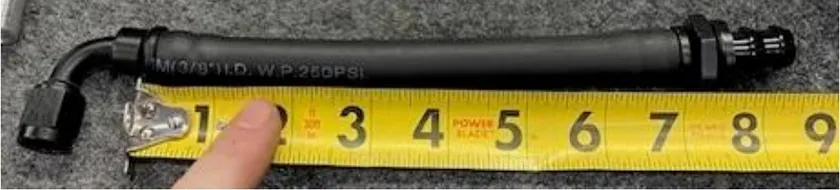
Locate the 7.0” long 6AN hose with 6AN 90 Degree fitting and 3/8-1/2” coupler.
- Step 30
Install this hose to the exit hose, reuse OEM 16-27mm worm drive clamp.
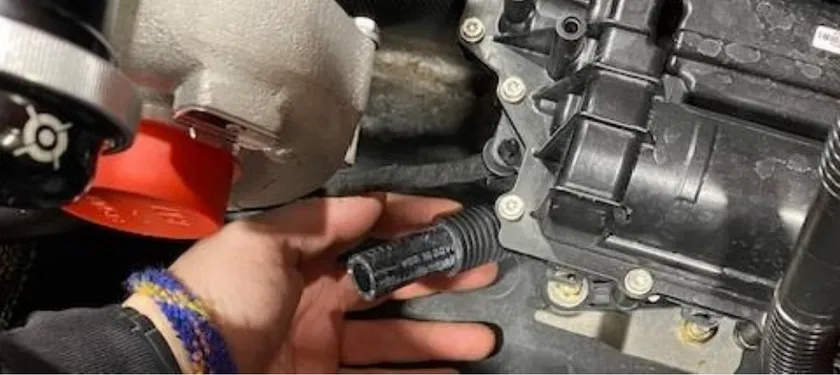
- Step 31
You can remove the turbocharger and place it on a work bench. You are left with both inlet and exit water feed lines for the turbocharger.
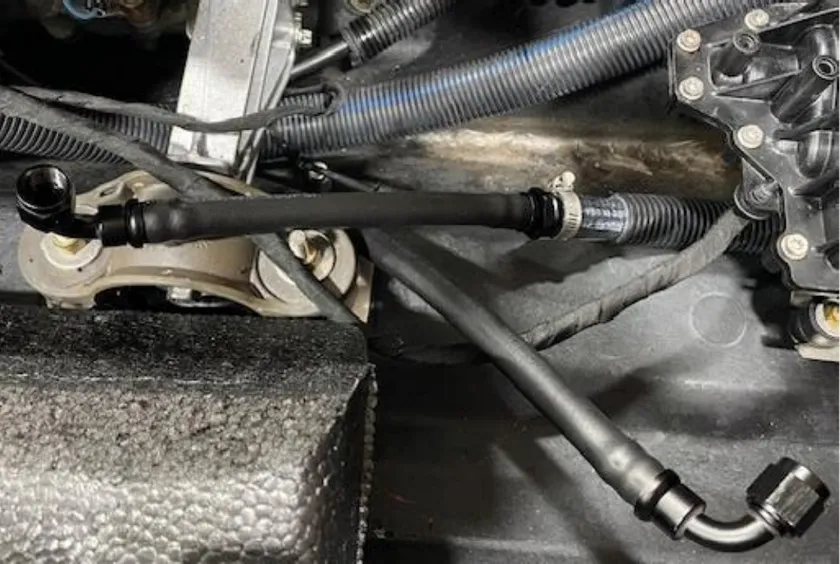
- Step 32
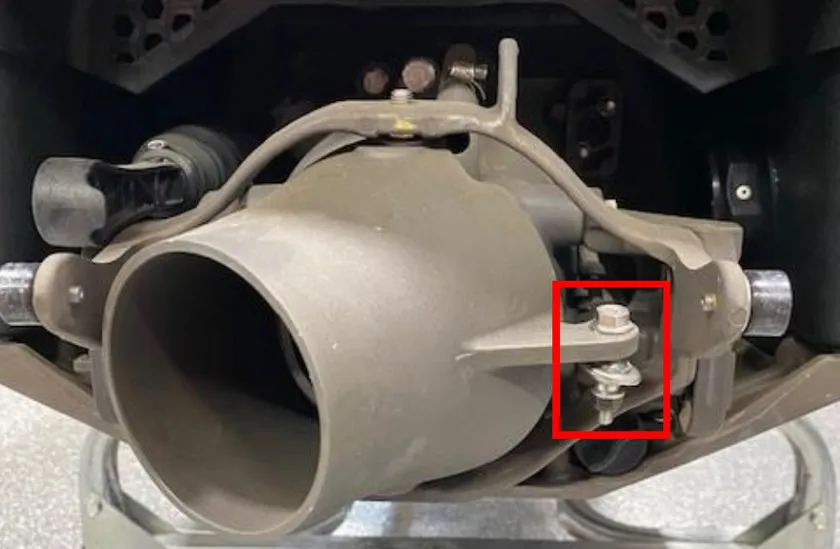
If your spark is equipped with IBR system, remove the (3) 13mm head screws. The top left screw has a nyloc nut on the back. Do not lose the stainless-steel bushings.
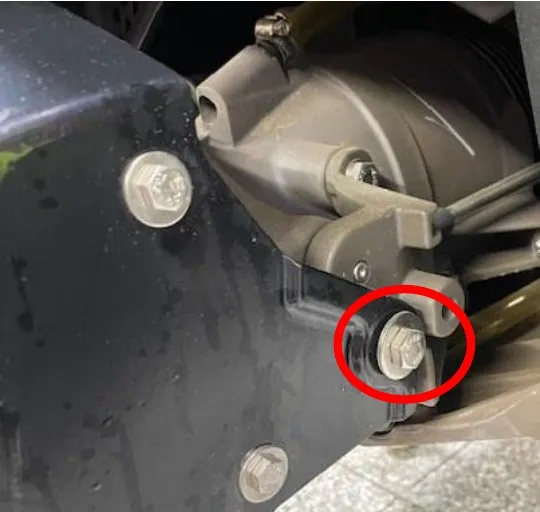
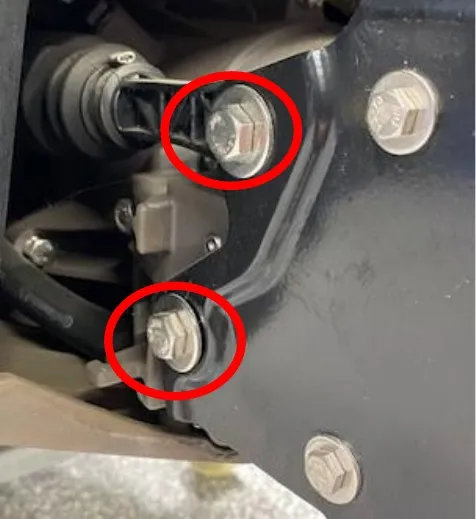
- Step 33
Turn the nozzle and remove the steering linkage. Use 2 10mm sockets.
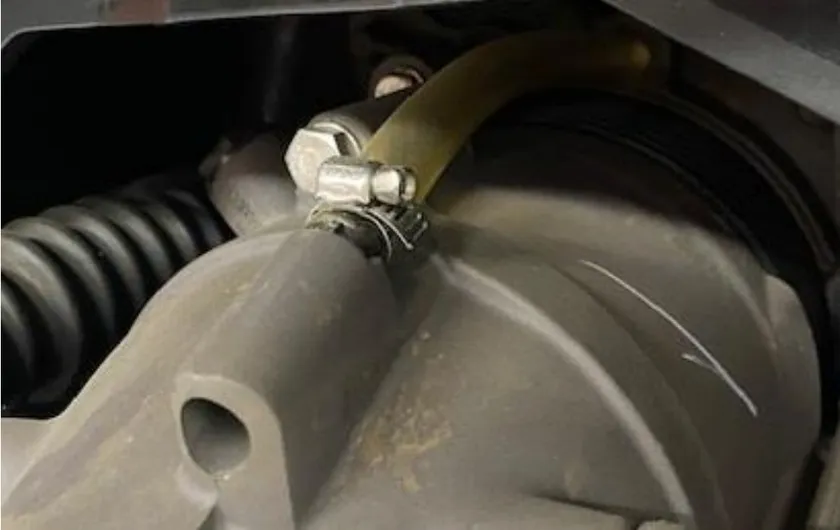
- Step 34
With a 1/4" socket loosen the worm drive holding the siphon tube onto the jet pump. Remove the siphon tube.
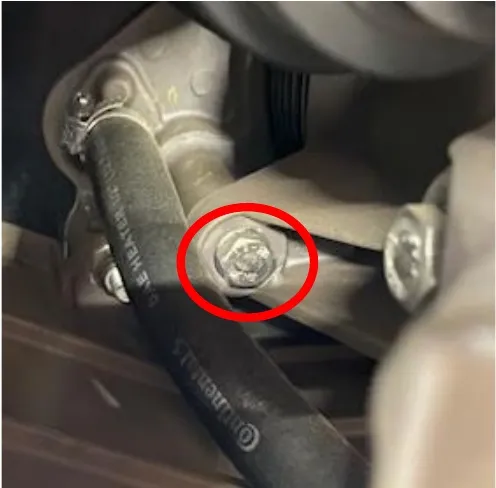
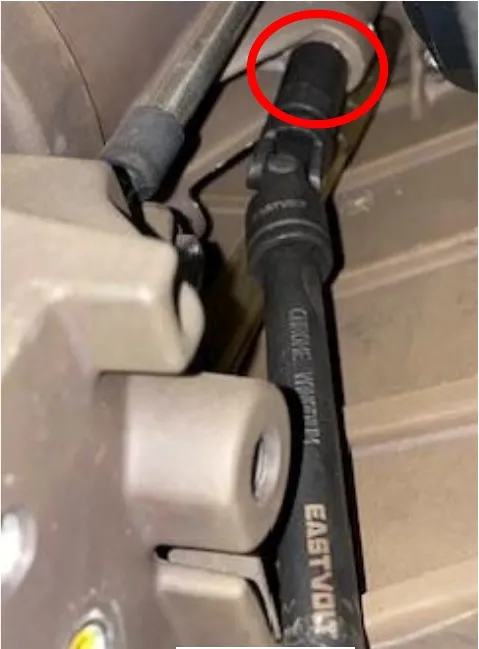
- Step 35
With a 12” extension and swivel you can access the (3) jet pump screws.

- Step 36
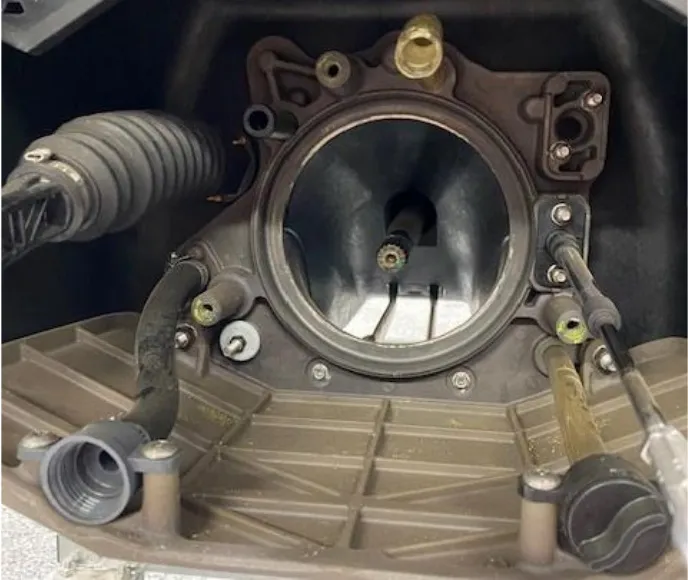
Once hardware is removed, wiggle the jet pump out of the hull and driveshaft.
- Step 37
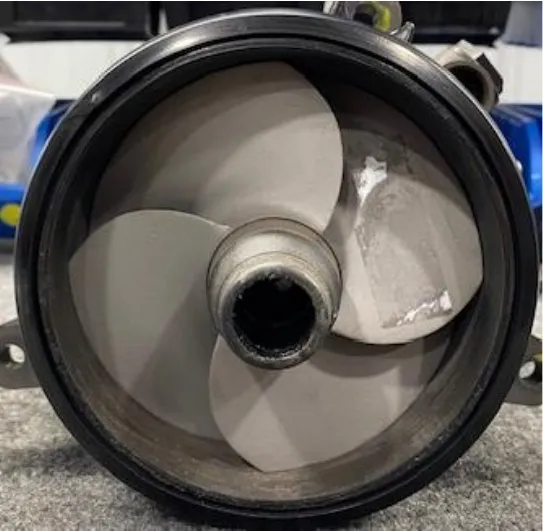
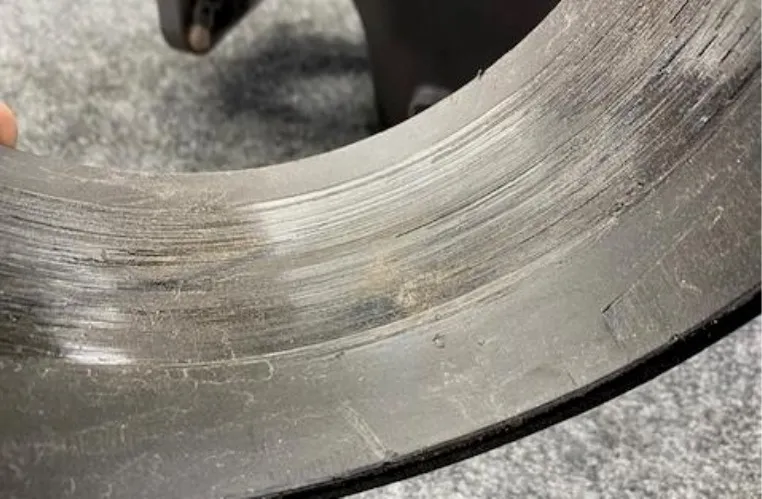
With the jet pump on a work area, remove and inspect the wear ring.
- Step 38
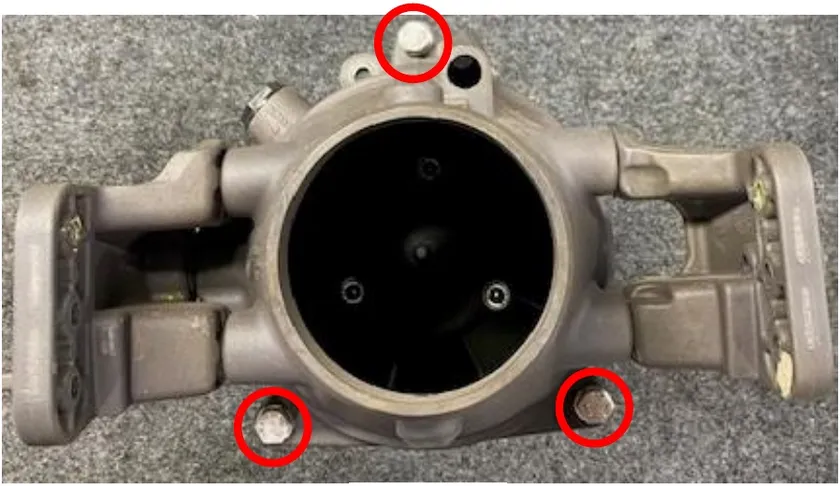
Loosen and remove the (3) venturi screws. Remove venturi from pump.
- Step 39
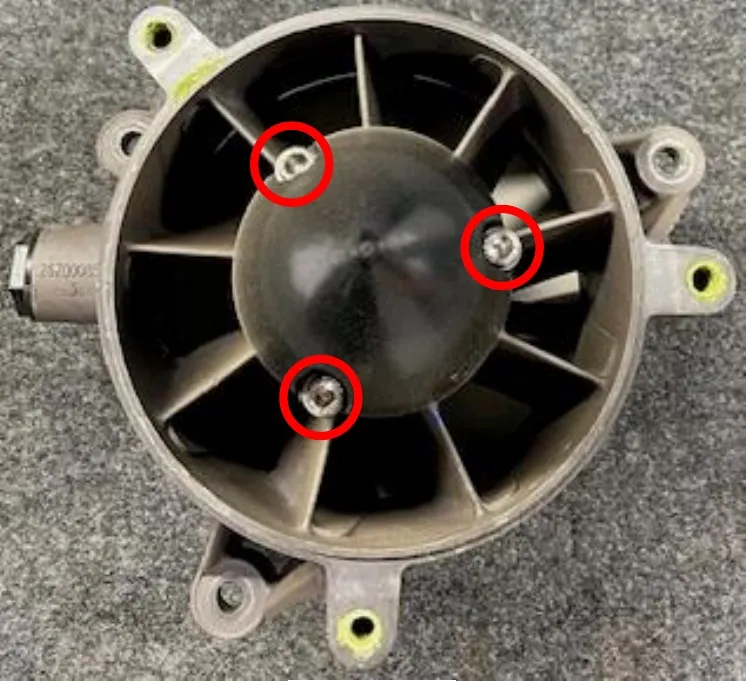
Remove the (3) Allen screws holding the impeller cone on. 5mm Allen.
- Step 40
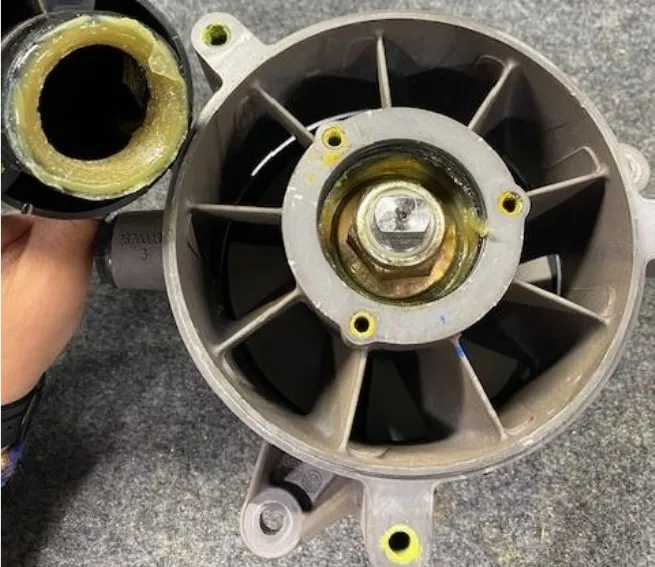
Remove the impeller cone, you may need to pry with a screwdriver.
- Step 41
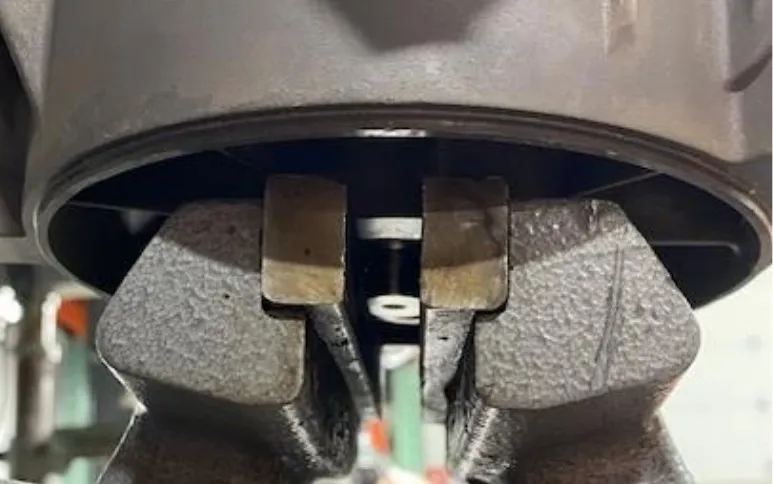
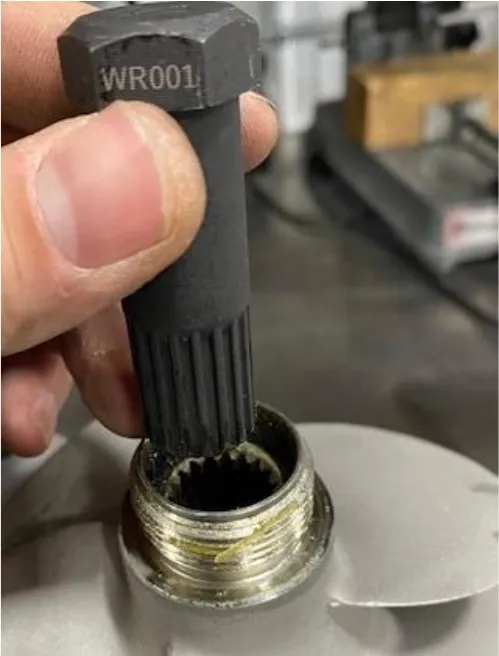
Install the two flat spots into a vice. Clamp tight. Install the impeller spline tool WR001 Into the impeller. Loosen the impeller with a breaker bar. Spin the impeller off.
- Step 42
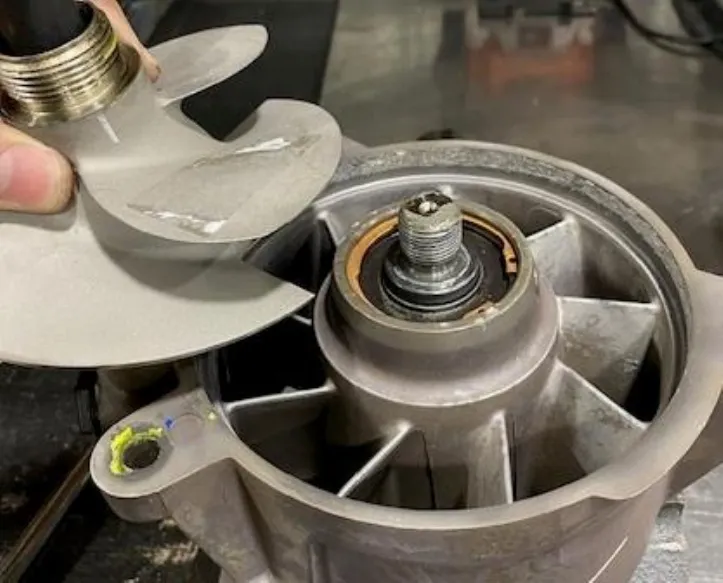
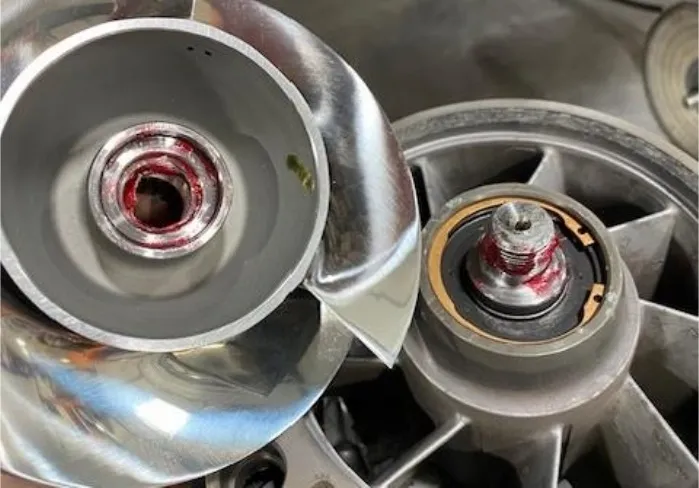
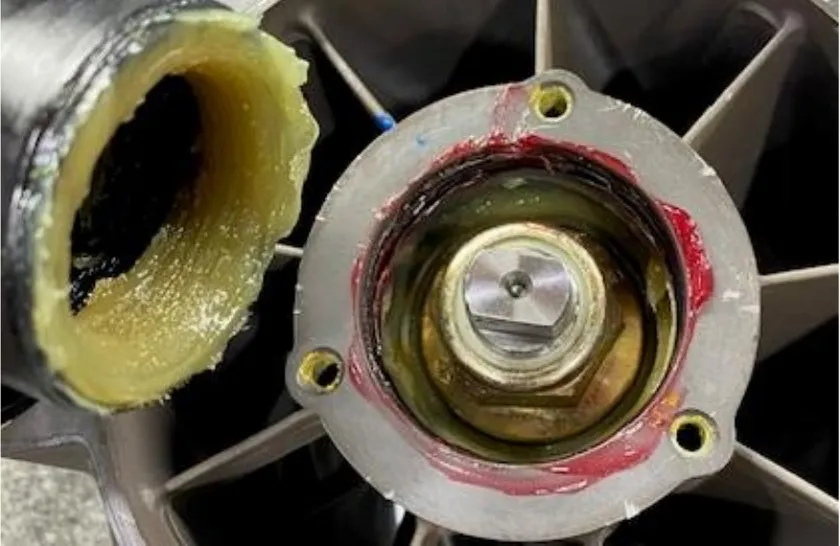
With the impeller removed, grease up the jet pump shaft, threads and new impeller O-ring and threads.
- Step 43
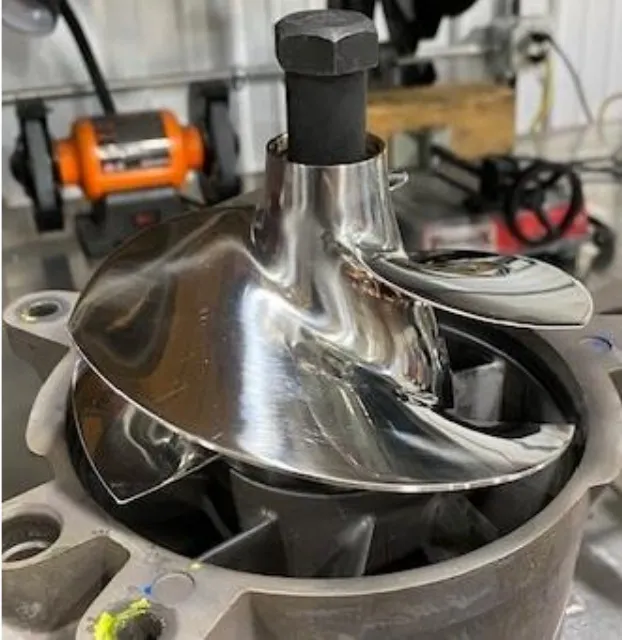
Install the new impeller and spine onto the jet pump threads. Install the spline tool and torque down to 92 ft-lbs.
- Step 44
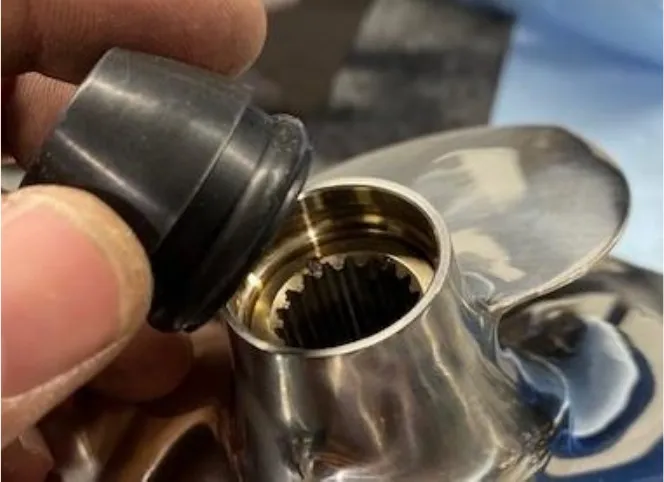
Remove the spline tool, grease the impeller splines and rubber boot. Install the rubber boot.
- Step 45
Grease the bottom of the jet pump, o rings and cone. Reinstall the cone. Torque screws to 80 in-lbs and apply blue Loctite.
- Step 46
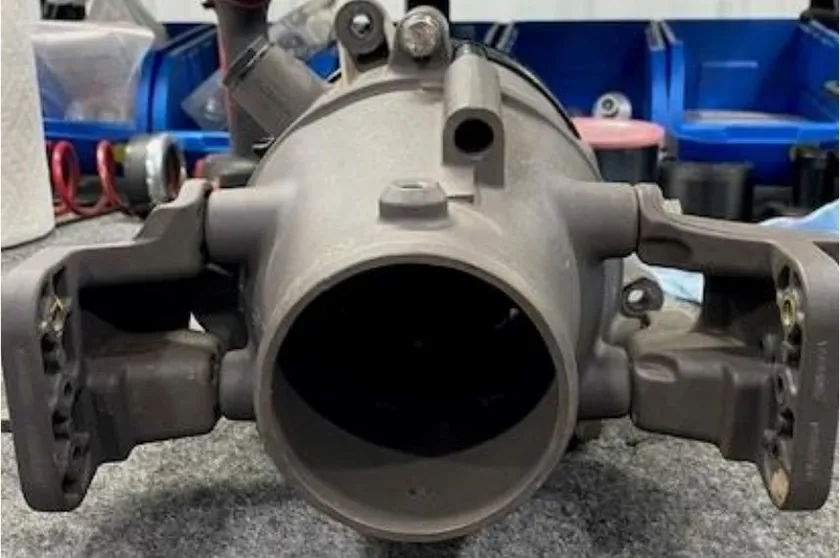
Reinstall the venturi onto the jet pump. Torque to 18 ft-lbs and apply blue Loctite to the threads.
- Step 47
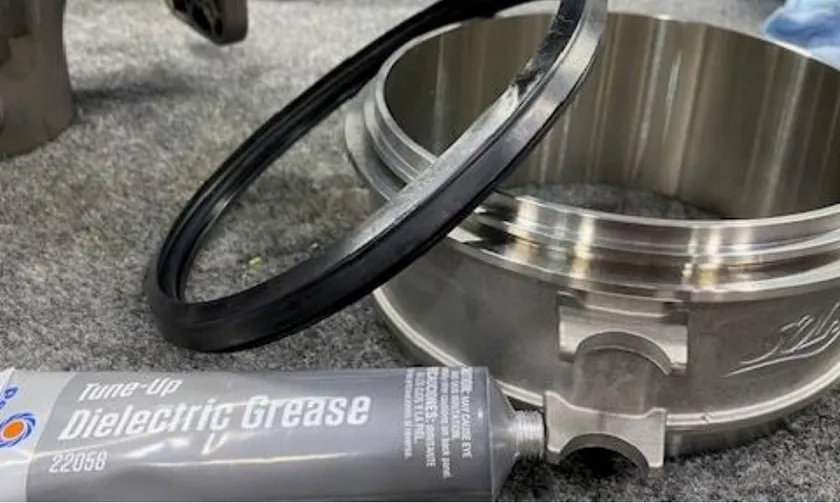
Remove the OEM wear ring seal. Apply grease on the o ring and install onto the new stainless steel wear ring.
- Step 48
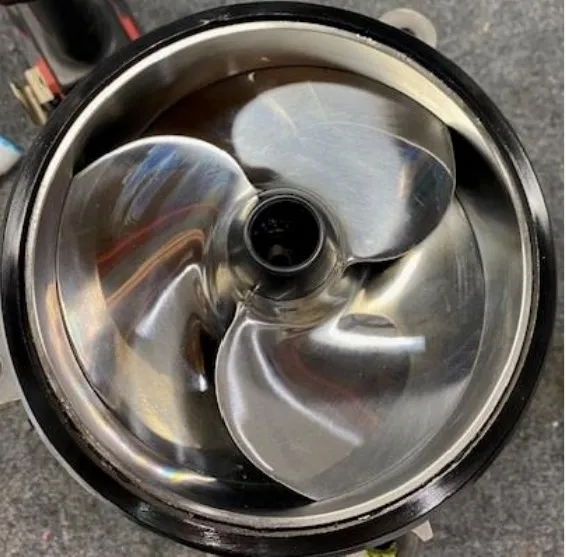
Apply a light amount of grease onto the inside of the wear ring and slide onto the jet pump. This helps for initial start up.
- Step 49
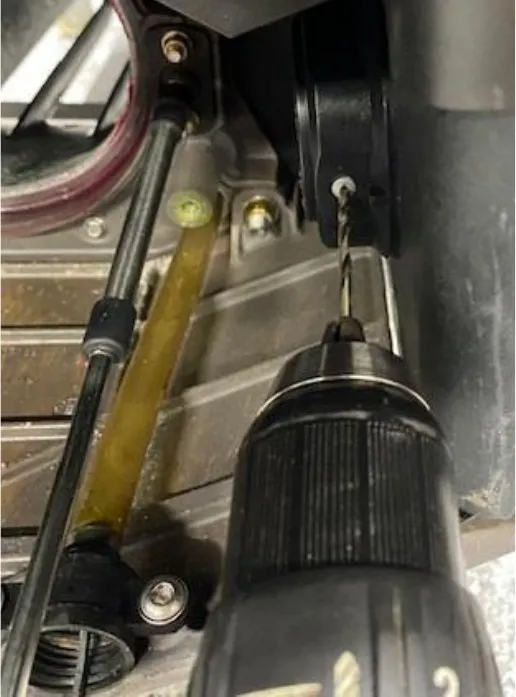
Drill out the rivet on the OEM exhaust piece. Use a 1/8” drill bit.
- Step 50
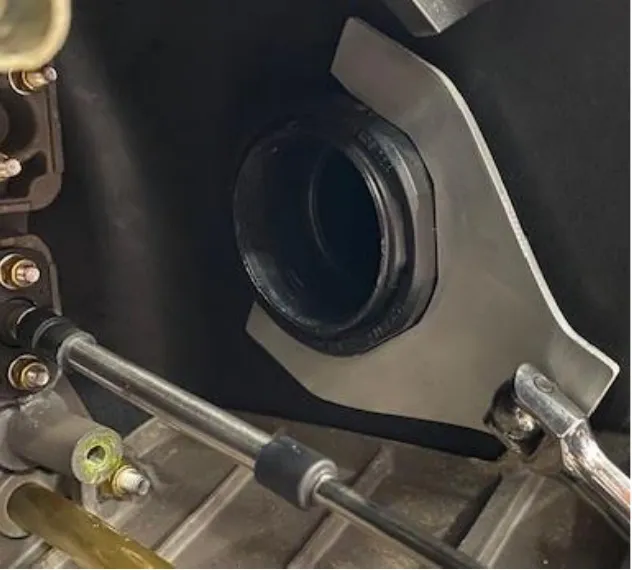
Use supplied exhaust nut wrench and loosen the nut.
- Step 51
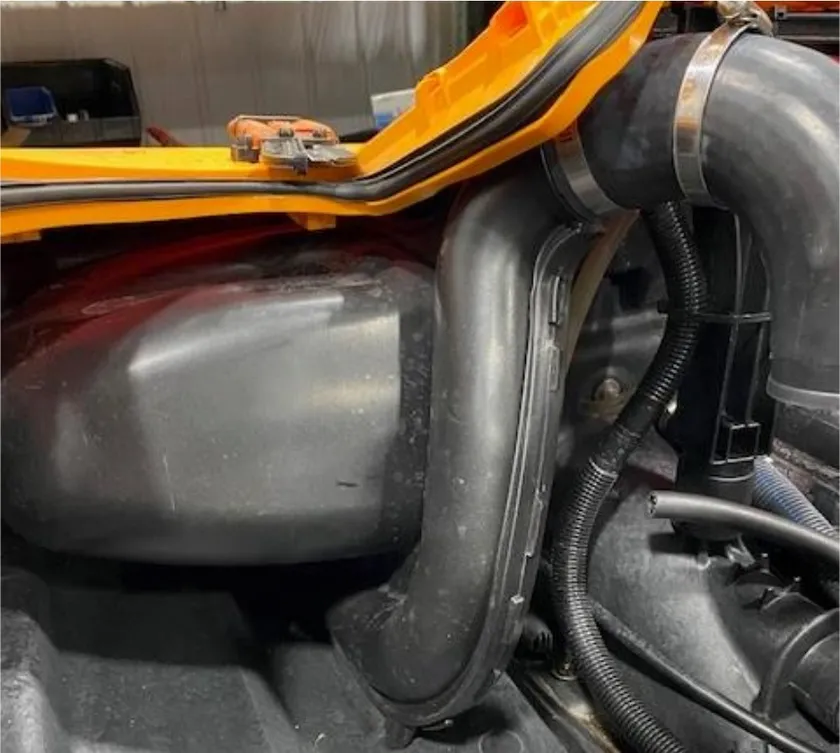
Remove the OEM “J” pipe and muffler.
- Step 52
Extract out as much oil as possible through the dipstick tube.
- Step 53
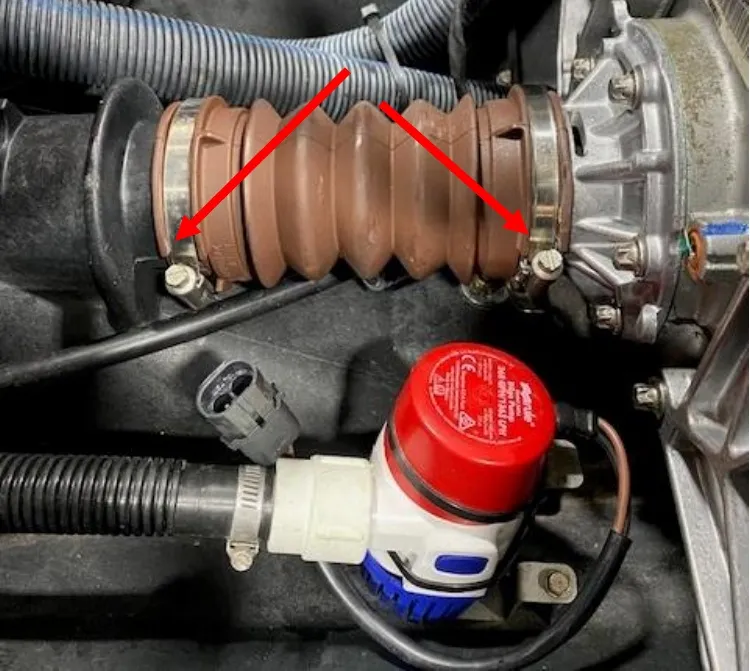
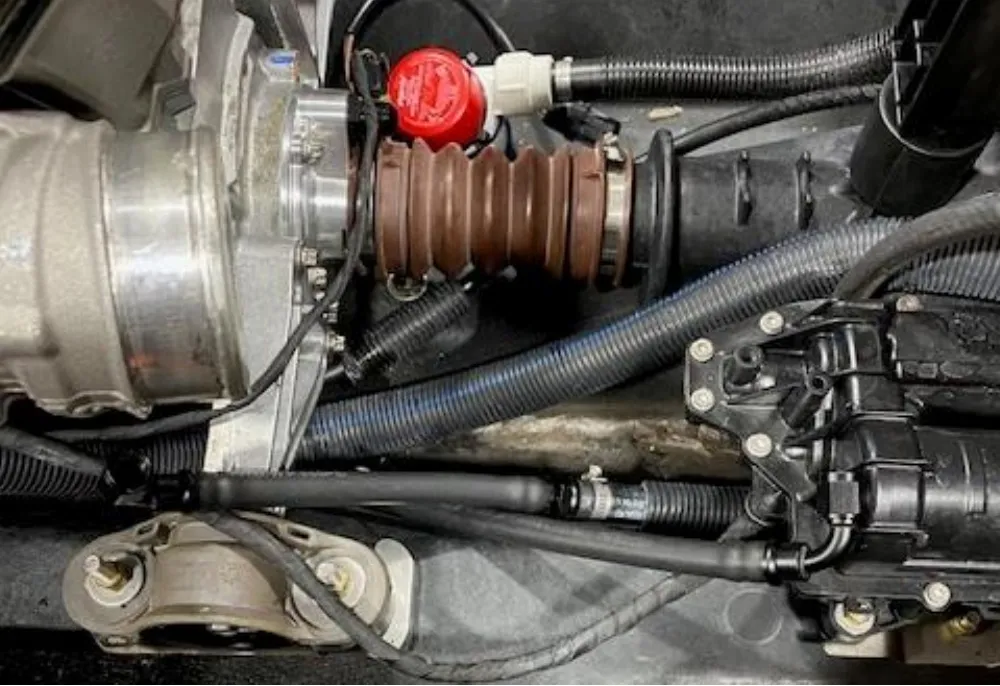
Loosen both worm drive clamps on the outer drive shaft boot.
- Step 54
Pull back on the outer brown boot, underneath is a pinch clamp around the inner boot. Cut this clamp.
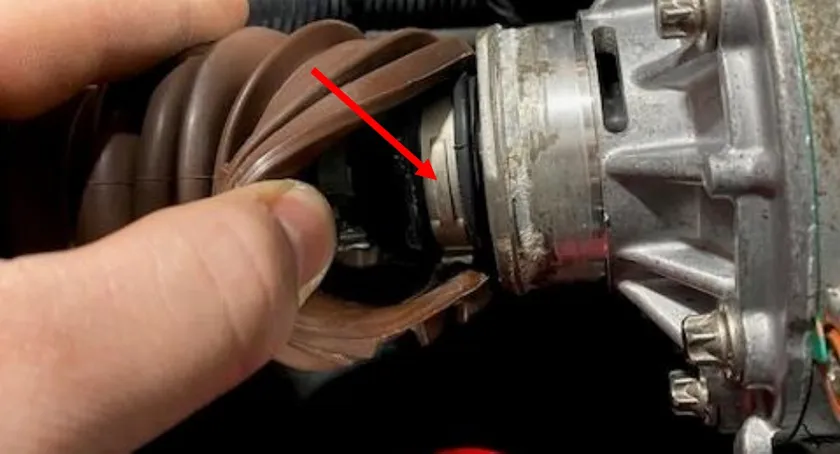
- Step 55
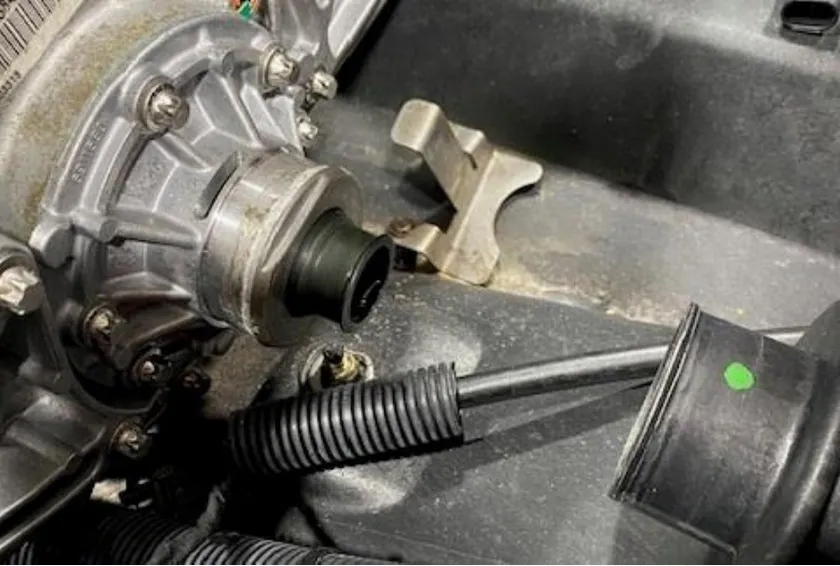
It is best to lift the rear of the jet ski about 6.0”. Pull the driveshaft out of the hull. Place rags underneath the PTO cover and remove (6) PTO cover screws using a E10.
- Step 56
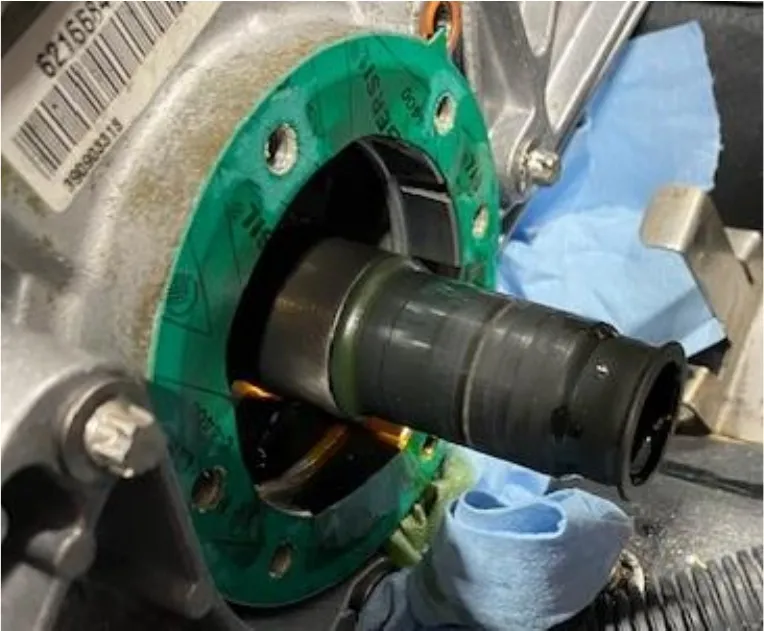
Remove the OEM PTO cover. Some oil will spill out.
- Step 57
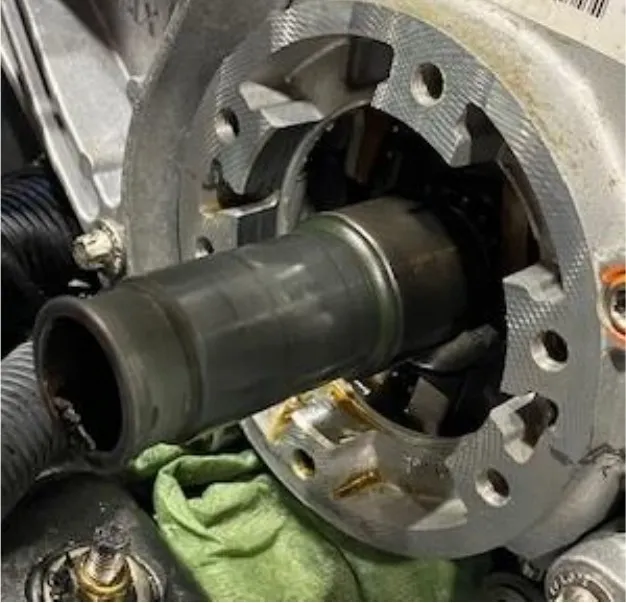
Remove the old PTO gasket.
- Step 58
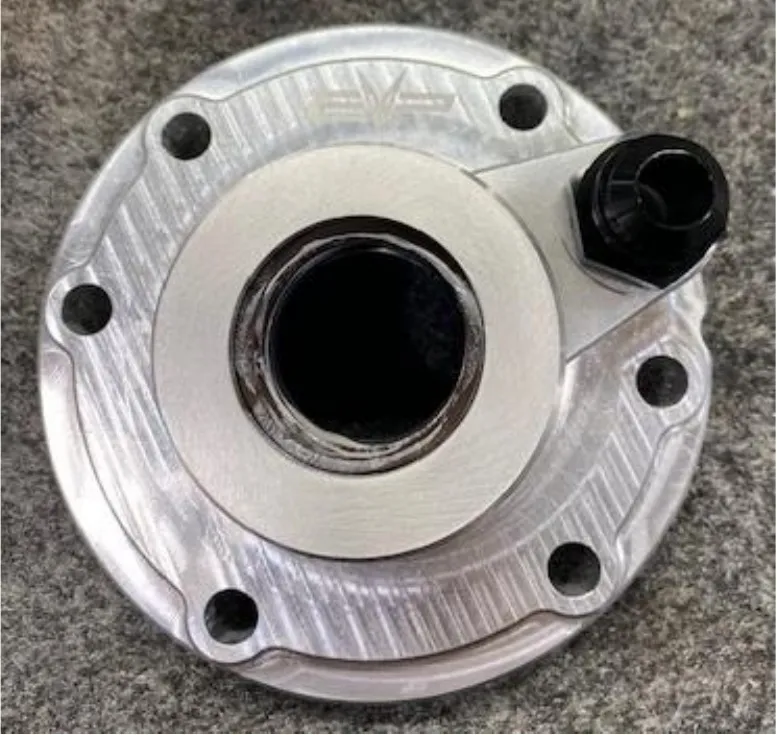
Locate your new PTO cover with 10AN fitting. 2014-2021 have a longer style PTO cover so these instructions might show a different PTO cover than a 2022+.
- Step 59
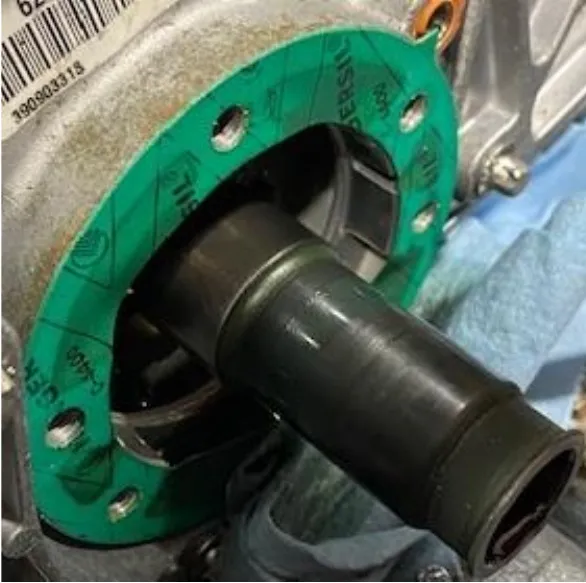
Install new supplied PTO gasket (words facing out) and PTO cover. Torque bolts in a cris-cross pattern to 17 ft-lbs.
- Step 60
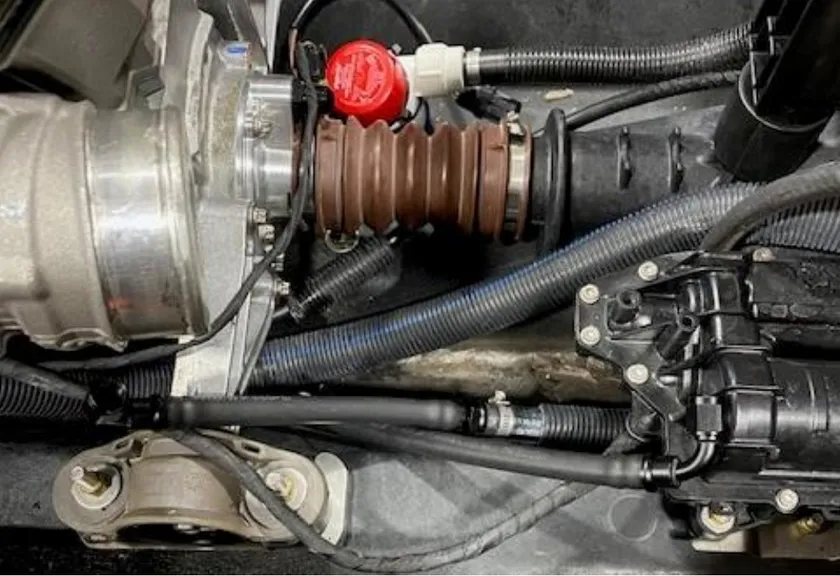
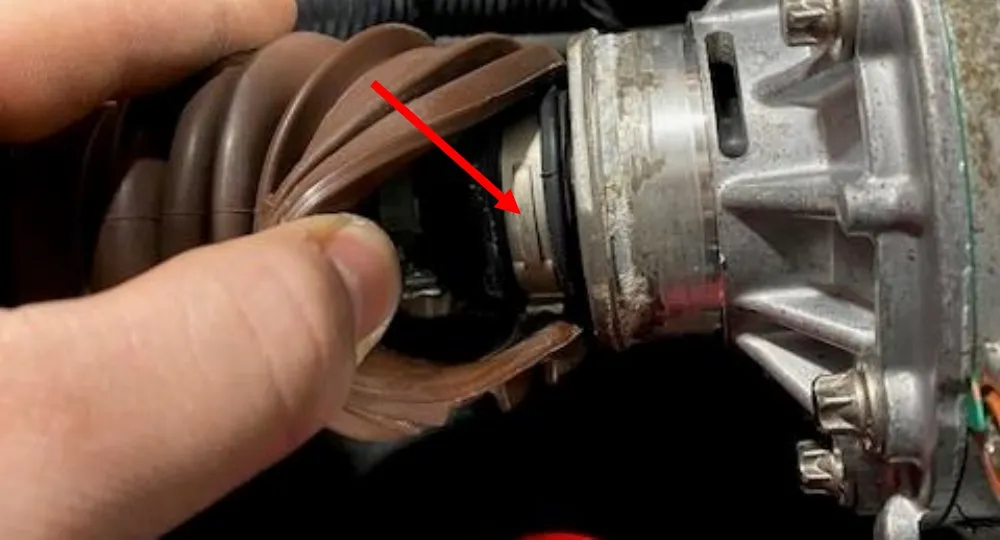
Grease up the splines on the drive shaft and inner drive shaft boot. Slide a 36.1mm pinch clamp over the inner boot and reinstall the drive shaft. Grease should squeeze out. Pinch the clamp, reinstall the outer brown boot and worm drive clamps.
- Step 61
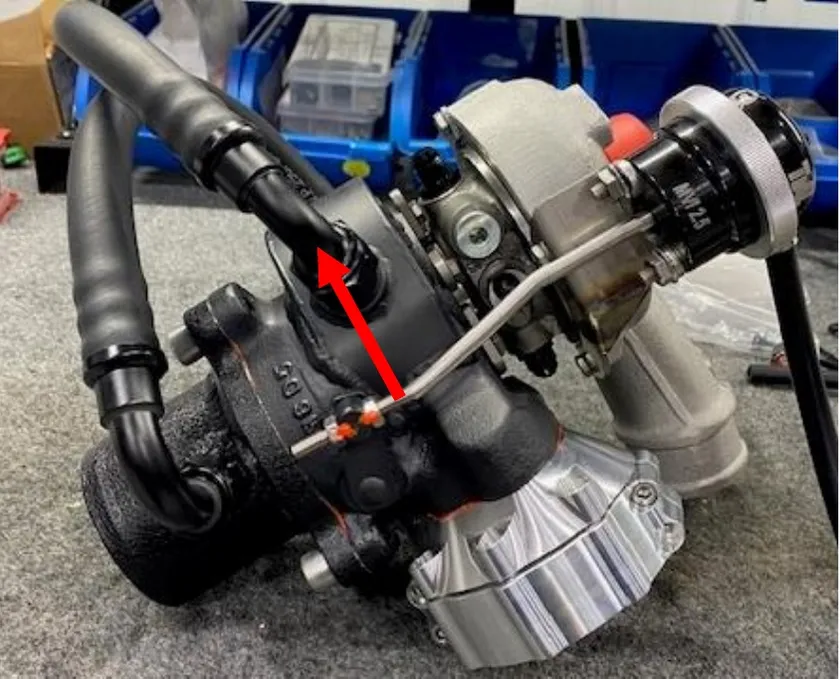
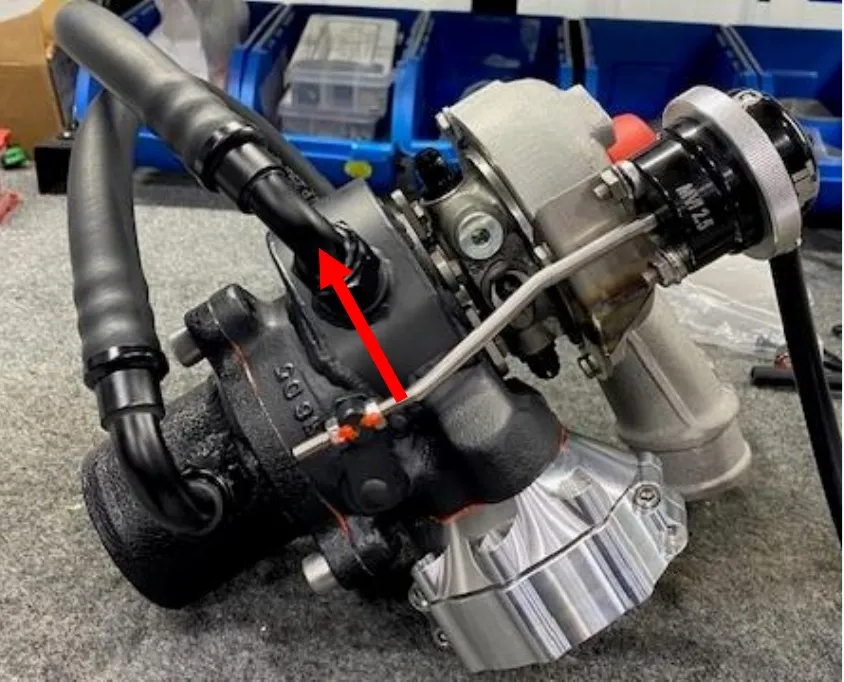
Install the turbocharger turbine housing inlet hose. 21” long with (1) 10AN 90 degree fitting to 1/2" adaptor. The opened end will get attached later.
- Step 62
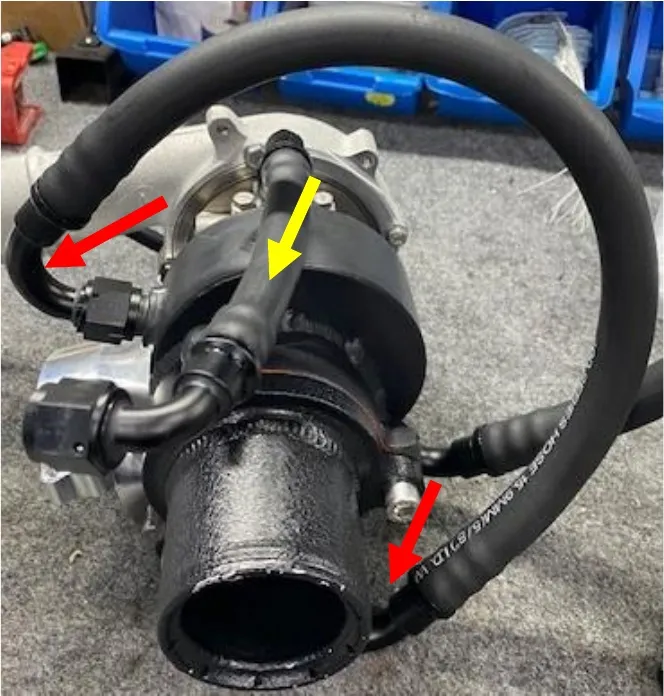
Install the turbocharger turbine housing exit to exhaust hose. 18” long with (2) 120-degree 10AN fittings. Install the oil drain line (2) 90-degree fittings 5-3/4” long.
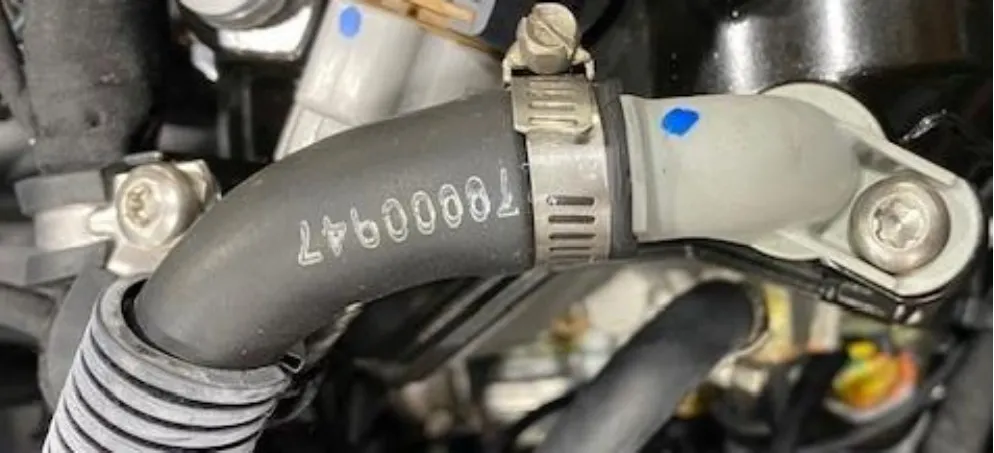
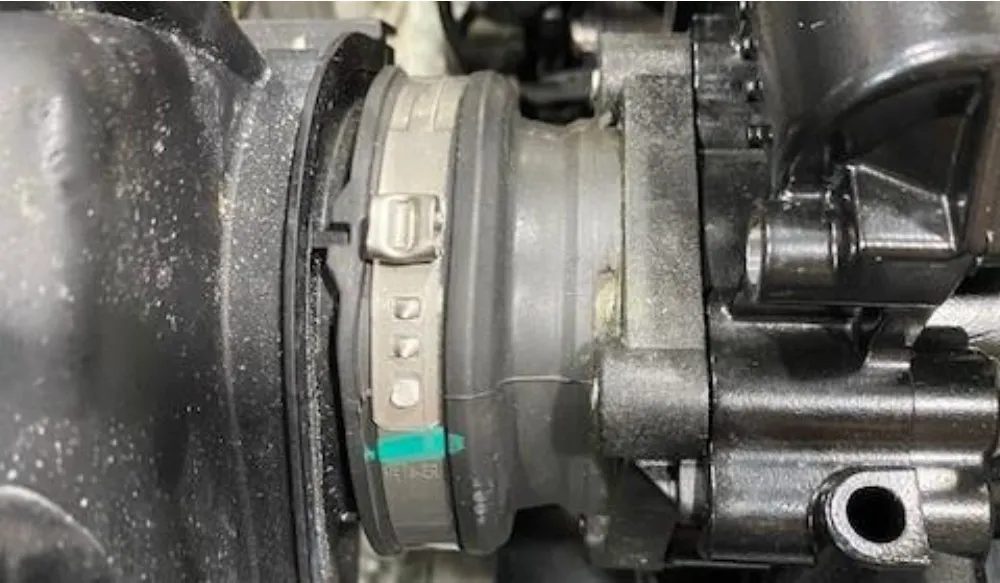
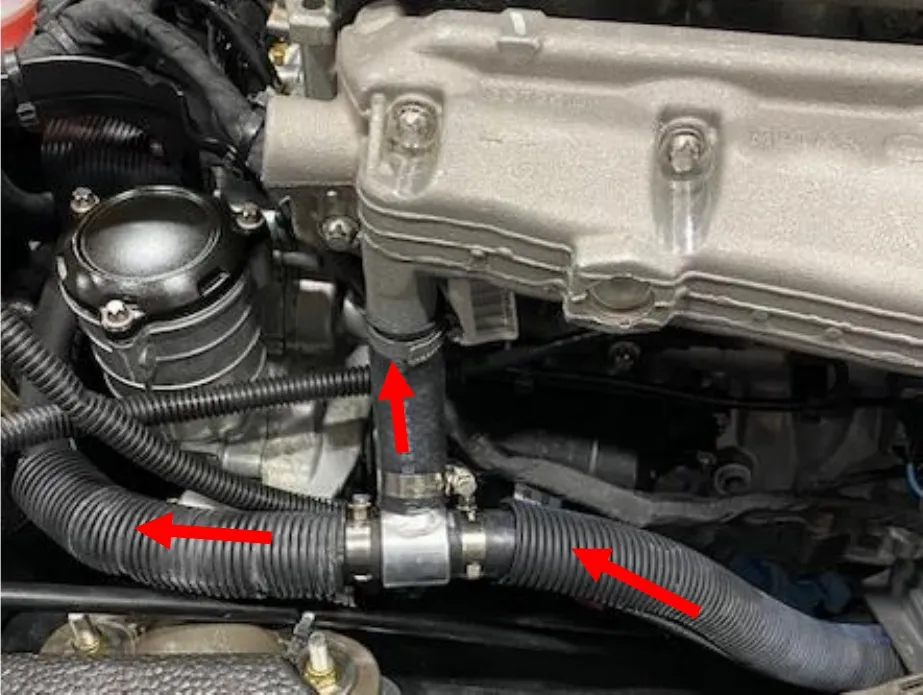
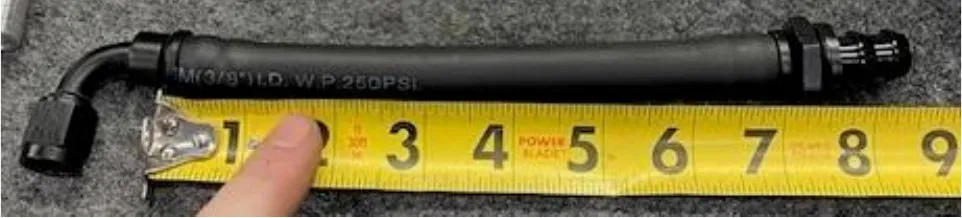
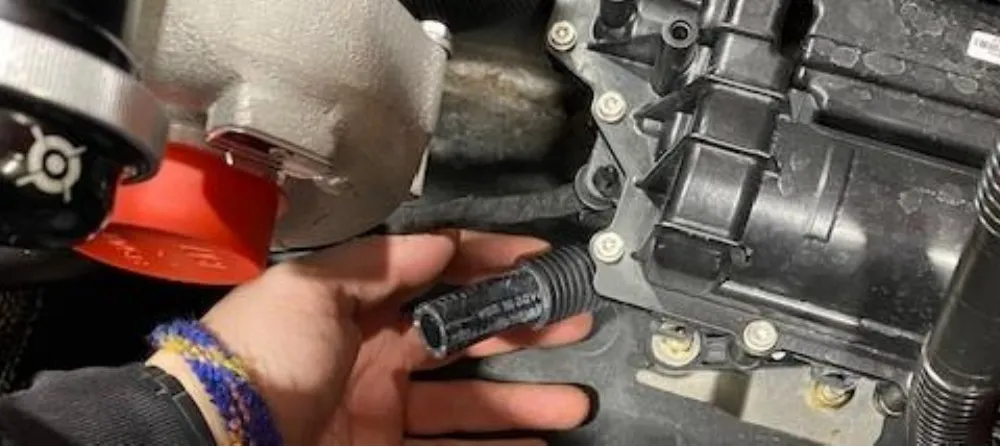
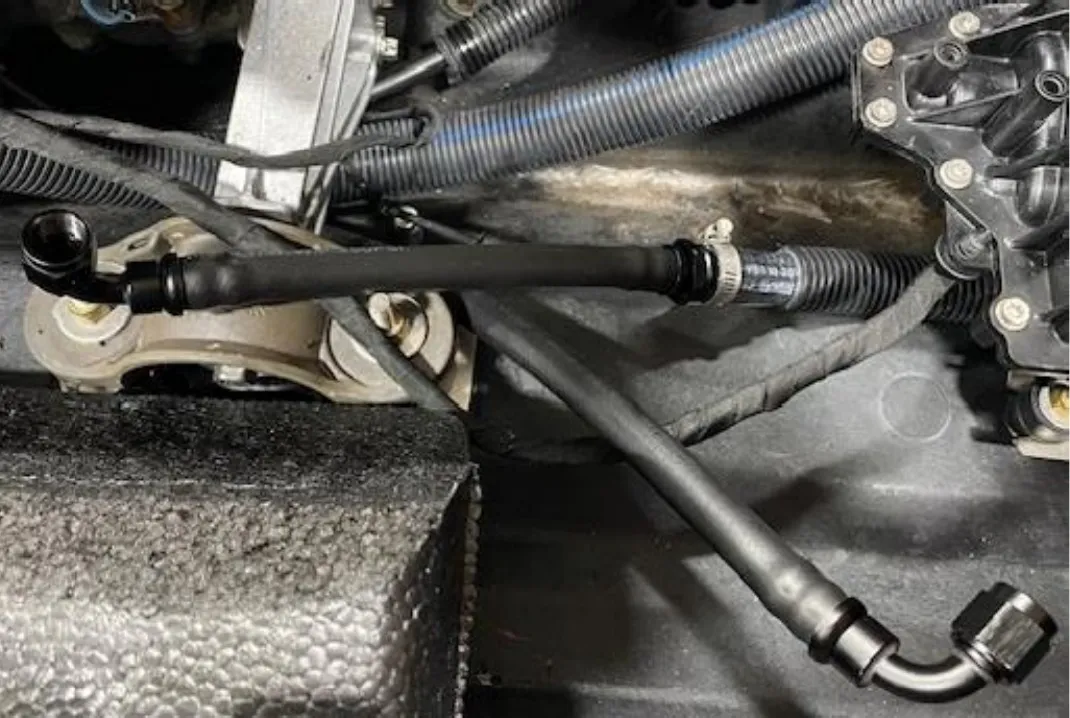
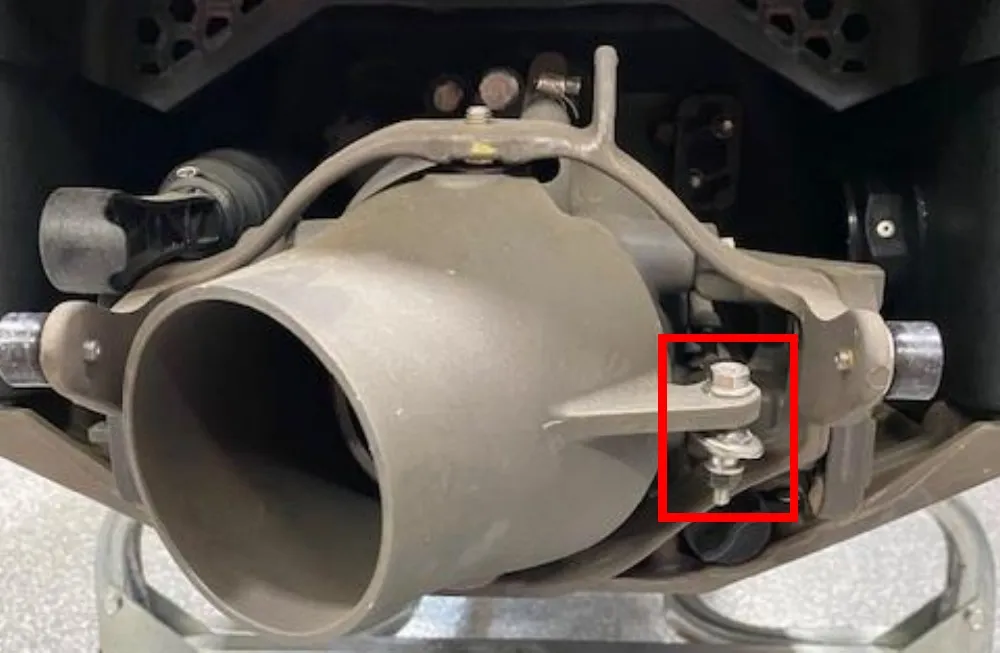
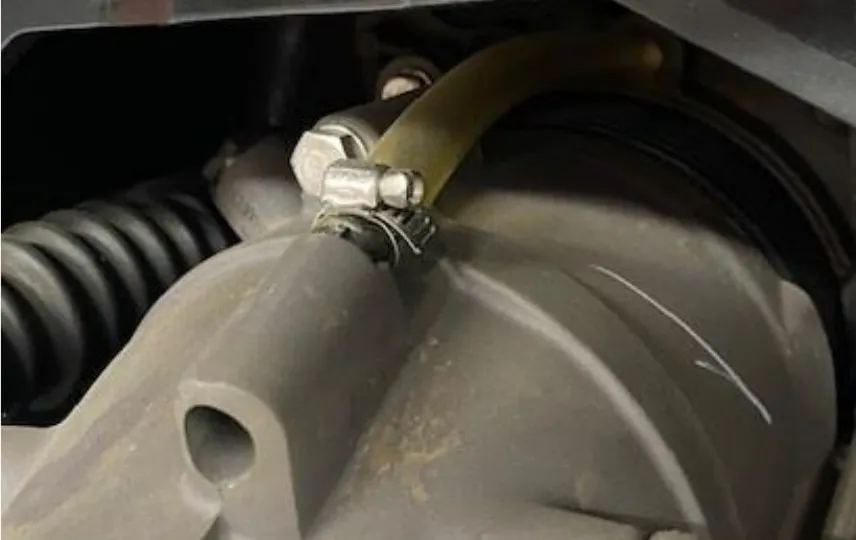
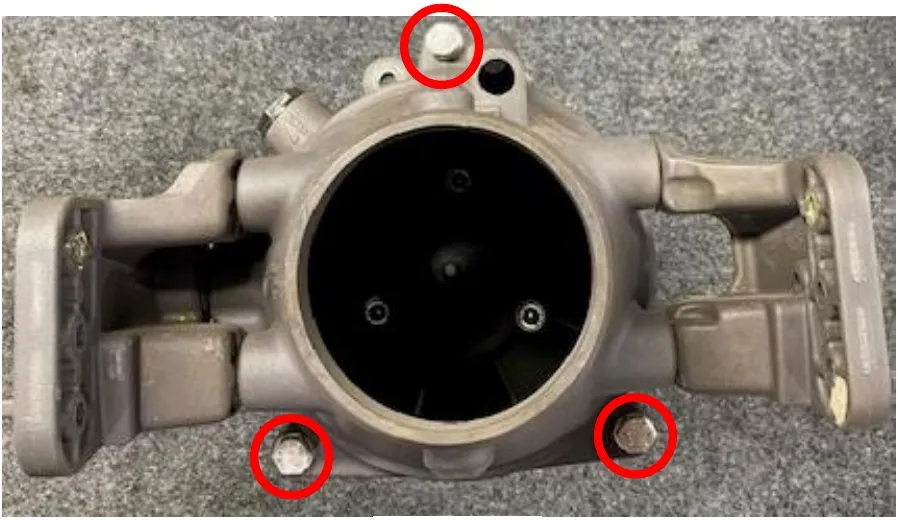
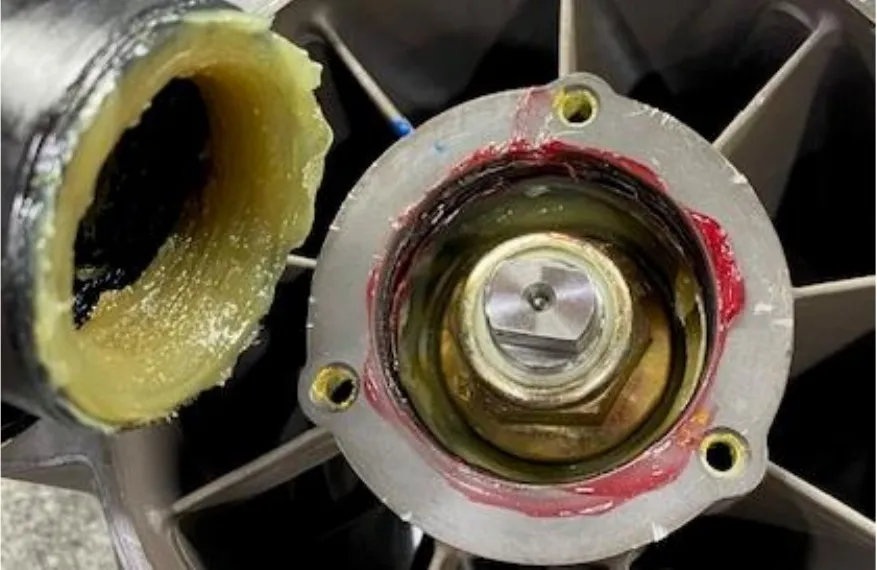
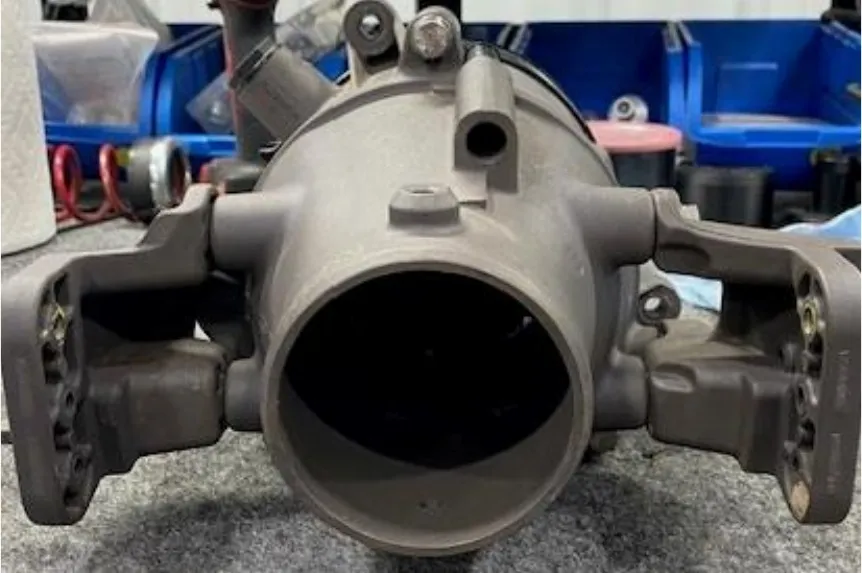
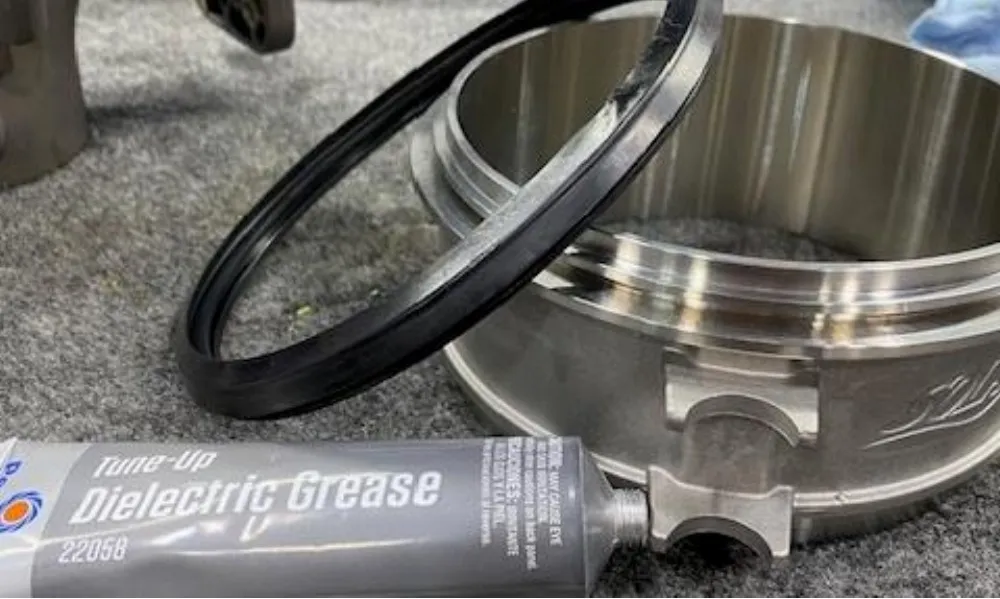
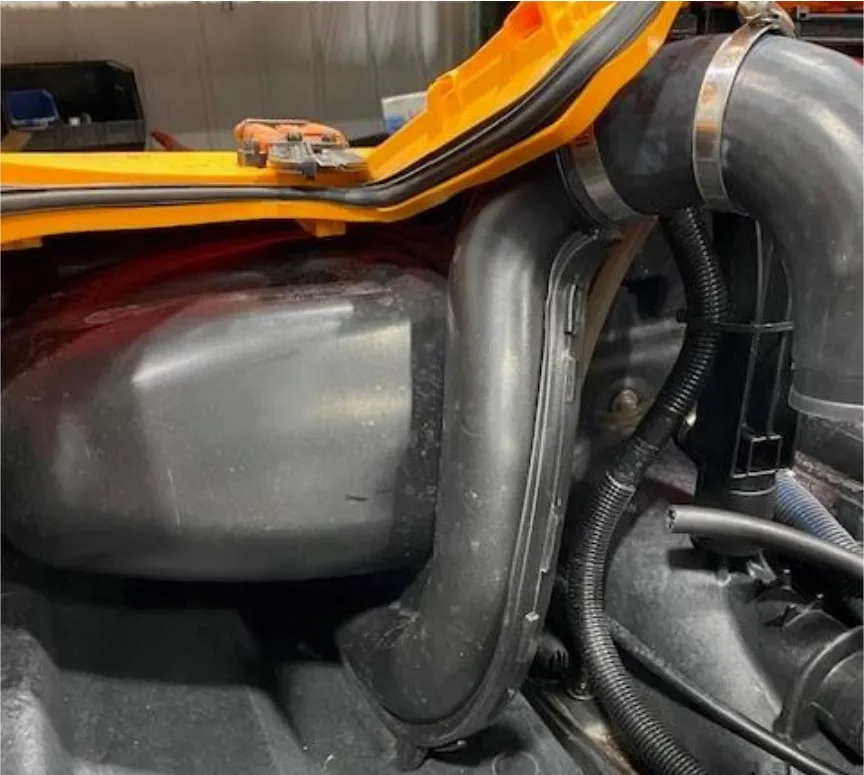
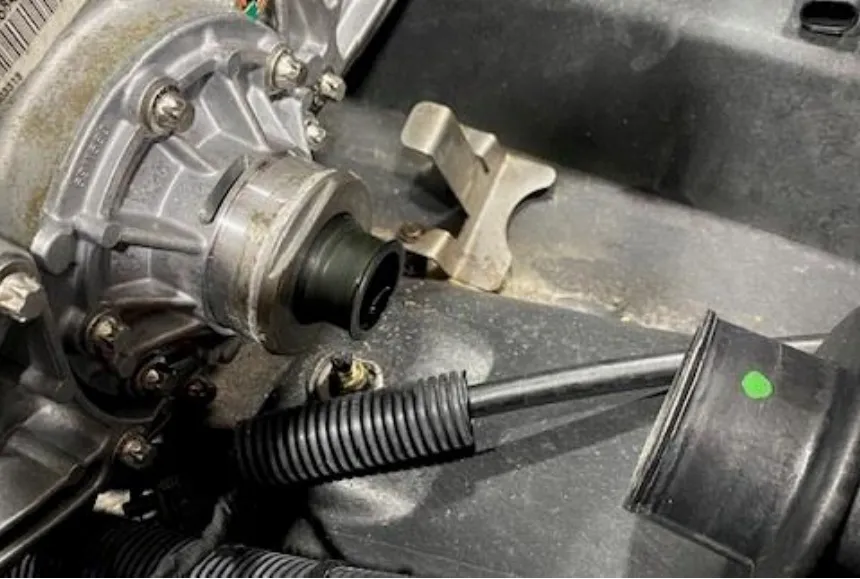
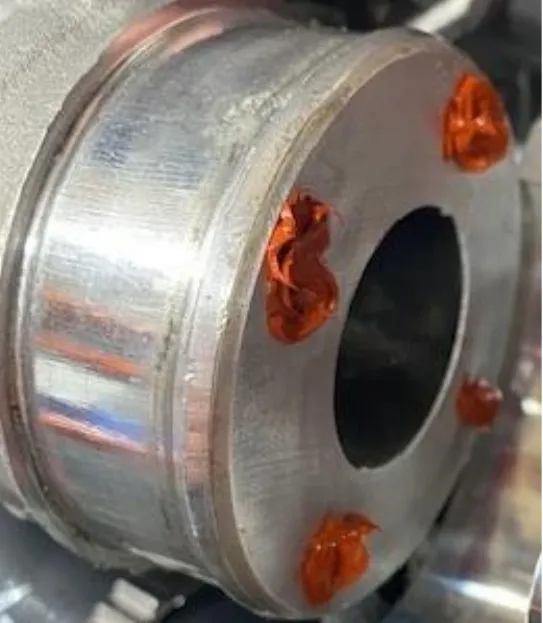
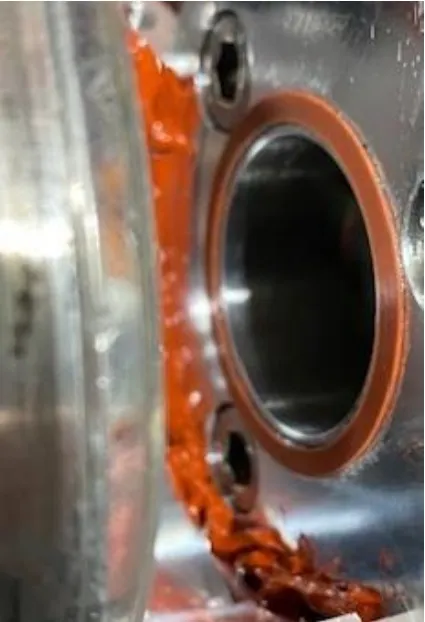
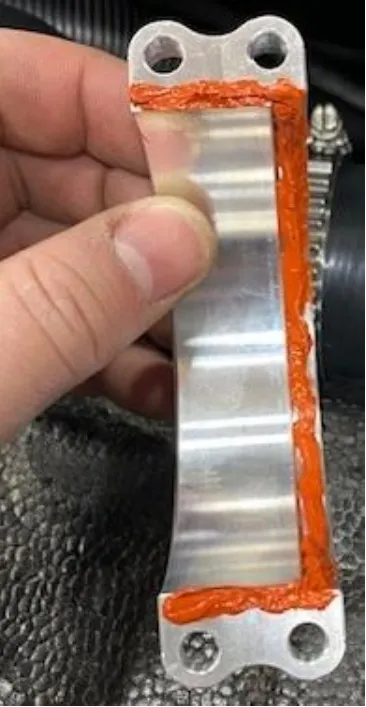
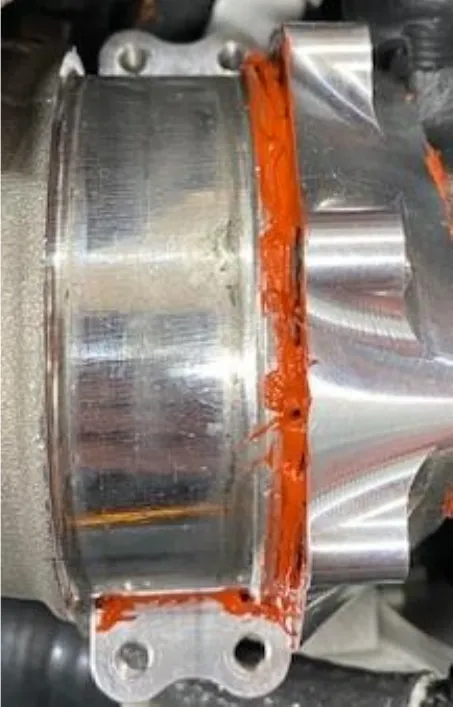
Apply a large amount of Permatex RTV, ultra red high temperature gasket maker to the (4) exhaust manifold water ports. Also run a thick bead on the outer lip of the billet connector.
- Step 63
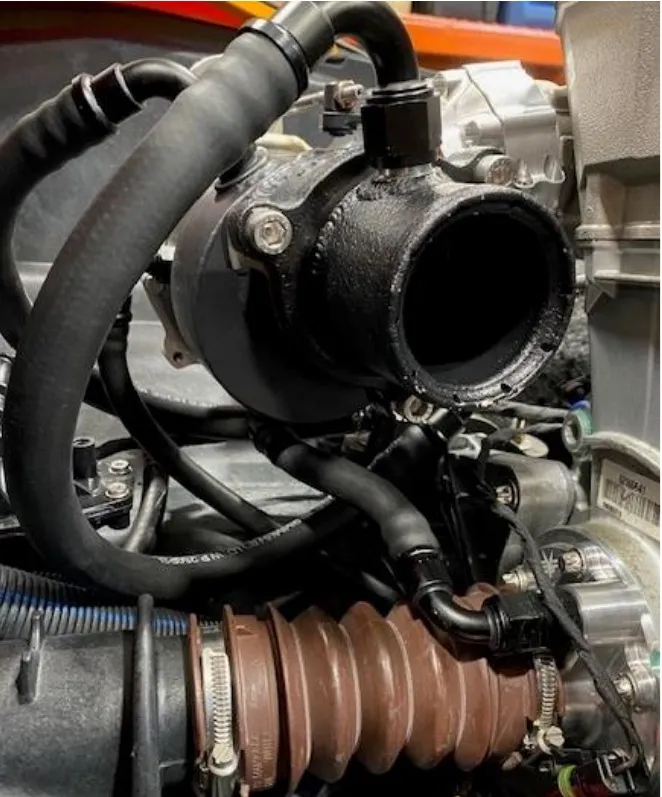
Install the turbocharger to the exhaust manifold loosely again, install the turbo oil drain line to the PTO cover. Clock the turbo if needed. Once this line is correct install all (7) M6 screws into the billet connector.
- Step 64
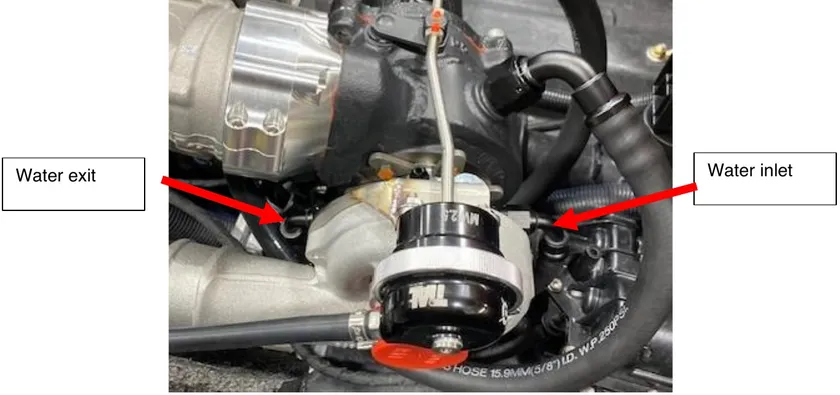
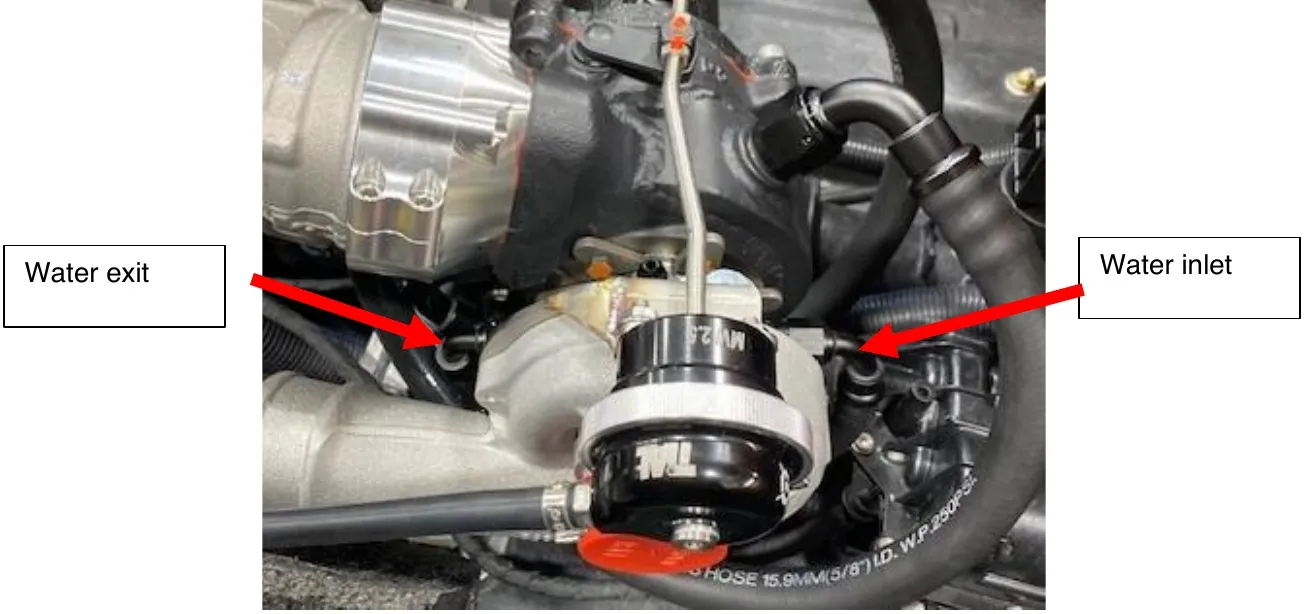
Install the turbocharger water inlet/exit hoses. Inlet coming from the intercooler line ran underneath the engine (right side), and the water exit leaving the hull (left side).
Water inlet. Water exit. - Step 65
Install the turbine water line to the last port on the exhaust manifold. This hose reduces to 1/2" hose. Use 16-25mm worm drive clamp.
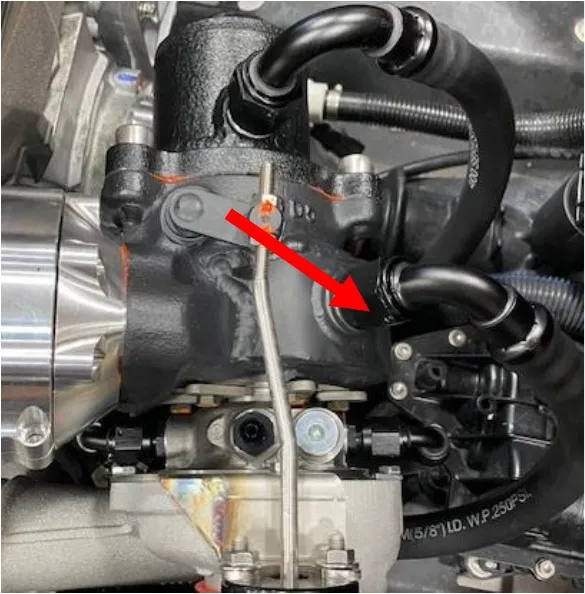
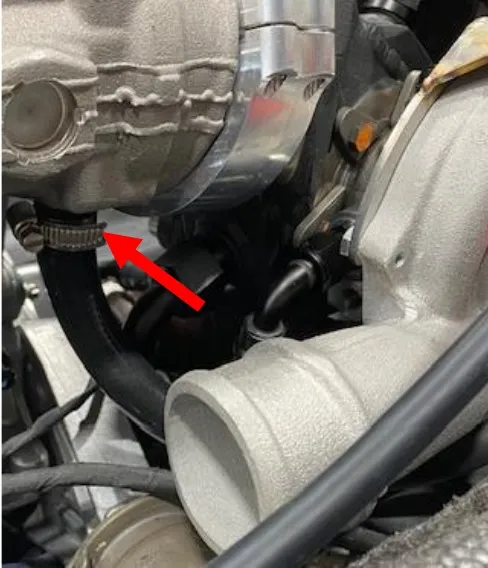
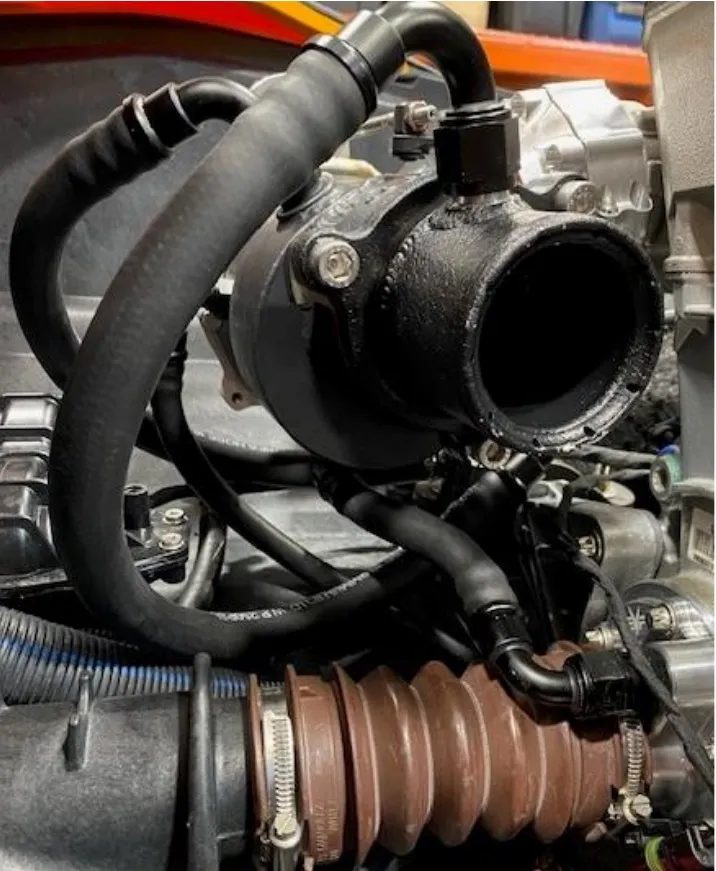
- Step 66
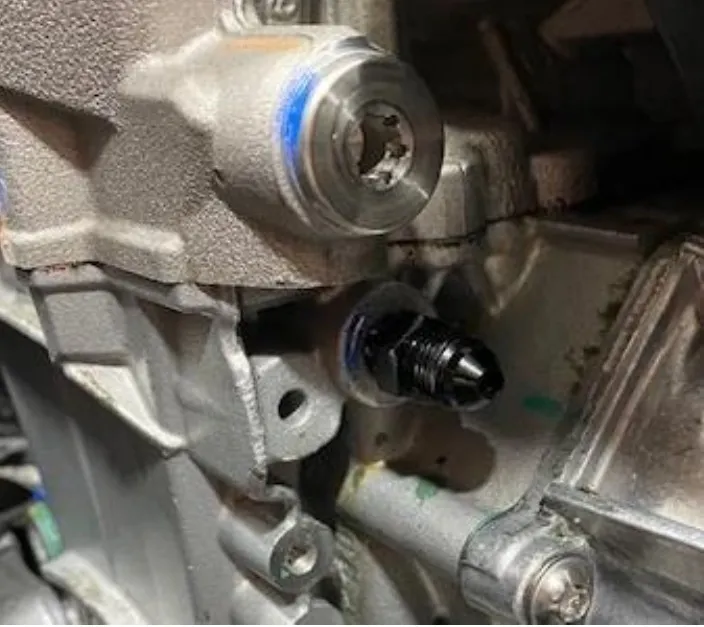
By the dipstick you will find an oil passage, remove the M6x1.0 plug.
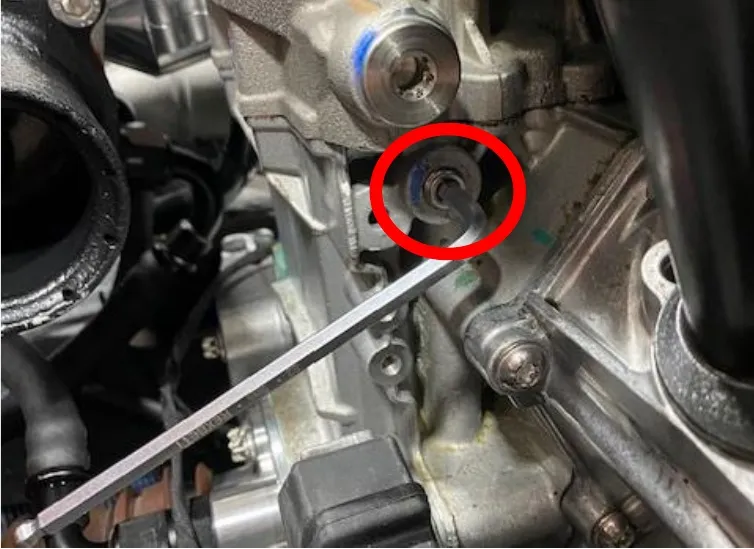
- Step 67
Install supplied 1/8MPT to 4AN male fitting, make sure fitting is snug but not overtighten.
- Step 68
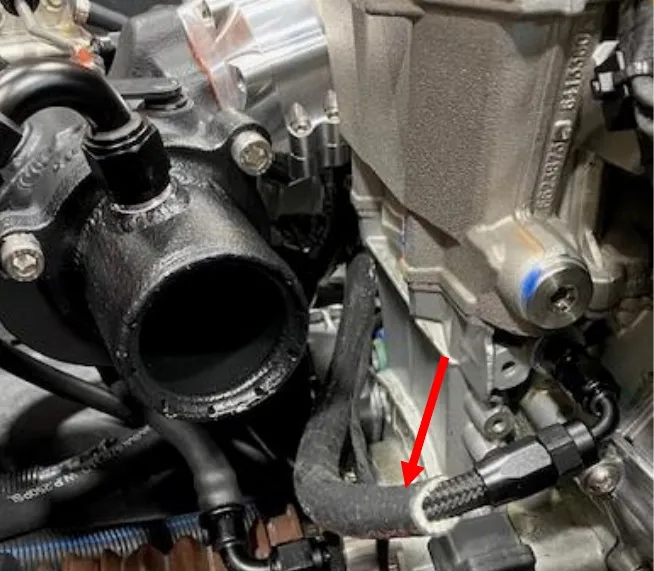
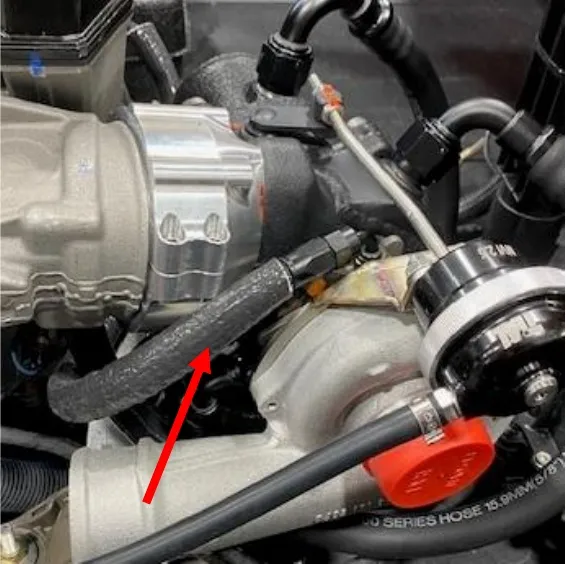
Install fire sleeve over the oil feed line. Blow out the line before install. Install one end to the fitting on the engine wrapped around to the turbocharger.
- Step 69
Now is a good time to go back through every hose and tighten all AN fitting’s. It is best to use aluminum AN wrenches so they don’t mar up the fittings. Double check routing and rubbing. Some fittings may need to be clocked a certain way so rubbing doesn’t accrue.
- Step 70
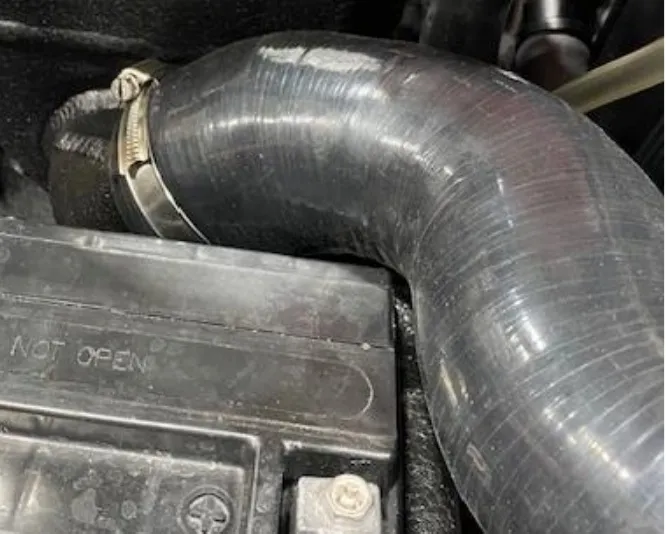
Install the charge tube from compressor housing to intercooler. Adjust the tube around the battery and the blow off valve port is facing upwards. Use a 60-80mm worm drive on the intercooler and 32 constant tension clamp on the turbo.
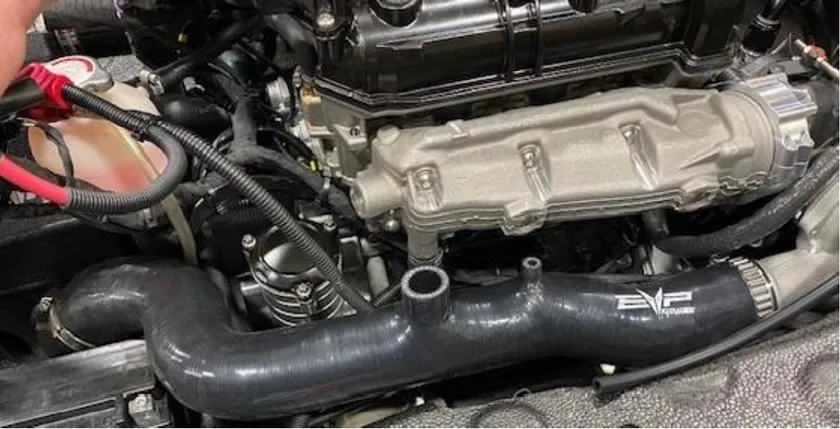
- Step 71
Remove the lower bracket on the electronics bracket. (2) 3mm Allen screws.
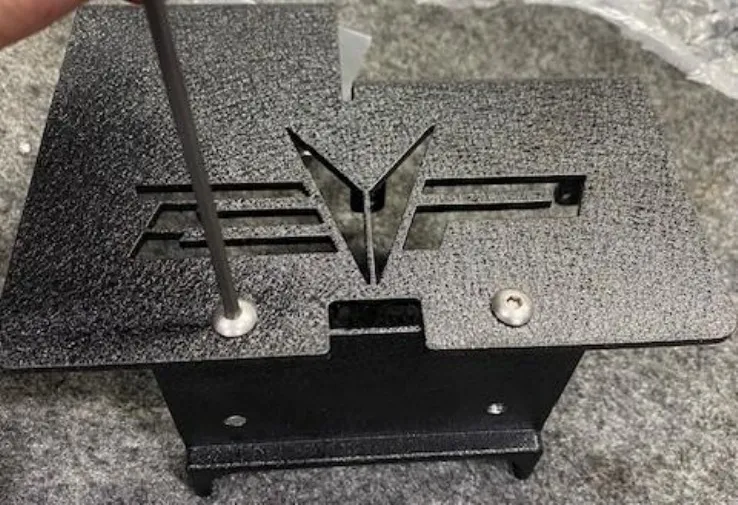
- Step 72
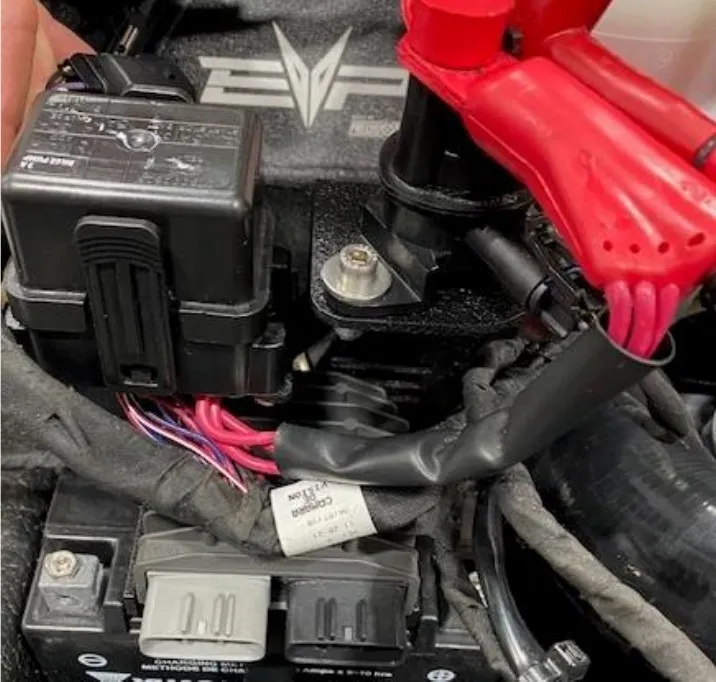
Install the voltage regulator onto the bottom electronics bracket, use supplied hardware. Place the battery strap underneath the voltage regulator. Reinstall the bottom bracket to the upper bracket using (2) 3mm screws.
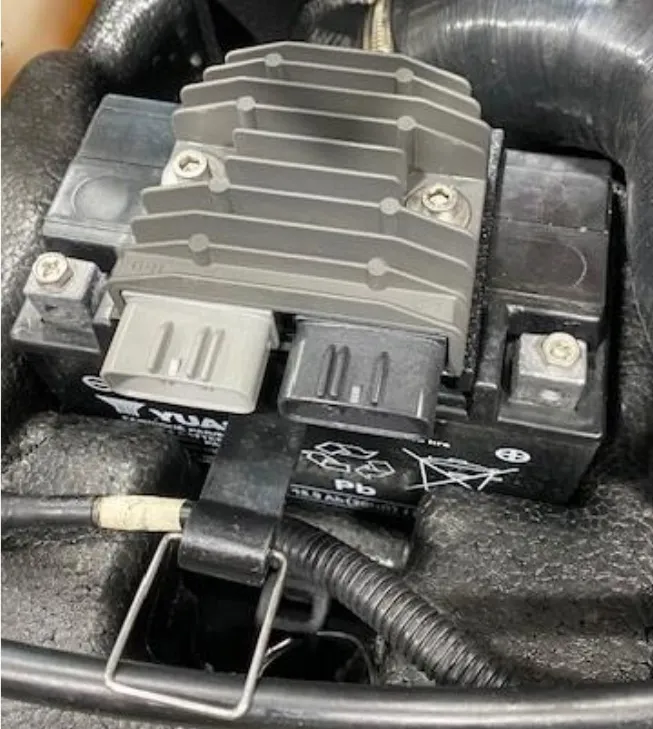
- Step 73
install the starter solenoid to the upper bracket using supplied hardware.
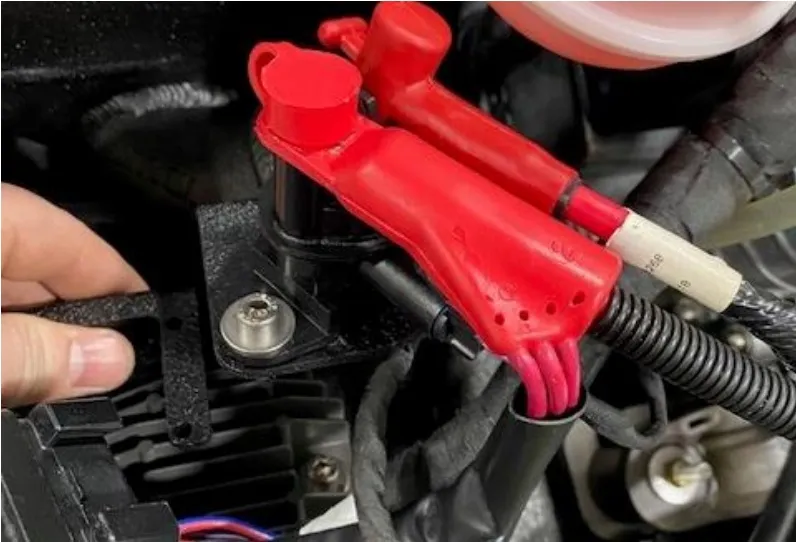
- Step 74
install the fuse box onto the upper bracket using (4) screws.
- Step 75
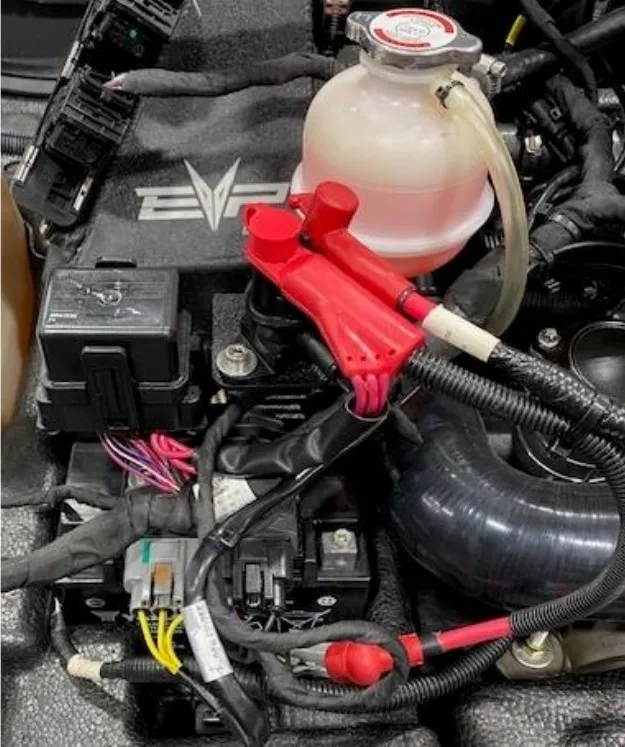
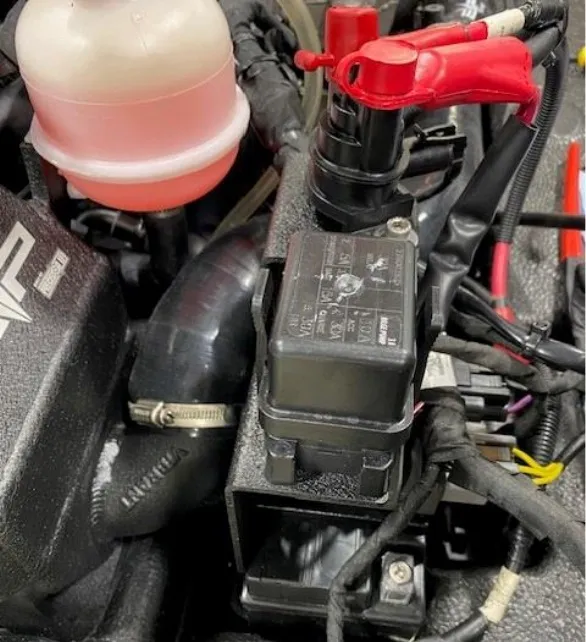
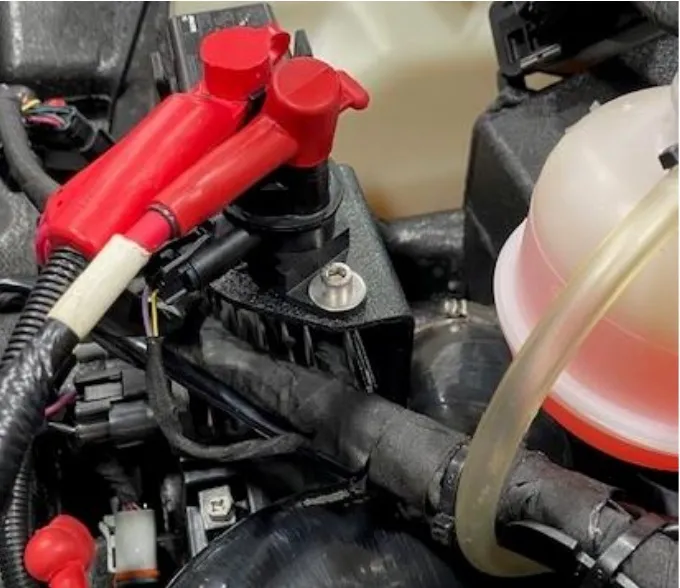
Strap the battery in place, this will hold the electronics bracket as well. Reconnect the voltage regulator. Install the coolant jug onto the intercooler bracket.
- Step 76
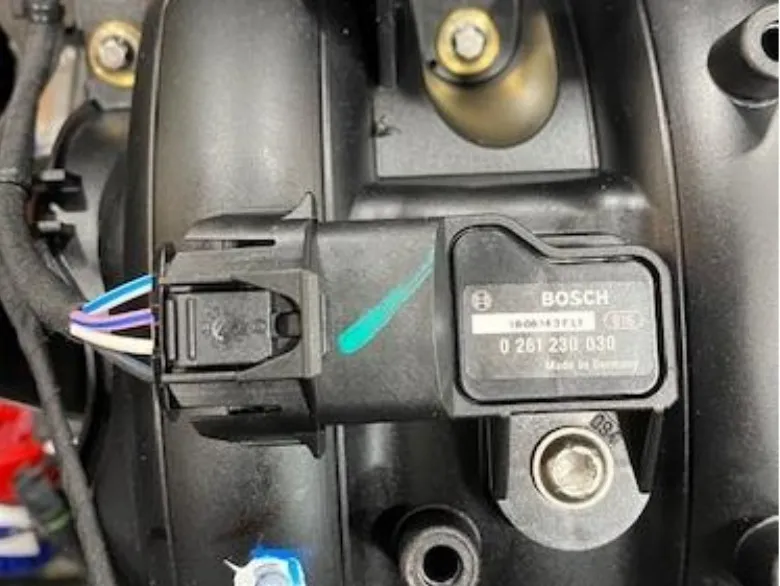
Remove map sensor connector. Don’t use a screwdriver. With a T30 remove the screw holding the MAP sensor in place.
- Step 77
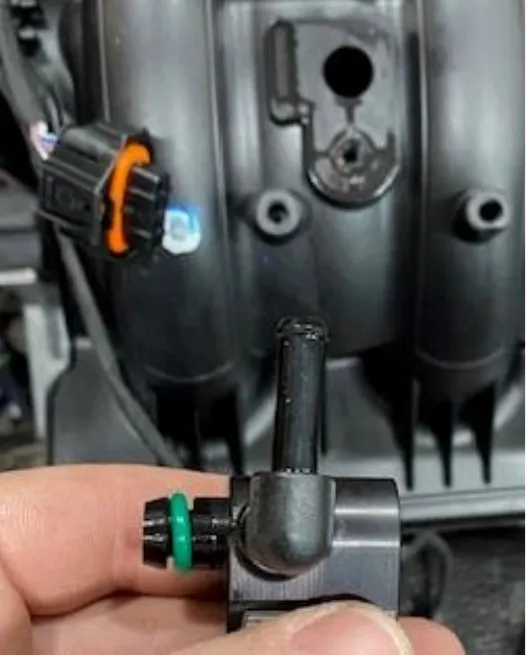
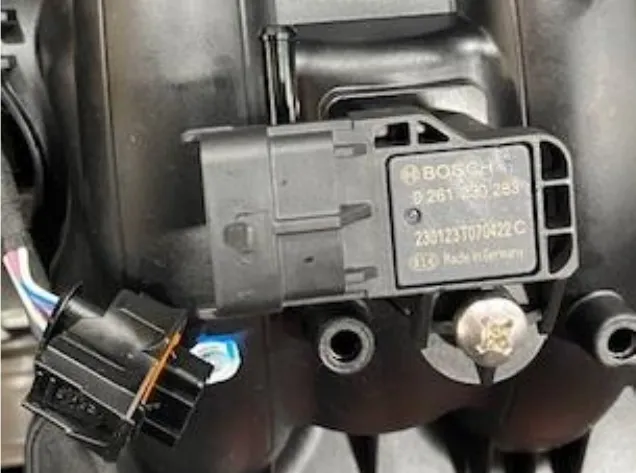
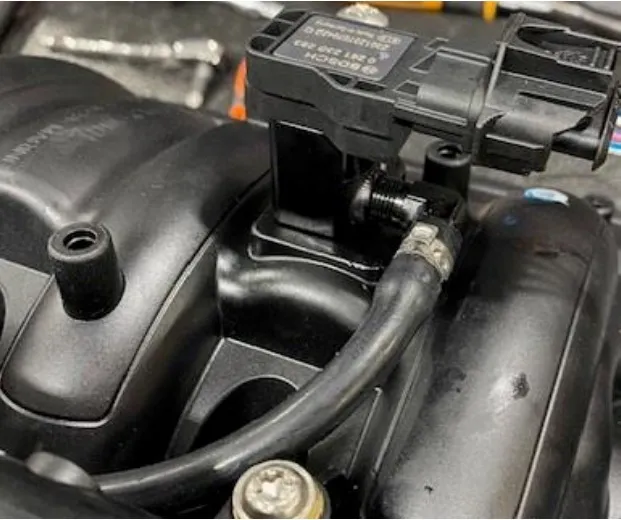
Install MAP sensor shim with 90 Degree barb facing the fuel rail. Use dielectric grease on the O-Ring. Install supplied MAP sensor and fasten down with supplied screw. Reconnect the electrical plug, you may need to cut a zip tie.
- Step 78
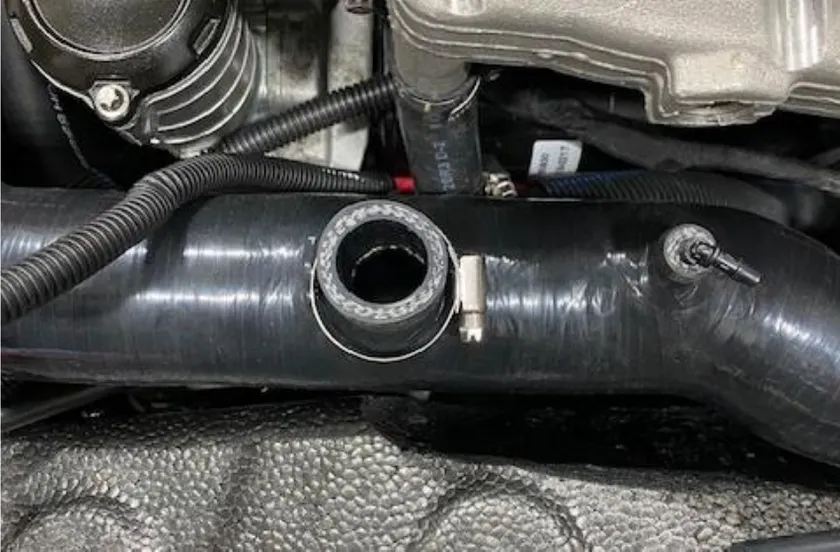
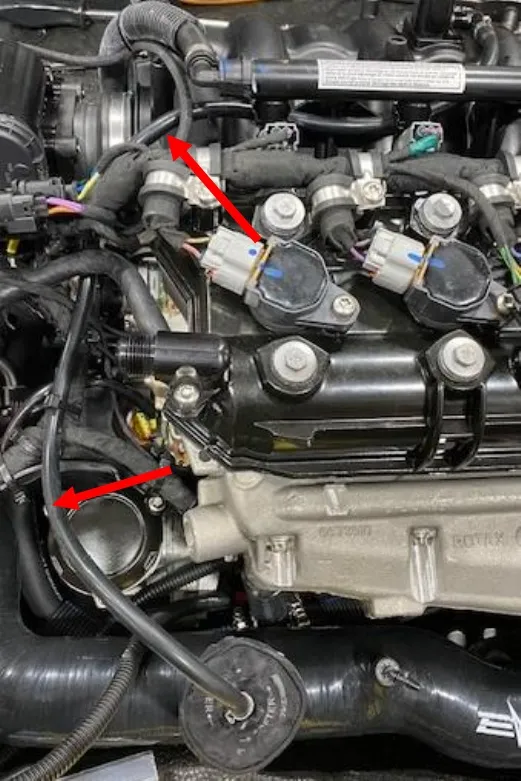
Install prefilter onto blow off valve. Install the BOV into the charge tube, fasten down with a 25-40mm worm drive. Install vacuum hose to BOV and fasten with 11.3mm pinch clamp.
- Step 79
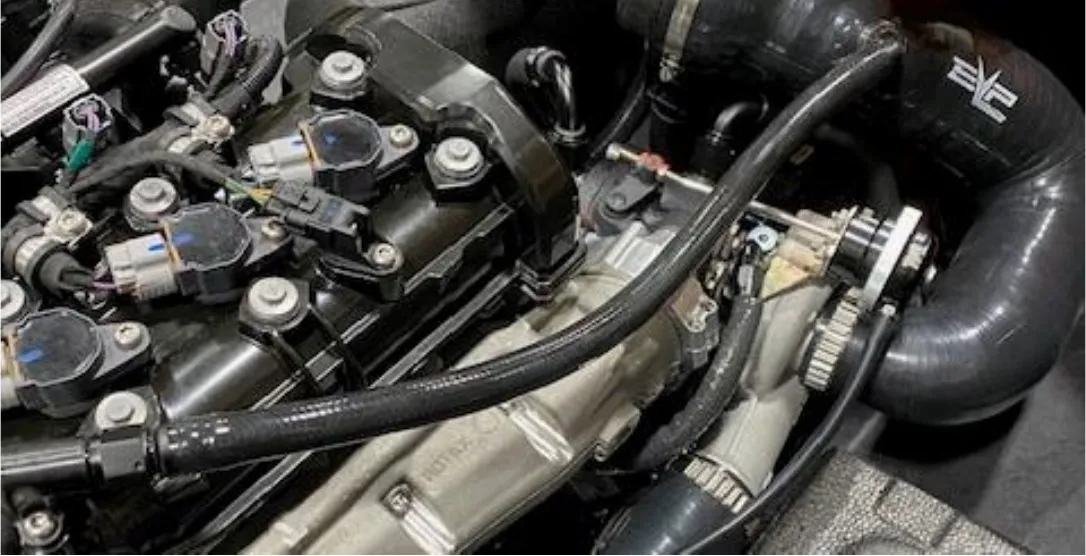
Route the vacuum line as seen in the photo up to the MAP sensor shim. Loosely zip tie the vacuum line to hold it in place.
- Step 80
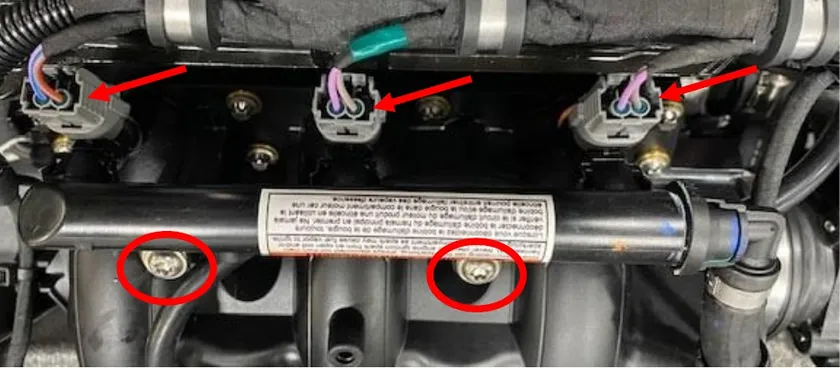
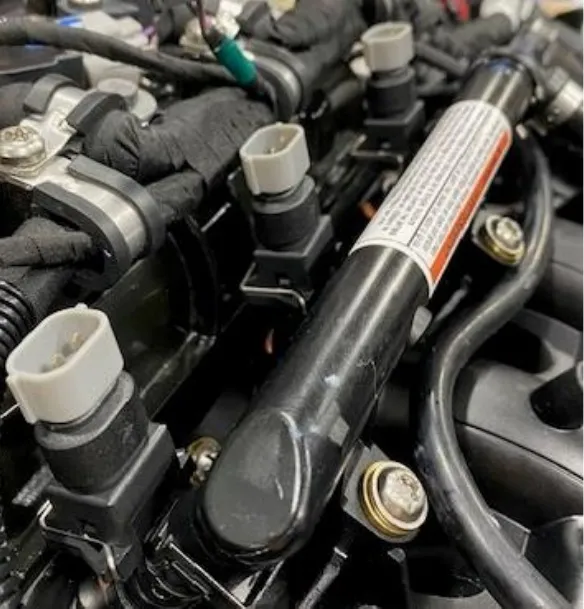
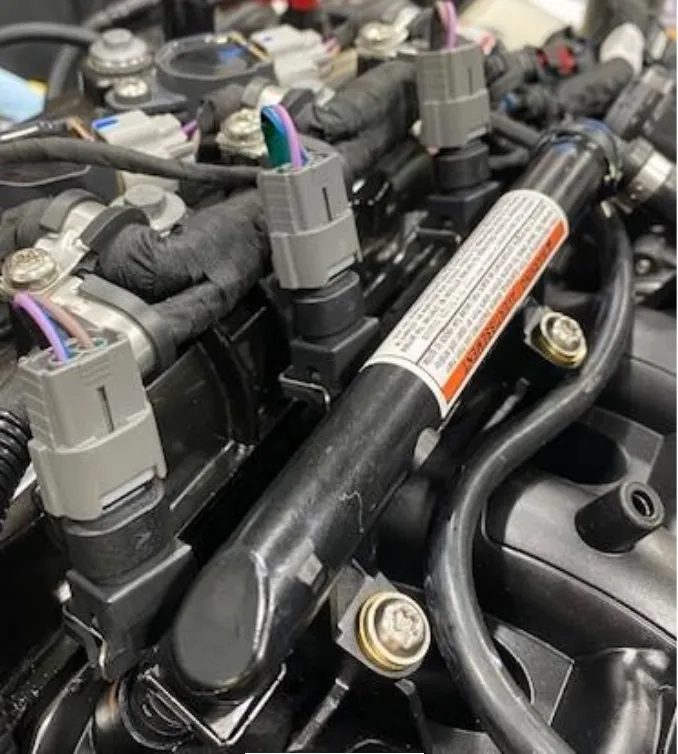
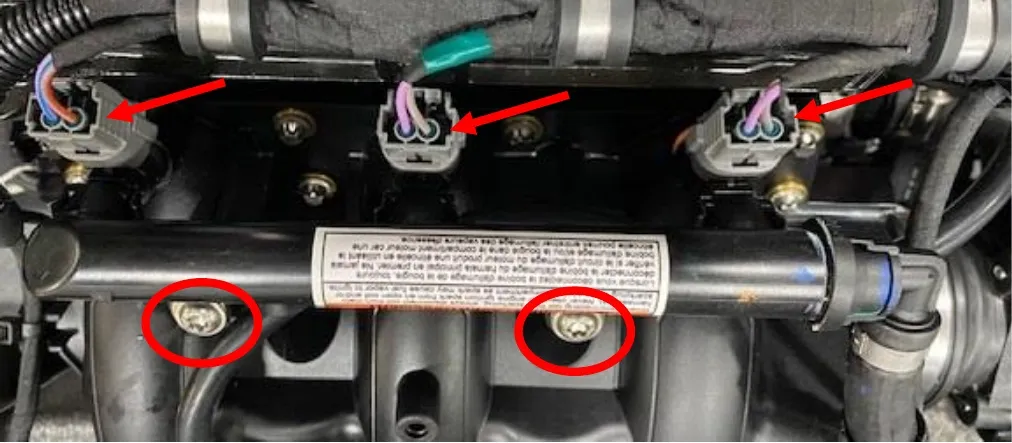
Unclip (3) injector connectors and remove the fuel rail screws using a T30.
- Step 81
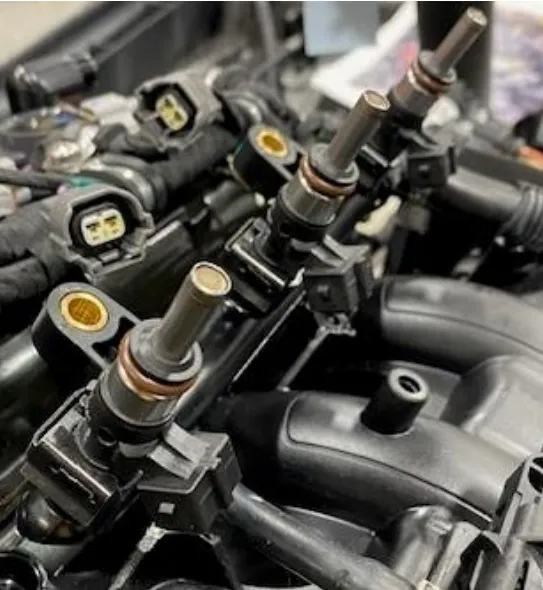
Flip the fuel rail up, remove the injector clips and remove the injectors. Install dielectric grease on the supplied injector O-ring and install. Reinstall the injector clips. Reinstall the fuel rail and hardware. Install (3) injector adaptors before reinstalling the injector electrical connectors.
- Step 82
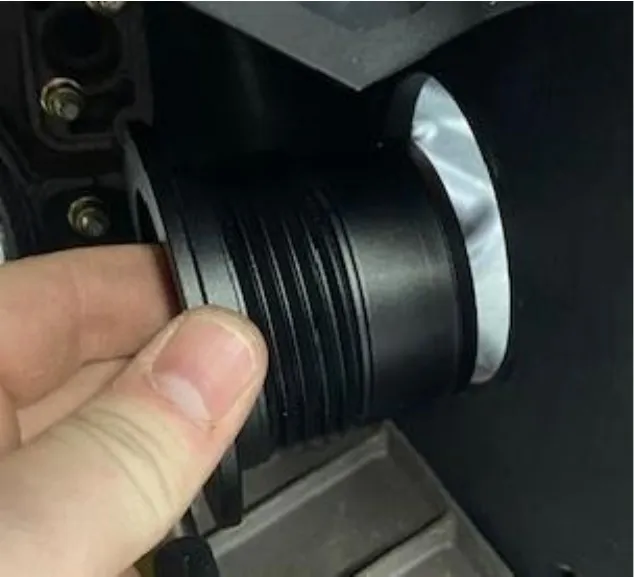
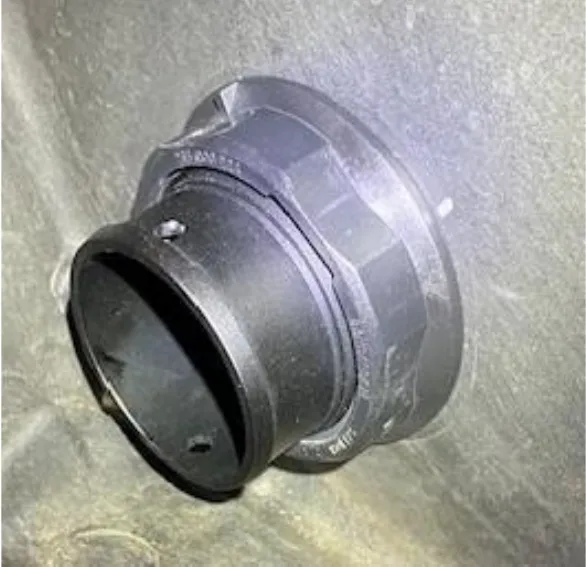
Install supplied O-ring onto exhaust outlet. Install the exhaust outlet from the outside of the hull into the inside. The threads should be on the inside of the hull. Install the OEM exhaust nut from the inside of the hull. Use supplied nut tool to snug up. DO NOT overtighten this plastic nut.
- Step 83
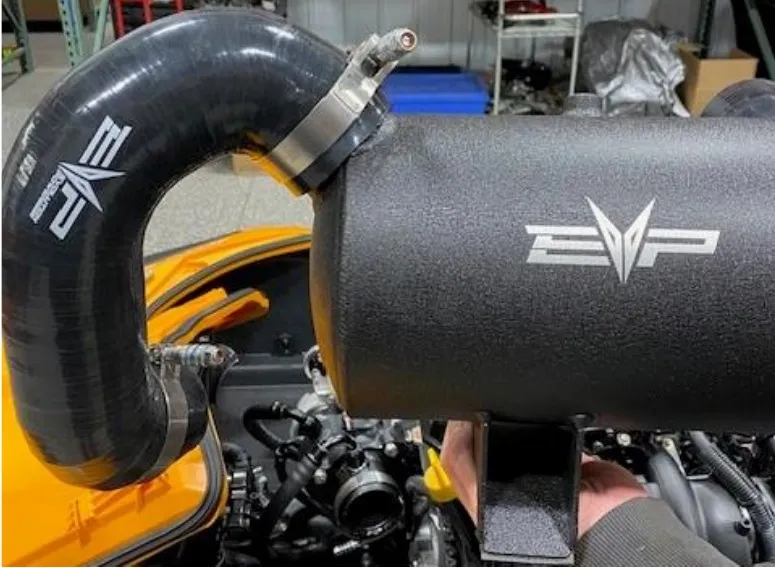
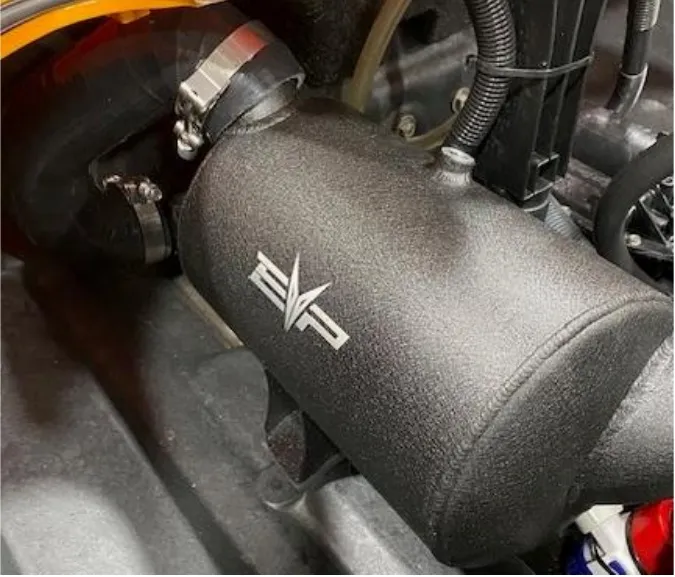
Install the rear exit silicone from the water box to exhaust outlet. Use (2) 312 T-bolt clamps to fasten silicone.
- Step 84
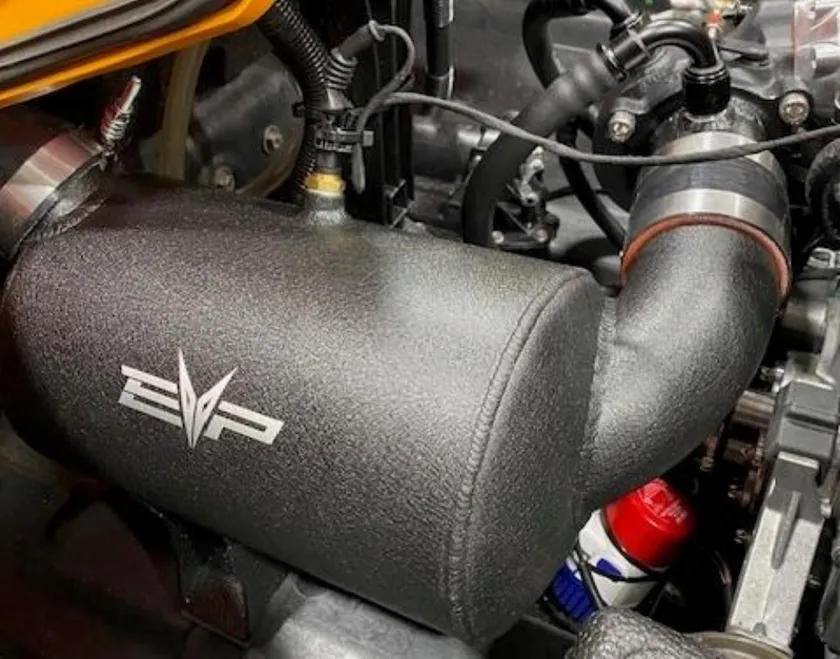
Install the 3.0” x 3.0” silicone coupler from the turbocharger to water box. Use (2) 359 T-bolt clamps to fasten down. Install the temperature sensor from the OEM water box, install anti seize on the threads and install into new water box. Use a 19mm wrench.

- Step 85
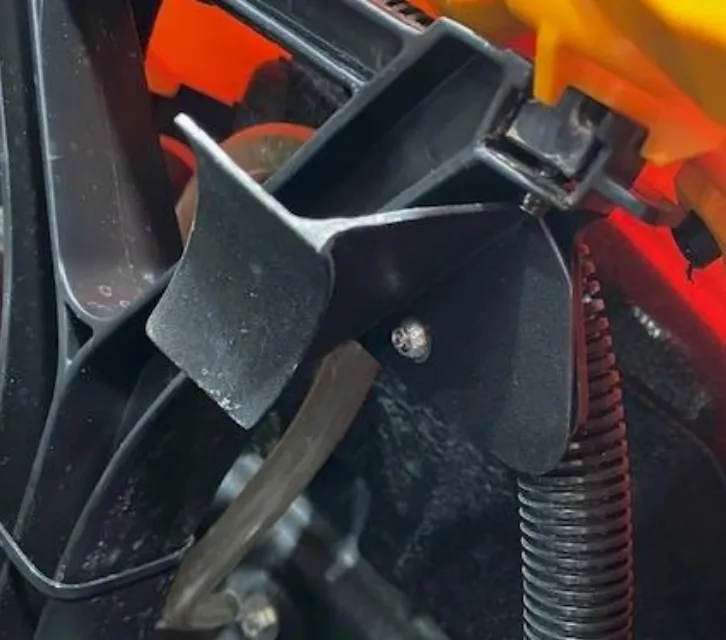
On the hull rear support, cut the zip tie holding the clear hose in place. Move this hose over to the other pillar and re zip tie. Install the air intake bracket to the rear support, fasten with M6 screw and locknut.
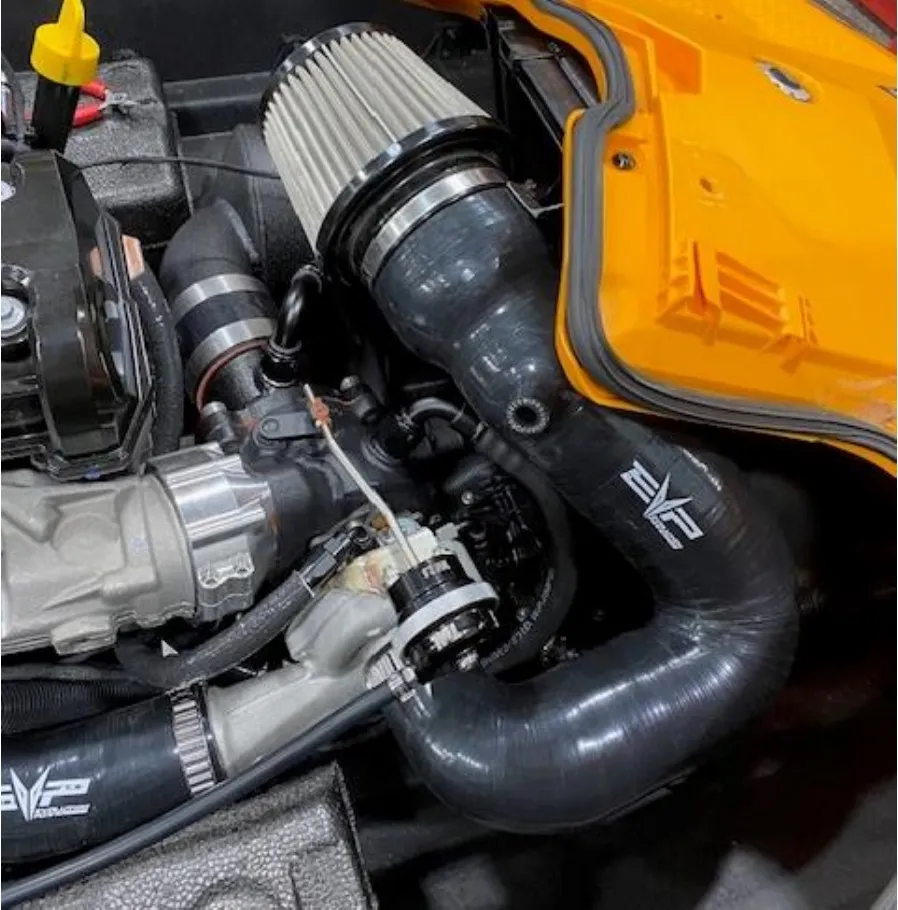
- Step 86
Install the air filter adaptor into the intake tube, half way. Use 32 constant tension worm drive on turbo side and (2) 110-120 worm drives holding the intake to the bracket and the air filter.

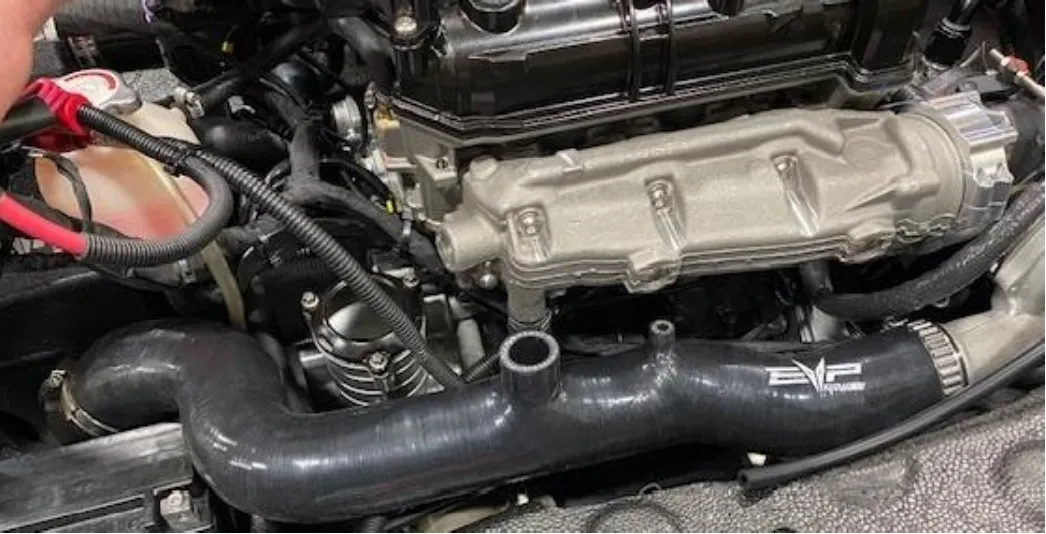
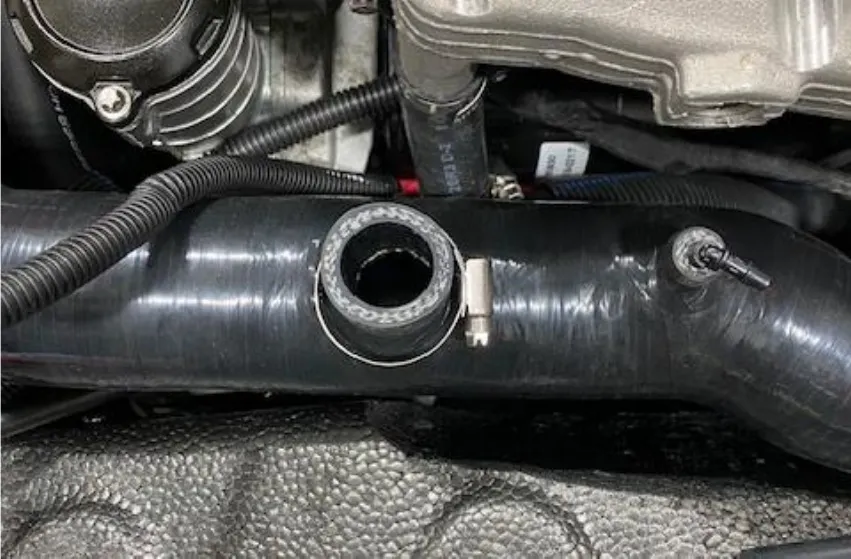
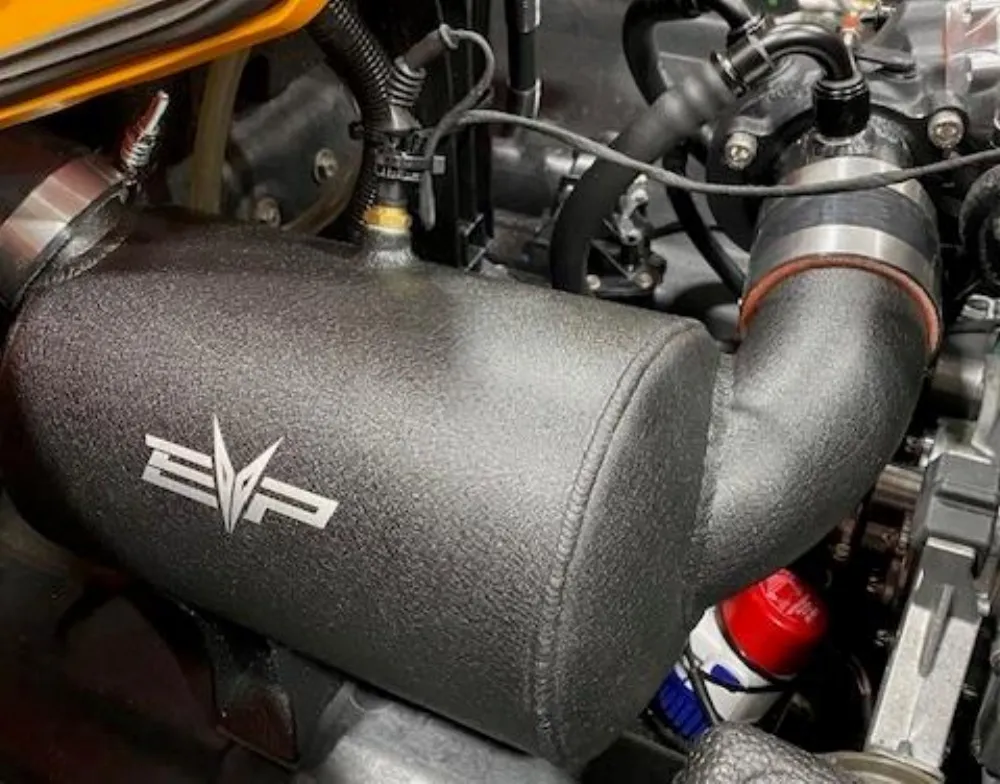

REMOVE RED CAP FROM COMPRESSOR INLET BEFORE INSTALLING.
- Step 87
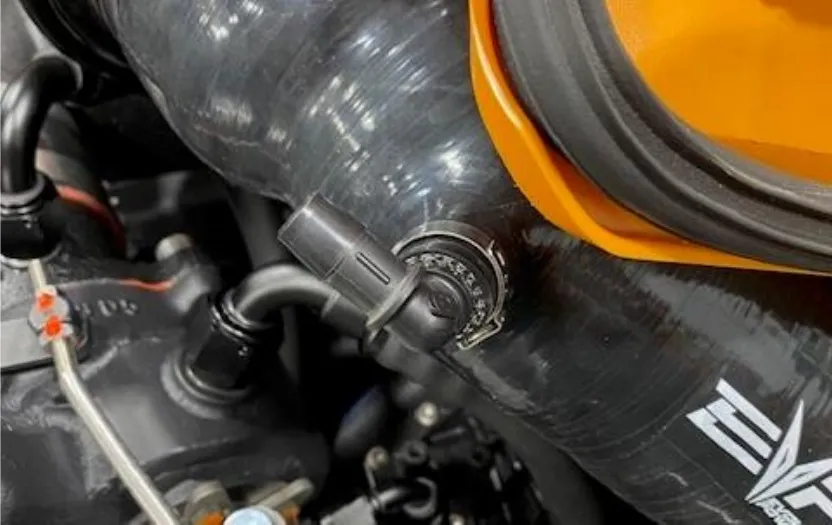
install the 90-degree barb into the intake tube and fasten down with a pinch clamp.
- Step 88
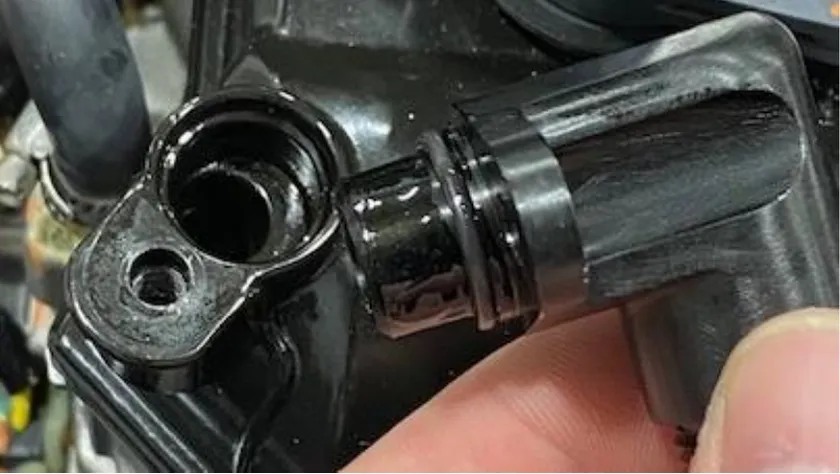
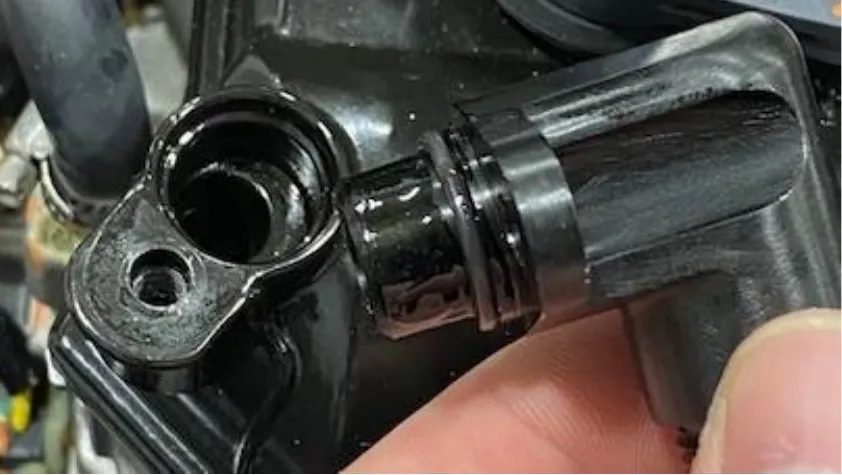
Install the supplied valve cover fitting with O-ring. Use dielectric grease and fasten down with OEM T30 screw.
- Step 89
Install the straight 6AN push lock fitting onto the valve cover fitting. Install 1/2" silicone hose from the valve cover to air intake barb.
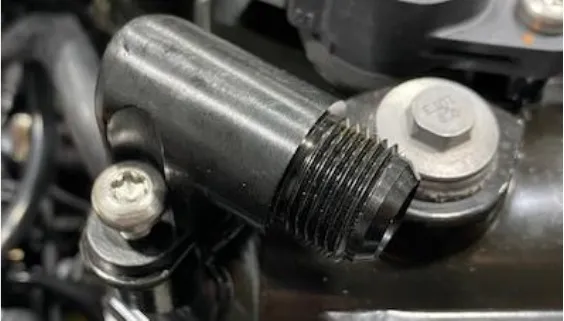
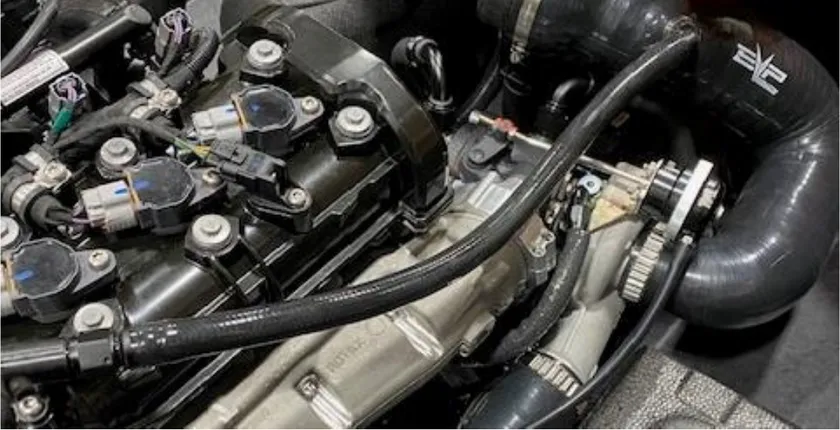
- Step 90
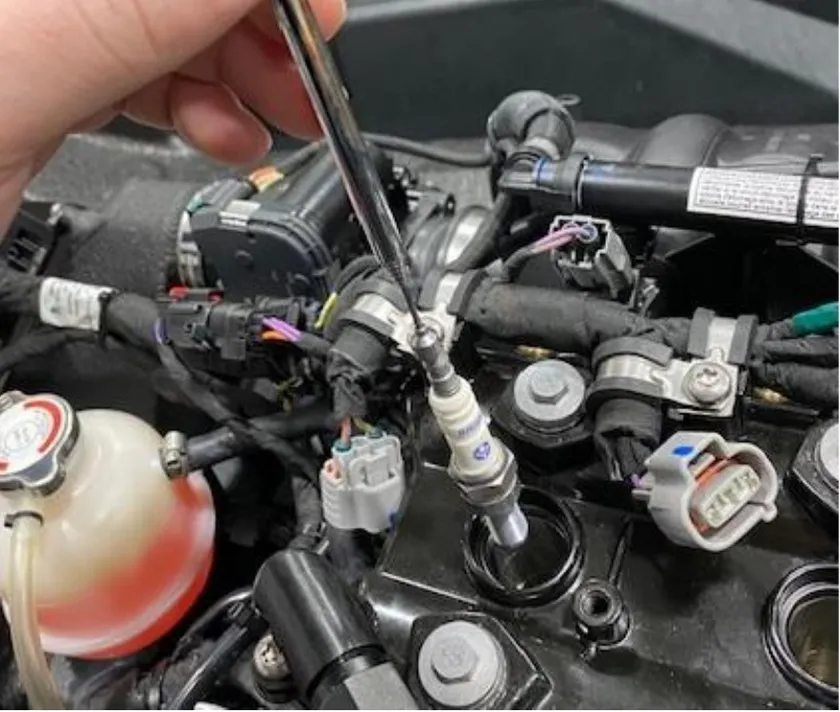
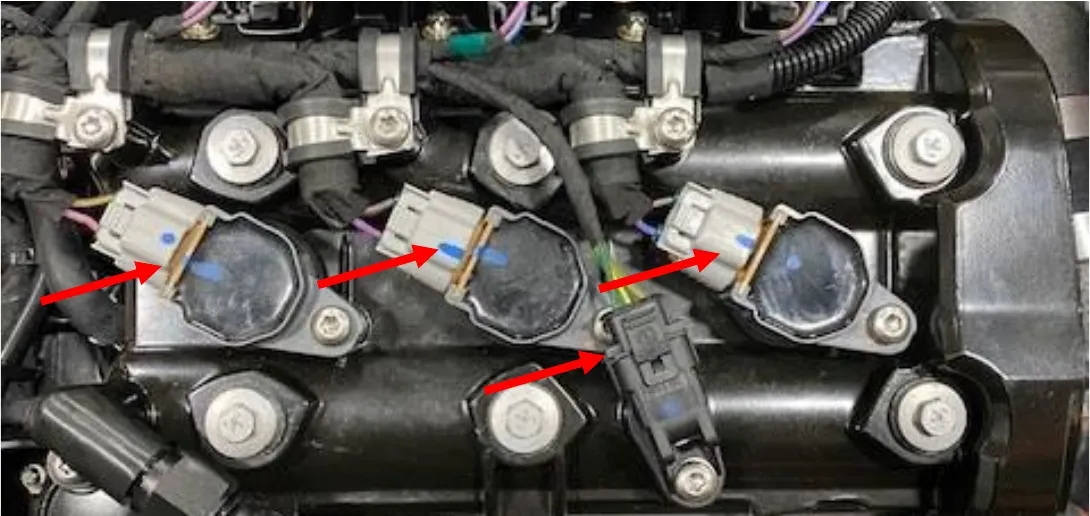
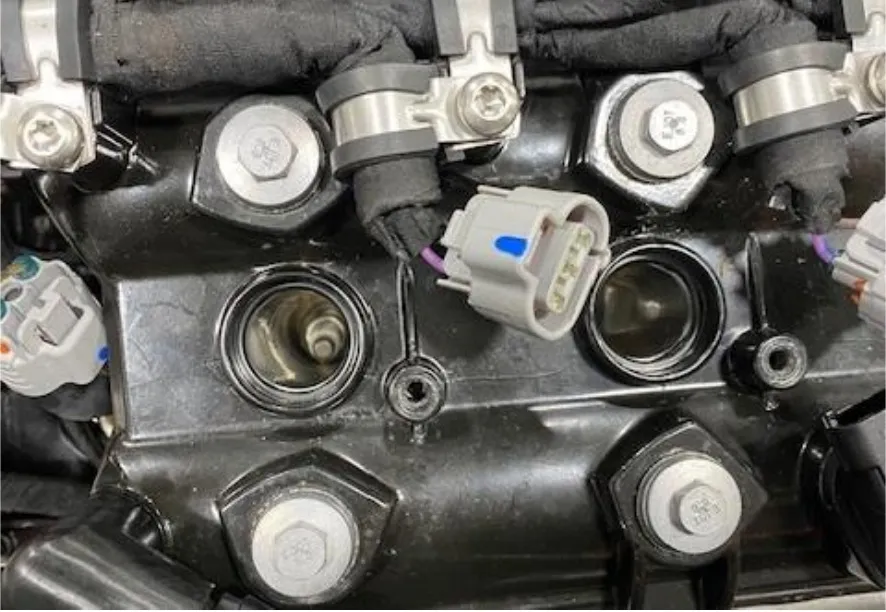
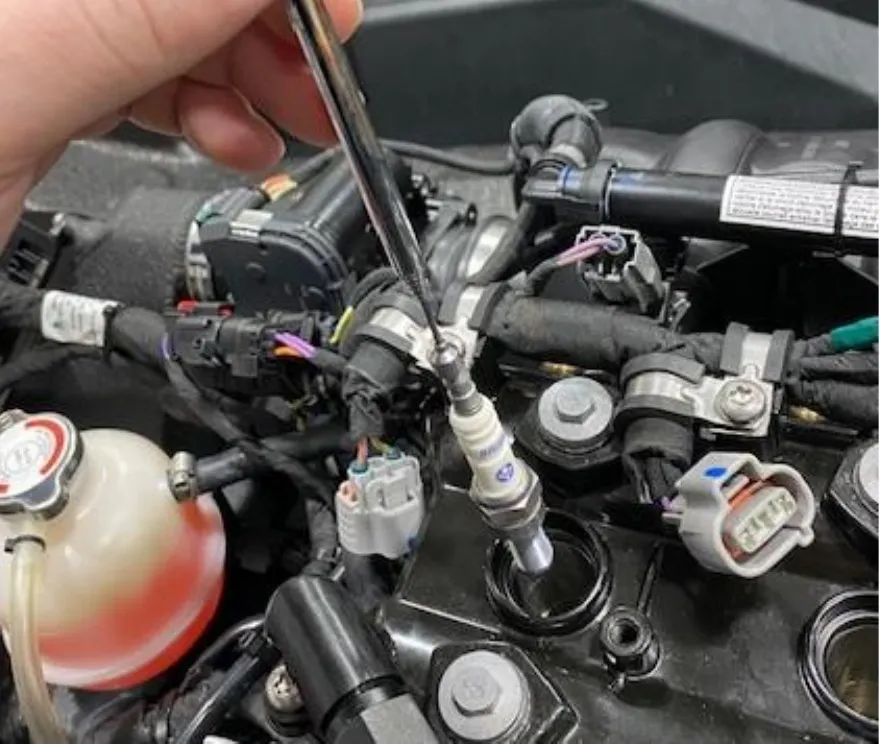
Remove the camshaft sensor connector and (3) coil connectors. It may help to loosen the P-clamps using a T30 socket. Remove the coil boots.
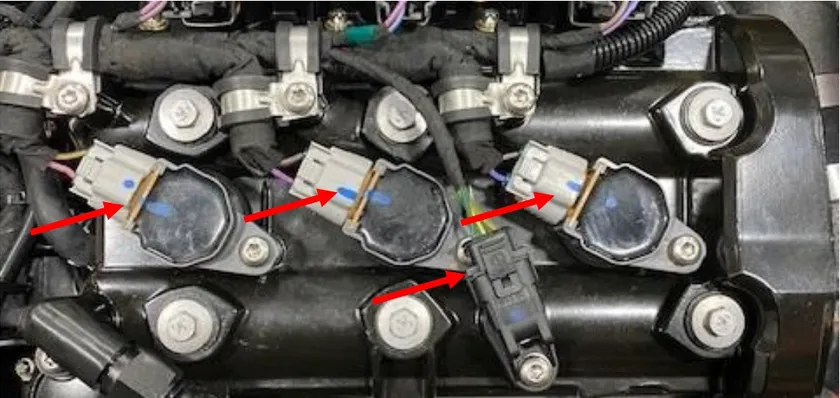
- Step 91
With a 5/8” spark plug socket loosen and remove the spark plugs. It is best to use a magnet to remove the plugs.
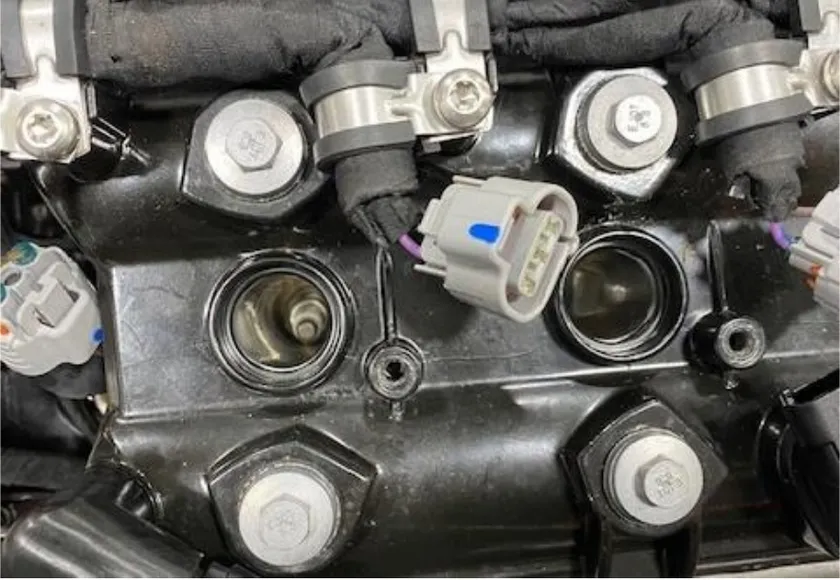
- Step 92
Install new plugs gapped at .018-.016”, using a magnet so you don’t drop the plugs. Reinstall the coil boots, screws, and connectors.
Procedure
Pre-Starting Checklist
- Check all fittings, hose clamps, connectors etc
- Add oil back into the engine. Roughly 1-1.5 liters. Check engine oil after you start the engine for a few seconds.
- Check jet pump and make sure all hardware is tight, no debris in the impeller or wear ring.
- Make sure the proper fuel has been added to the fuel tank.
- Make sure no hoses or charge tubes are rubbing.
- ECU is properly tuned.
Procedure
Winterizing Procedure
- Step 1
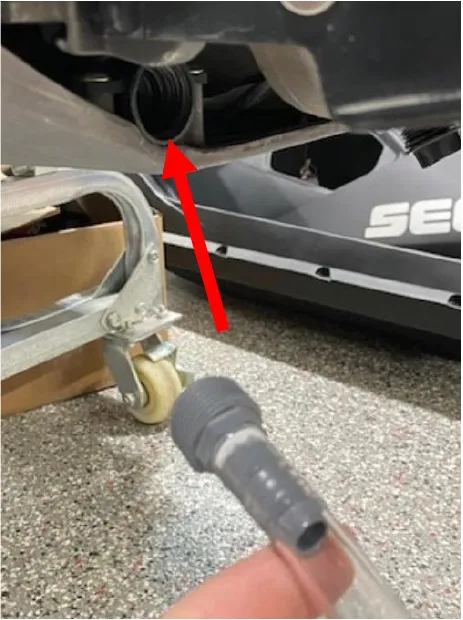
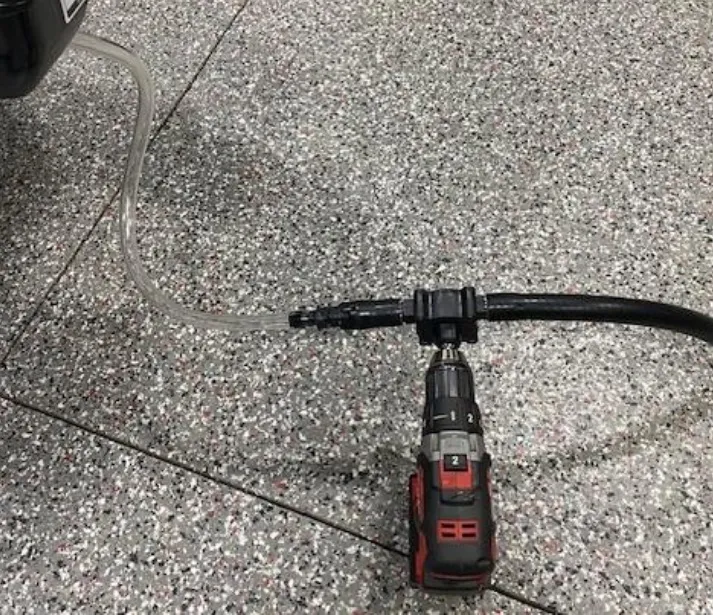
Get a gallon of antifreeze, pump, and a flush kit (if not already installed).
- Step 2
For these photos we installed a 3/4" threaded fitting to 1/2" barb attached to a drill pump.
- Step 3
Start the machine, let idle.
- Step 4
Start the drill pump, pushing antifreeze through the flush kit.
- Step 5
Once antifreeze starts coming out the jet pump, make sure its dark pink, stop pumping.
- Step 6
Let the machine run a few seconds longer, then shut off.
- Step 7
Remove the water box, dump out the fluids, pour a splash of antifreeze into the bottom and reinstall the water box.
Need technical support?
Submit a ticket with your vehicle and what you're seeing, and our support team will get back to you.
