 BUY NOW, PAY LATER. Starting at 0% APR


Polaris XP Turbo/S & Pro XP Racing Intercooler Core Replacement
XP Turbo/S & Pro XP Racing Intercooler Core Replacement
In the box
Parts and tools
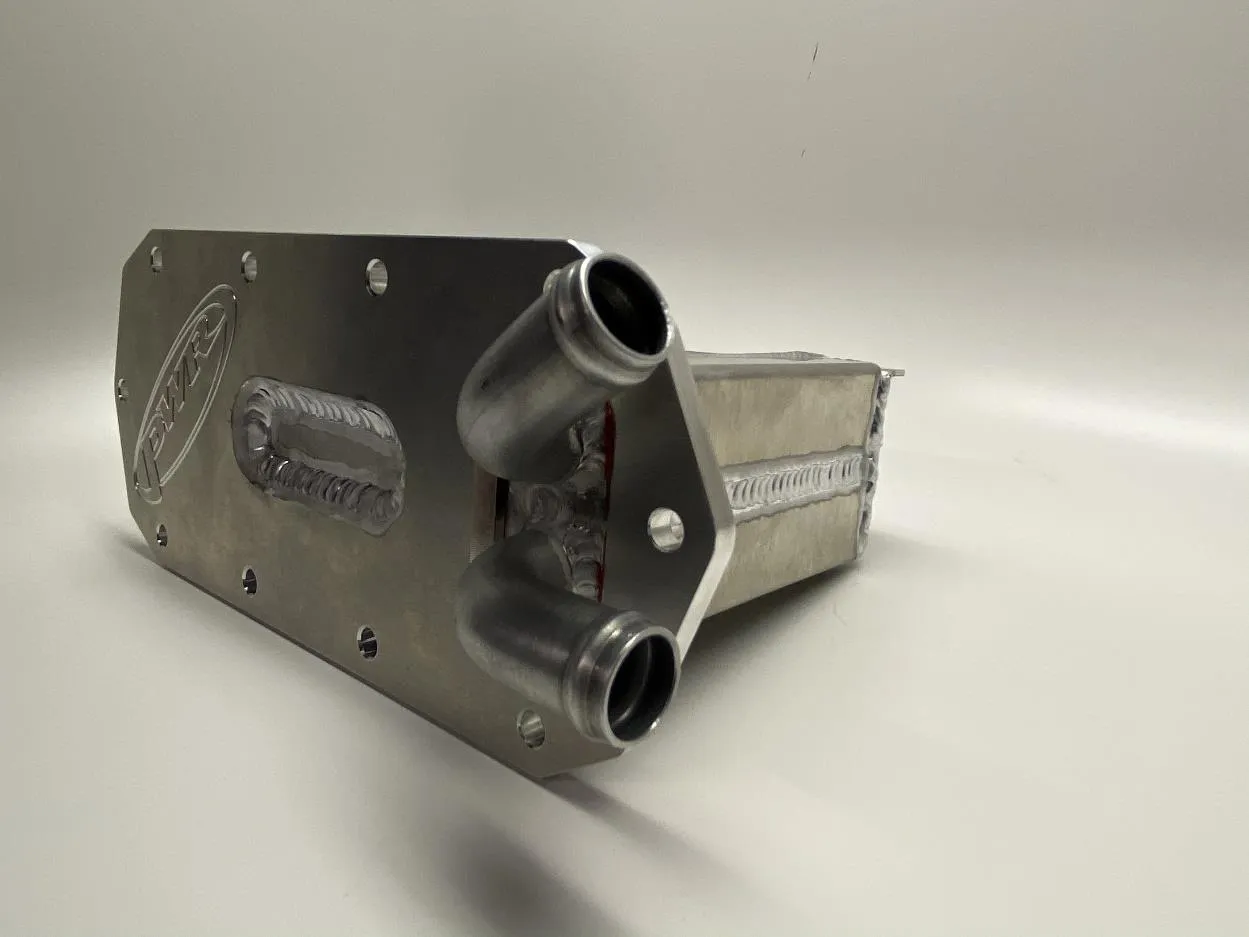
Included parts
- 1Racing Intercooler
Required tools
- T-40 Torx Socket
- Spring Puller
- 22mm Open End Wrench
- 8,10,15mm Socket
- Hose Pinch Tools
- Flat Blade Screwdriver
Procedure
Installation
- Step 1
Remove the rear bed with a T-40 Torx
- Step 2
Remove the rear valance if the vehicle still has OEM exhaust. Then remove exhaust, O2 sensor and heat shield. Circled is the intercooler. (See figure 1).
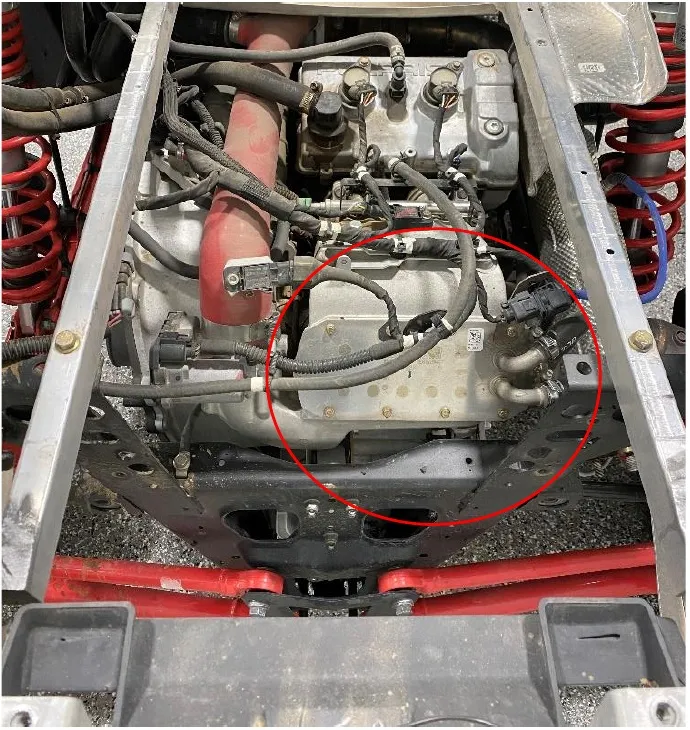
Fig. 1 - Step 3
Located on the intercooler are two brackets. Remove all (3) plugs from the brackets using a flat blade screwdriver.
Cautionthese will be remounted onto the new intercooler so do not break them. One is the first 02 sensor plug, and the other two are feeding to the throttle body.
- Step 4
Label both coolant lines feeding into the intercooler (top/bottom), pinch both lines off to stop coolant from leaking out, place a catch can underneath the machine and disconnect the lines from the intercooler.
- Step 5
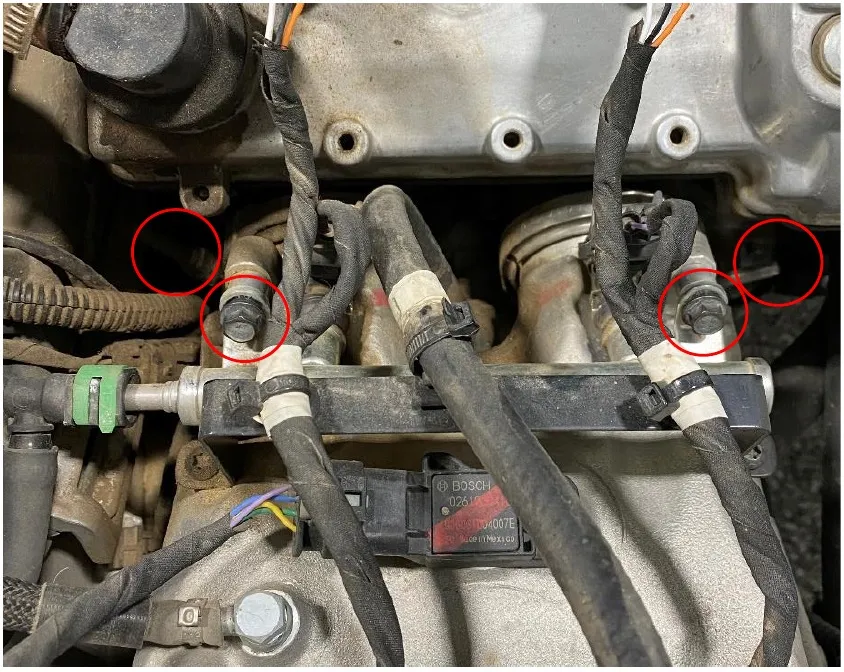
Remove (2) 10mm bolts and spacers holding the fuel rail in place. (See figure 2).
- Step 6
Loosen both V-Clamps retaining the intake manifold to the engine, 11mm socket. (See figure 2).
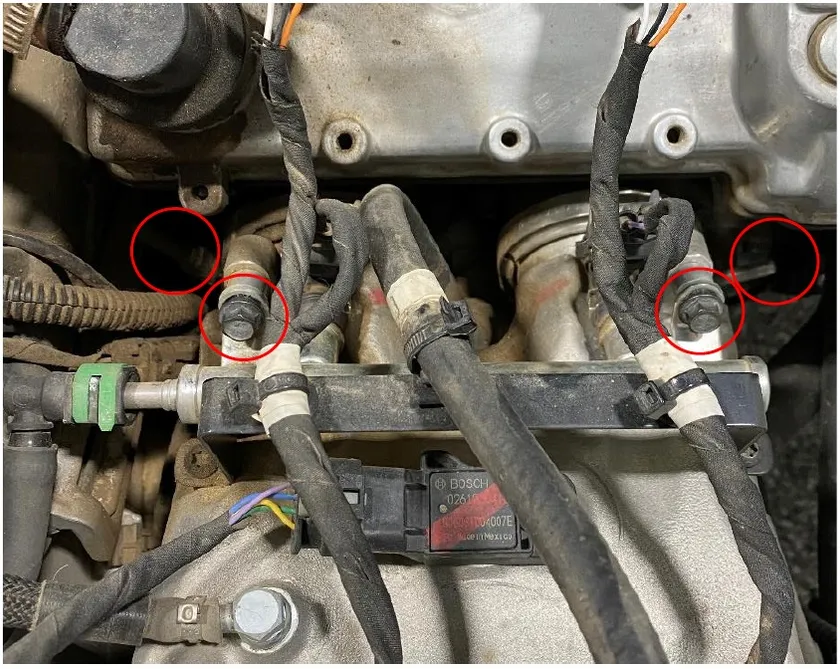
Fig. 2 - Step 7
Remove the charge tube going into the throttle body using a 11mm socket and remove (4) 10mm bolts on the throttle body going to the intake. (See figure 3)
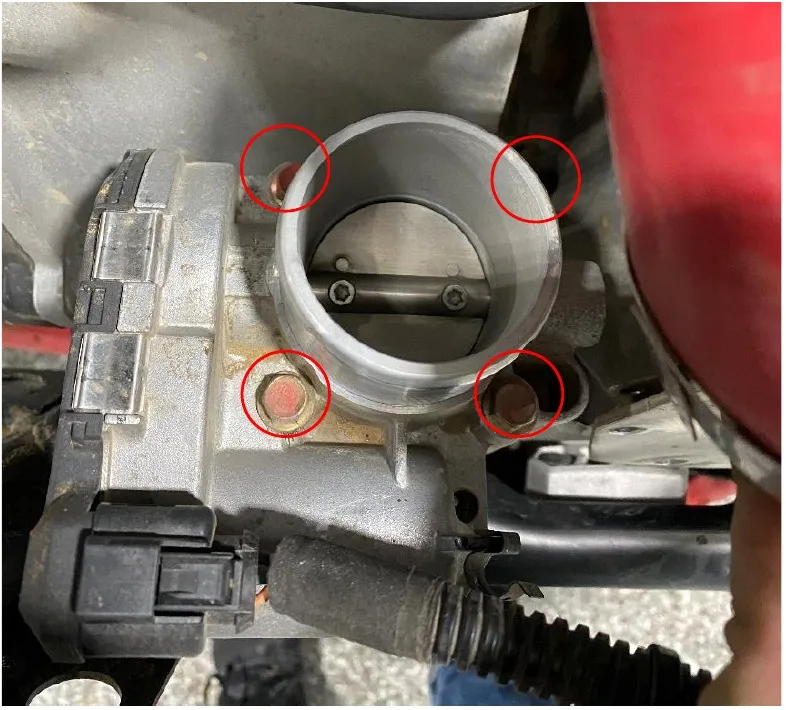
Fig. 3 - Step 8
Remove the top bolt on the transmission bracket, holding the plenum using a 13mm socket. (See figure 4).
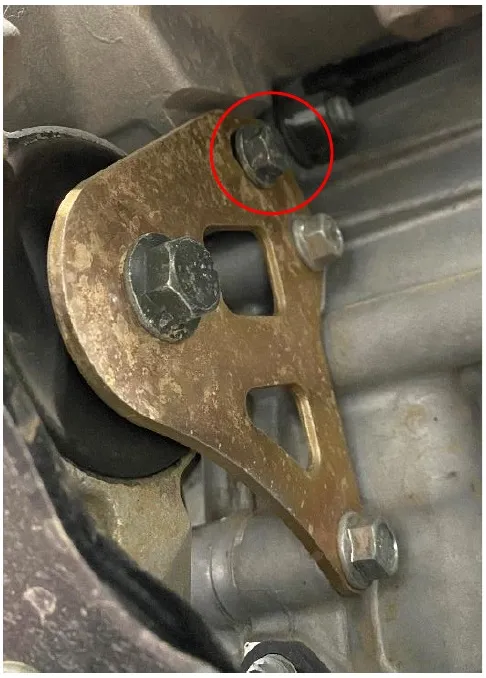
Fig. 4 - Step 9
Remove both intake manifolds from the engine, allowing the plenum and intercooler to rotate.
- Step 10
Take out (10) 8mm bolts on the intercooler (2) of them will have brackets on them. Remember where they are located. Now the intercooler can be removed, and able to pass the frame.
- Step 11
Take the gasket off the OEM intercooler and place it on a work bench. Next you will cut the gasket and reinstall just the bottom portion onto the new intercooler. (See figure 5-7).
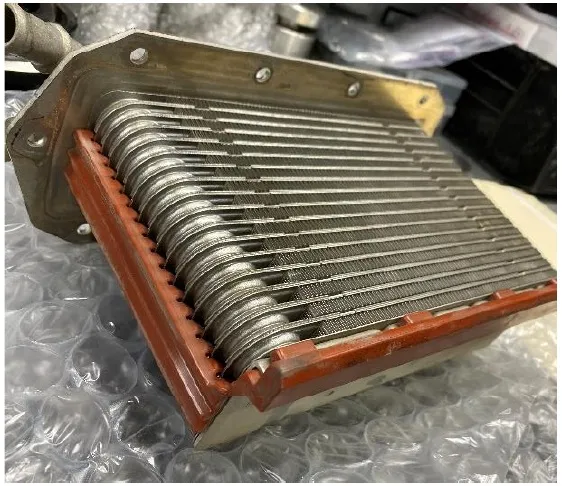
Fig. 5 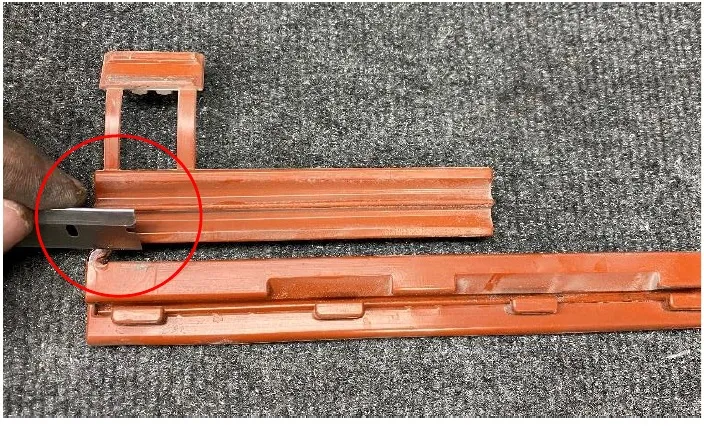
Fig. 6 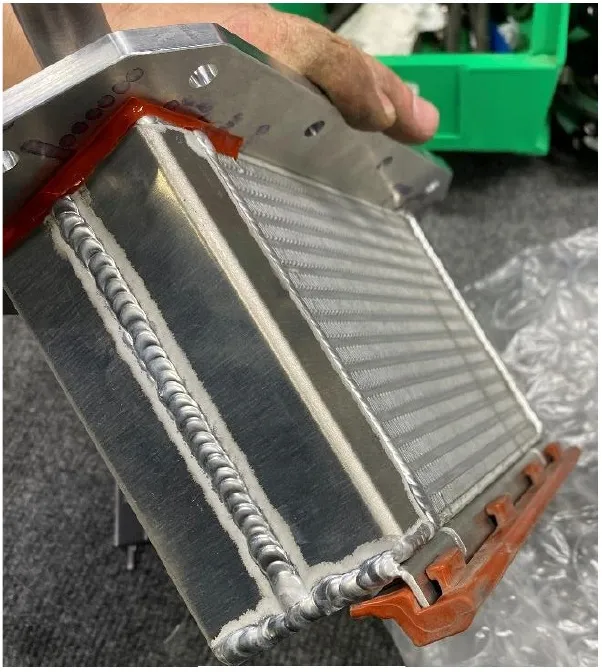
Fig. 7 - Step 12
Reinstall the new intercooler. Place both brackets into their original position and fasten all (10) 8mm bolts down to 7 ft lbs. Reconnect the (2) throttle body and (1) 02 sensor back to the correct bracket. (See figure 8).
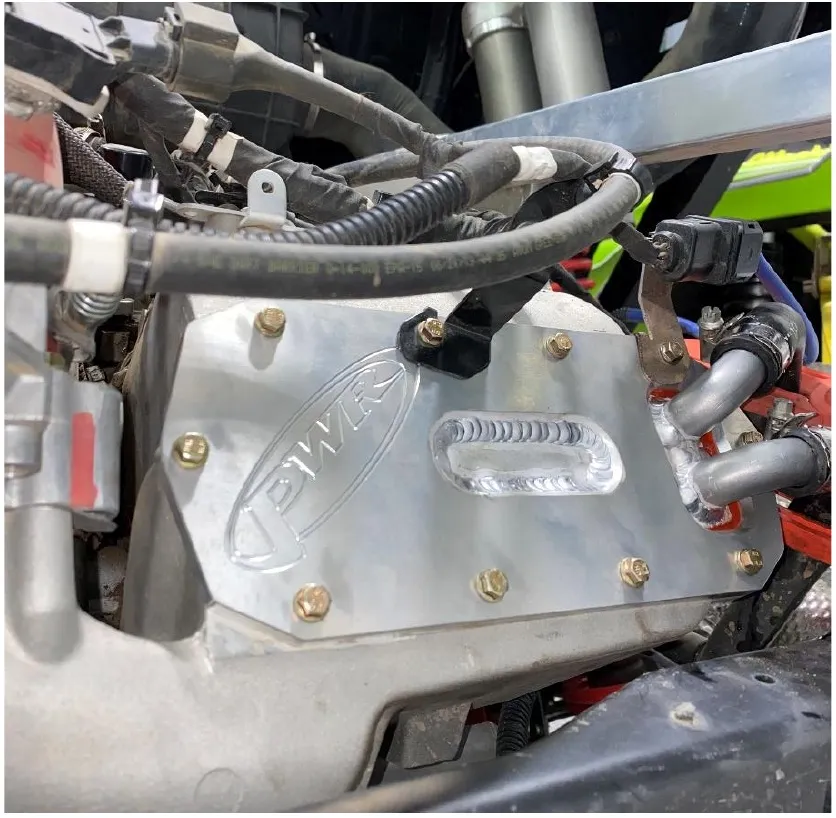
Fig. 8 CautionBe careful not to damage any fins on the radiator.
- Step 13
Reinstall the plenum to transmission 13mm bolt. Do not fasten down yet.
- Step 14
Reassemble both V-Clamps onto the intake and engine. Make sure they are seated before you fasten down.
- Step 15
Reassemble the throttle body to the plenum using (4) 10mm bolts. Reinstall the charge tube at this time using a 11mm socket.
- Step 16
Reassemble the fuel rail bolts and spacers. Torque to 7ft lbs. You can now fasten the plenum-transmission bolt down.
- Step 17
Re-connect both top/bottom coolant hoses into their original orientation. Undo clamps.
- Step 18
Reassemble the rear heat shield and exhaust. Connect the 02 sensor back into the exhaust.
- Step 19
Top the coolant off and let the engine run for 10min or until coolant level is correct.
- Step 20
Reassemble the box and rear valance.
Need technical support?
Submit a ticket with your vehicle and what you're seeing, and our support team will get back to you.
