 BUY NOW, PAY LATER. Starting at 0% APR


Polaris XP Turbo/S Pro XP 1300cc Injector, Set of 2
Installation instructions for the XP Turbo/S Pro XP 1300cc Injector, Set of 2 on the Polaris Pro XP (RZR) (SKU 502FP0003). Parts, tools, and full procedure.
In the box
Parts and tools
Included parts
- 2EVP 1300cc Injectors
- 2Injector Retaining Clips
- 2Injector Adaptors
- 26mm Flange Bolts
- 2Fuel Rail Spacers
Required tools
- 8mm Socket
- 10mm Socket
- Di Electric Grease
- Medium Strength Tread Lock
- Safety Glasses
Procedure
Pre-Installation Steps
- Step 1
This installation should be done OUTDOORS or in a well-ventilated area with a cold engine and away from any potential spark or heat sources.
- Step 2
Disconnect the ground terminal off the battery.
Procedure
Installation Steps
- Step 1
Remove the box and back panel off the firewall.
- Step 2
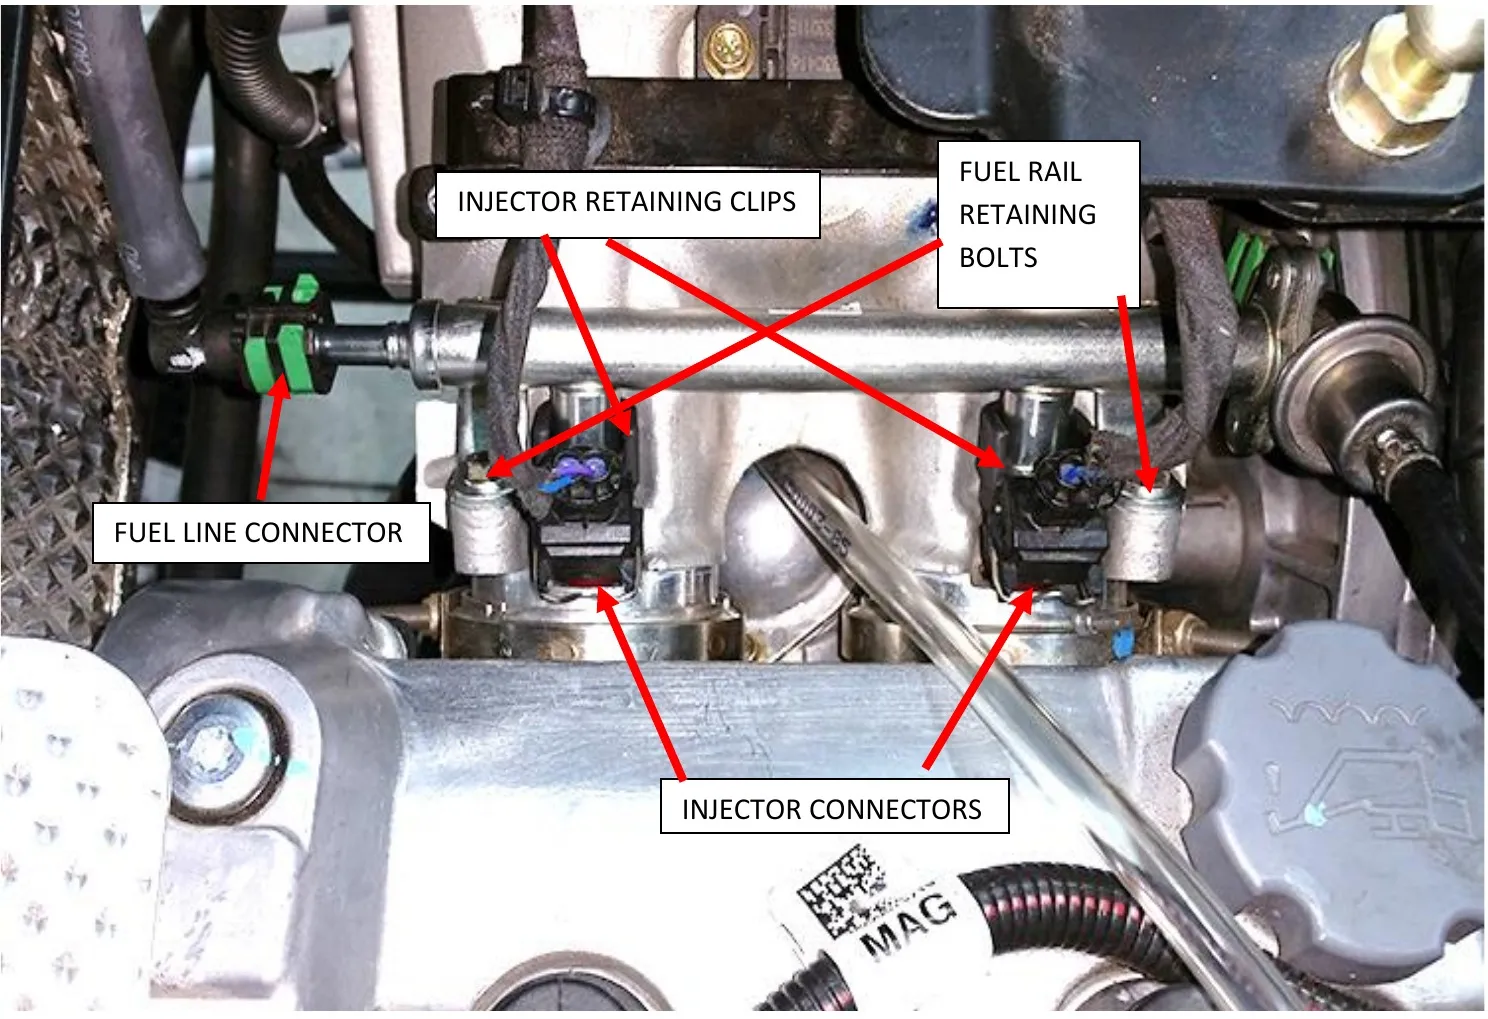
Remove the electric connectors from the injectors – this is done by squeezing the wire clips towards the back of the vehicle and pulling the connectors off the injectors. See figure 1.
- Step 3
MAKE SURE TO WEAR SAFETY GLASSES IN THIS STEP. Disconnect the fuel line from the fuel rail by removing the GREEN clip– See figure 1.
Warningfuel may spray when this is released.
- Step 4
Remove the two 8mm bolts holding the fuel rail to the manifold.
- Step 5
Push the fuel rail towards the back of the vehicle while lifting upwards. This will expose the tip of the injectors. With a sharpie and tape mark injector connecters 1 & 2. Starting with injector 1, push the plastic injector clip down (see figure 1.) This will release the injector from the fuel rail. Remove both the clip and injector. Repeat step 5 for injector 2.
- Step 6
Grab your new EVP 1300 injectors and put di electric grease on the O-rings before securing them into the fuel rail.
- Step 7
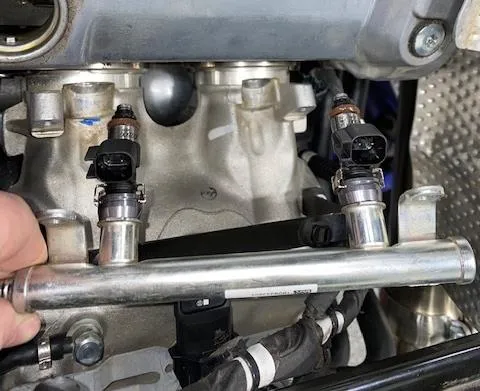
Install the EVP 1300 injectors into the fuel rail. The slots in the clips slide onto the outer rings of the fuel rail. Push the injector up into the fuel rail until the slot on the injector lines up with the ribs and locating tab on the clip.
- Step 8
Put the provided fuel rail spacers between the intake and the fuel rail and secure the fuel rail in and replace the OEM 8mm bolts with the (2) M6 flange bolts.
Noteuse medium strength thread lock.
- Step 9
Reinstall the fuel line and fuel line clips.
- Step 10
Reconnect the ground terminal to the battery.
- Step 11
Switch the key to the “ON” position and check for fuel leaks. If leaks are detected, go back to step 7.
- Step 12
If no leaks are detected, cycle the key 3 times and start the engine.
- Step 13
Re-check after 50 miles.
Need technical support?
Submit a ticket with your vehicle and what you're seeing, and our support team will get back to you.
