 BUY NOW, PAY LATER. Starting at 0% APR


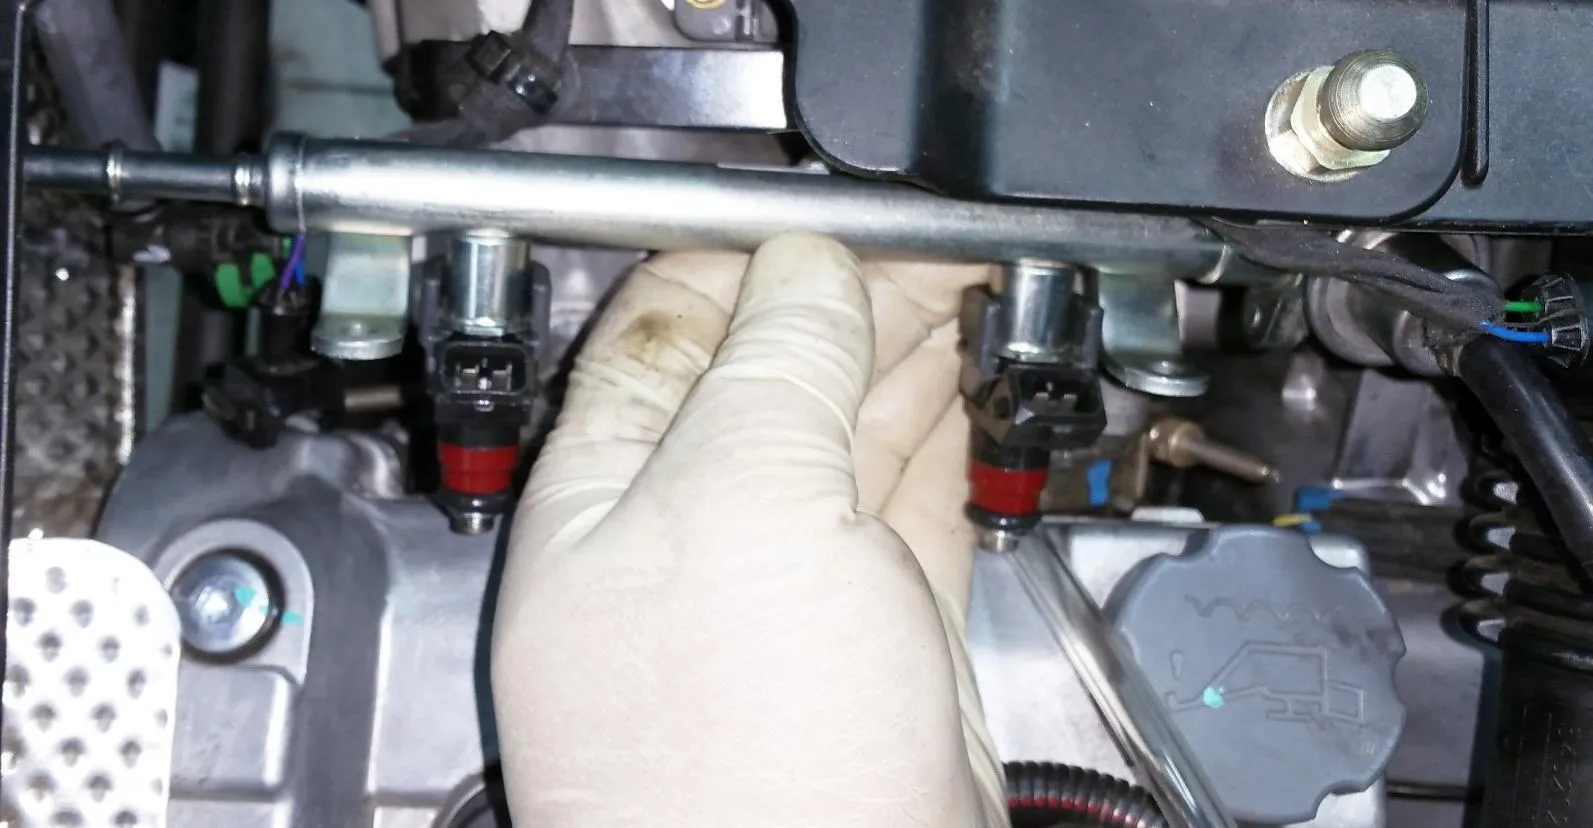
Reconnect O2 sensors back into the appropriate injector. Remove tape.
Polaris XP Turbo/S Big Injector Kit 850cc, Set of 2
Installation instructions for the XP Turbo/S Big Injector Kit 850cc, Set of 2 on the Polaris RZR Turbo (SKU 501FP0004). Parts, tools, and full procedure.
In the box
Parts and tools
Included parts
- 2850 Fuel Injectors
- 1O2 Sensor Bypass (Only for 2016 Model)
Required tools
- Dremel
- 8mm Socket
- 5/32” Drill Bit
- Di Electric Grease
- Medium Strength Thread Lock
- Open End Wrench Set
- Safety Glasses
- Sharpie/Tape
Procedure
Pre-Installation Steps
- Step 1
This installation should be done OUTDOORS in a well-ventilated area with a cold engine and away from any potential spark or heat sources.
- Step 2
Disconnect the ground terminal off the battery.
Procedure
Installation Steps
- Step 1
Remove the box and back panel off the firewall.
- Step 2
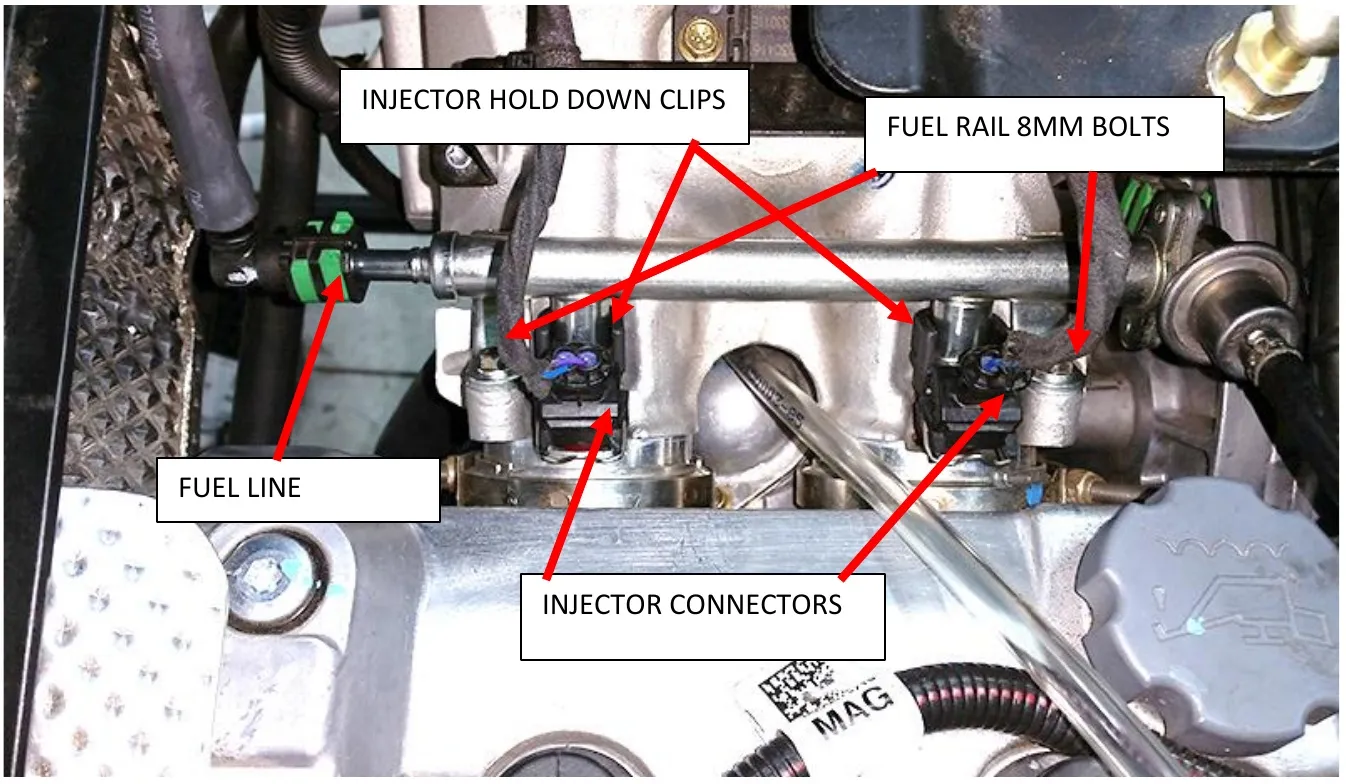
Remove the electric connectors from the injectors – this is done by squeezing the wire clips towards the back of the vehicle and pulling the connectors off the injectors. See figure 1.
- Step 3
MAKE SURE TO WEAR SAFETY GLASSES IN THIS STEP. Disconnect the fuel line from the fuel rail by removing the GREEN clip– See figure 1.
Warningfuel may spray when this is released.
- Step 4
Remove the two 8mm bolts holding the fuel rail to the manifold.
- Step 5
Push the fuel rail towards the back of the vehicle while lifting upwards. This will expose the tip of the injectors. With your sharpie and tape mark injector connecters 1 & 2. Starting with injector 1, push the plastic injector clip down (see figure 1.) This will release the injector from the fuel rail. Remove both the clip and injector. Repeat step 5 for injector 2.
- Step 6
Remove the bottom O-ring from the stock injectors and replace the bottom O-rings on the bottom of the new EVO 850 injectors.
- Step 7
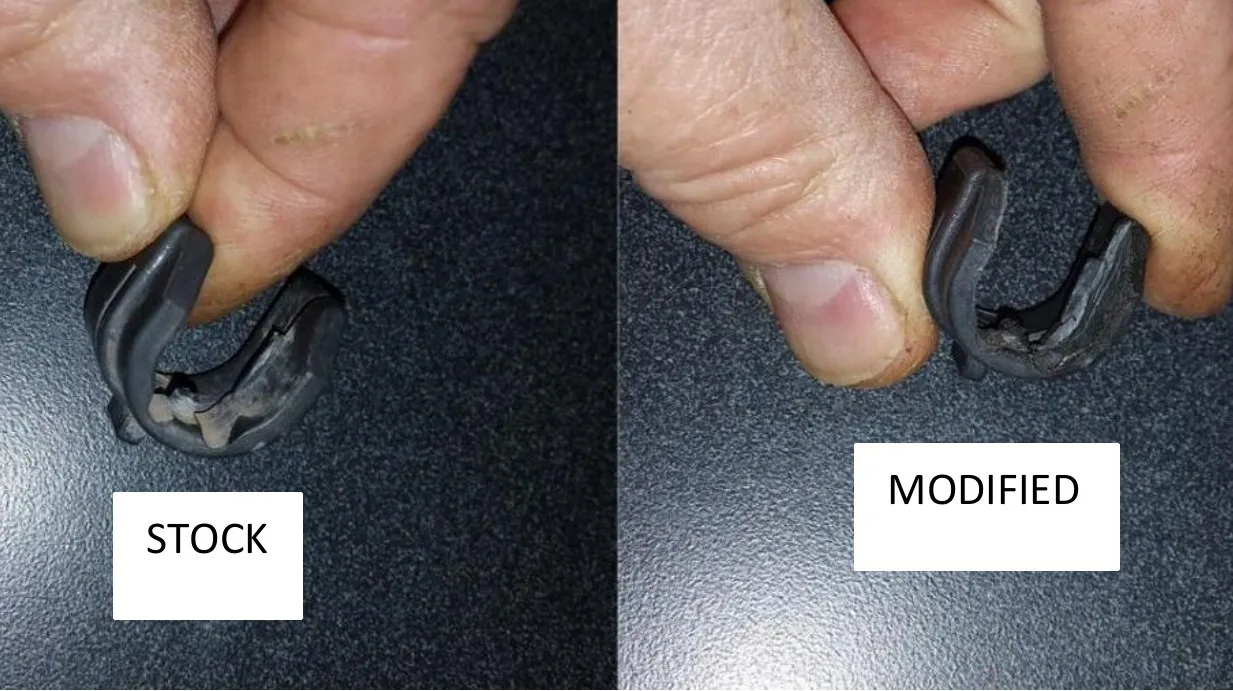
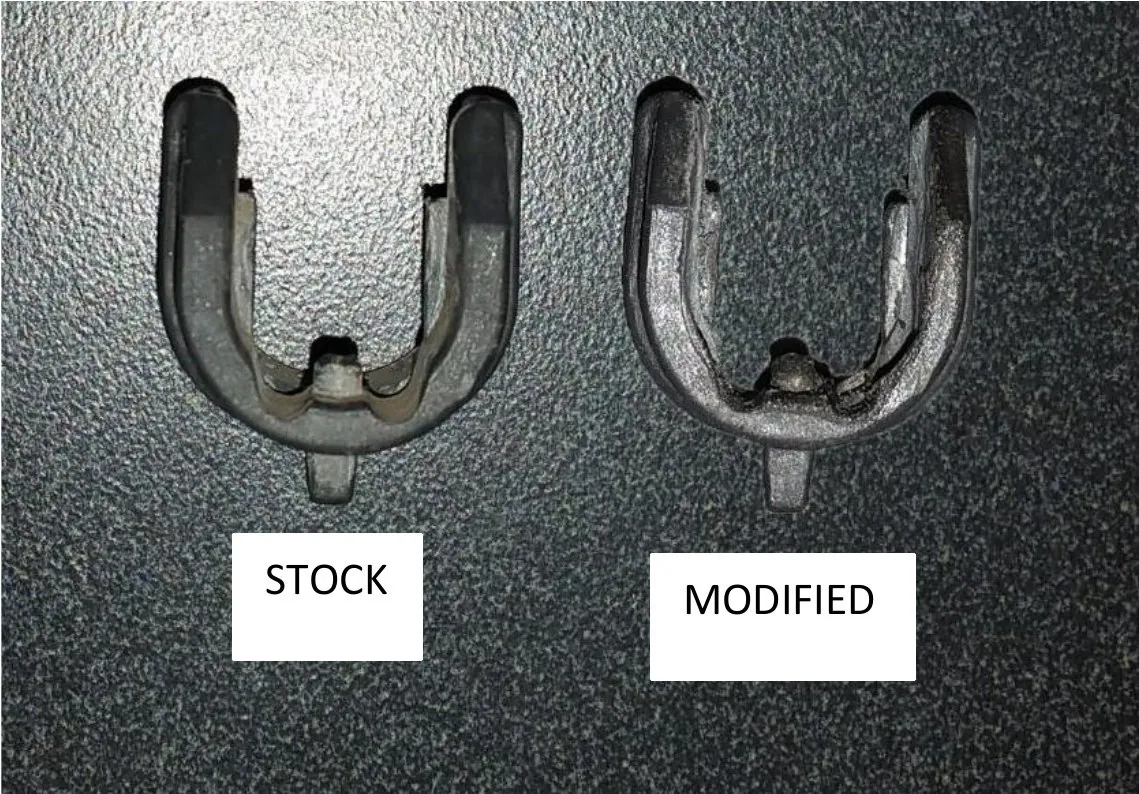
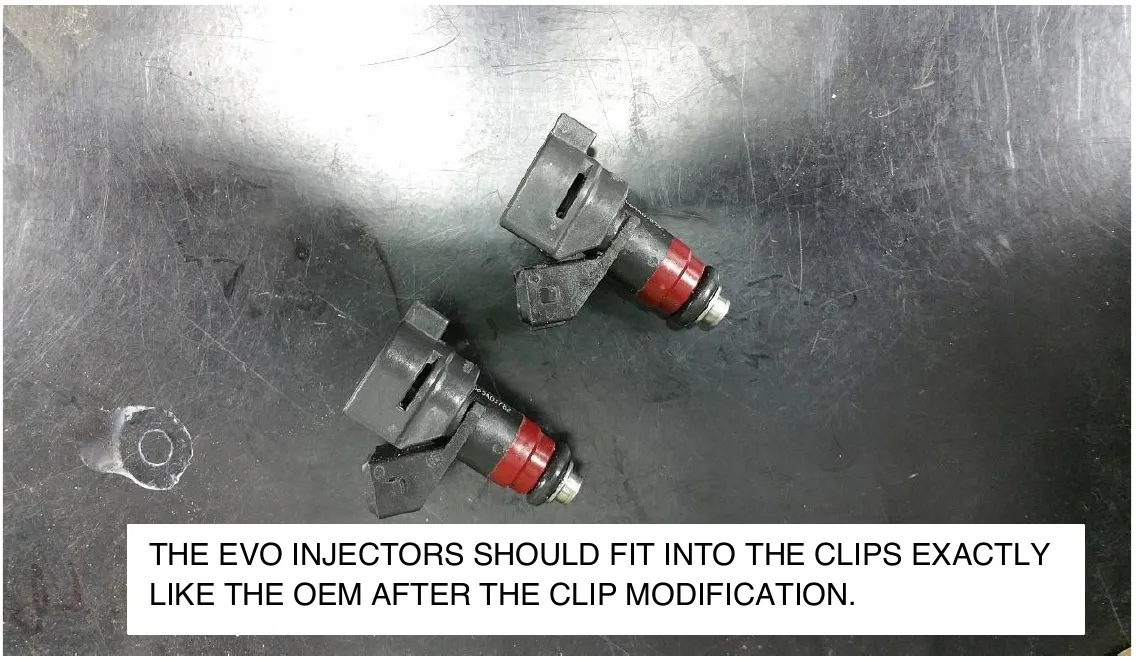
The opening of the injector clips needs to be modified so the EVO 850 injectors fit into the retaining clip like the OEM injector.
- Step 8
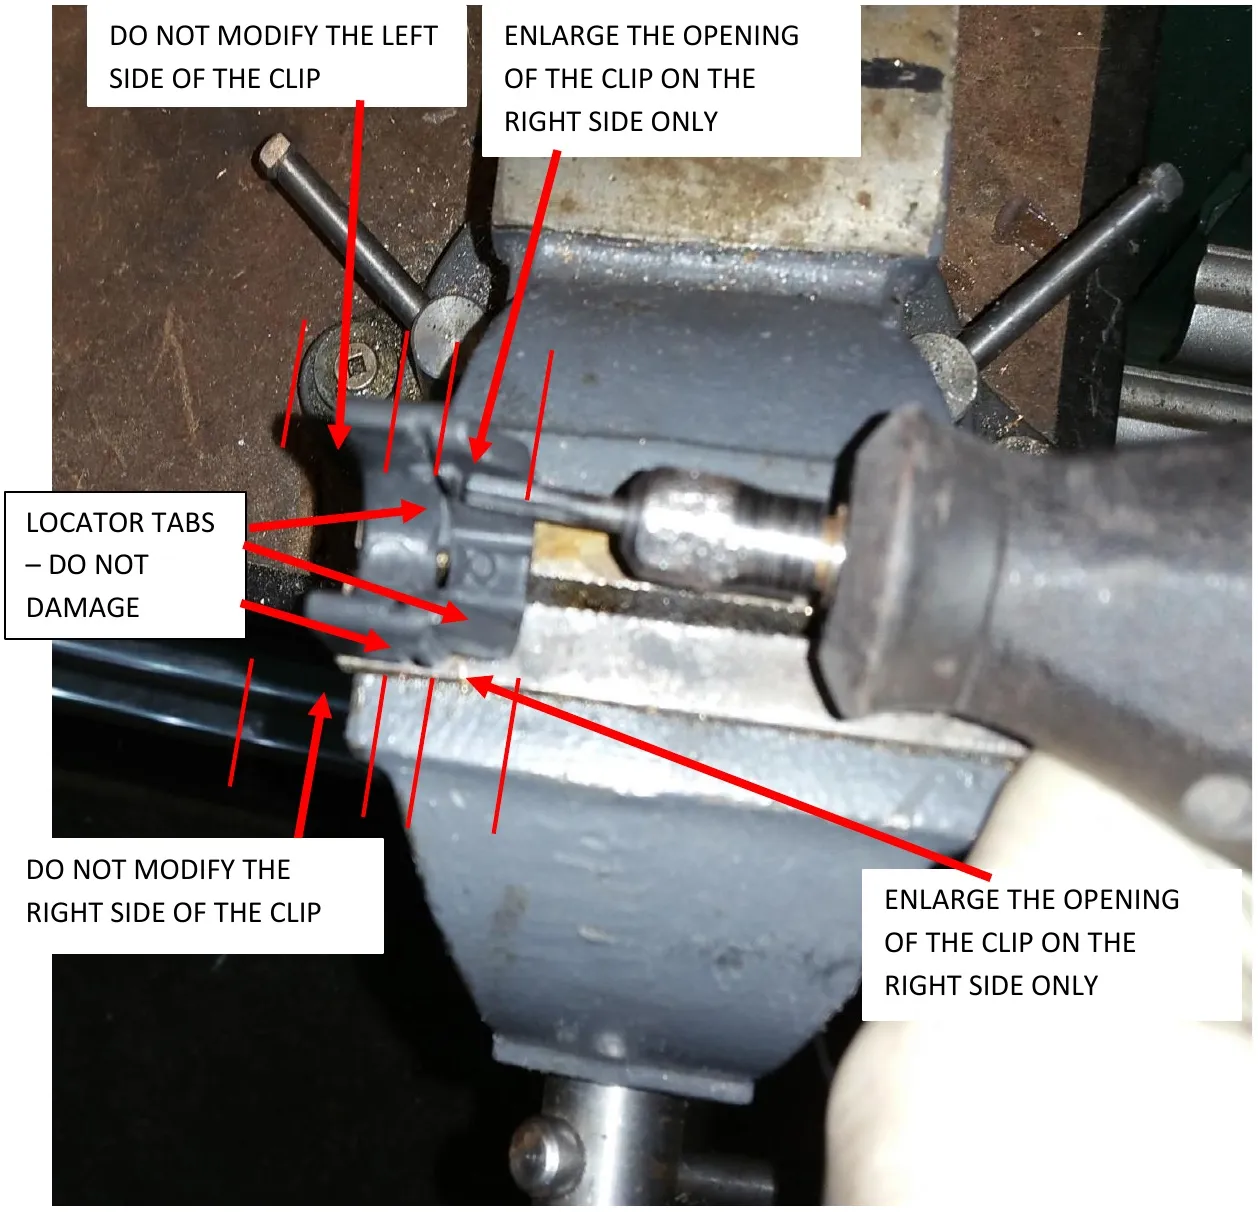
Place the injector locating tab into a vice. Using a Dremel with a small de-burring bit, enlarge the opening as shown in figure 2. Enlarge the sides of the opening of the clip from the top to bottom. Make sure NOT to grind off the side or bottom locator tabs. See figures 2 & 3.
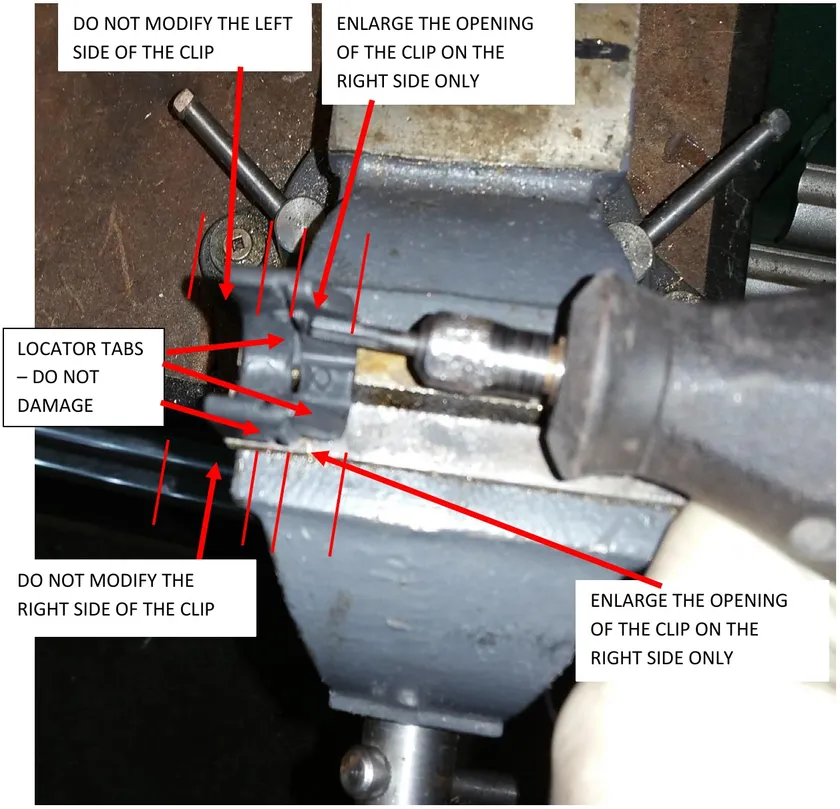
Fig. 2 DO NOT MODIFY THE LEFT SIDE OF THE CLIP. ENLARGE THE OPENING OF THE CLIP ON THE RIGHT SIDE ONLY. LOCATOR TABS – DO NOT DAMAGE. DO NOT MODIFY THE RIGHT SIDE OF THE CLIP. ENLARGE THE OPENING OF THE CLIP ON THE RIGHT SIDE ONLY 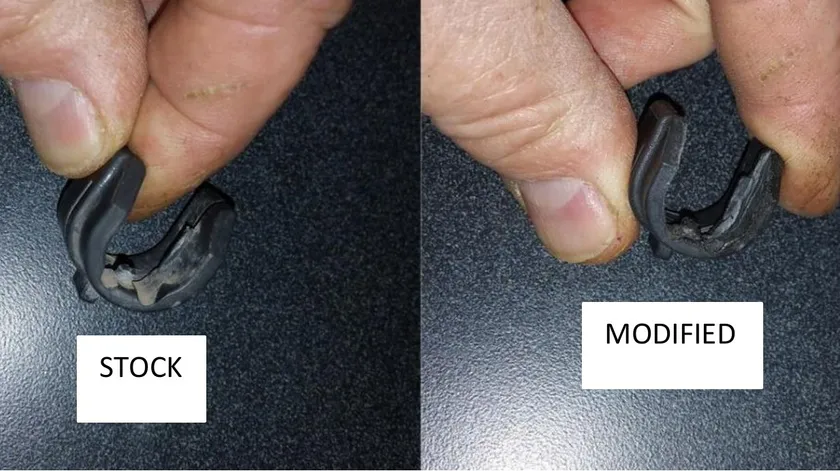
Fig. 3 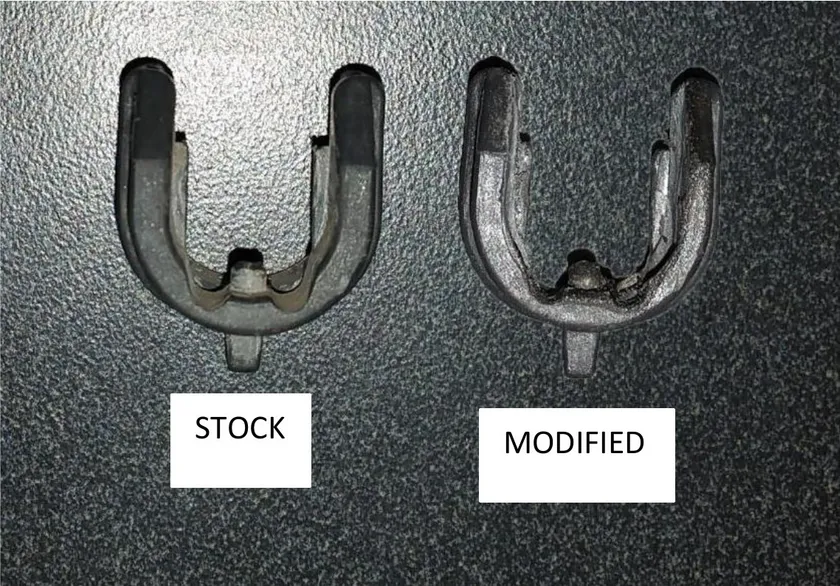
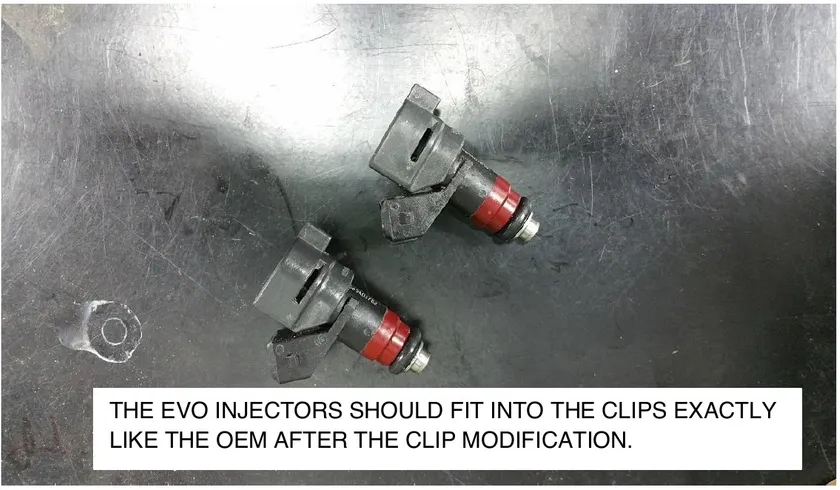
THE EVO INJECTORS SHOULD FIT INTO THE CLIPS EXACTLY LIKE THE OEM AFTER THE CLIP MODIFICATION. - Step 9
Put di-electric grease onto the top and bottom of each injectors O-rings.
- Step 10
Install the modified injector retaining clips onto the bottom of the fuel rail.
- Step 11
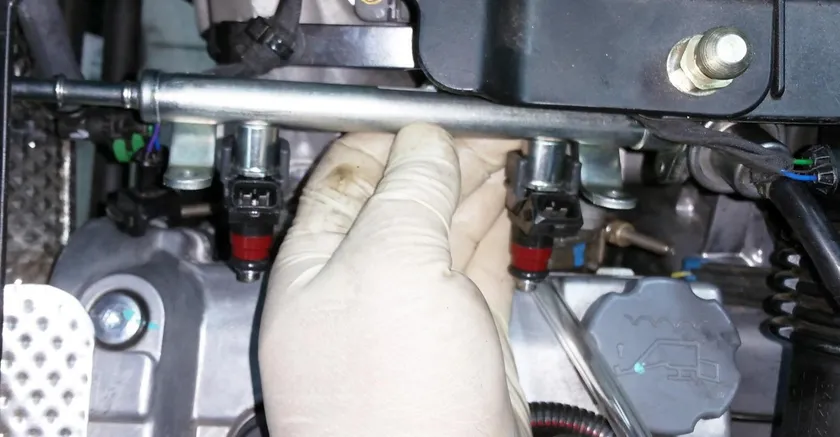
Install the injectors into the fuel rail. The slots in the clips slide onto the outer rings of the fuel rail. Push the injector up into the fuel rail until the slot on the injector lines up with the ribs and locating tab on the clip. Push the retaining clips up from the bottom until they lock in place. When the injector clips and fuel rail outer ring are lined up correctly, the retaining clip should slide in place easily and the injector should have no movement.
- Step 12
Tip the injector rail downward to get the injectors into the manifold. Push the fuel rail toward the manifold to seat the O-rings into manifold injectors seats. You should feel the O-rings click into place on the manifold side.
- Step 13
Reinstall the fuel rail 8mm bolts – use BLUE LOCTITE on the threads.
- Step 14
Reinstall the fuel line and fuel line clips.
- Step 15
(Only For 2016 Model) Install O2 sensor bypass plug into harness. Zip tie factory O2 sensor plug end to the frame.
- Step 16
Reconnect the ground terminal to the battery.
- Step 17
Switch key to the “ON” position and check for fuel leaks. If leaks are detected, go back to step 9.
- Step 18
If no leaks are detected, cycle the key 3 times and start the engine.
- Step 19
Re-check after 50 miles.
Emissions notice. This product is exempt from the emission standards and related requirements of 40 C.F.R. § 1051 as provided by 40 C.F.R. § 1051.620, and California law [e.g., vehicle code §§ 27156 and 38391]. This product is sold only for use in connection with EPA certified, purpose-built, nonroad vehicles used solely for closed course, nonroad competition/racing and not used for any recreational purpose or on public highways or right of ways maintained by and open to the public. This product is sold only in connection with machines that do not fall under state and/or federal noise or emission standards/regulations. Purchasers who/that purchase this product represent and warrant that the product is purchased only in connection with EPA-certified, emission-regulations-exempt and noise-regulations-exempt competition/racing vehicles as interpreted under applicable state and/or federal law.
Need technical support?
Submit a ticket with your vehicle and what you're seeing, and our support team will get back to you.
