 BUY NOW, PAY LATER. Starting at 0% APR


Can-Am X3 Torrent-B Billet Intake Plenum Assembly
X3 Torrent-B Billet Intake Plenum Assembly
In the box
Parts and tools
Included parts
- 1Torrent “B” Billet Intake Plenum
- 1Hardware/O-Rings Kit
Required tools
- 8, 13mm Socket
- 13mm Open End Wrench
- T-30 Torx
- Di Electric Grease
- Torque Wrench
- Spring Puller
Procedure
Installation Steps
- Step 1
Use the T-30 Torx and remove the bolts holding the rear valance on.
- Step 2
Remove spring holding the muffler and the cat pipe together.
- Step 3
Using the 13mm wrench and 13mm socket remove the 4 bolts holding the muffler on and remove it.
- Step 4
Remove the exhaust vent on the clutch box to help have room to get to the plenum.
- Step 5
Remove the charge tube from the throttle body.
- Step 6
Unplug the Map sensor.
- Step 7
Disconnect the fuel line from the fuel rail.
- Step 8
Using the T-30 or 8mm remove the fuel rail from the plenum.
- Step 9
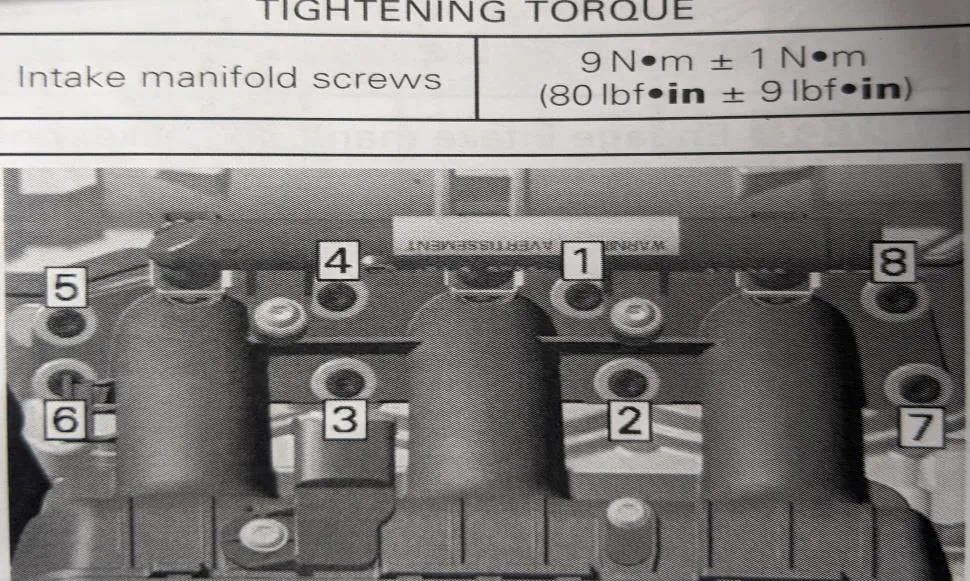
Using the T-30 or 8mm remove the 8 bolts holding the plenum onto the car.
- Step 10
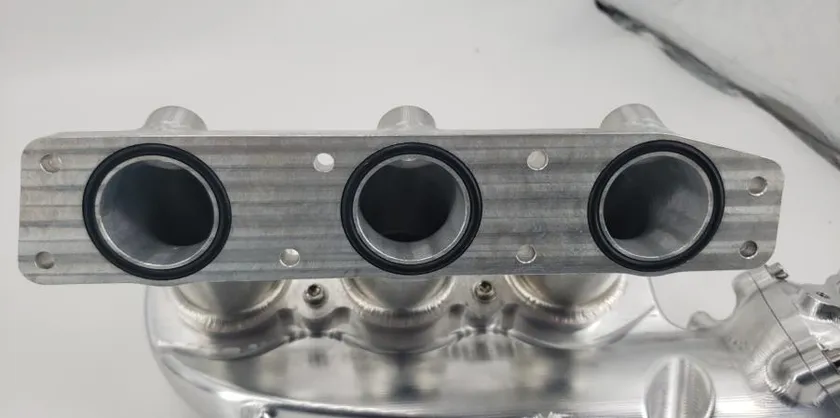
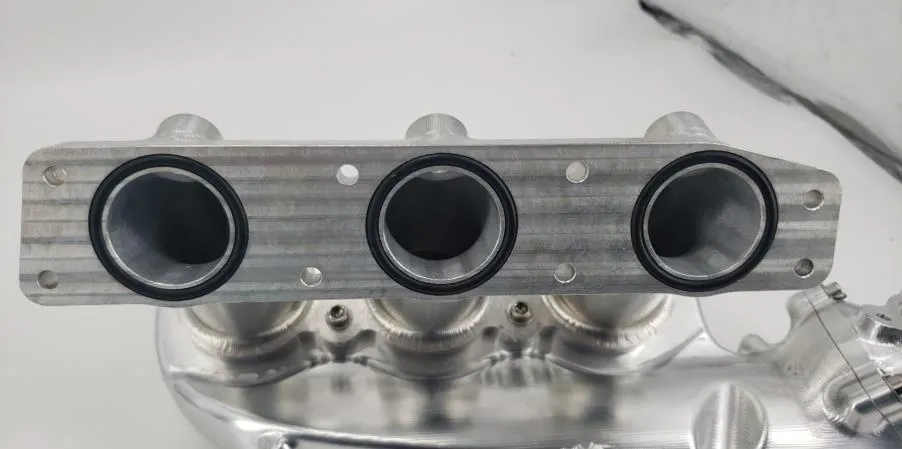
Install the 3 O-rings on the runners, use di electric grease on the O-rings to get them seated correctly in the groove.
- Step 11
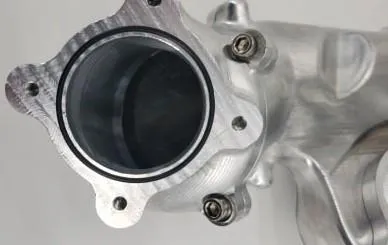
Install the big O-ring on the side for the throttle body. Use di electric grease.
- Step 12
Install throttle body onto the new plenum, make sure the plug is facing towards the engine and using the M6 x 1 x 45 bolts to fasten it on.
- Step 13
Install the map sensor and use di electric on the O-ring use the m6x1x16 and fasten it on.
- Step 14
Install the new plenum, using the OEM 8 bolts.
- Step 15
Torque the bolts to the correct specs.
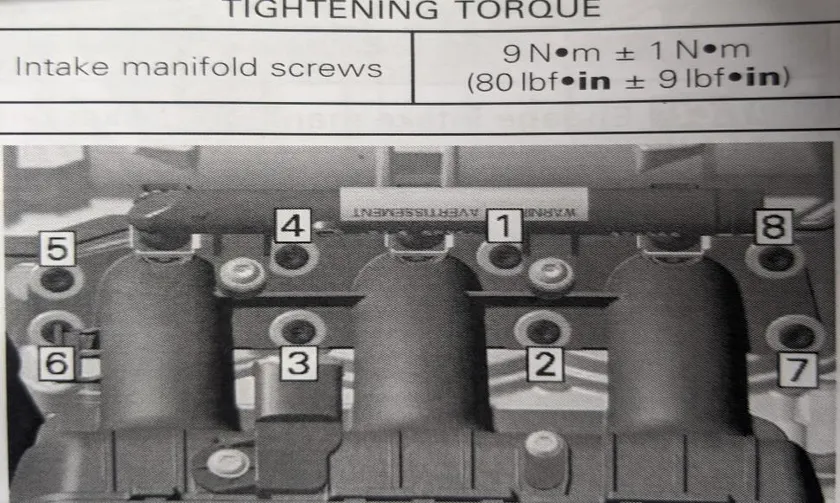
- Torque9 N•m ± 1 N•m (80 lbf•in ± 9 lbf•in)Intake manifold screws
- Step 16
Install fuel rail using the provided bolts and connect the fuel line.
- Step 17
Plug in map sensor.
- Step 18
Plug in throttle body.
- Step 19
Connect the blow off valve to the open port.
- Step 20
Reinstall the clutch vent tube.
- Step 21
Reinstall the exhaust.
- Step 22
Reinstall the rear valance.
Procedure
Installation
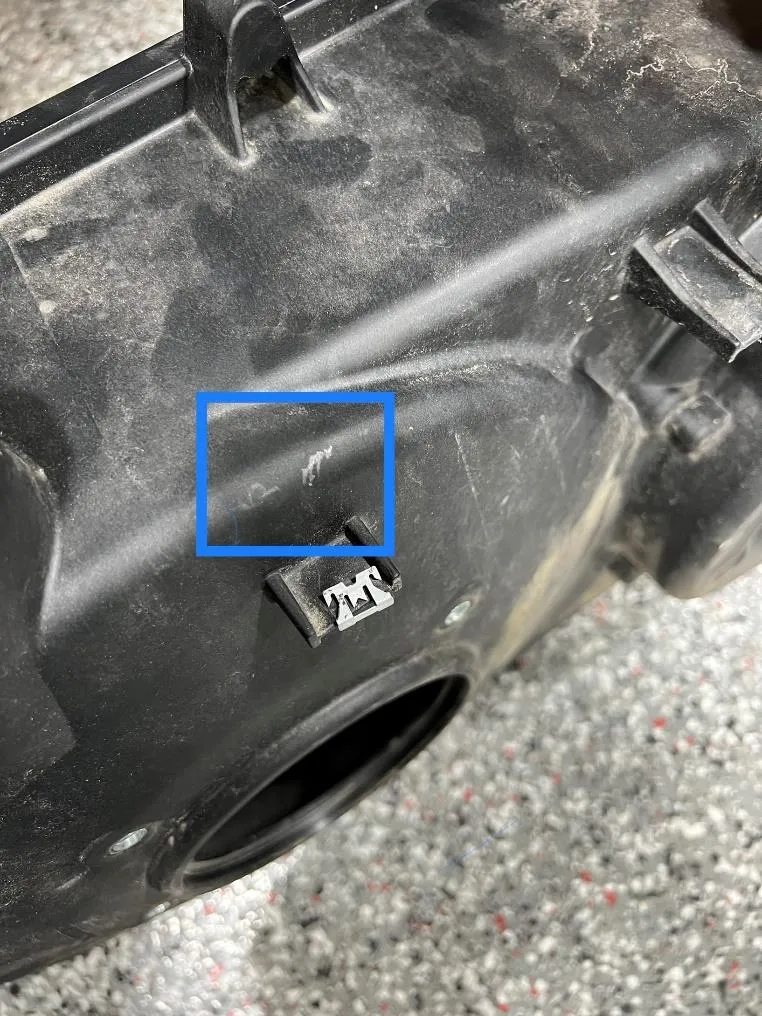
If you are running the stock belt cover, you may need to sand away the rear part of the belt cover, so the Torrent-B doesn’t rub.
- Step 1
Remove both clutches.
- Step 2
Remove (8) bolts holding the rear CVT cover to the motor.
- Step 3
In the photo below, with a Dremel sand away where the blue box is. Doing this will allow room for the throttle body. DO NOT remove the clip. DO NOT sand all the way through the cover or it won’t be watertight.
- Step 4
Re assemble the CVT box and clutches once there is enough clearance.
Need technical support?
Submit a ticket with your vehicle and what you're seeing, and our support team will get back to you.
