 BUY NOW, PAY LATER. Starting at 0% APR


Can-Am X3 3” Shocker Electronic Cutout Side Dump Race Bypass Pipe
X3 3” Shocker Electronic Cutout Side Dump Race Bypass Pipe
In the box
Parts and tools
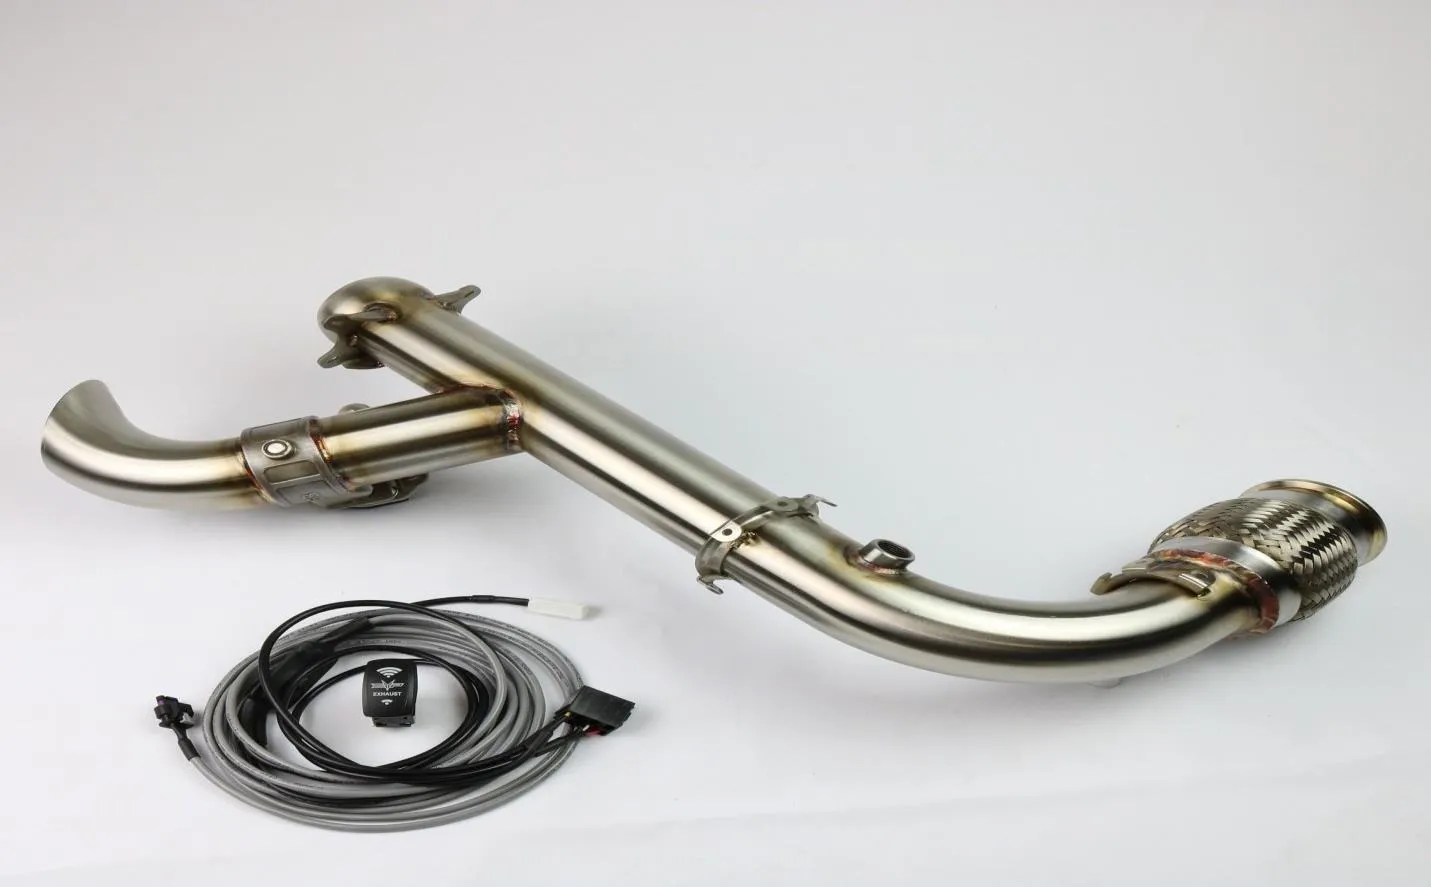
Included parts
- 1Shocker Side Dump Pipe
- 1Wiring Harness
- 10Plastic Cable Ties
- 1Heat Tape
Required tools
- Anti-Seize
- 17,22mm Open End Wrench
- Spring Puller
- T-30 Torx
- Side Cutter
- 8,10,11mm Socket
Procedure
Installation
- Step 1
Remove the rear fascia from your X3. The panel is mounted using five (T30) torx bolts, three along the top and two on the bottom.
- Step 2
Remove the four muffler springs (figure 1), using a spring puller is recommended. Remove the muffler by taking out the four mounting bolts (figures 2 and 3).
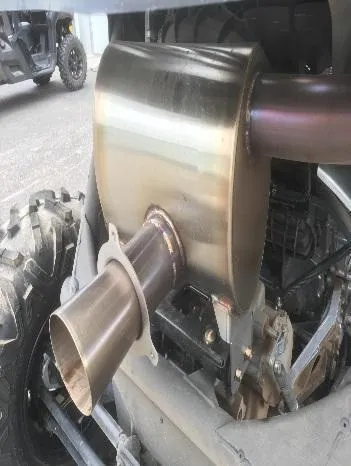
Fig. 1 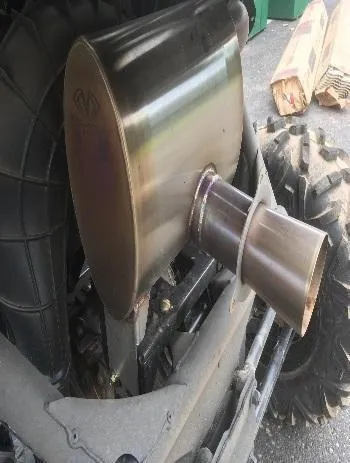
Fig. 2 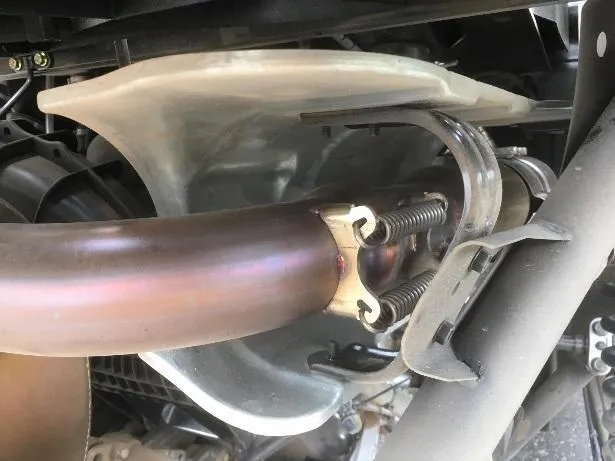
Fig. 3 - Step 3
Locate and disconnect the O2 sensor wire from the wire harness.
- Step 4
Remove the 02 sensor (22mm wrench) from the catalytic converter pipe. Pay close attention to the tip of the sensor to prevent damage or contamination.
- Step 5
Remove the two heat shield panels and clamps (8mm socket) from the catalytic converter. These will be reinstalled later.
- Step 6
Loosen the v-band clamp (11mm socket) connecting the catalytic converter to the turbo. This clamp can be accessed through the access panel in the cabin of the car.
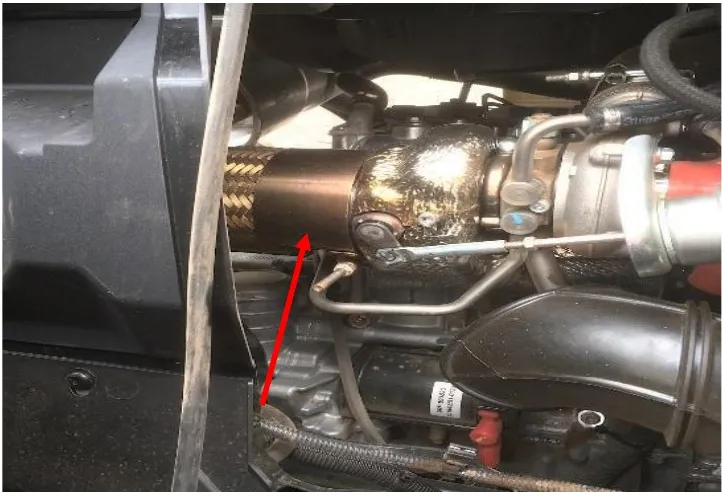
Fig. 4 - Step 7
To remove the catalytic converter pipe, slide it toward the front of the car, over the mount. Next, pivot the turbo side down until it is vertical. Finally, twist the entire converter out of the shielding and remove from the vehicle. Follow the images below.
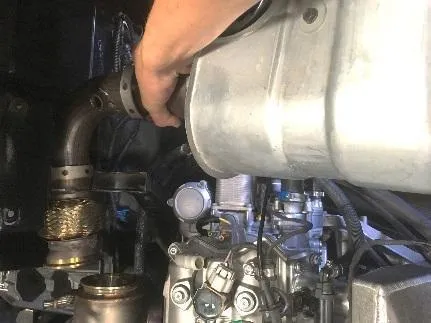
Fig. 5 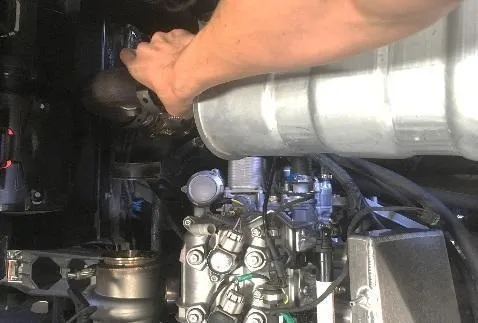
Fig. 6 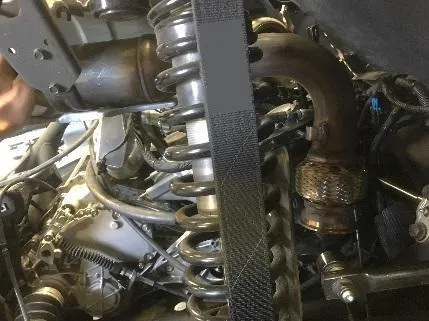
Fig. 7 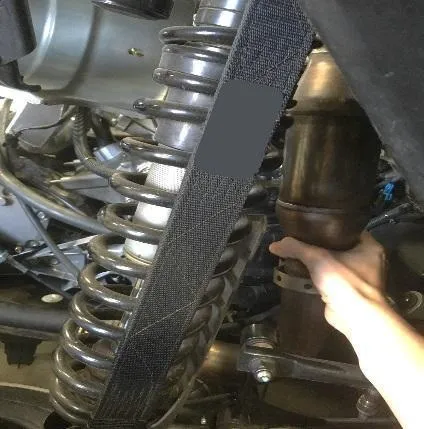
Fig. 8 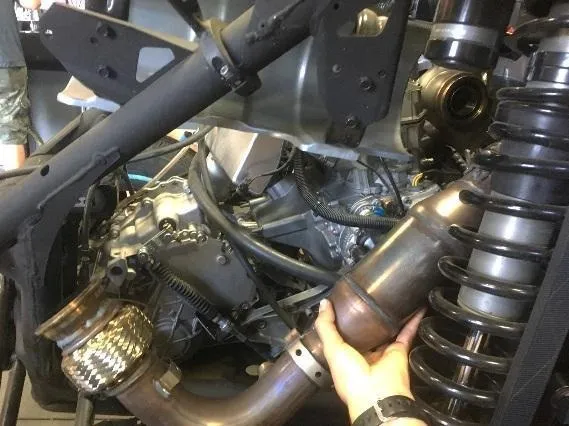
Fig. 9 NoteThese images were taken with the rear cargo rack removed for better visual instruction, the rack can be left on when removing the converter. (Figure 4-9)
- Step 8
Insert the Shocker pipe (following the removal steps in reverse) and loosely secure the v-band clamp, attaching the Shocker exhaust to the turbo with the exhaust gasket in place. It is recommended to apply anti-seize lubricant to the clamp nut.
- Step 9
Attach the heat shield panels and loosely secure with the original clamps.
- Step 10
Install the o2 sensor on the Shocker Exhaust with anti-seize lubricant applied to the threads.
CautionDo not apply anti-seize to the tip of the sensor!
- Step 11
Reinstall the muffler and loosely mount using the four mounting bolts (13mm socket). Secure the muffler to the Shocker Exhaust with the four muffler springs
- Step 12
With the springs installed and all other mounts loosely in place, tighten the v-band clamp to 8 ft lb (97 in lb). Next tighten the heat shield clamps. Finally, tighten the muffler mounting hardware.
- Step 13
Attach the rear valence with the (5) T-30 Torx bolts. Installation of the Shocker Exhaust is complete.
Procedure
Electrical Installation
- Step 1
Select an unused rocker switch position on your dash and remove the cover plate. Route the rocker switch plug attached to the harness to that location and connect the rocker switch.
- Step 2
Remove the passenger seat from the vehicle. (18mm socket, 13mm socket, 13mm wrench)
- Step 3
To gain access to the power accessory bar. Remove the left-hand lateral console panel. (Figure 10)
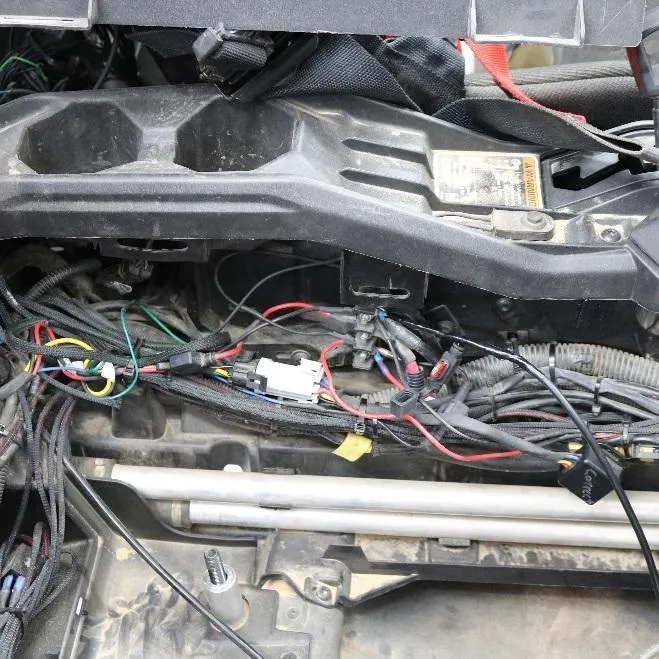
Fig. 10 - Step 4
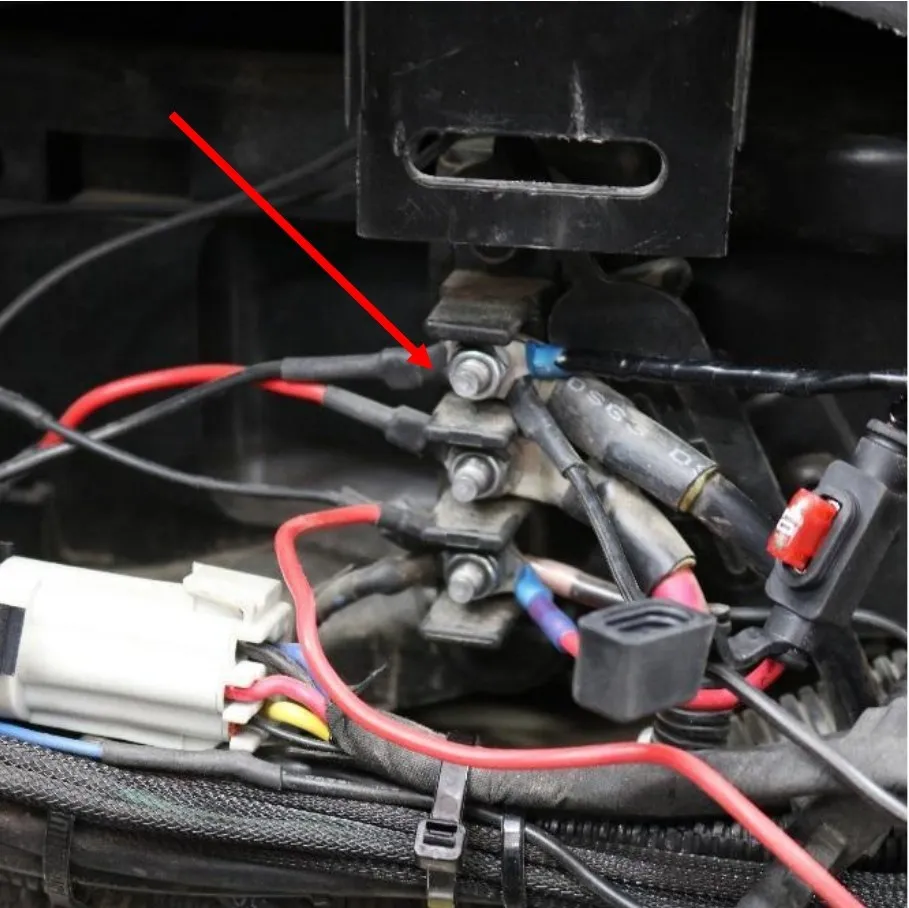
Route the wiring harness to the power accessory bar and connect the positive ring terminal to key power and the negative ring terminal to the negative terminal. (Figure 11)
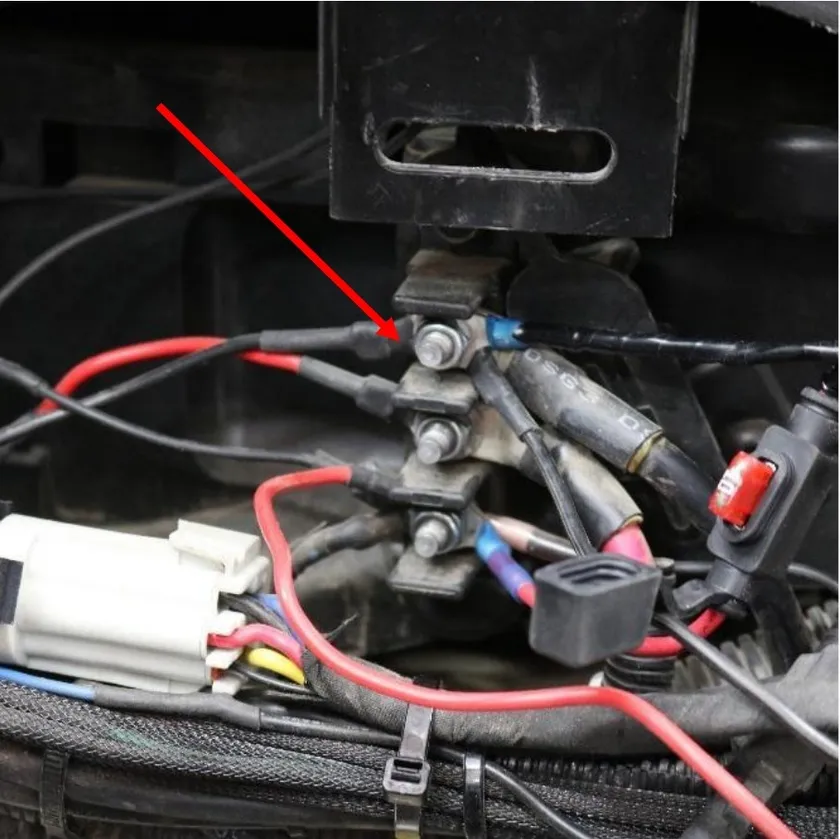
Fig. 11 - Step 5
Route the remaining side of the harness back to the actuator on the exhaust. Use the supplied cable ties to loosely secure the harness to the chassis, be sure to secure the harness away from hot and or moving components.
CautionIF you ran the wiring harness near a heat source or exhaust, please use supplied heat tape to prevent the wiring harness from being damaged.
Need technical support?
Submit a ticket with your vehicle and what you're seeing, and our support team will get back to you.
