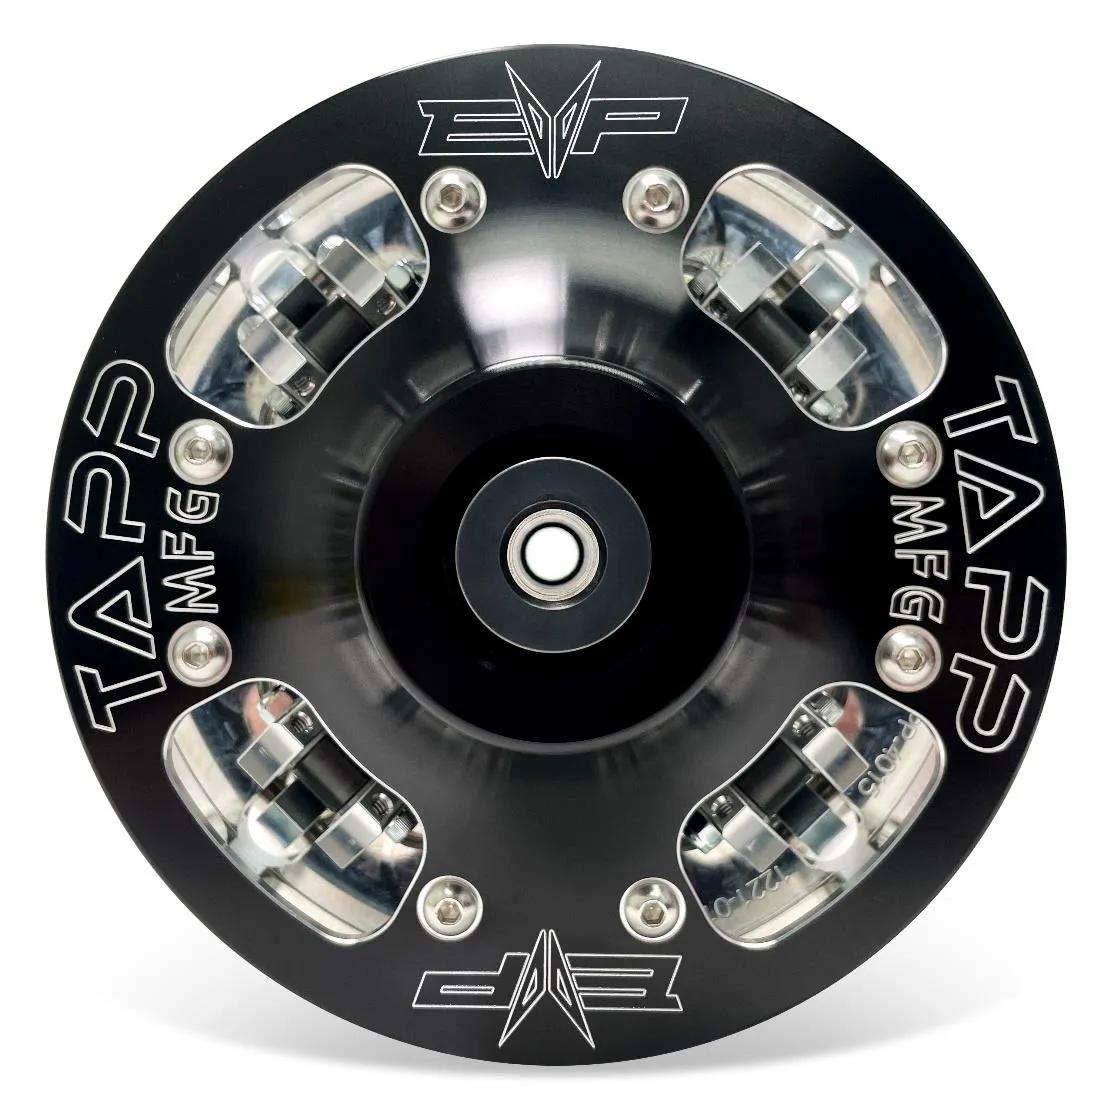
We have found the best way to install the TAPP clutch is by the “valve lapping” technique between the clutch to the engine crank shaft. This should be done every time you remove the clutch from the engine crank shaft to ensure there is a perfect mate between clutch tapper and crank shaft taper not allowing the clutch to spin on the crank. We recommend Permatex™ fine grit.
Step 1
Put nitrile gloves on, lightly apply Valve Grinding Compound onto the crank shaft taper and clutch taper.
Step 2
Slide the clutch onto the crank shaft, spin the clutch in one direction, 25 cycles with your hands. Pull the clutch off and look for a uniform grey section all the way around the crank. When a new crank is installed, you must do this three times, or until uniform all around the crank.
Step 3
Once complete, brake clean all the valve lapping compound off the crank shaft and clutch. If you don’t remove all the compound, you will ruin the crankshaft and clutch taper.
Procedure
Installing the Primary Clutch Bolt
If you are using the Can Am OEM bolt, you will need to torque the primary bolt down to 89 ft/lbs and drive the car up to 4000rpms, then re-torque to 89 ft/lbs. Repeat this process while slowly raising the RPMs each time. Do this until you are able to make a few wide-open pulls without the bolt losing torque to ensure the primary bolt is torqued completely or it can come off.
EVP designed and built a primary clutch bolt specifically for the TAPP clutch that outperforms anything else on the market [X3 XR Series Primary Clutch Bolt, TAPP (SKU:404FC0039)]. If you are using our recommend XR Series Clutch Bolt, you will need to follow the same process, but torque to 110 ft/lbs. instead. It usually does not take more than 3 re-torque cycles before our bolt stops losing torque.
Make/Model
Torque Spec
Can Am X3 OEM Bolt
89 ft-lbs
Can Am EVP Bolt
110 ft-lbs
Polaris XP Turbo/S Pro XP Turbo R (OEM)
96 ft-lbs
Polaris XP Turbo/S Pro XP Turbo R (EVP)
100 ft-lbs
Polaris Pro R (OEM Bolt)
100 ft-lbs (OEM clutch 140 ft-lbs)
2022+ Pro R: Reuse OEM clutch bolt with supplied spacer.
2020+ Can Am X3: You must remove the clutch cover liner for the or the Tapp clutch cover will rub.
2020+ Pro XP/ Turbo R: You must purchase EVP clutch cover shim over the clutch cover or the Tapp will rub on the outer cover.
2017-2021 XP Turbo/S: EVP also has a clutch cover shim kit allowing more room for the Tapp.
Procedure
Adjusting the TAPP Clutch
There are (4) main adjustable components on the TAPP primary clutch: Ramp Profile, Ramp Angle, Roller Size, Adjustable Weights. Always use Blue Loctite when adjusting the weights.
Procedure
Adjusting Ramp Angle:
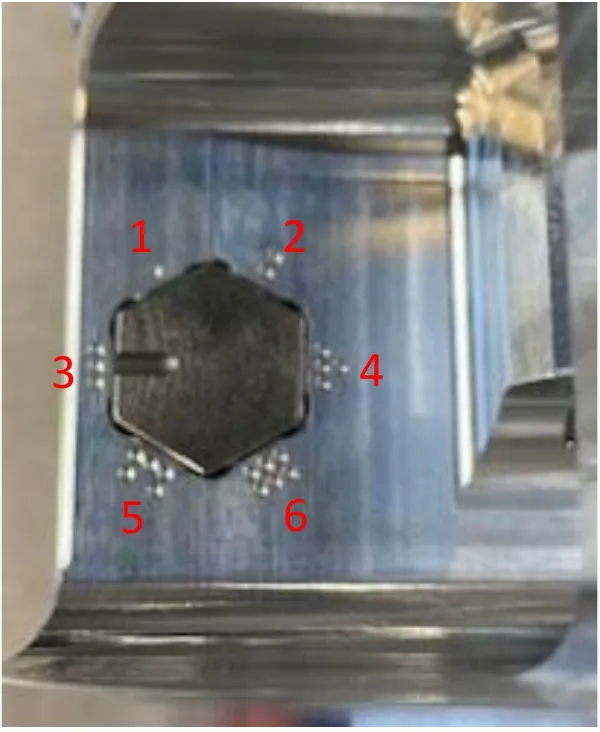
The ramp angle in your TAPP Clutch is adjustable from the outside via the use of the Quick Shift Bolts. As with other clicker style clutches the higher the number, the higher the RPM. This will mainly affect the full shift speed but also affects the engagement and low speed slightly. On the TAPP clutch each ramp has its own quick clicker adjustments. Each clicker has (6) adjustments. Each click will add or subtract 25rpm but they need to be done in opposite pairs actually adding/subtracting 50rpm.
Caution
Always adjust the ramp angle in pairs across from each other, if you do not the clutch will be out of balance.
Procedure
Adjusting Ramp Profile:
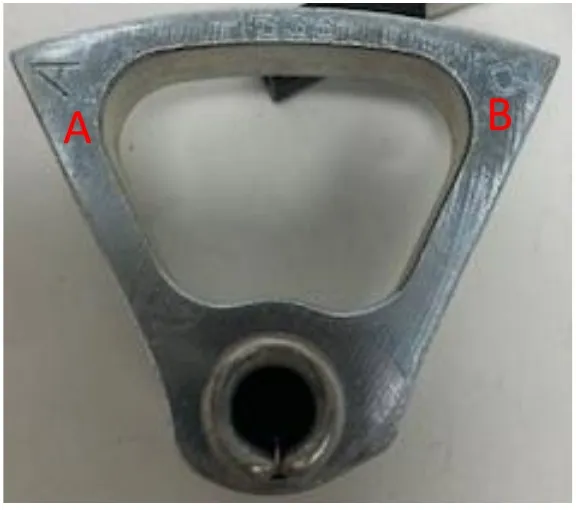
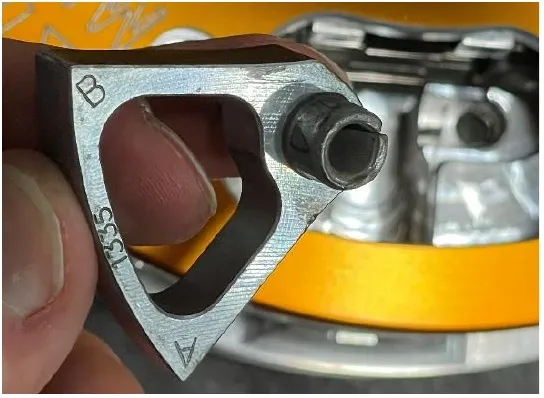
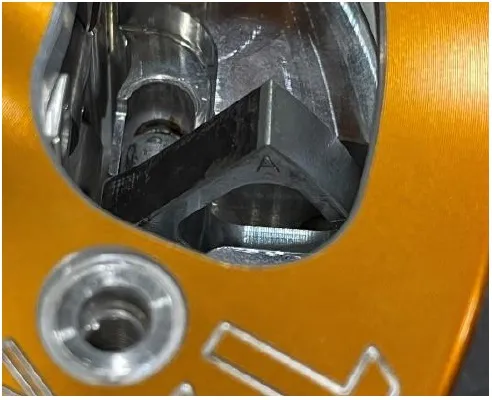
Your TAPP clutch comes with a set of (4) pre-chosen ramps that have been tested in many scenarios and are calibrated for your vehicle setup. Each ramp has an “A” profile side and “B” profile side. “A” side will always be lower engagement, “B” side will be higher engagement. Changing the profile of the ramp will have many effects on the shift profile including engagement rpm and back shift. This should only be done by an experienced tuner.
Caution
Always adjust the ramp profile in pairs across from each other, if you do not the clutch will be out of balance.
Ramp Profile
A side B side
Engagement
1328 Convex
A Side 2900+ rpm B Side 5000+ rpm
Medium/High
1335 Concave
A Side 2000+ rpm B Side 3000+ rpm
Low/Medium
1336 Concave
A Side 1700+ rpm B Side 4500+ rpm
Low/High
1338 Concave
A Side 2300+ rpm B Side 4000+ rpm
Medium/High
Procedure
How to Flip TAPP Ramps
If you’re needing to make drastic changes to your engagement RPM, for example if you were changing from trail riding to drag racing, you’re going to need to flip your ramps around. This can be done with the clutch on the car and the cover still on. Every TAPP ramp has two sides, side A and side B. Side A is always the lower engagement. With the 1335 ramps, you will be at 2000-2500rpm engagement on side A, and 3000-3500rpm engagement on side B. You can also set two ramps to side A and two ramps to side B to meet somewhere in the middle. The 1335 ramps do not require any other changes to be made to the weight setup as the profile is very similar on both sides. Other ramps such as the 1336 or 1328 may require further clutching adjustments to be made when you flip your ramps around. Please contact us for further assistance if needed.
Step 1
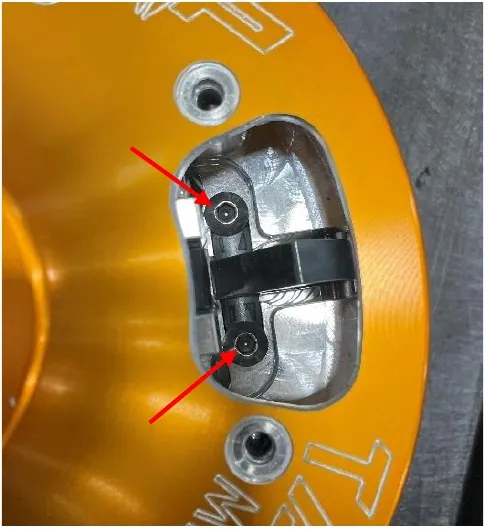
Remove the two allen screws holding the ramp down.
Step 2
Remove the ramp, and reinstall it with the desired side facing up (towards the roller).
Step 3
Use blue Loctite to reinstall the ramp bolts.
Procedure
Adjusting Roller Size:
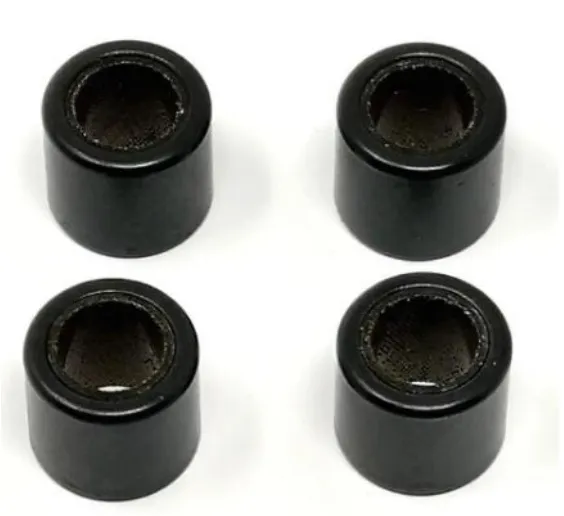
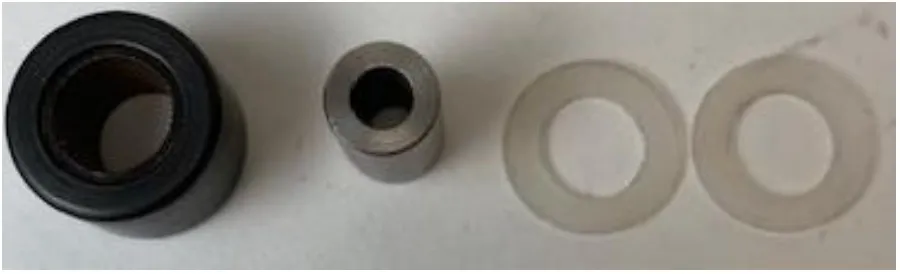
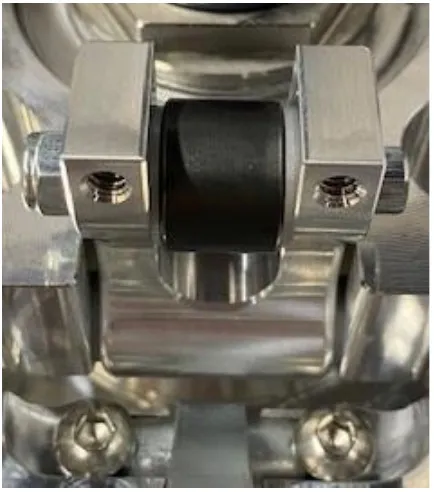
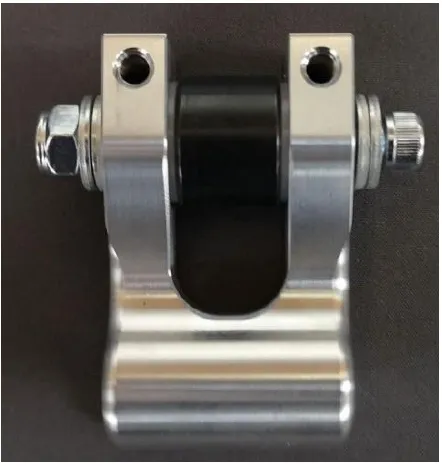
There are 3 sizes of rollers available: standard, 1mm oversize, and 2mm oversize. Bigger rollers make the low end "quicker RPM's" but shift out quicker and lower the full shift RPM. Smaller rollers make the engine slower shift and raise the full shift RPM. This has to do with the angle of the arms combined with the weight difference of the rollers. The roller assembly consist of a roller, axel, and two washers.
Caution
As with the ramp angle roller size must be done in pairs across from each other, failure to do so will result in an imbalance of the clutch and possibly failure.
Roller Profile
Measurements
0mm Rollers
OD 15.5mm with a weight of 9.9 grams, each.
+1mm Rollers
OD 16.5mm with a weight of 12.5 grams, each.
+2mm Rollers
OD 17.5mm with a weight of 15.3 grams, each.
Roller Assembly: Roller, Axle, (2) washers located on the outside of the roller.
Procedure
Adjusting Weight Overview:
The weight in the arms can be adjusted in two ways: set screws in the arms, and washers on the roller thru bolt. Your clutch was shipped with a standard tuning kit. As with all other clutches add weight to lower RPM, remove weight to raise RPM.
A good rule of thumb when choosing how much weight to add or remove from your clutch is that 1 gram per arm equals just under 100rpm. For example, if you’re targeting a 9000rpm shiftout and you’re only hitting 8600 at WOT, you would want to remove roughly 5 grams of weight per arm as a starting point. Adjust this as needed for your application.
Caution
As with all other adjustments, do this evenly and only in pairs across from each other, failure to do so will result in an imbalance of the clutch and possible failure.
Procedure
Adjusting Weight on the Arms:
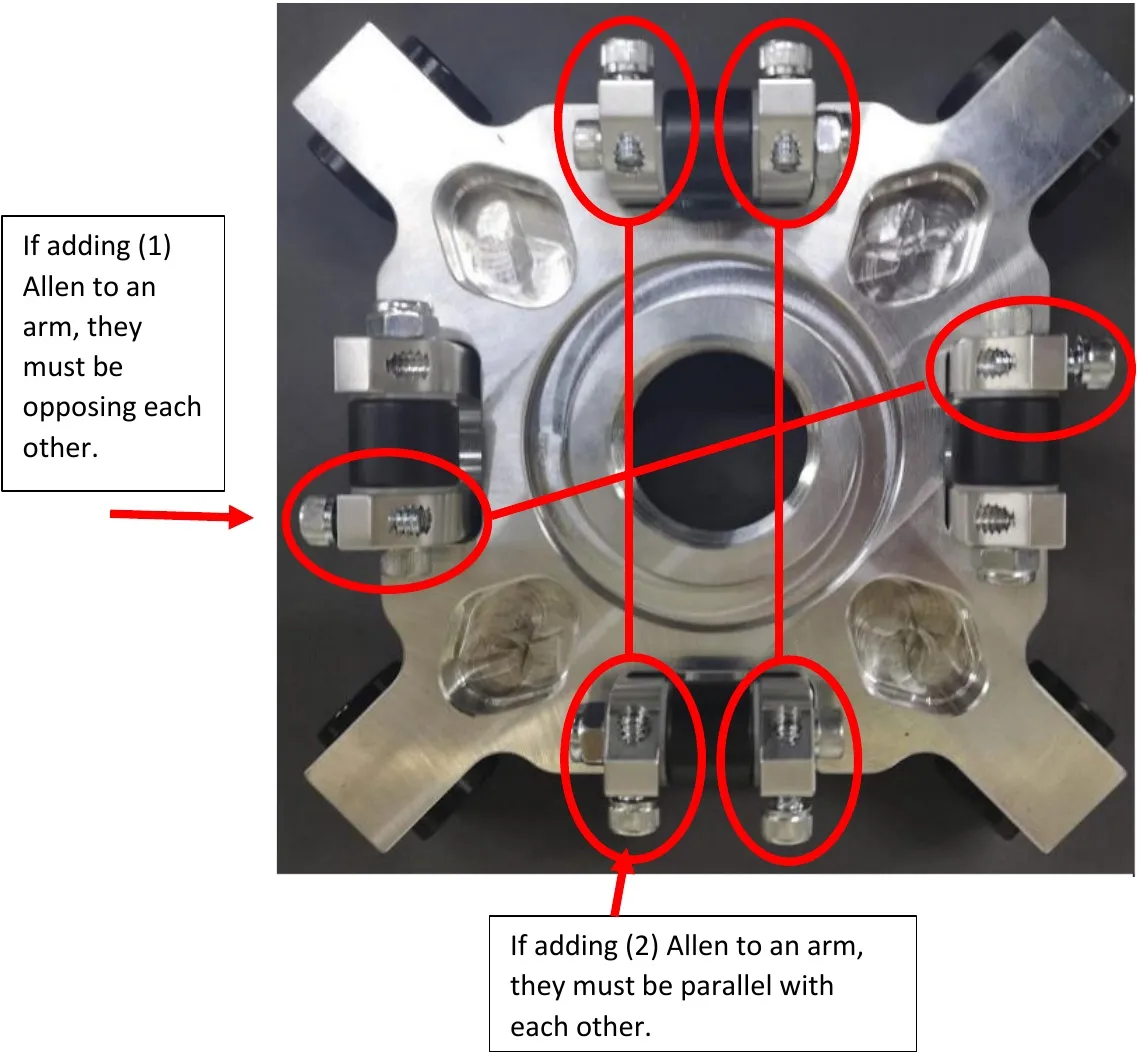
Allen screws must be added in pairs opposite to one another. Allen screws are .500” weighing 2.7 grams. Adding two Allen screws will add 5.2 grams. Added all eight Allen screws will add 20.8 grams.
If adding (1) Allen to an arm, they must be opposing each other. If adding (2) Allen to an arm, they must be parallel with each other.
Procedure
Adjusting Weight on the Roller:
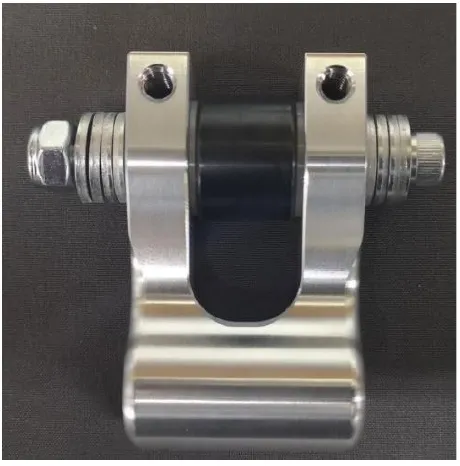
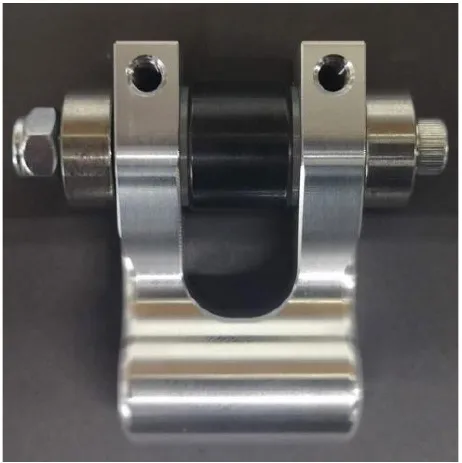
The TAPP clutch includes a roller weight kit with the following parts.
Hardware
Dimension
Weight (Grams)
Socket Head Screws (4)
1.50”
5.8 grams
Socket Head Screws (4)
1.75”
6.8 grams
Socket Head Screws (4)
2.00”
7.5 grams
Nylon Locknut (4)
10-32
2.2 grams
Washer (16)
.0625 (1/16”)
1.2 grams
Race Weight (8)
.250 (1/4”)
8 grams
Using Socket Head Screw 1.50” doesn’t allow for added weight.Using Socket Head Screw 1.75” allows for a max of 4 washers adding 5.8 grams.Using Socket Head Screw 2.00” allows for a max of 8 washers adding 10.3 grams.Using Socket Head Screw 2.00” allows for a max of 2 race weights adding 16.7 grams.
Procedure
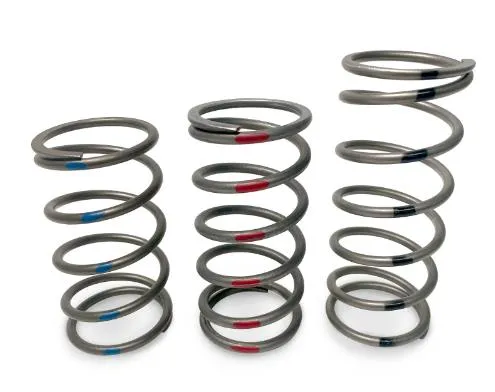
TAPP Primary Spring(s)
Spring Color
Spring Rating 2.8”/1.50”
Blue
100/190
Black
140/210
Red
160/270
Orange
40/210
Yellow
40/300
Green
70/160
Blue/Orange
185/320
Emissions notice. This product is exempt from the emission standards and related requirements of 40 C.F.R. § 1051 as provided by 40 C.F.R. § 1051.620, and California law [e.g., vehicle code §§ 27156 and 38391]. This product is sold only for use in connection with EPA certified, purpose-built, nonroad vehicles used solely for closed course, nonroad competition/racing and not used for any recreational purpose or on public highways or right of ways maintained by and open to the public. This product is sold only in connection with machines that do not fall under state and/or federal noise or emission standards/regulations. Purchasers who/that purchase this product represent and warrant that the product is purchased only in connection with EPA-certified, emission-regulations-exempt and noise-regulations-exempt competition/racing vehicles as interpreted under applicable state and/or federal law.
Need technical support?
Submit a ticket with your vehicle and what you're seeing, and our support team will get back to you.
We use cookies to improve your experience on our website. Read about how we use cookies in our Privacy Policy. By browsing this website, you agree to our use of cookies.
privacy policy
 BUY NOW, PAY LATER. Starting at 0% APR