Can-Am Maverick R Spark Plug

Installation instructions for the Maverick R Spark Plug on the Can-Am Maverick R (SKU 804FC0317 (OEM Heat Range)). Parts, tools, and full procedure.

SKU
3552010003 (OEM Heat Range)
Legacy SKU
804FC0317
Revision
Rev_080724

In the box

Parts and tools

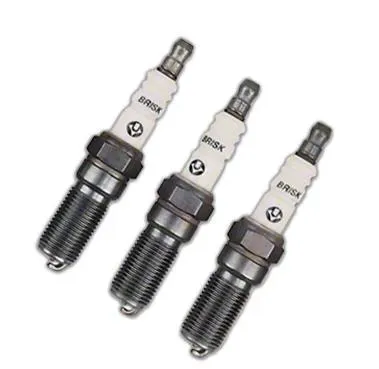
Maverick R Spark Plug

Included parts

  • 3Set of Spark Plugs

Required tools

  • 10, 11, 14mm Socket
  • T-30 Socket
  • Anti-seize
  • Magnet

Procedure

Installation

  1. Step 1

    Remove the bed and intercooler / radiator wind dam.
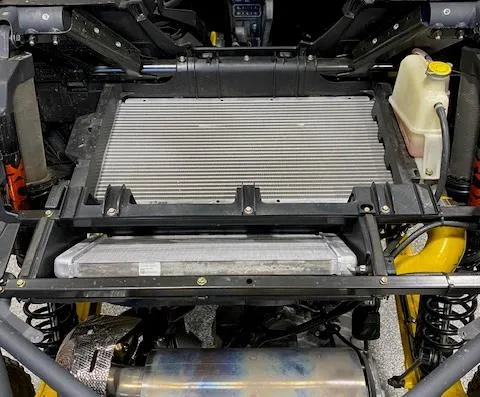
    Remove the bed and intercooler / radiator wind dam.
  2. Step 2

    Remove both charge tubes from the intercooler using an 11mm socket.
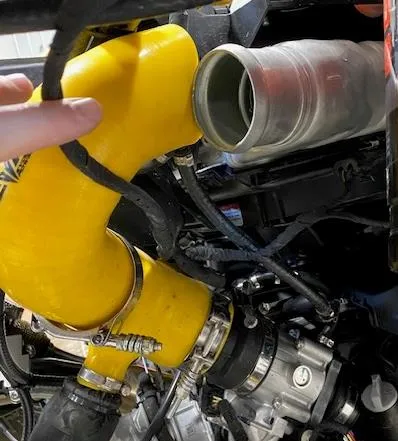
    Remove both charge tubes from the intercooler using an 11mm socket.
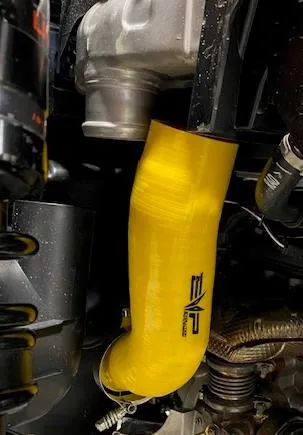
    Remove both charge tubes from the intercooler using an 11mm socket.
  3. Step 3

    Remove the (1) coolant reservoir mounting screw using a 10mm socket.
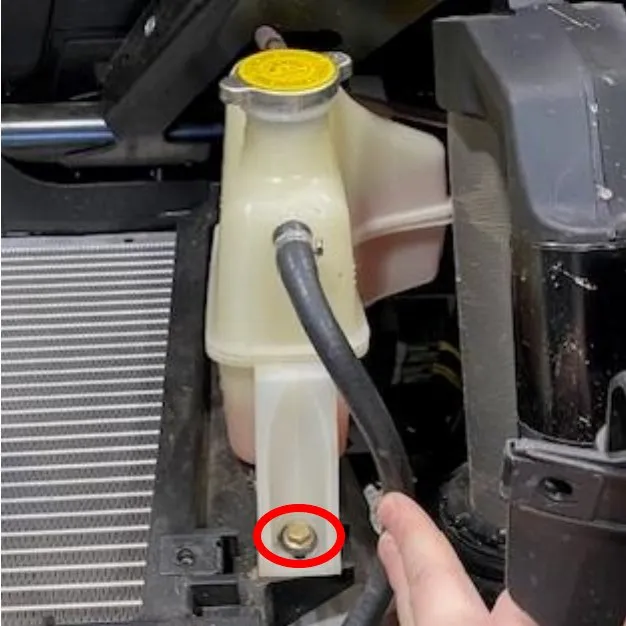
    Remove the (1) coolant reservoir mounting screw using a 10mm socket.
  4. Step 4

    Remove the coolant reservoir and bungee it up to the cage.
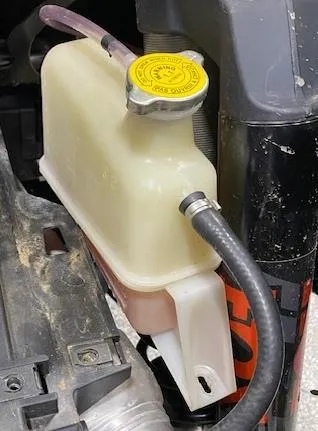
    Remove the coolant reservoir and bungee it up to the cage.
  5. Step 5

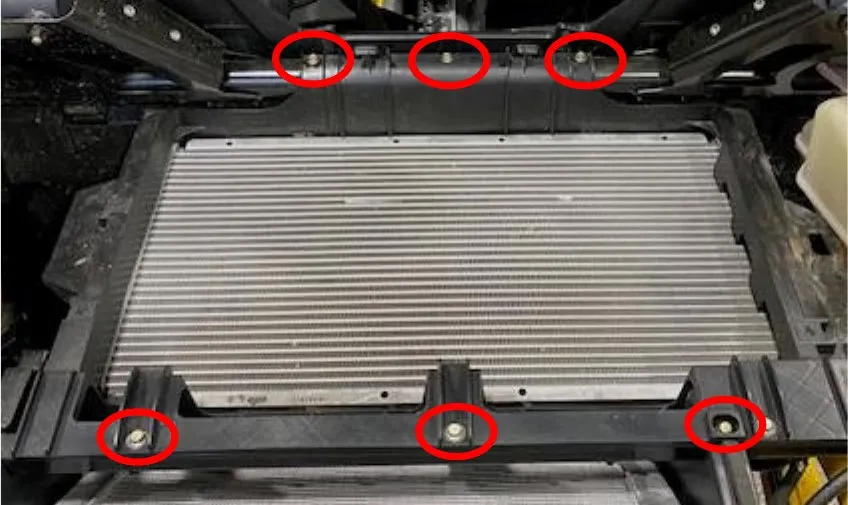
    Remove (6) intercooler tray screws using a 10mm socket.
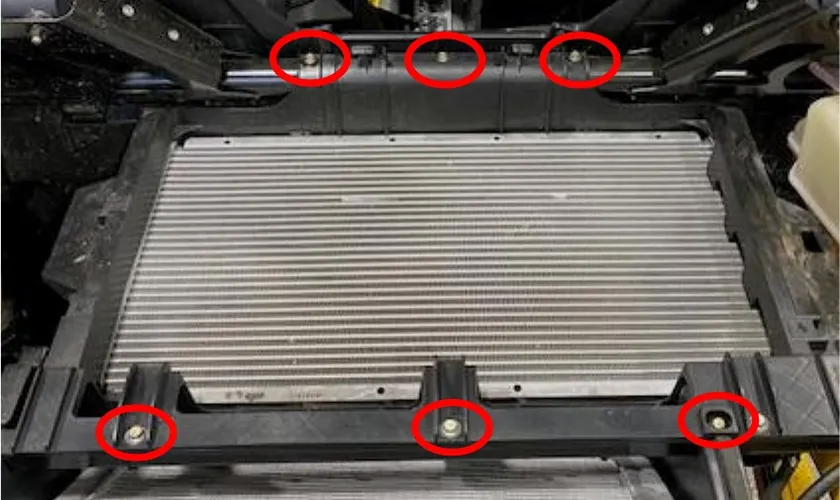
    Remove (6) intercooler tray screws using a 10mm socket.
  6. Step 6

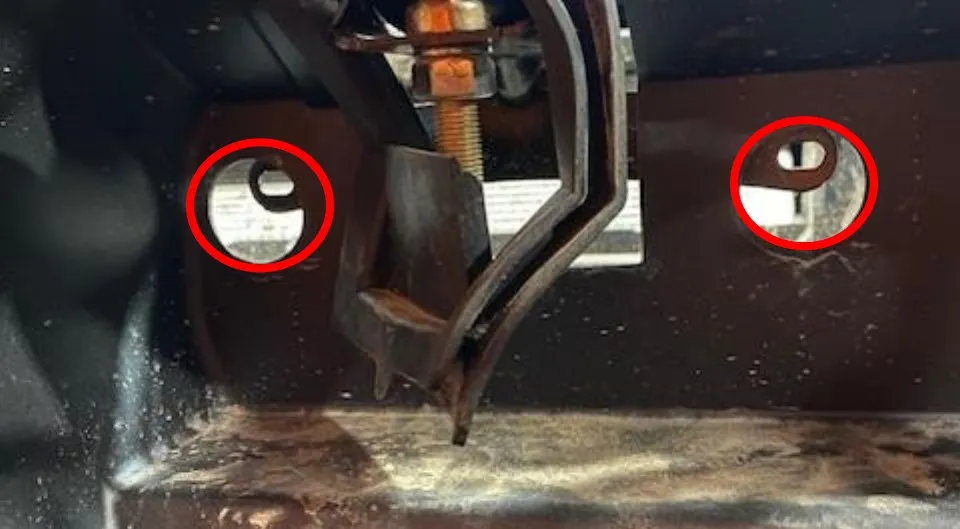
    Behind the seats, remove (4) rubber plugs and access (4) 10mm screw. Two located behind the passenger seat and drivers seat.
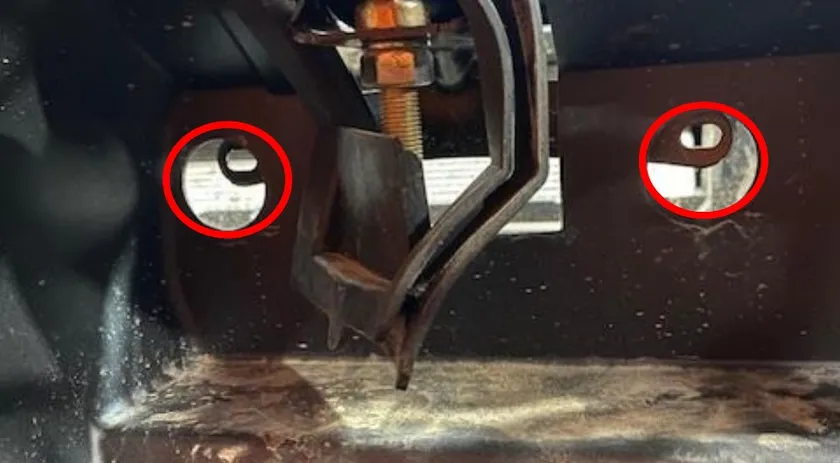
    Behind the seats, remove (4) rubber plugs and access (4) 10mm screw.
  7. Step 7

    Tilt the back of the intercooler upwards, unplug (2) intercooler fan connectors. Remove the intercooler from the vehicle.
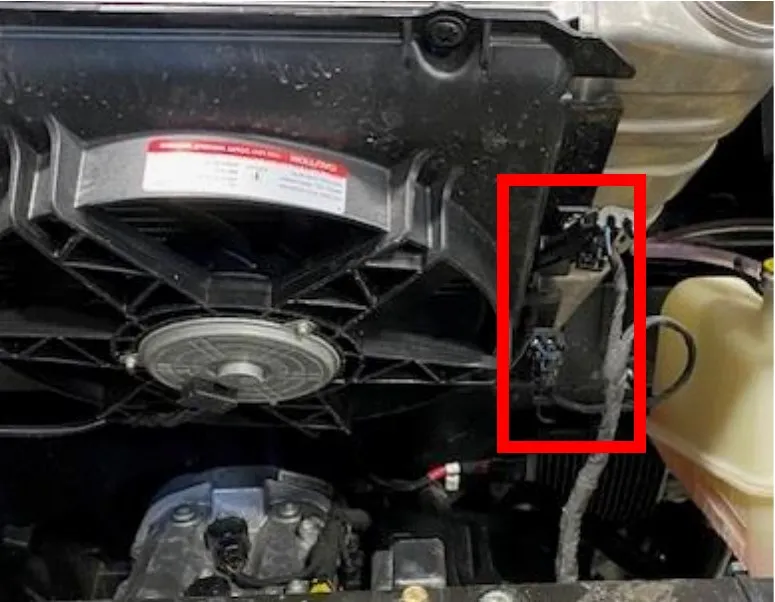
    Tilt the back of the intercooler upwards, unplug (2) intercooler fan connectors.
  8. Step 8

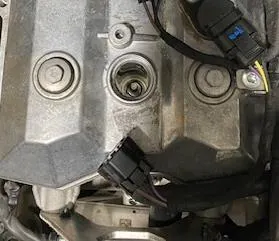
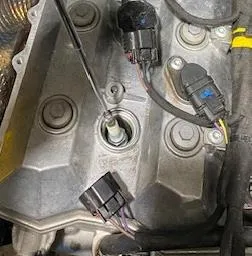
    With the intercooler removed you can now access the valve cover. Unplug (3) coil pack connectors, (3) T-30 screws, and remove (3) coils. With a 14mm socket loosen the spark plugs. Use a magnet to remove the plugs. Apply a small amount of anti-seize to the threads of the new plugs. Install the plugs into the head using a magnet. Torque the plugs to 124 in-lb (14 Nm).
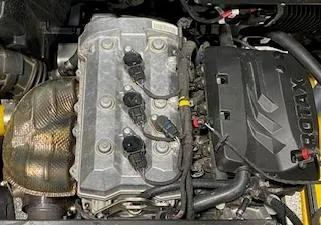
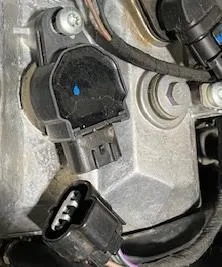
    With the intercooler removed you can now access the valve cover.
    Unplug (3) coil pack connectors, (3) T-30 screws, and remove (3) coils.
    With a 14mm socket loosen the spark plugs.
    Use a magnet to remove the plugs.
  9. Step 9

    Once complete, reinstall vehicle in reverse order.
Emissions notice. This product is exempt from the emission standards and related requirements of 40 C.F.R. § 1051 as provided by 40 C.F.R. § 1051.620, and California law [e.g., vehicle code §§ 27156 and 38391]. This product is sold only for use in connection with EPA certified, purpose-built, nonroad vehicles used solely for closed course, nonroad competition/racing and not used for any recreational purpose or on public highways or right of ways maintained by and open to the public. This product is sold only in connection with machines that do not fall under state and/or federal noise or emission standards/regulations. Purchasers who/that purchase this product represent and warrant that the product is purchased only in connection with EPA-certified, emission-regulations-exempt and noise-regulations-exempt competition/racing vehicles as interpreted under applicable state and/or federal law.

Need technical support?

Submit a ticket with your vehicle and what you're seeing, and our support team will get back to you.

Contact Support
We use cookies to improve your experience on our website. Read about how we use cookies in our Privacy Policy. By browsing this website, you agree to our use of cookies. privacy policy
accept

Your cart

×
×