 BUY NOW, PAY LATER. Starting at 0% APR


Kawasaki H2 Supercharger Gear Upgrade Assembly
Kawasaki H2 Supercharger Gear Upgrade Assembly
Before you start
| Component | Torque |
|---|---|
| Lower Gear | 15 ft-lb |
| Upper Gear (LH Thread) | 18 ft-lb |
| Upper Sprocket Cover Bolts | 89 in-lb (7.4 ft-lb) |
| Chain Tensioner Bolts | 89 in-lb (7.4 ft-lb) |
| Stay Plate | 89 in-lb (7.4 ft-lb) |
| Throttle Body Bolts | 89 in-lb (7.4 ft-lb) |
| Air Intake Chamber Bolts | 71 in-lb (5.9 ft-lb) |
| Mag Cover Bolts | 13 ft-lb |
In the box
Parts and tools
Included parts
- 1Gear Set
- 1Gasket Kit
Required tools
- Drain pan + Oil Change Kit
- Side Cutters, Pliers
- Metric Sockets
- Allen Sockets
- Torque Wrench
Procedure
Installation
- Step 1
Remove rear interior, seats, firewall, etc.
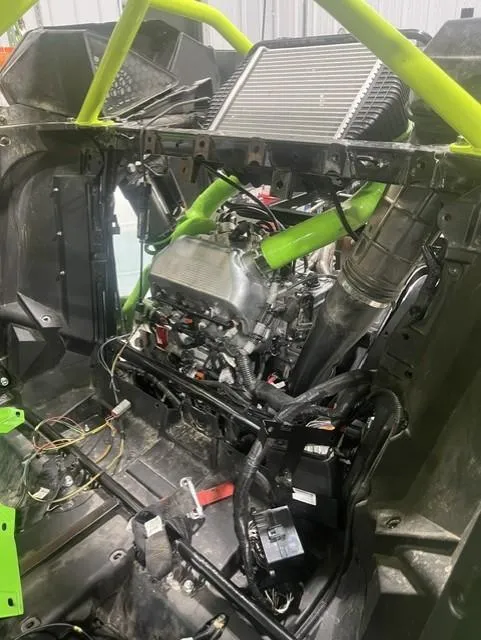
- Step 2
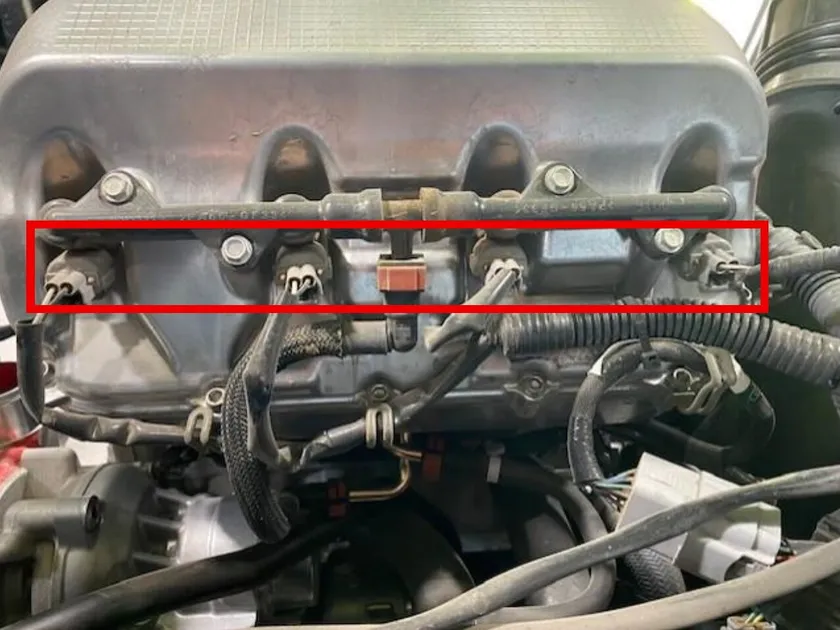
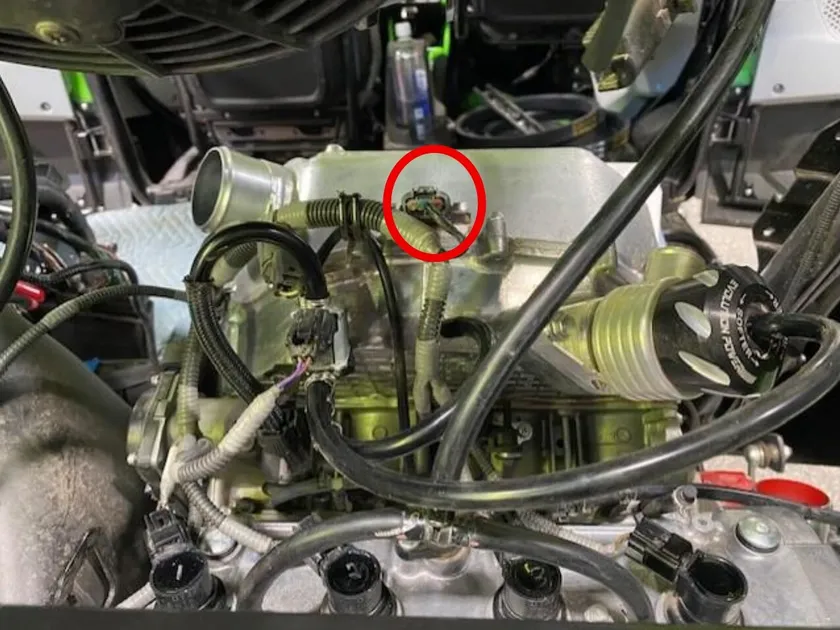
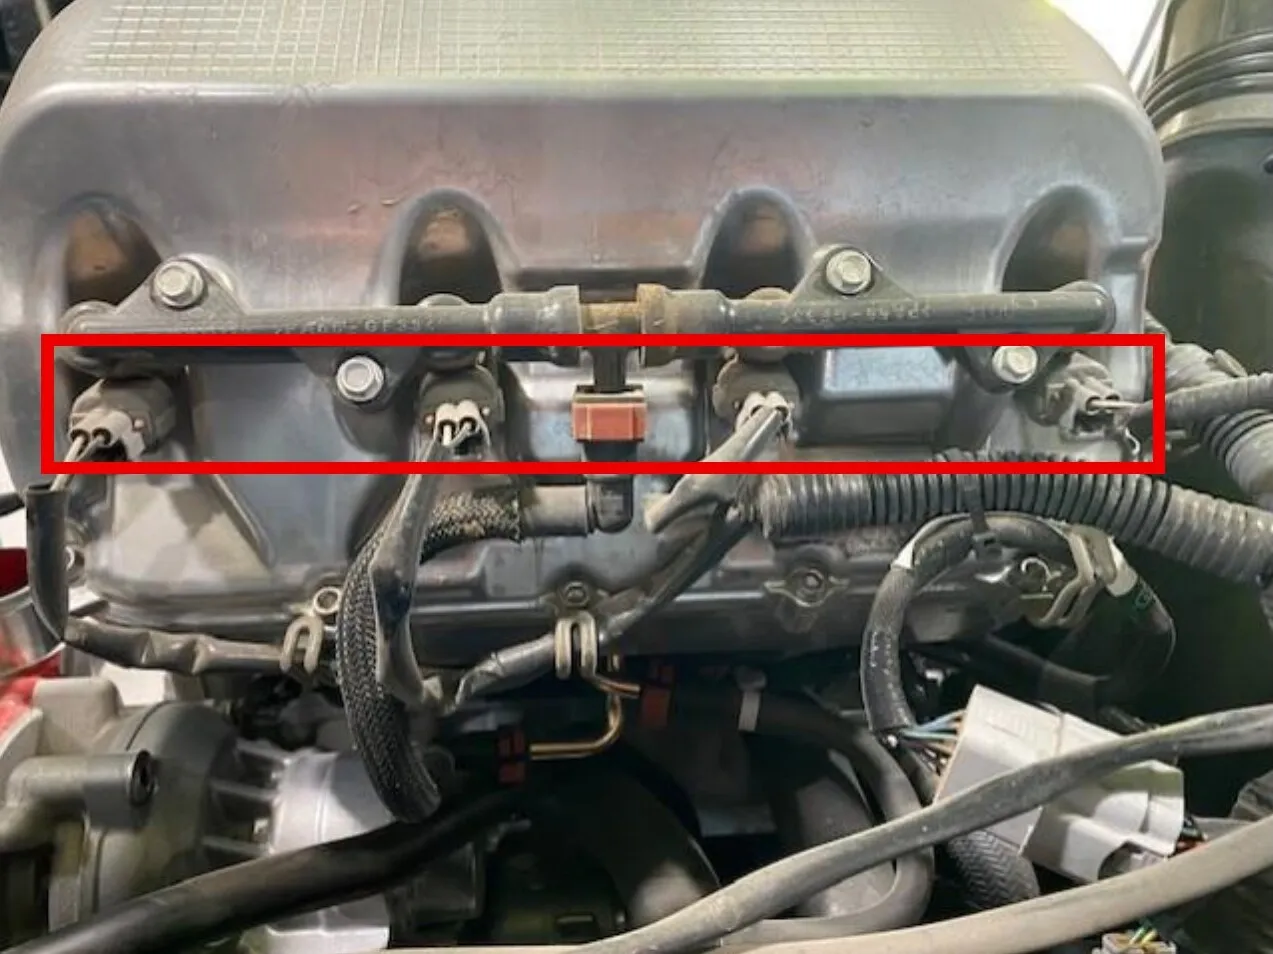
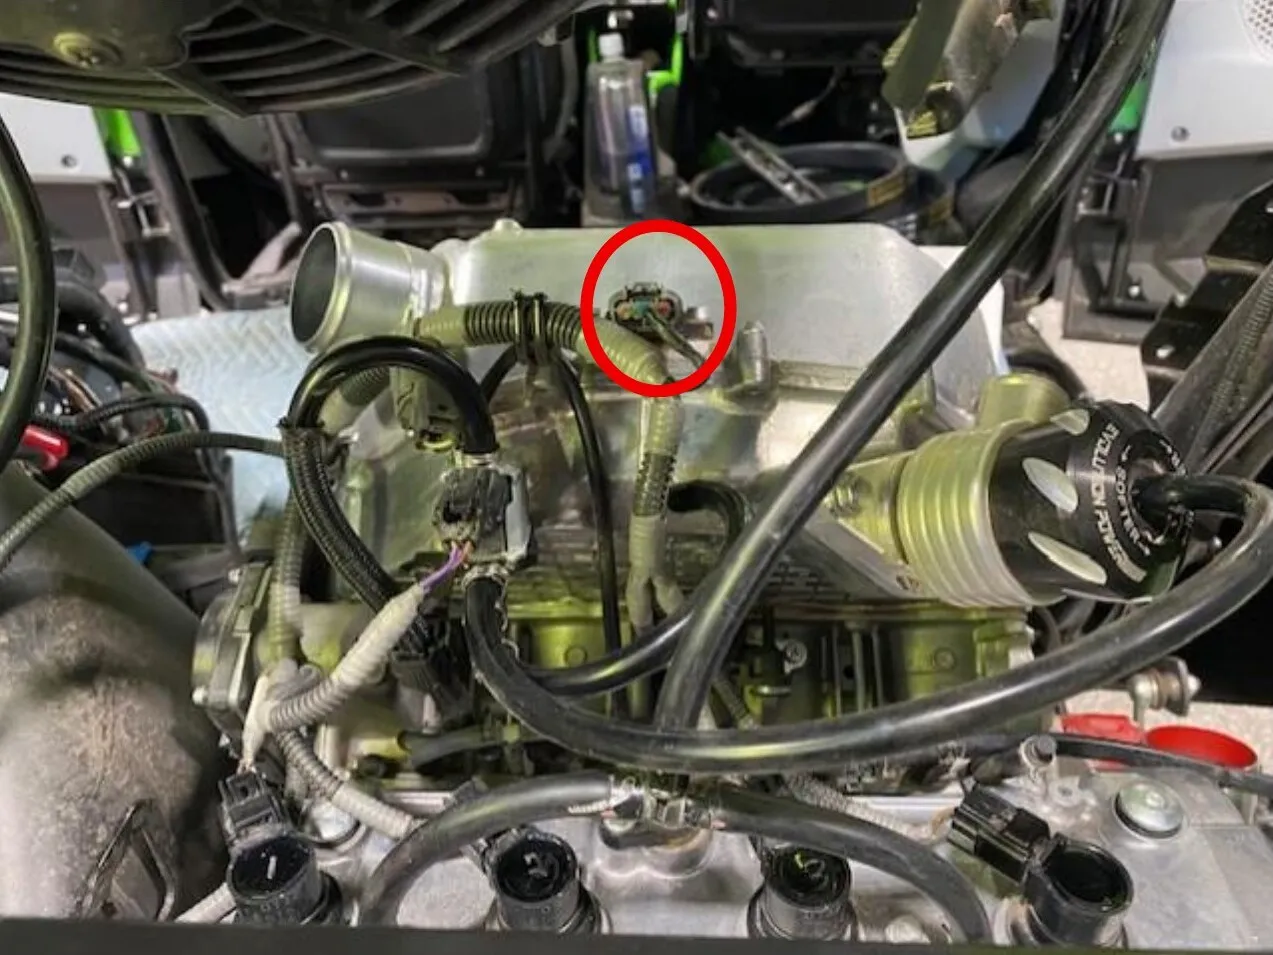
Remove engine harness: coils, MAP sensor, Atmosphere sensor, BRV vacuum lines, cam position, secondary injector clips, fuel rail connectors, charge tubes.
- Step 3
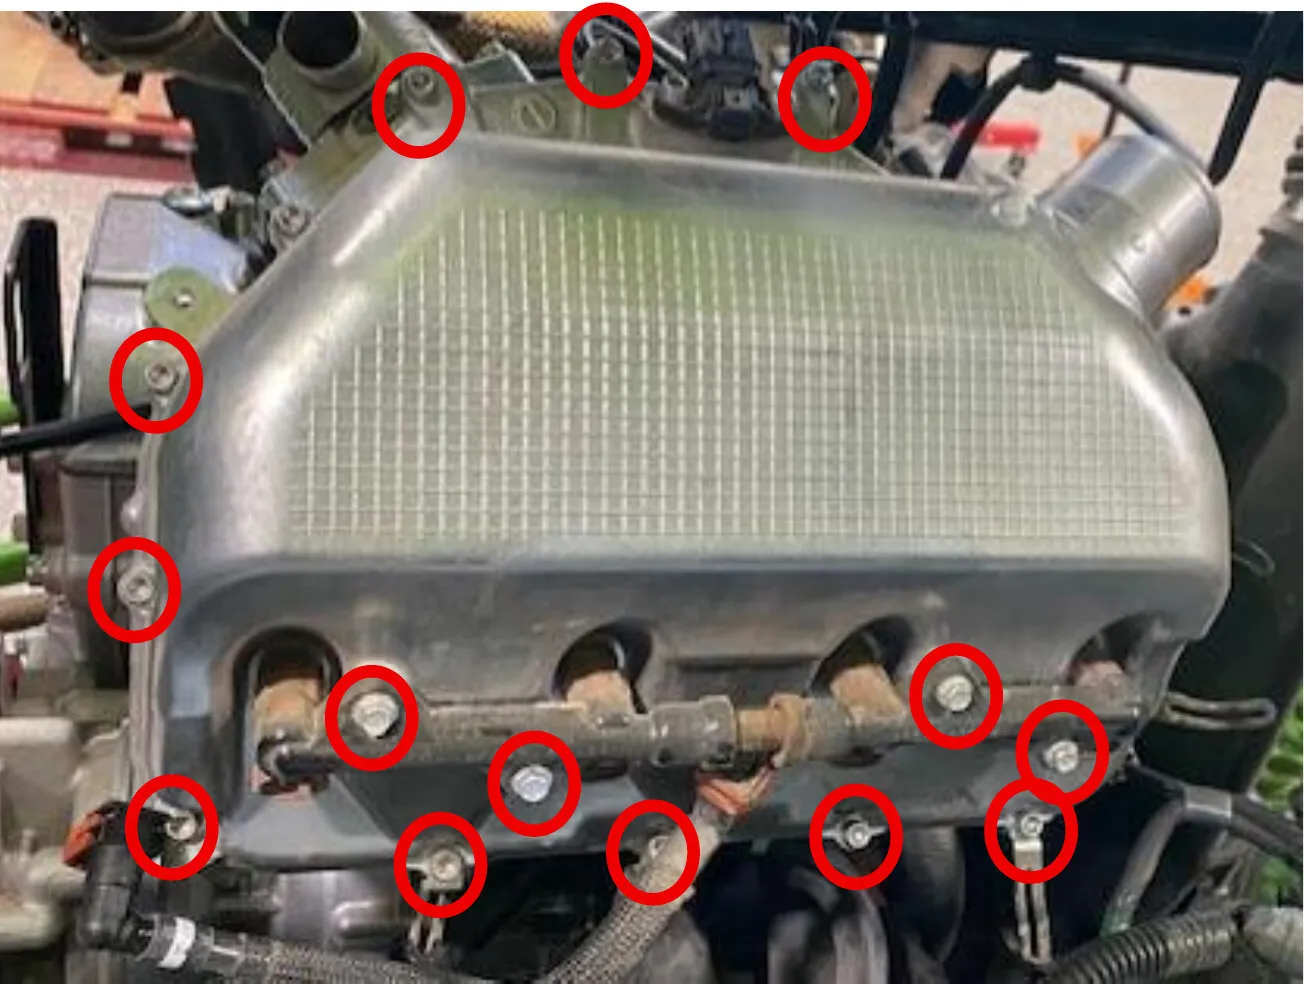
Cut zip-ties holding coolant temperature sensor and injector harness. Remove upper fuel rail from intake manifold. Next, remove upper intake manifold (15) M5 Allen, remove upper half watch for (2) dowel pins and gasket.
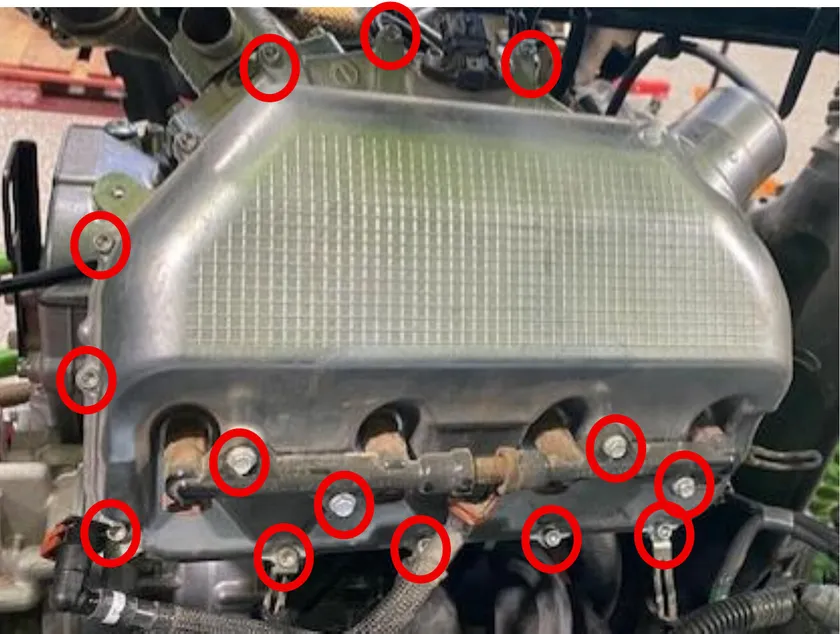
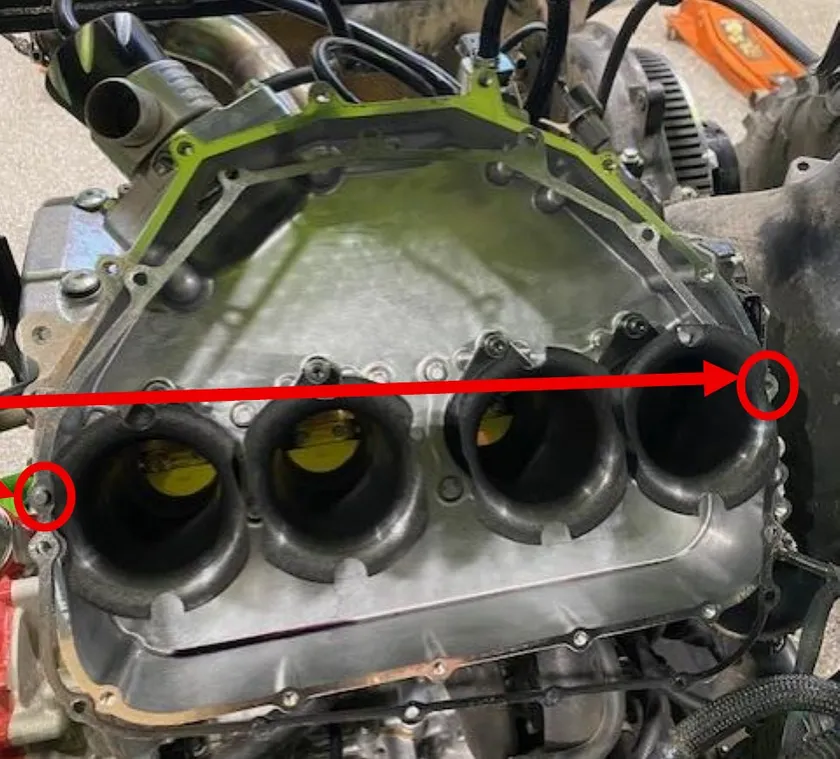
Dowel Pins will fall out. - Step 5
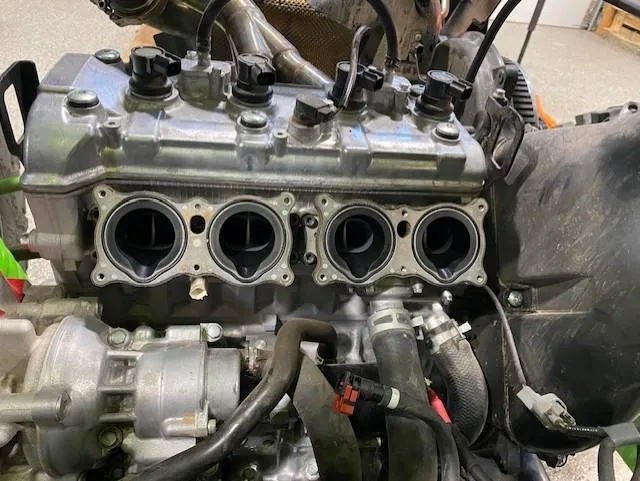
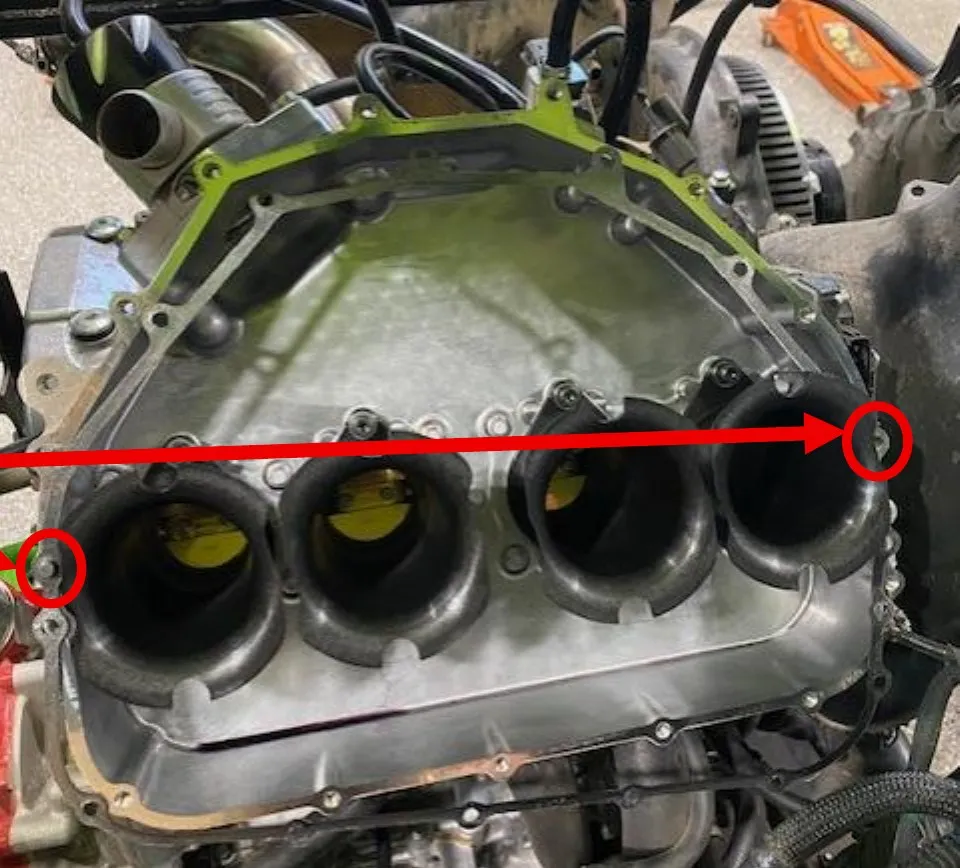
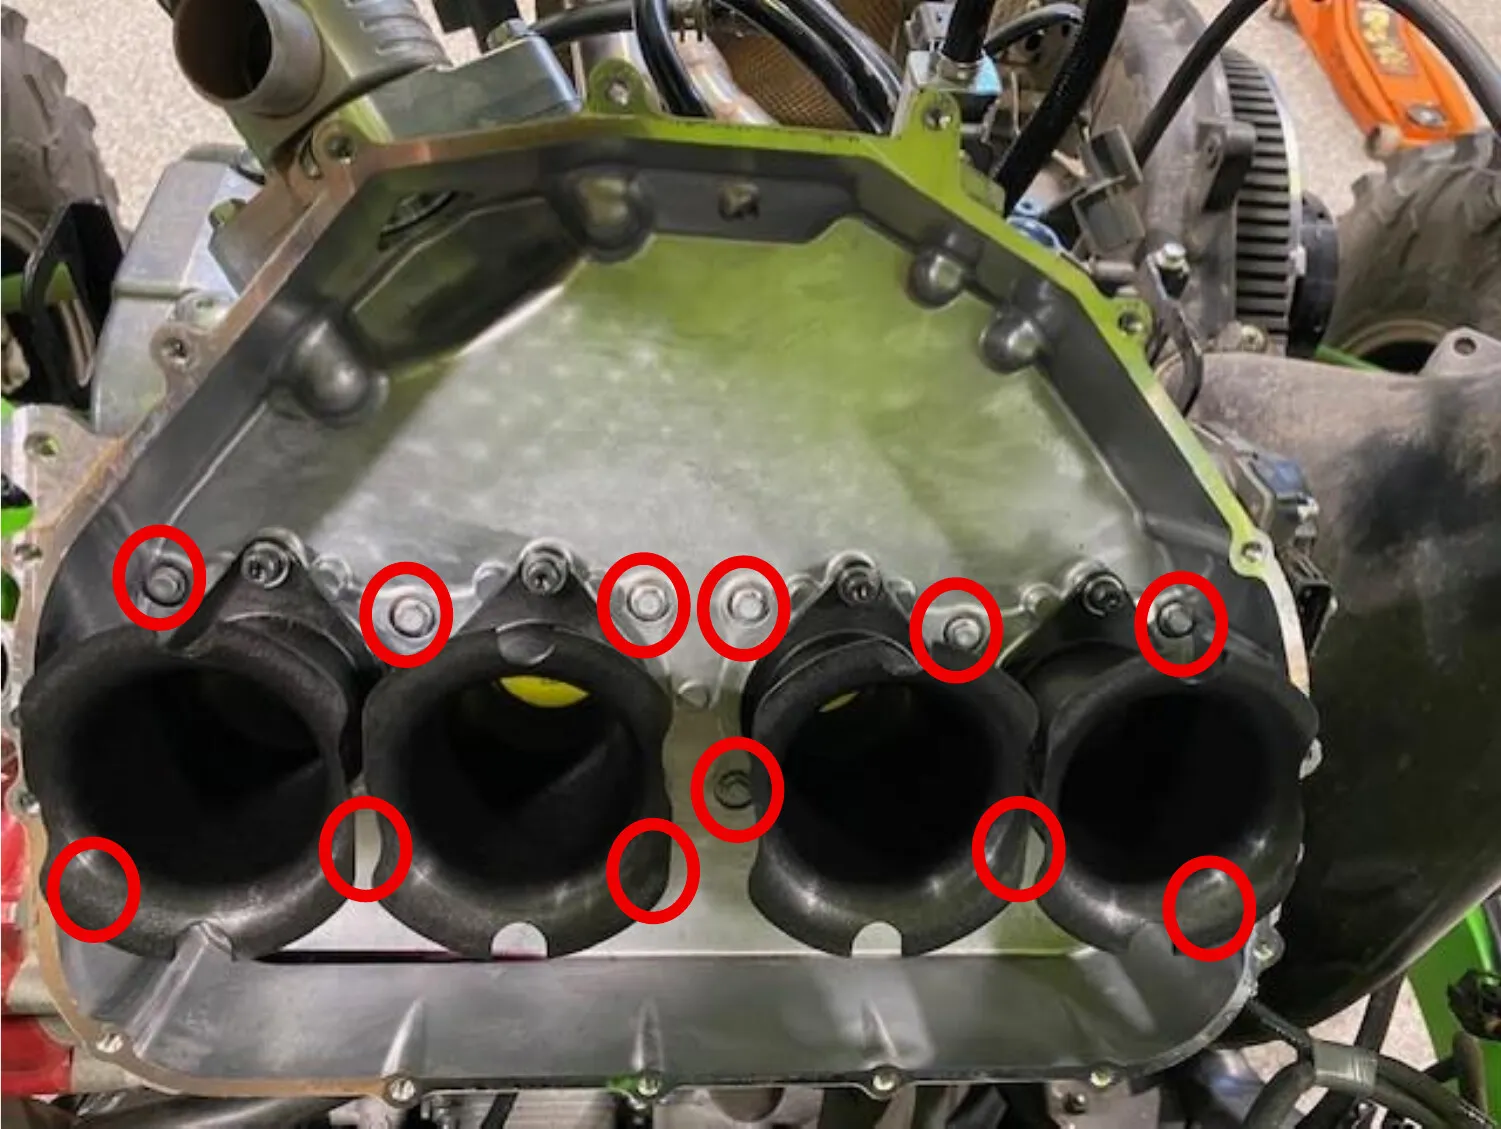
Remove (12) 7mm screws holding the intake on (you can keep the trumpets on).
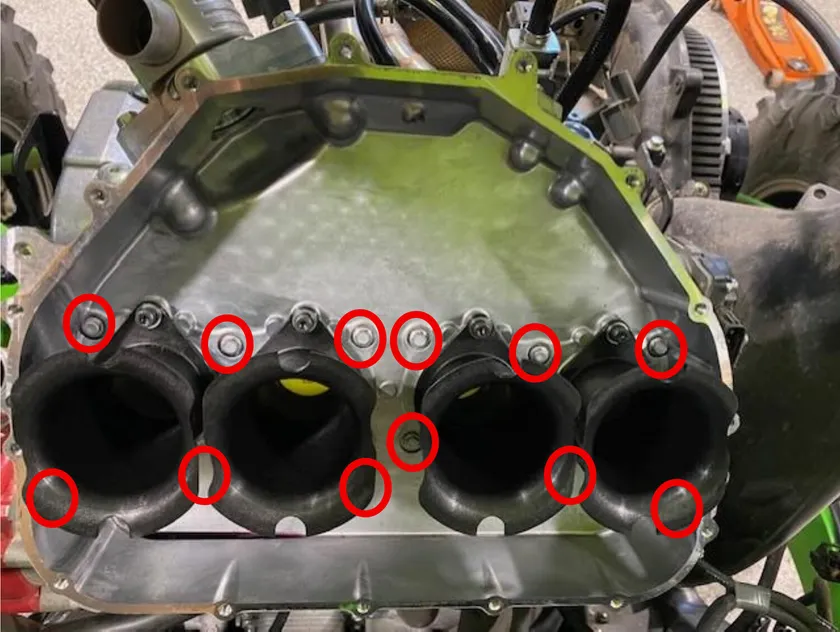
- Step 6
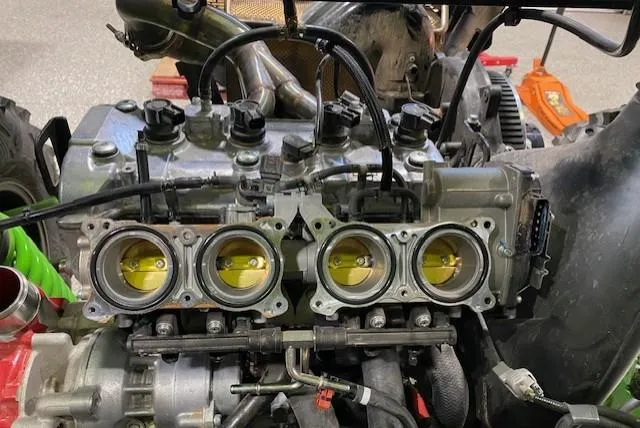
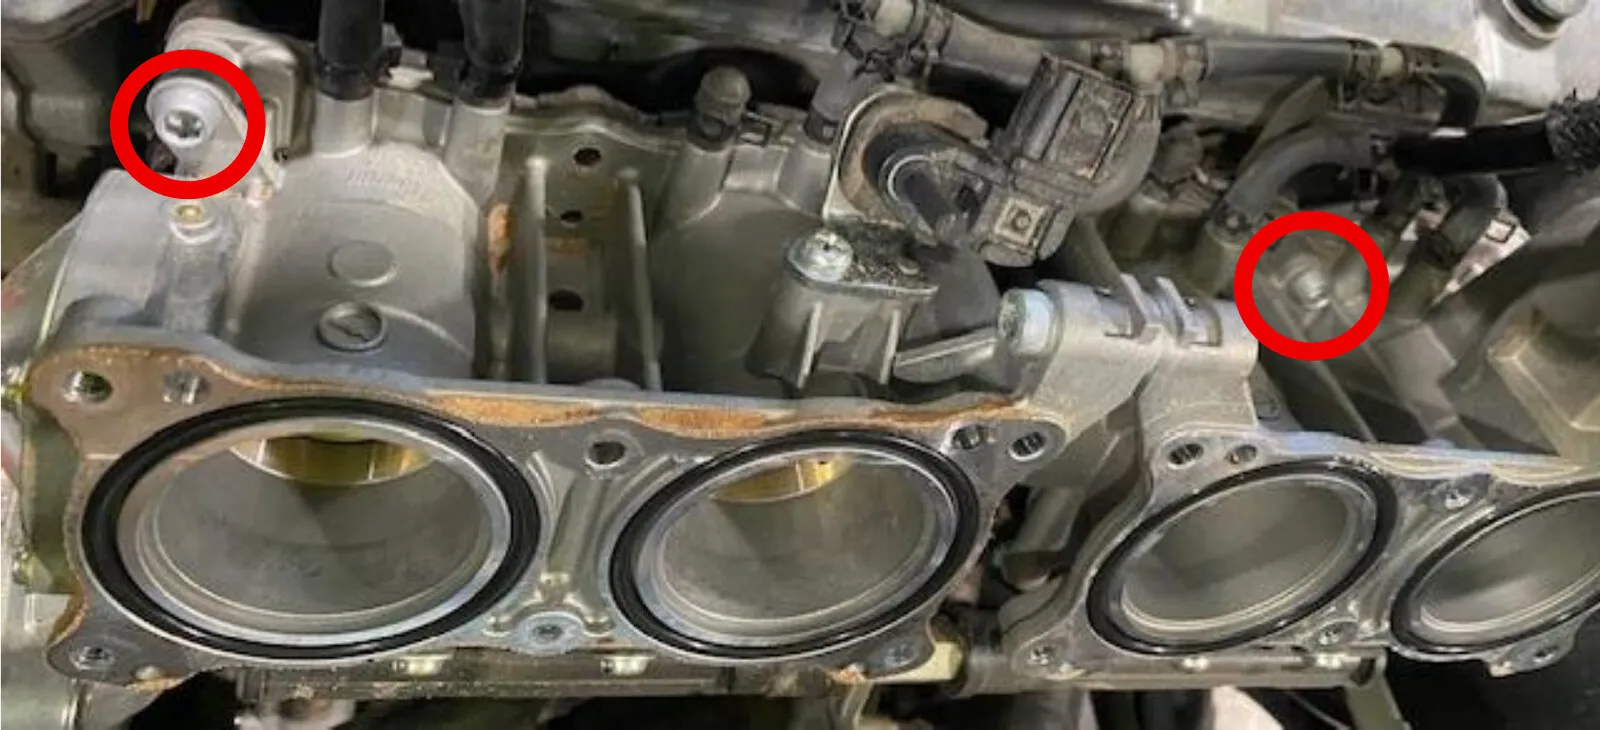
Remove all throttle bodies, remove (8) M5 screws above and below the bodies.
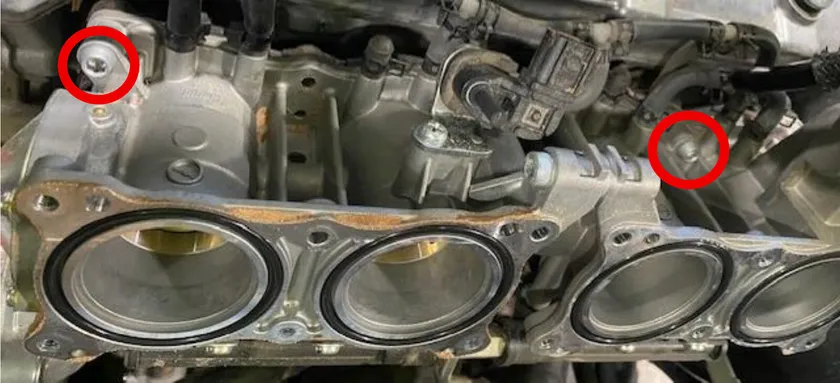
- Step 7
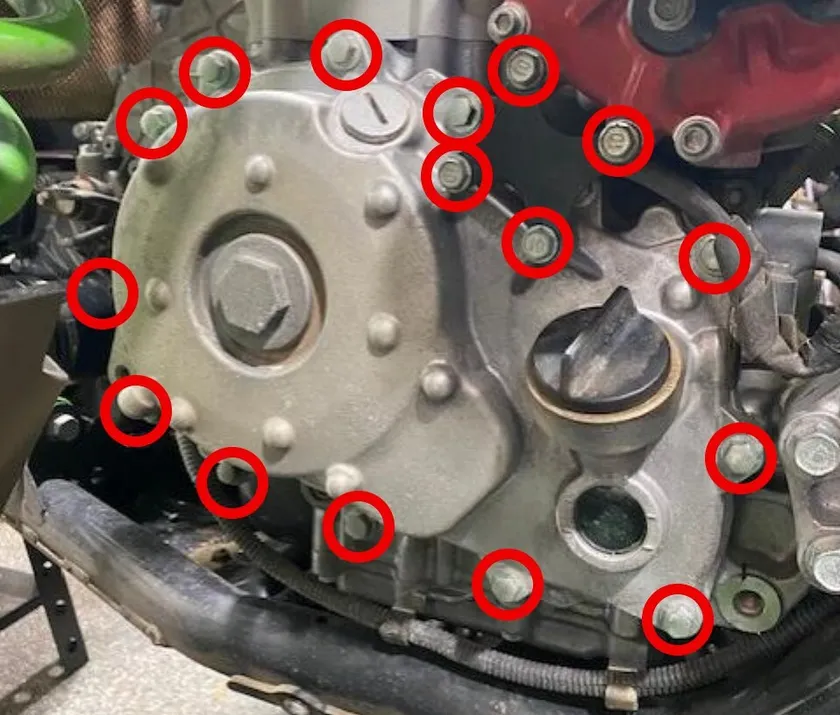
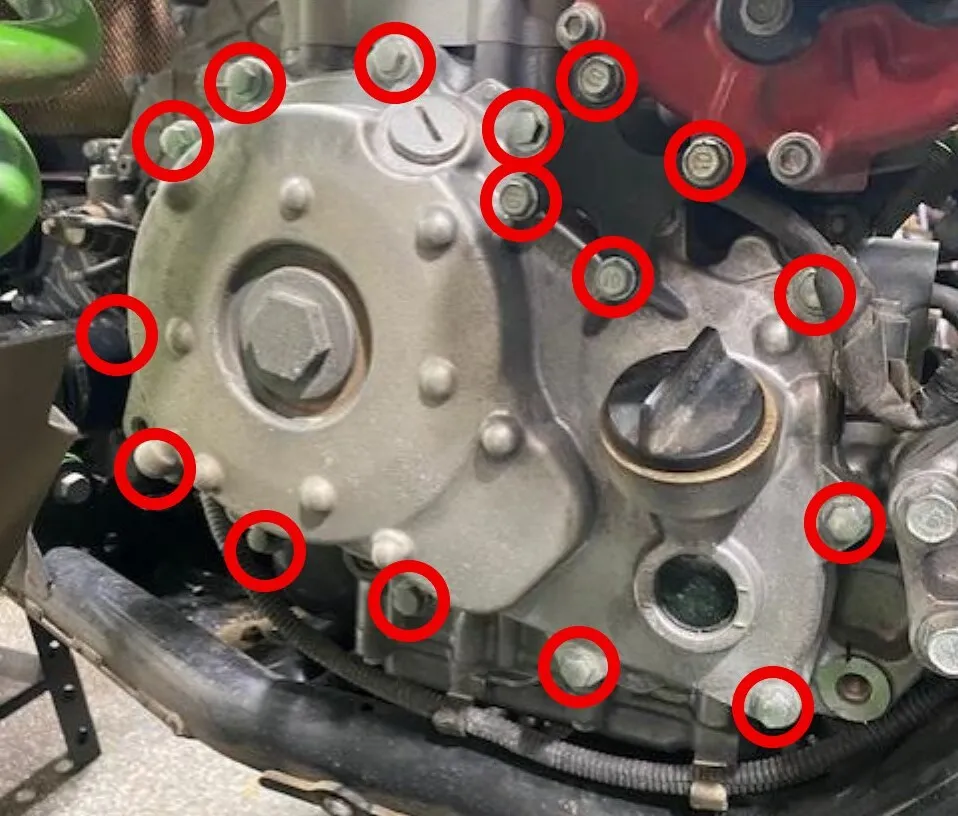
Drain engine oil. Remove (4) 10mm screws on supercharger support plate. Remove (14) 10mm screws on the stator cover.
- Step 8
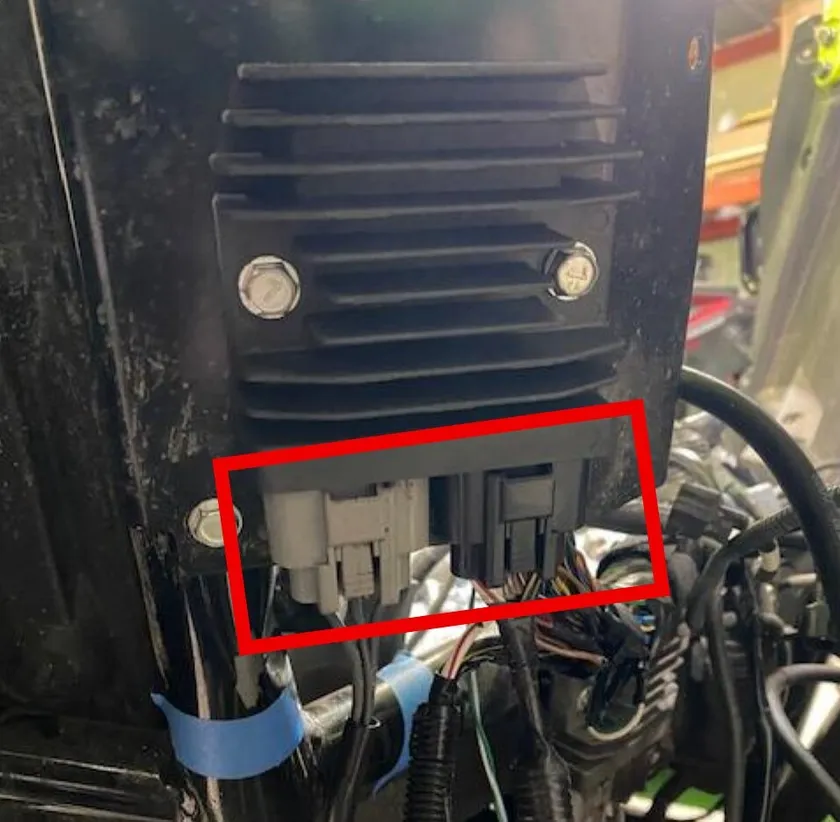
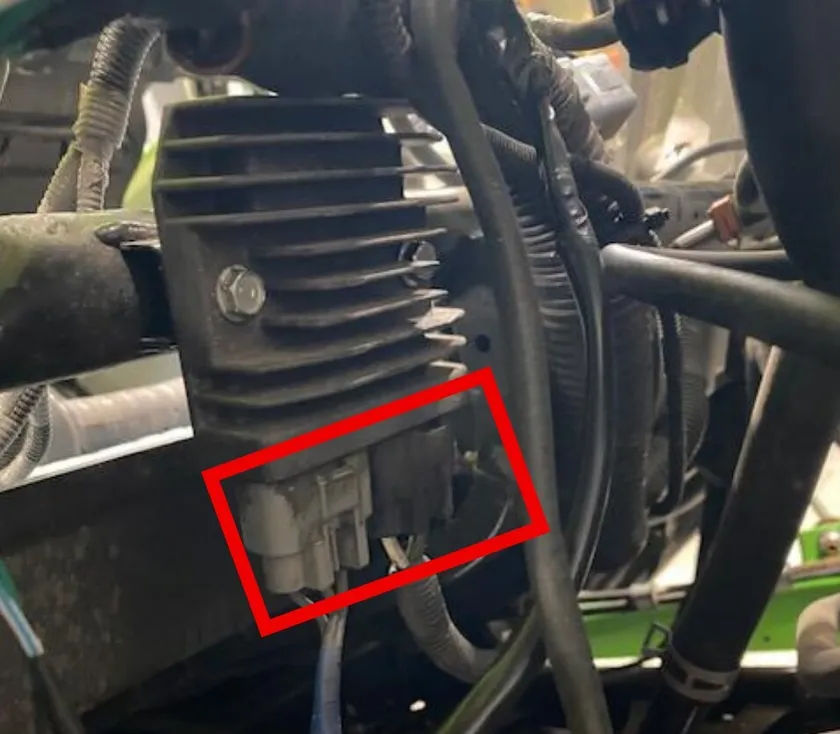
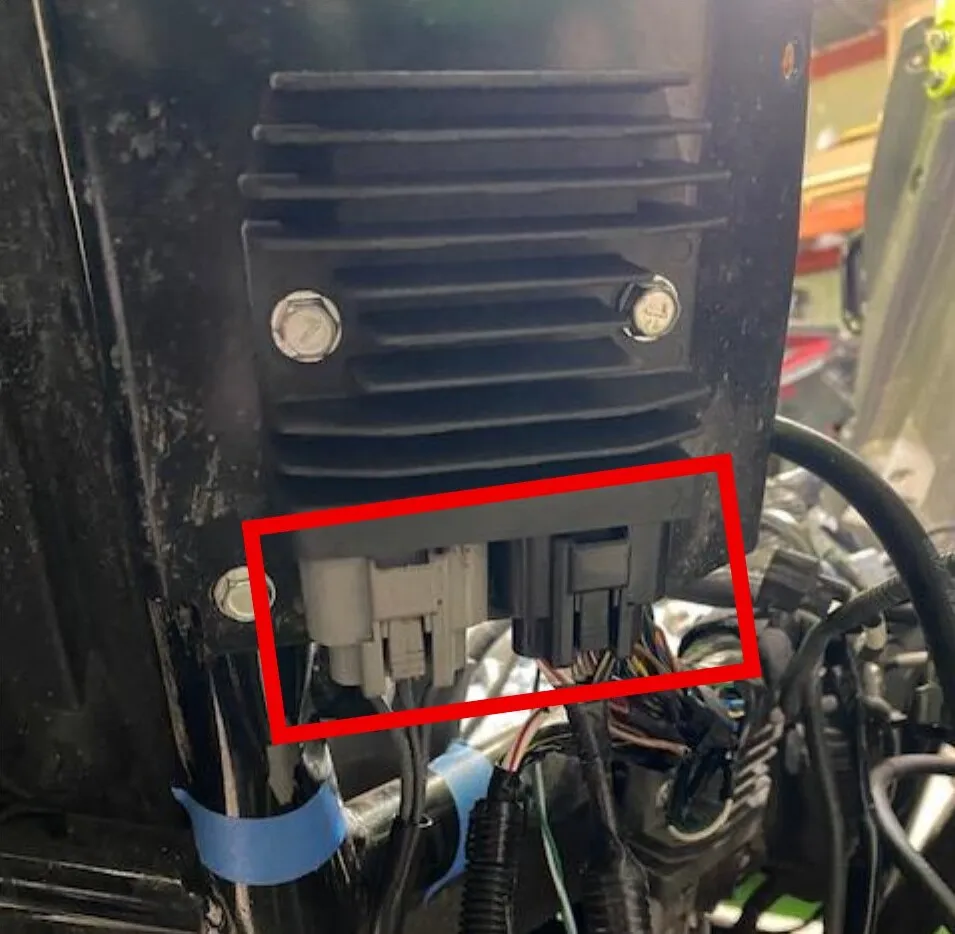
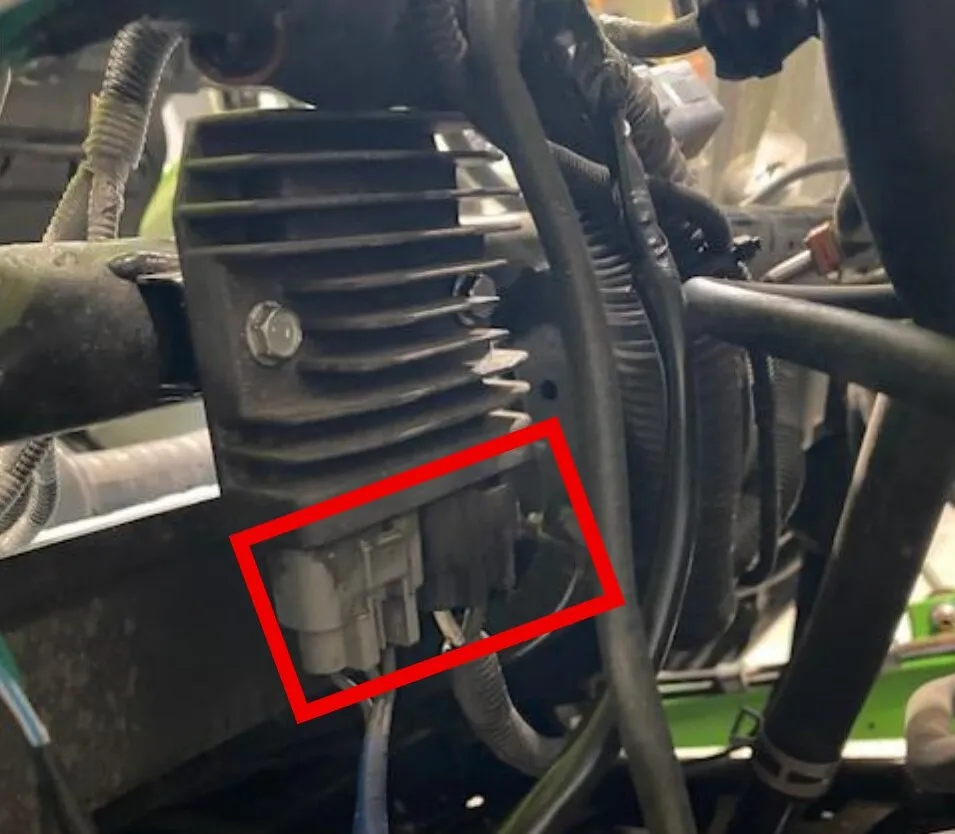
Remove stator harness, cut zip-ties, unclip from both regulators.
- Step 9
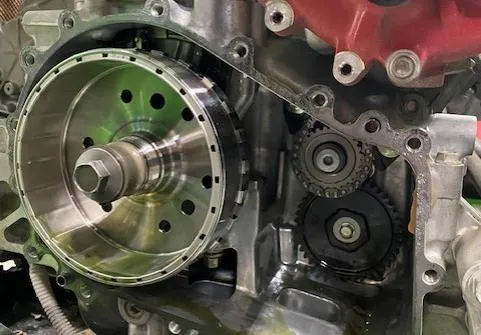
Remove stator cover, some oil will pour out.
- Step 10
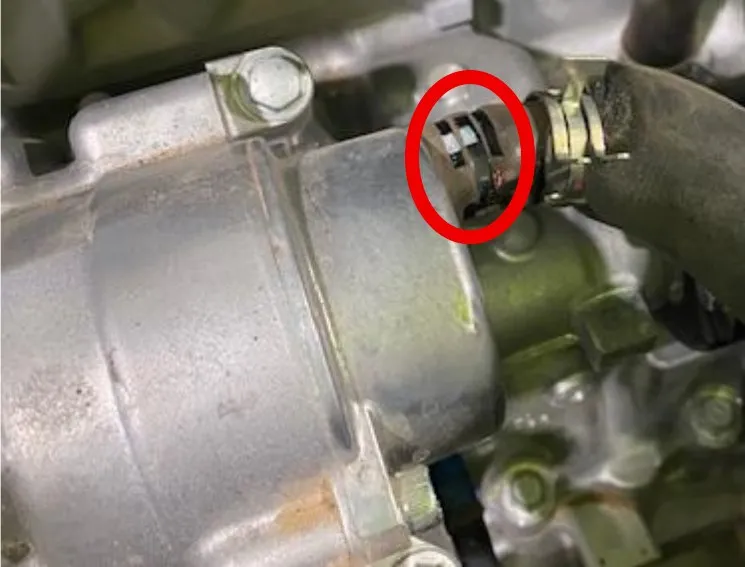
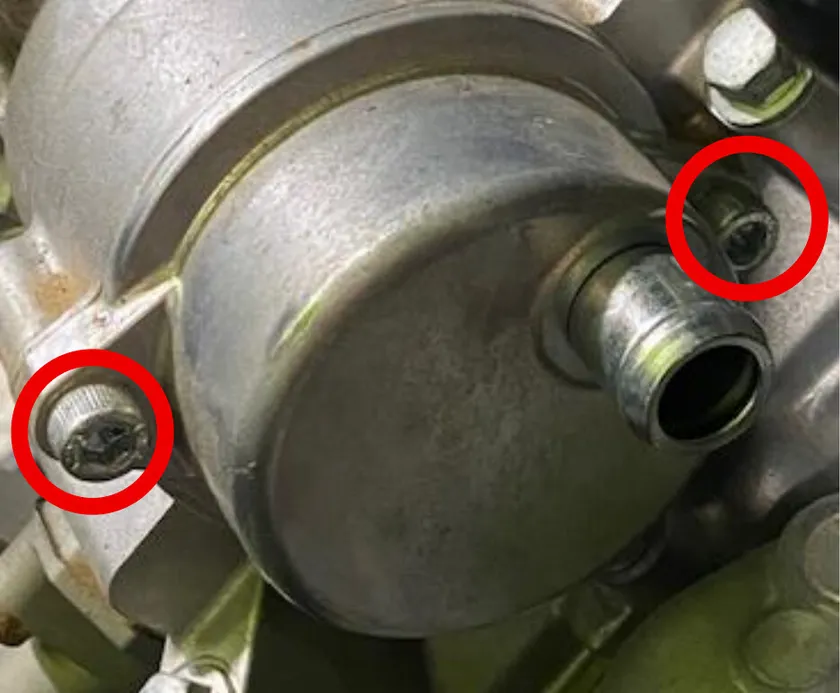
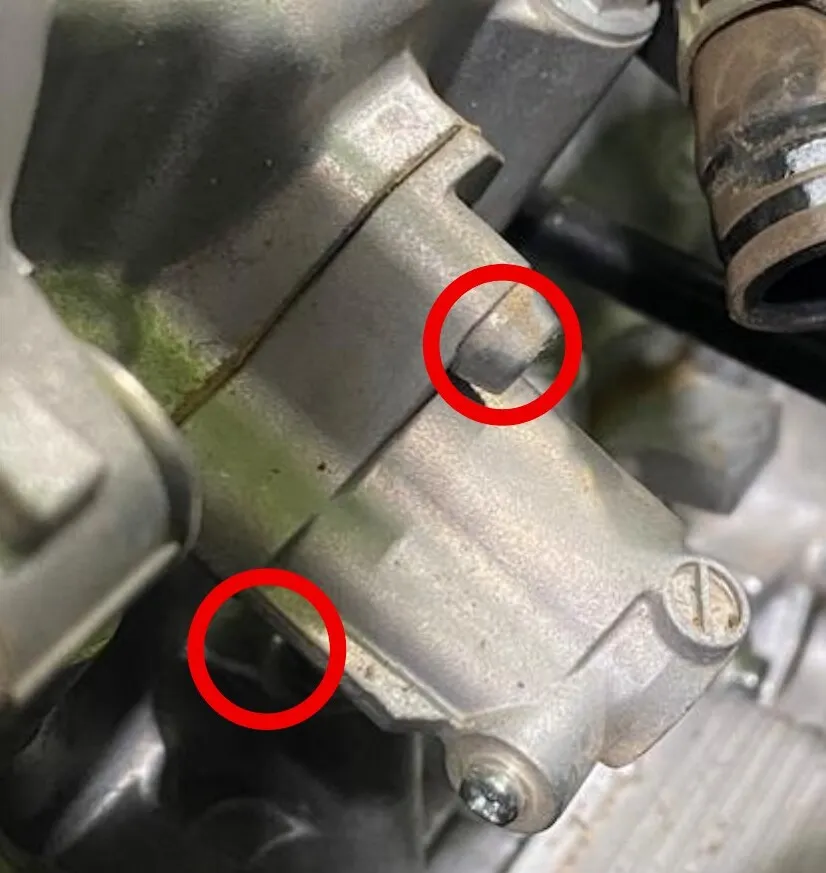
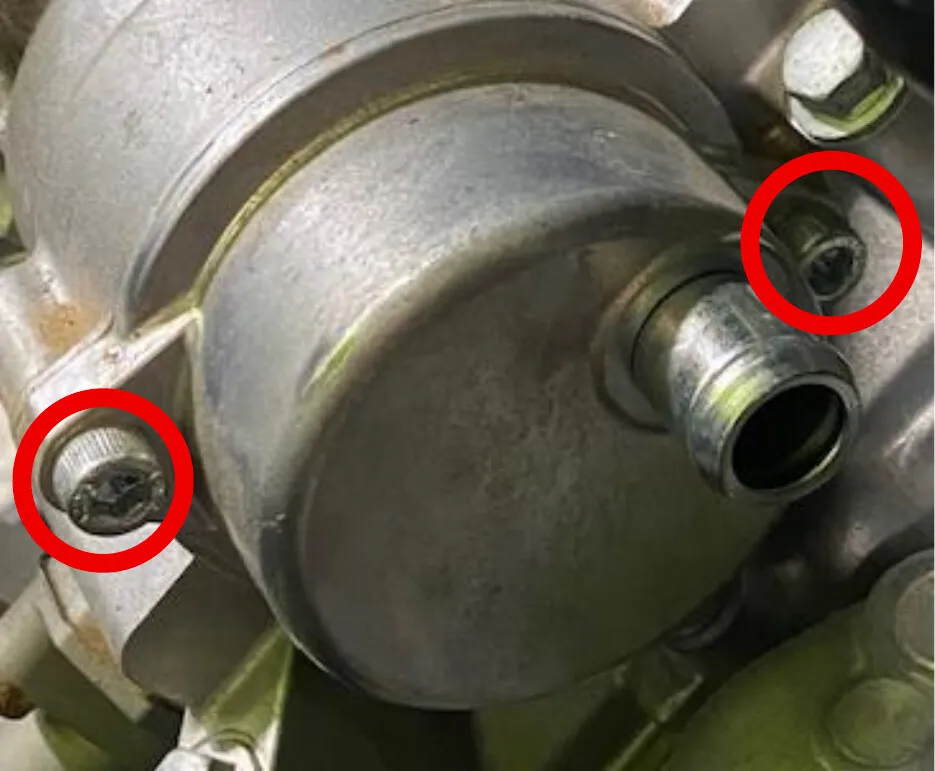
Remove breather hose off back side of compressor, remove (2) M5 screws on rear cover and O-ring. Remove (2) M5 screws from the tensioner and remove.
- Step 11
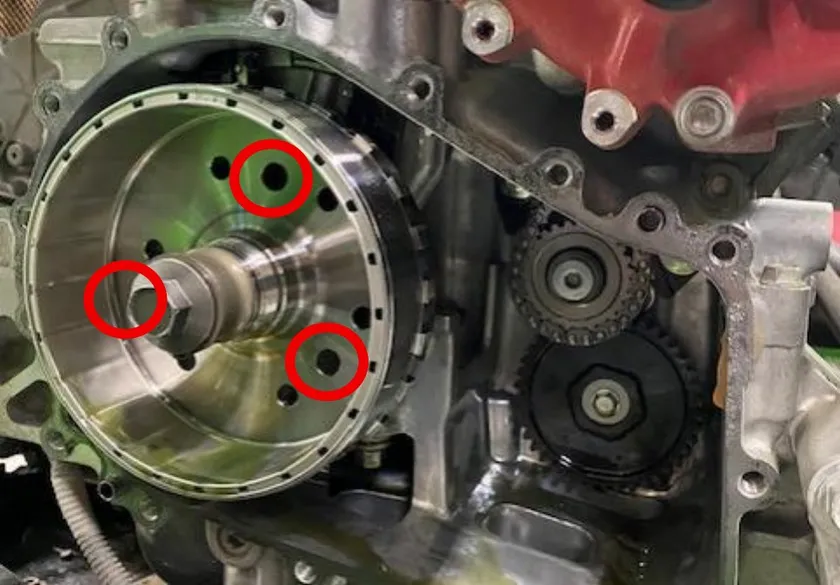
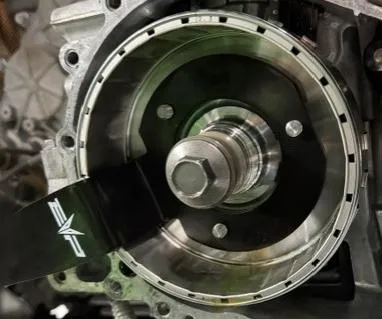
On the flywheel you will notice a few different size balance holes. The crankshaft holding tool will use these (3) holes.
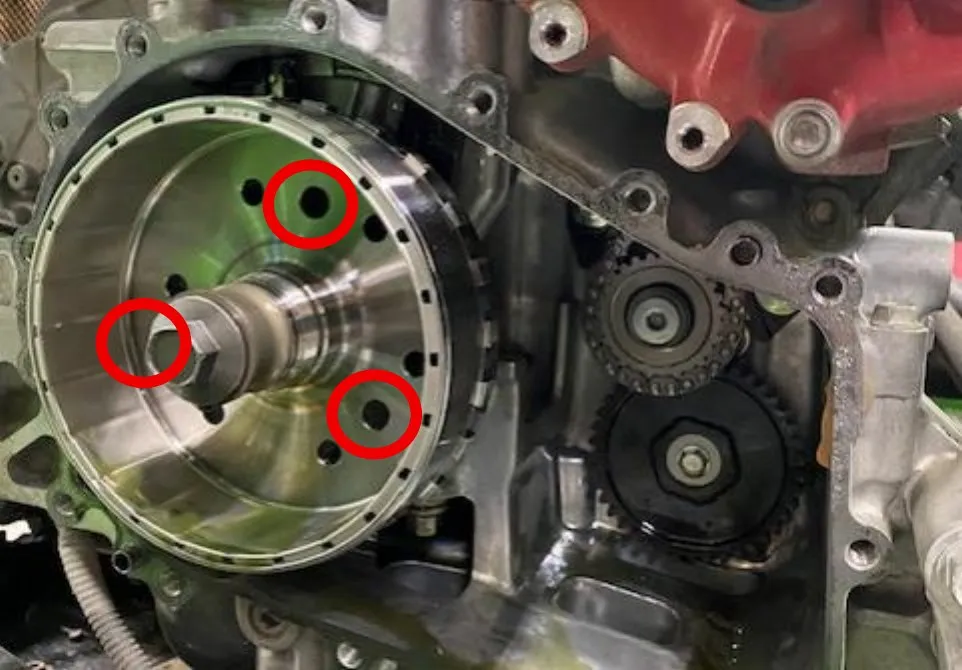
- Step 12
Install the supplied nut over the flywheel bolt onto the threads of the crankshaft. This nut does not need to be torqued, just snug. You can hold the crankshaft and rotating assembly still when torquing.
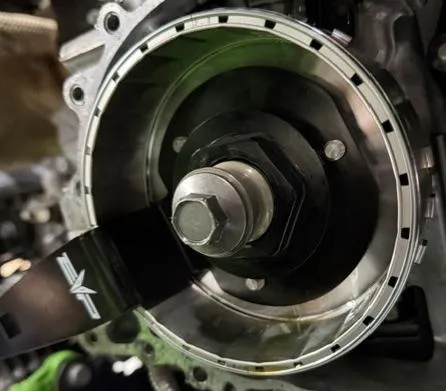
Procedure
Installation
- Step 11
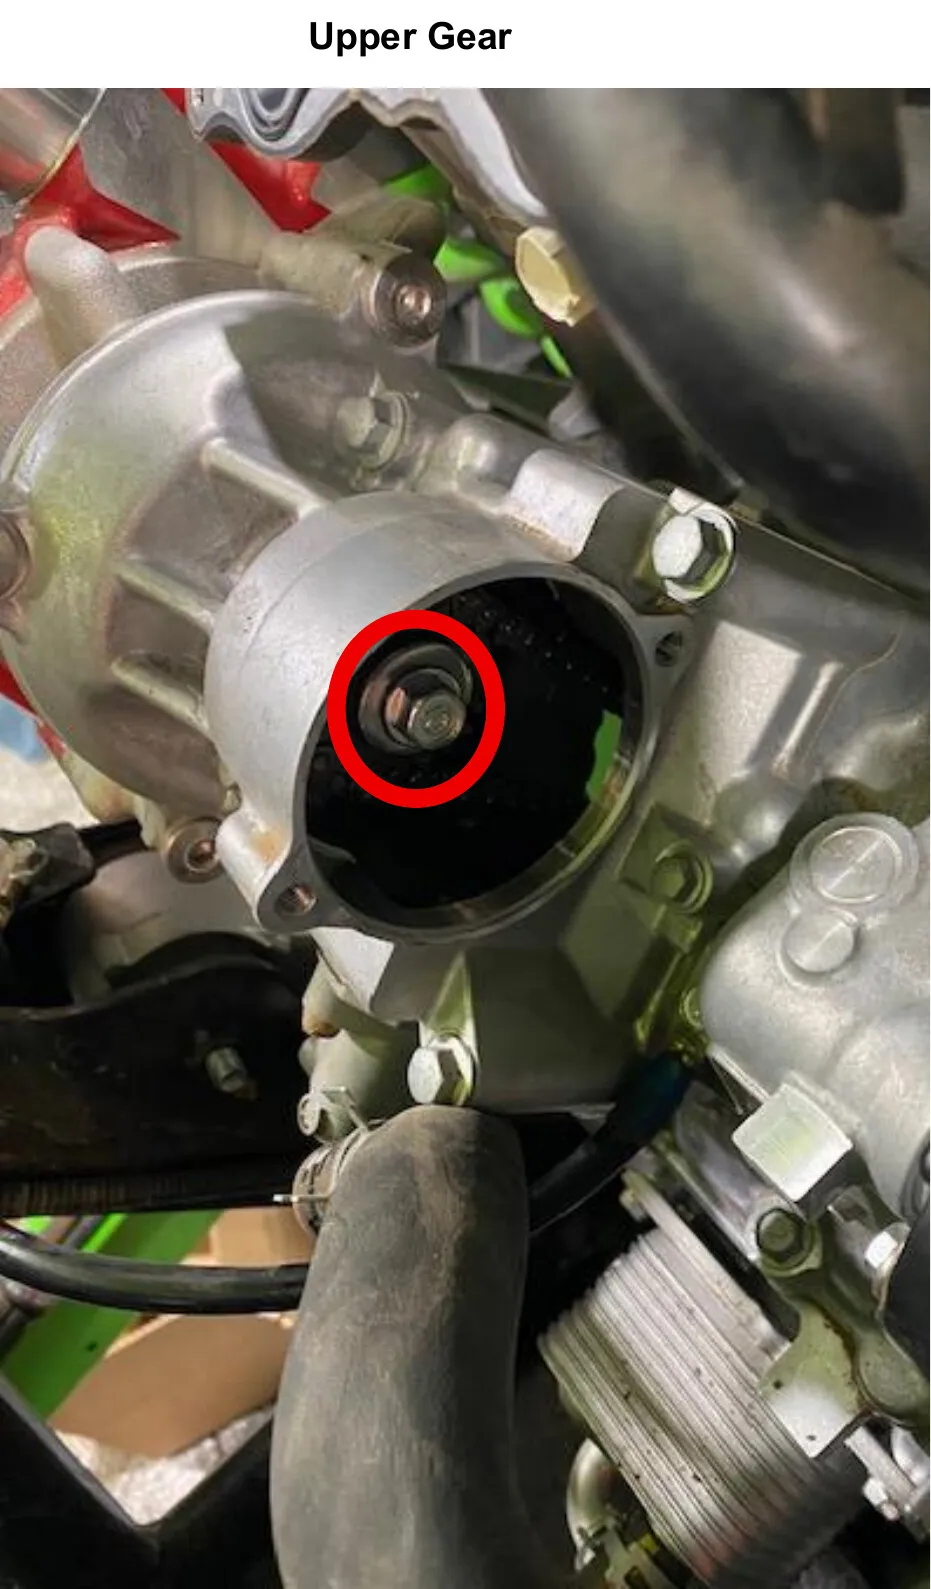
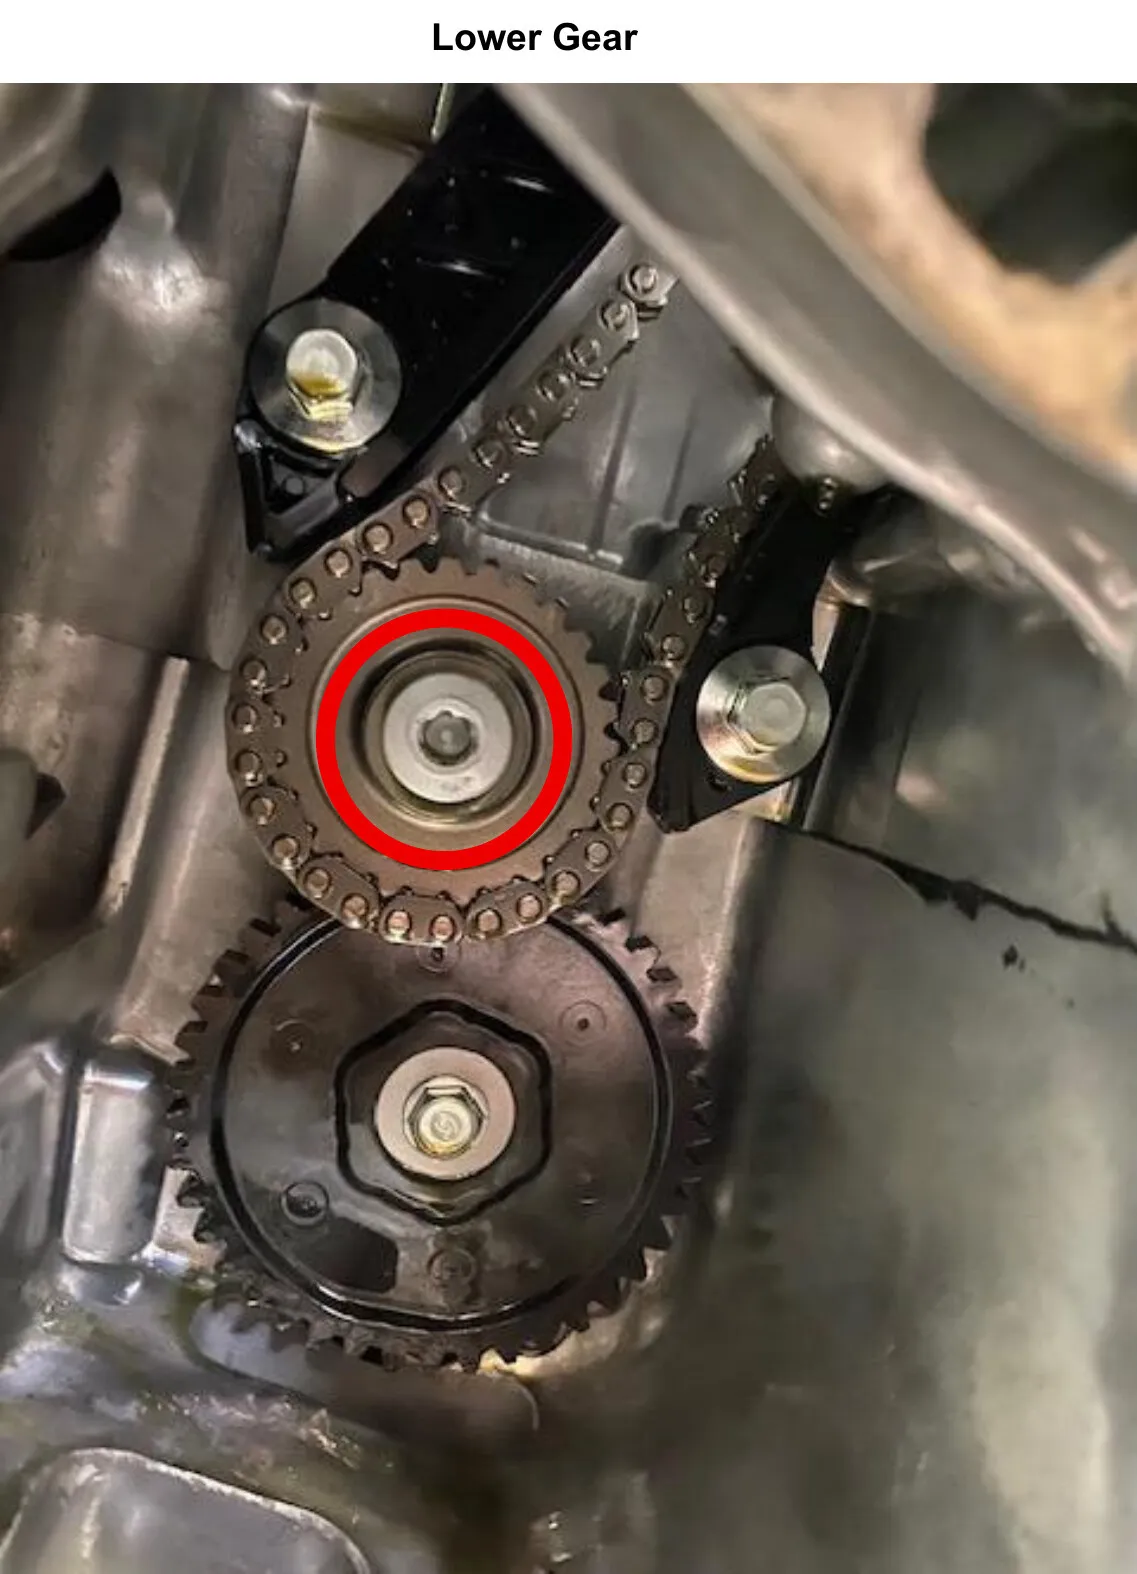
(UPPER GEAR LEFT HAND THREAD) Remove the upper 10mm bolt from the top gear. (LOWER GEAR REGULAR THREAD) Remove the lower M5 bolt from lower gear behind stator cover. Slide gear outward and remove.
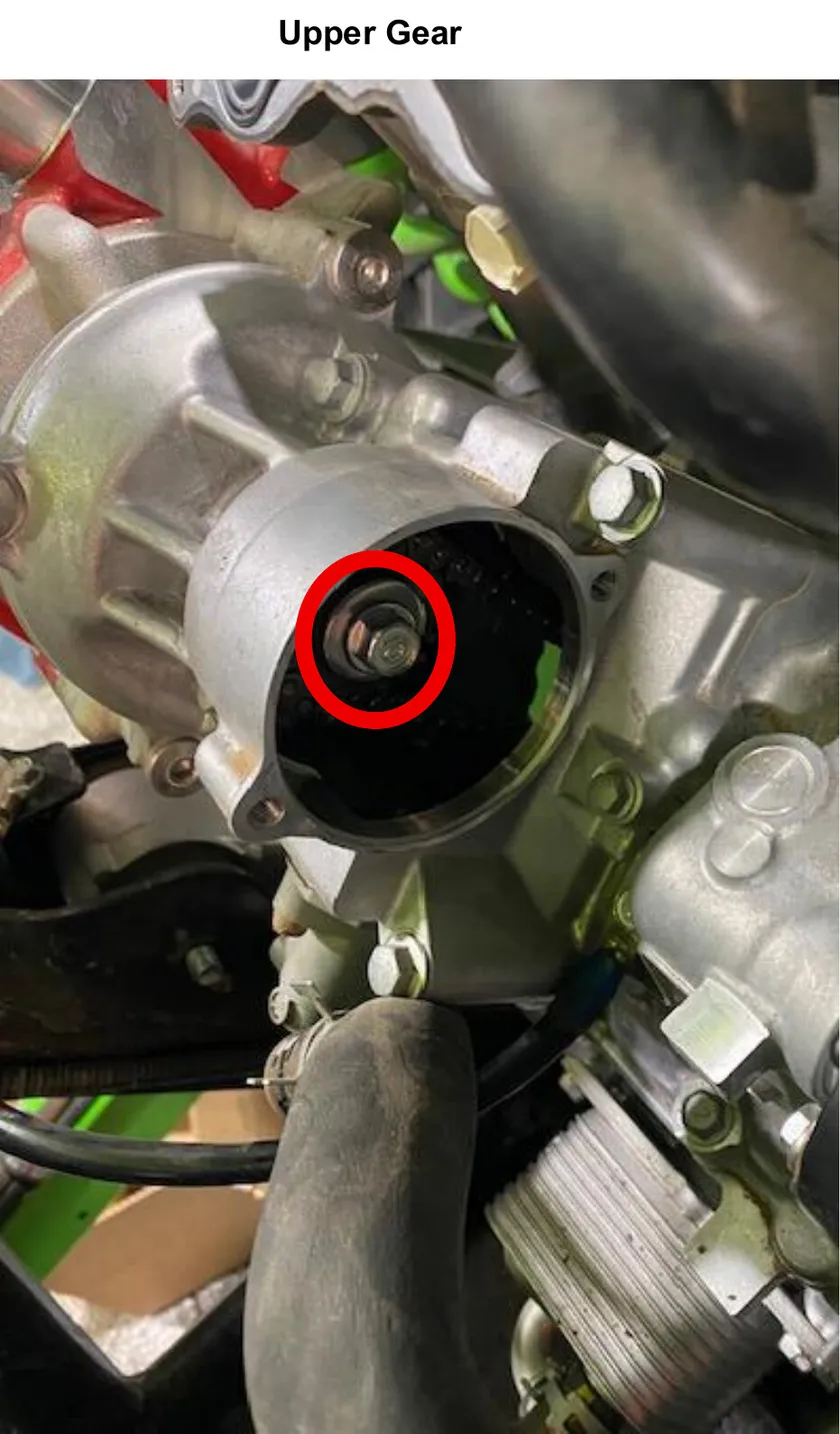
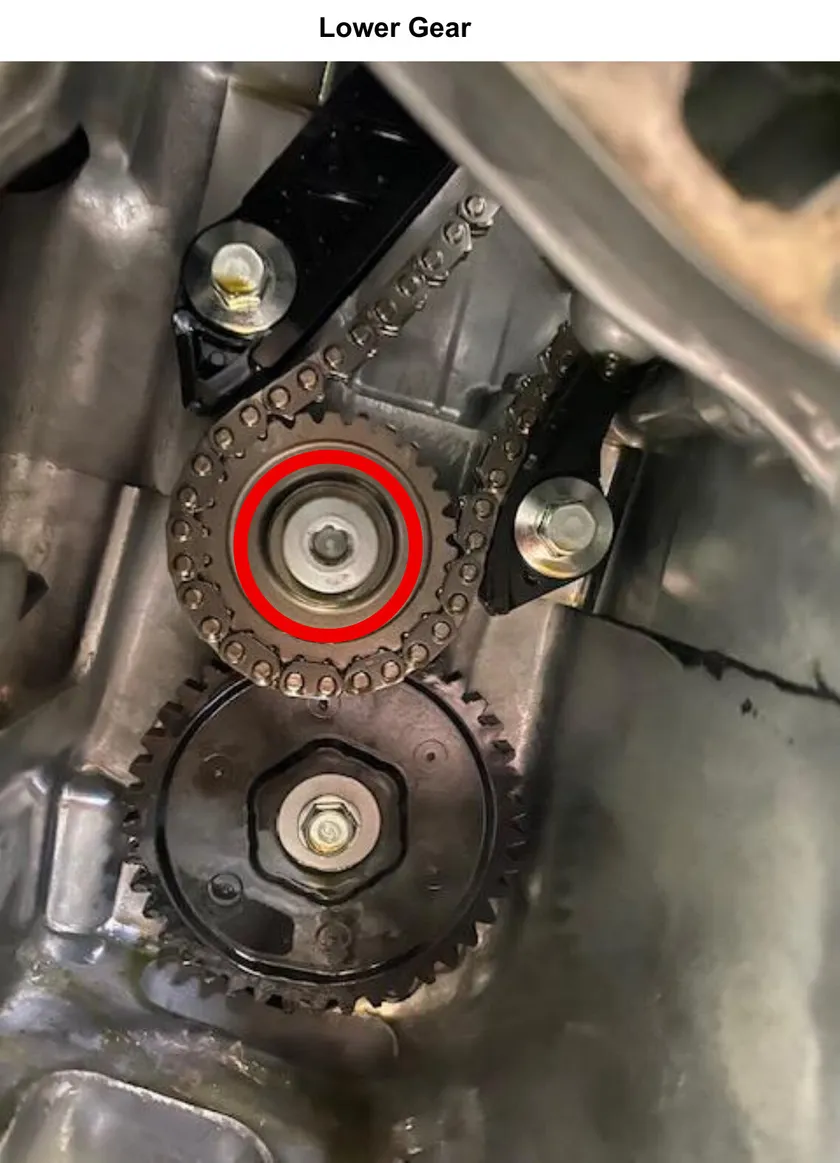
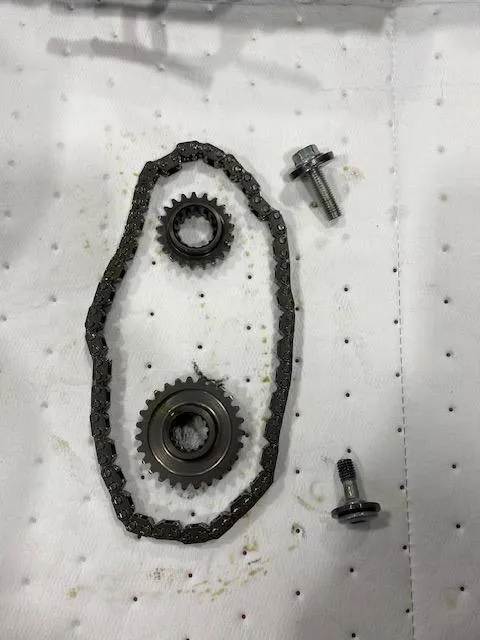
- Step 12
Reinstall chain and new supercharger gears in reverse order. The lower gear boss faces inward. Apply Loctite 648 to both bolts. Upper bolt torque to 18 ft-lbs (reverse thread). Lower bolt torque to 15 ft-lbs.
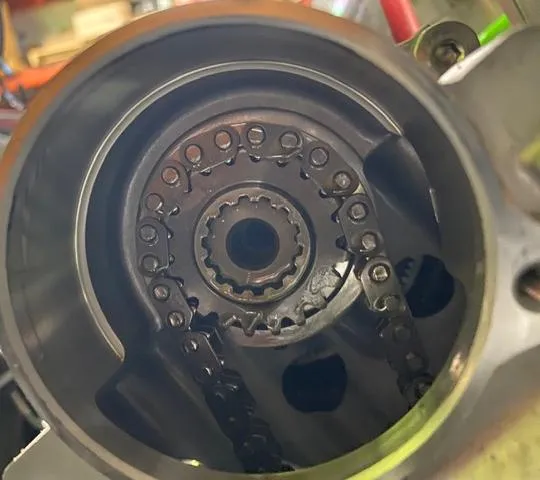
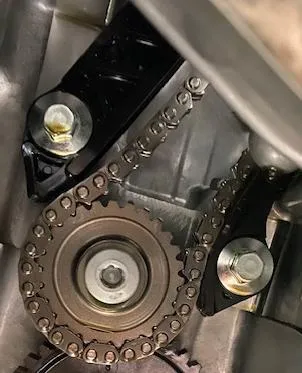
- Step 13
Reinstall the chain tensioner as shown below. Replace gasket.
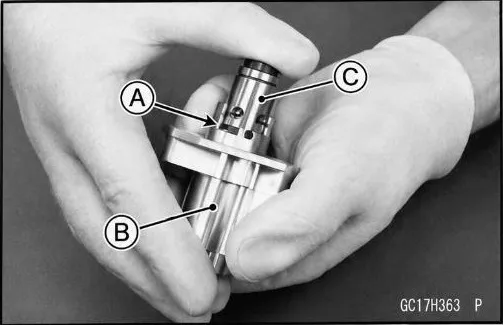
Opening snap ring (A), release it and turn the tensioner body (B) clockwise while holding the push rod (C). 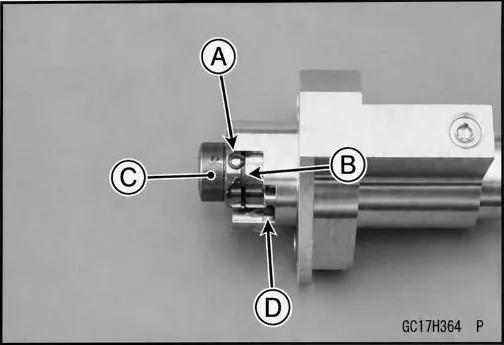
Turning the tensioner body clockwise, slide the stopper (A) into the groove (B) of the push rod (C) NOTE- do not fit the snap ring (D) into the groove. 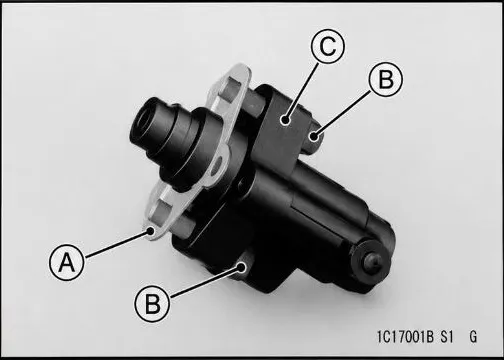
Replace the gasket (A) with a new one. Replace tensioner bolts (B) with new ones. Torque tensioner bolts to 89 in-lb. 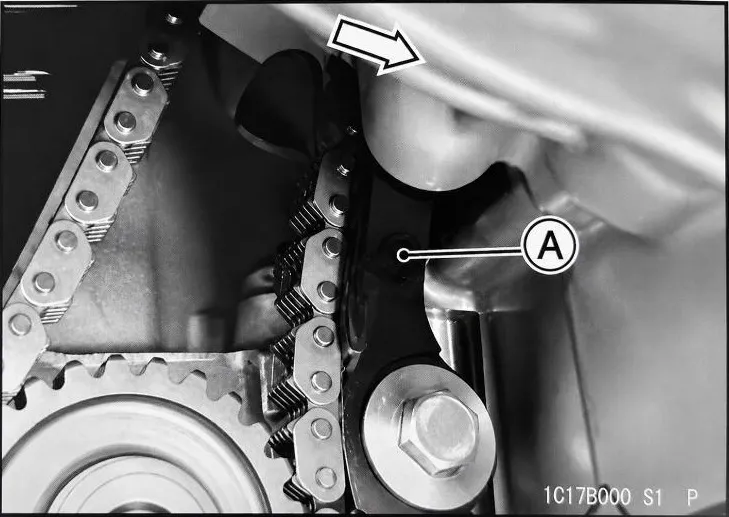
Push the front chain guide (A) forward to allow the tensioner to expand. **NOTE- you will hear the sound of the push rod moving out. If you DO NOT HEAR THIS, remove the tensioner and reassemble.
Need technical support?
Submit a ticket with your vehicle and what you're seeing, and our support team will get back to you.
