Kawasaki H2 Exhaust

Kawasaki H2 Exhaust

Category
Exhaust
SKU
2002030002 (Race Bypass), 2002030004 (Muffler & Link Pipe), 2002030005 (Header & Muffler)
Revision
REV_041426

In the box

Parts and tools

Kawasaki H2 Exhaust
Kawasaki H2 Exhaust

Included parts

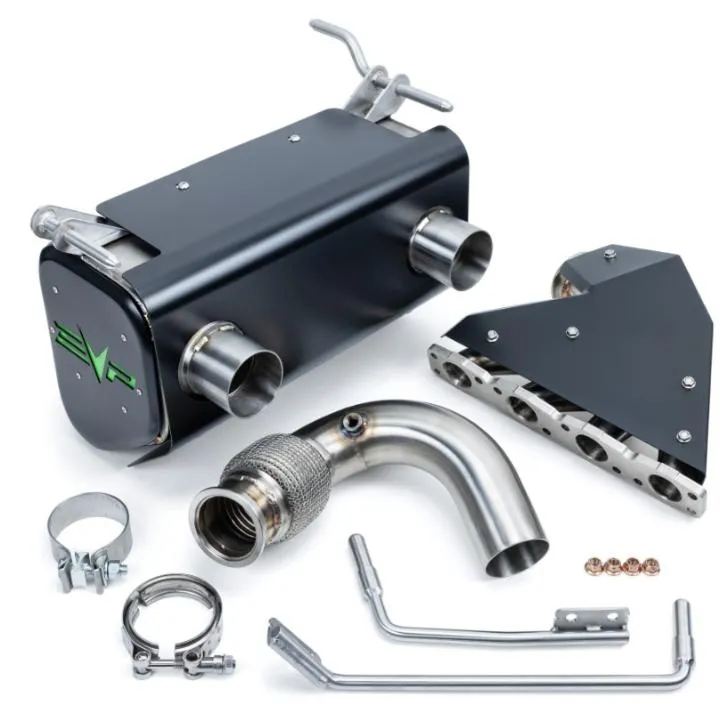
  • Magnum Muffler
  • Race Bypass (side)
  • Magnum Header & Mid Pipe
  • Magnum Muffler Link Pipe

Required tools

  • P-Drive Clutch Service Tools
  • 6mm Allen Socket
  • 19,22mm Sockets
  • Impact Driver
  • T-20 Torx Socket
  • Blue Loctite
  • Torque Wrench

Procedure

Installation

  1. Step 1

    Remove front cargo bed cover by removing (8) quick rivets. There is a tab underneath the cover holding up against the intercooler cover, you may need to pop the intercooler cover up.

  2. Step 2

    Remove the lower cargo bed by removing (12) quick rivets, (4) cargo tie downs, (4) screws. It helps to remove (4) push darts holding the rear fascia on. Remove bed.

  3. Step 3

    Remove heat shields under the bed by removing (8) Philips head screws and (2) 10mm. Some screws are through bolted. Photo of heat shields removed.

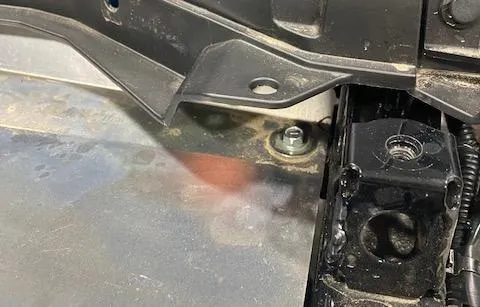
    Remove heat shields under the bed by removing (8) Philips head screws and (2) 10mm. Some screws are through bolted. Photo of heat shields removed.
    Remove heat shields under the bed by removing (8) Philips head screws and (2) 10mm. Some screws are through bolted. Photo of heat shields removed.
    Remove heat shields under the bed by removing (8) Philips head screws and (2) 10mm. Some screws are through bolted. Photo of heat shields removed.

Procedure

Removing and Installing Side Muffler

  1. Step 1

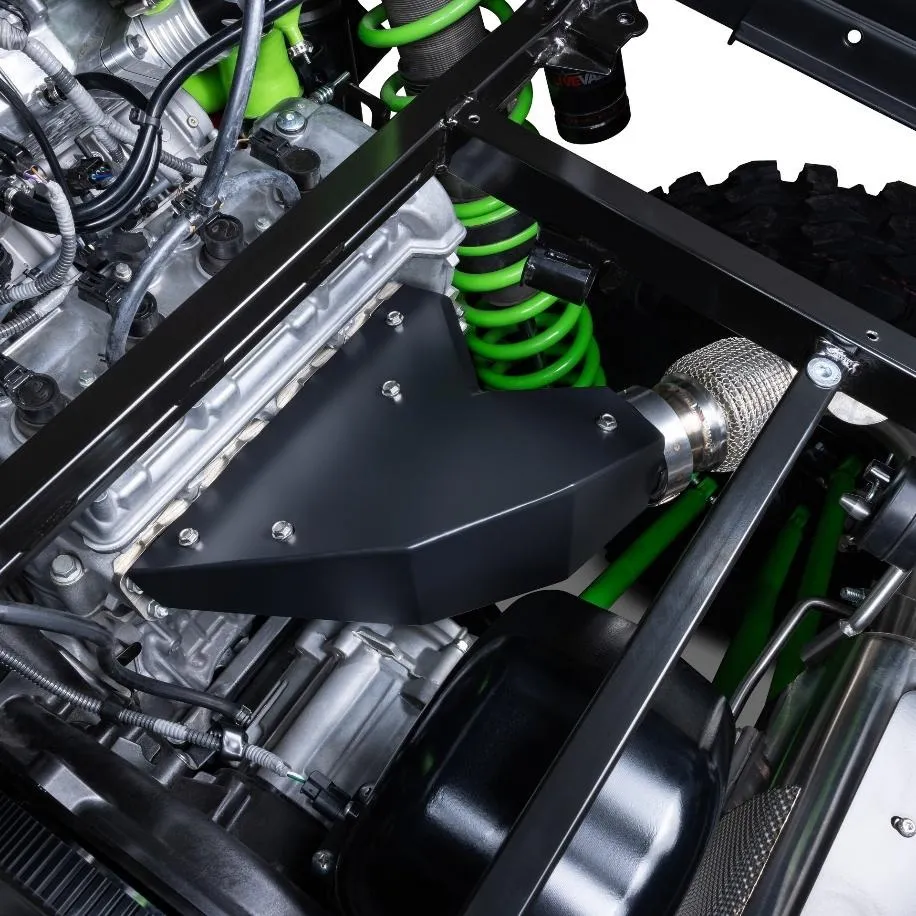
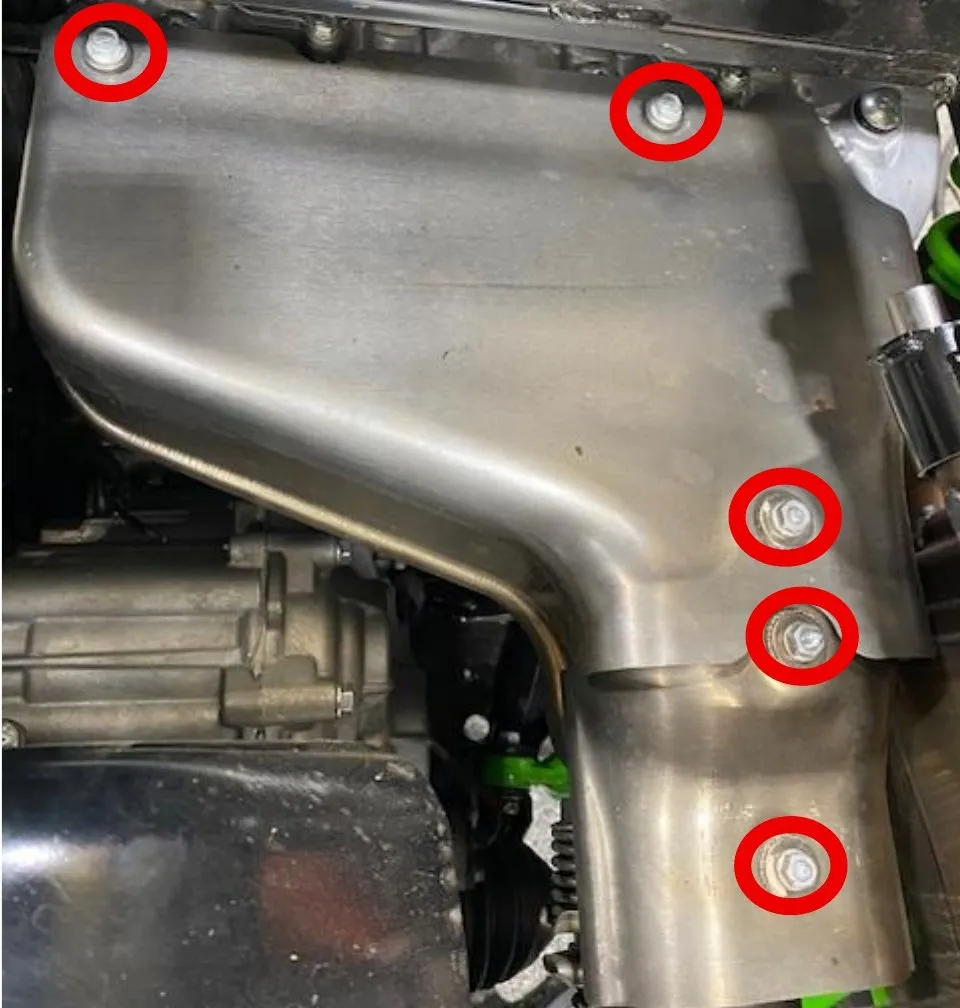
    Remove the top heat shields on the header. Remove (5) 10mm nuts and washers.
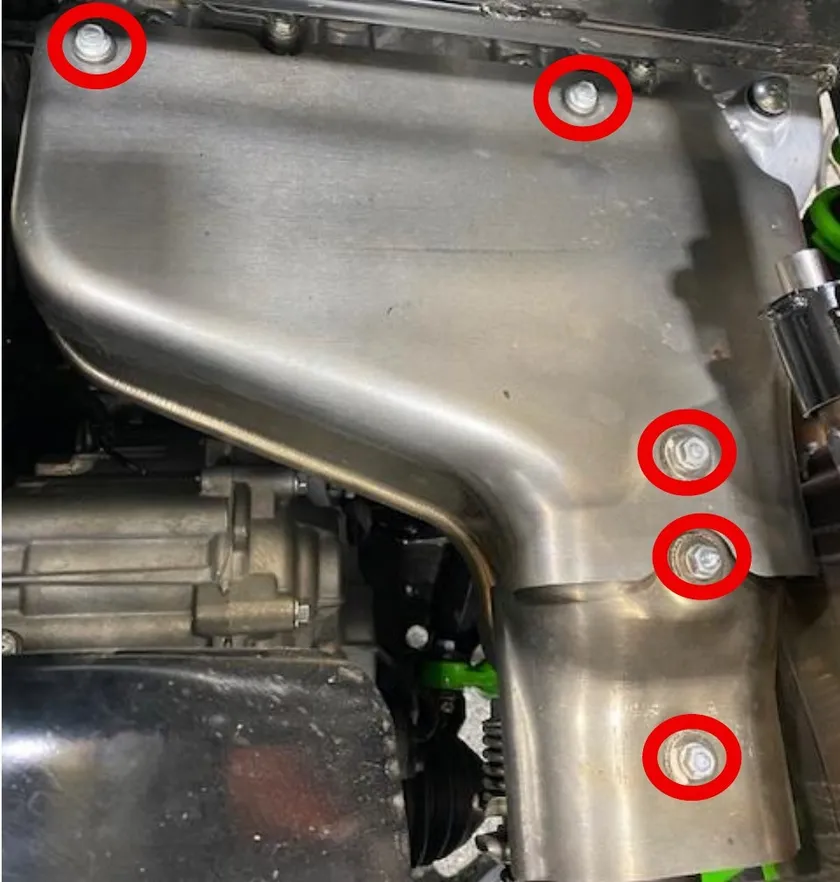
    Remove the top heat shields on the header. Remove (5) 10mm nuts and washers.
  2. Step 2

    Disconnect the 02 sensor located on the rear of the vehicle. Remove the 02 sensor from the mid pipe. Don’t damage the 02 sensor.
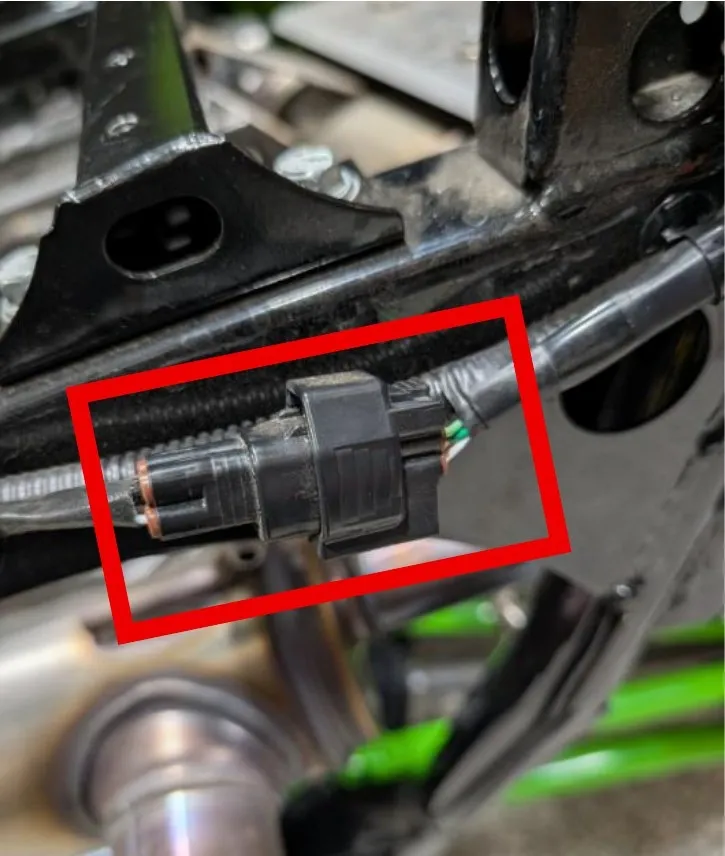
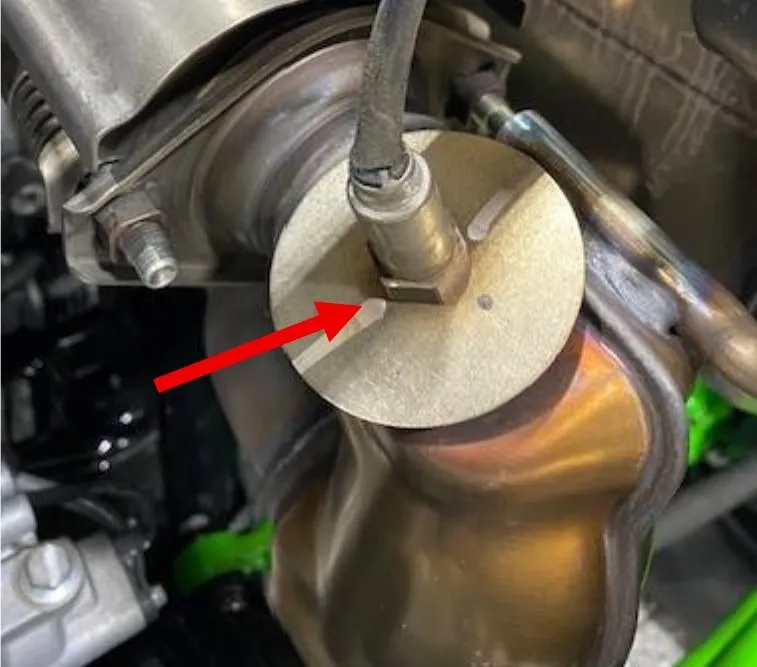
    Disconnect the 02 sensor located on the rear of the vehicle. Remove the 02 sensor from the mid pipe. Don’t damage the 02 sensor.
    Disconnect the 02 sensor located on the rear of the vehicle. Remove the 02 sensor from the mid pipe. Don’t damage the 02 sensor.
  3. Step 3

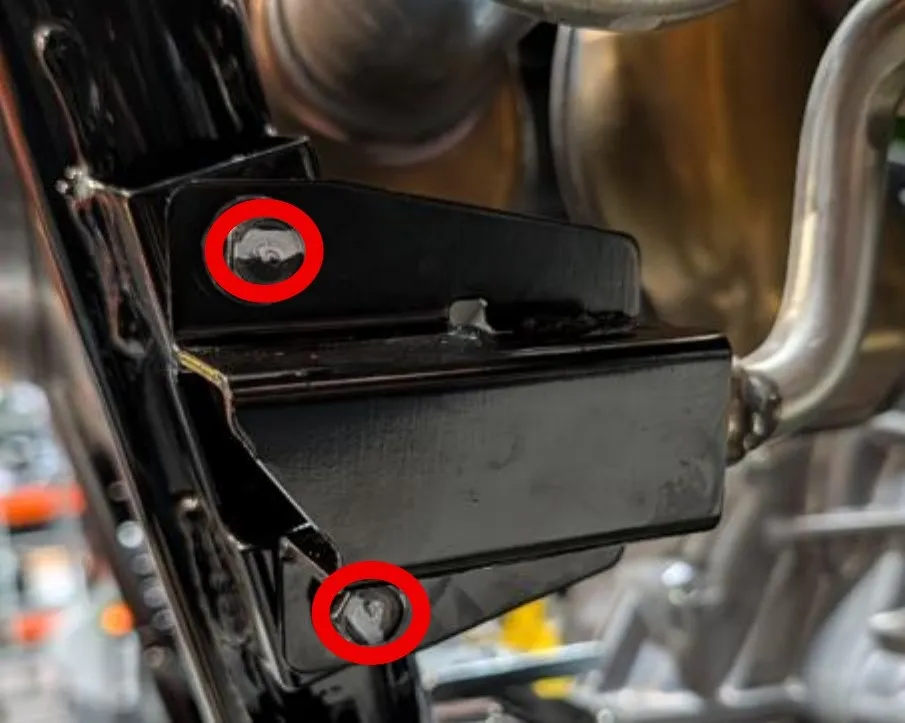
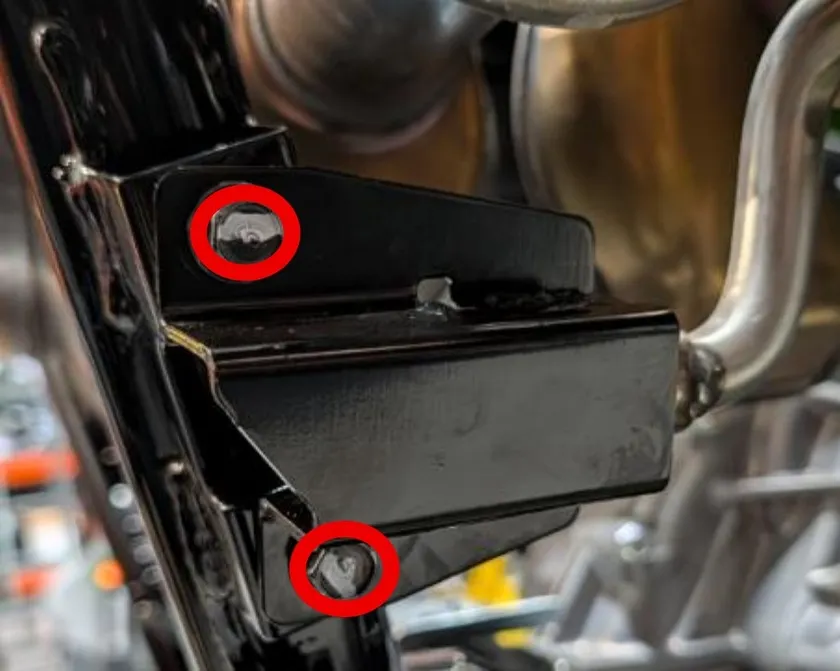
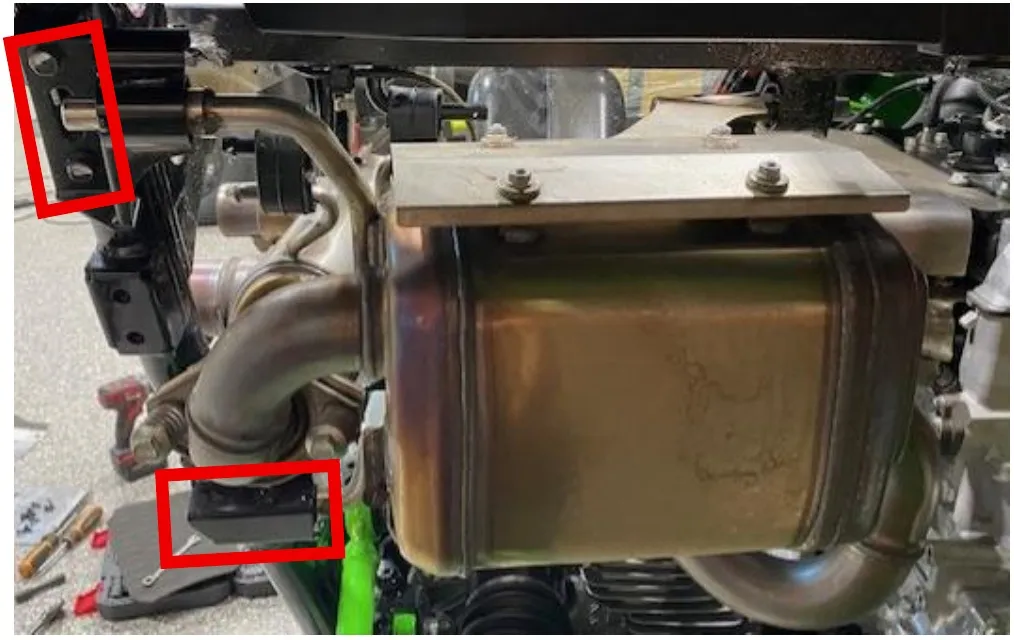
    Remove both side muffler hanger brackets from the frame. (4) 14mm bolts.
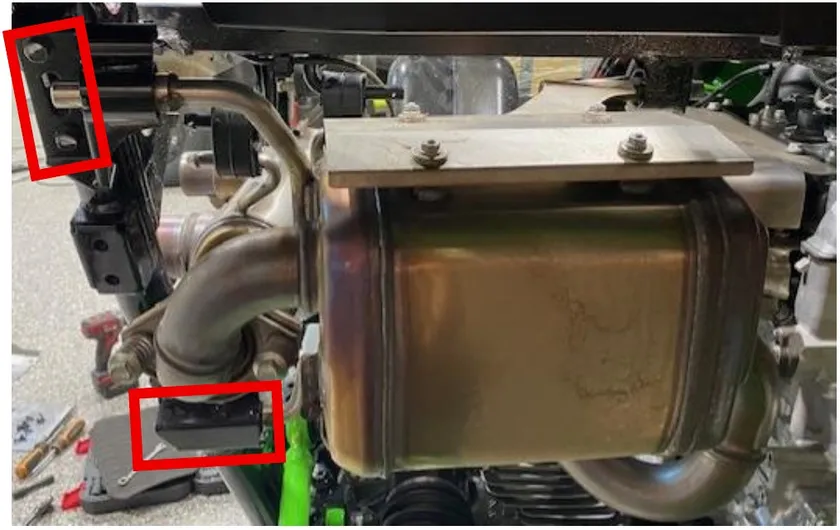
    Remove both side muffler hanger brackets from the frame. (4) 14mm bolts.
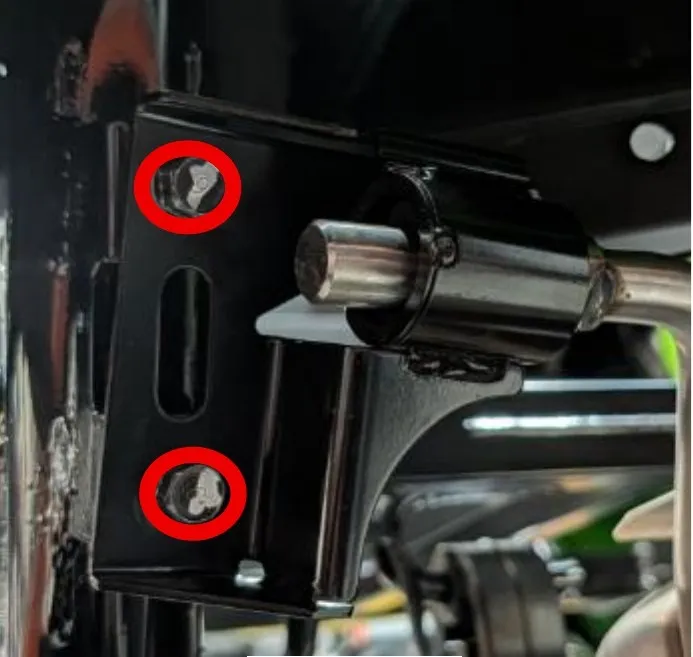
    TOP Bracket
    TOP Bracket
    BOTTOM Bracket
    BOTTOM Bracket
  4. Step 4

    Remove (2) 14mm exhaust bolts and springs from the connection between the header and side muffler.
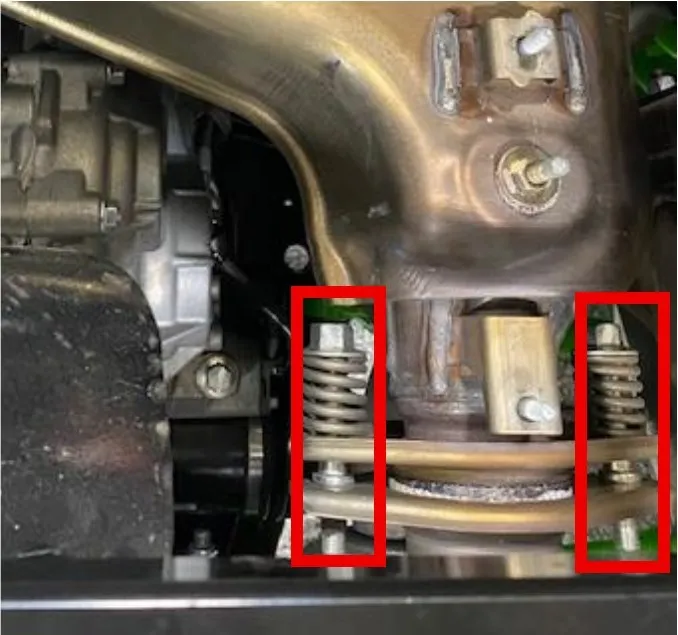
    Remove (2) 14mm exhaust bolts and springs from the connection between the header and side muffler.
  5. Step 5

    Remove (2) 14mm exhaust bolts and springs from the connection between the rear muffler and side muffler.

    Remove (2) 14mm exhaust bolts and springs from the connection between the rear muffler and side muffler.
  6. Step 6

    Remove the side muffler, there is hanger in the front you must slide out of the rubber grommet. Remove both exhaust donuts.

    Remove the side muffler, there is hanger in the front you must slide out of the rubber grommet. Remove both exhaust donuts.
  7. Step 7

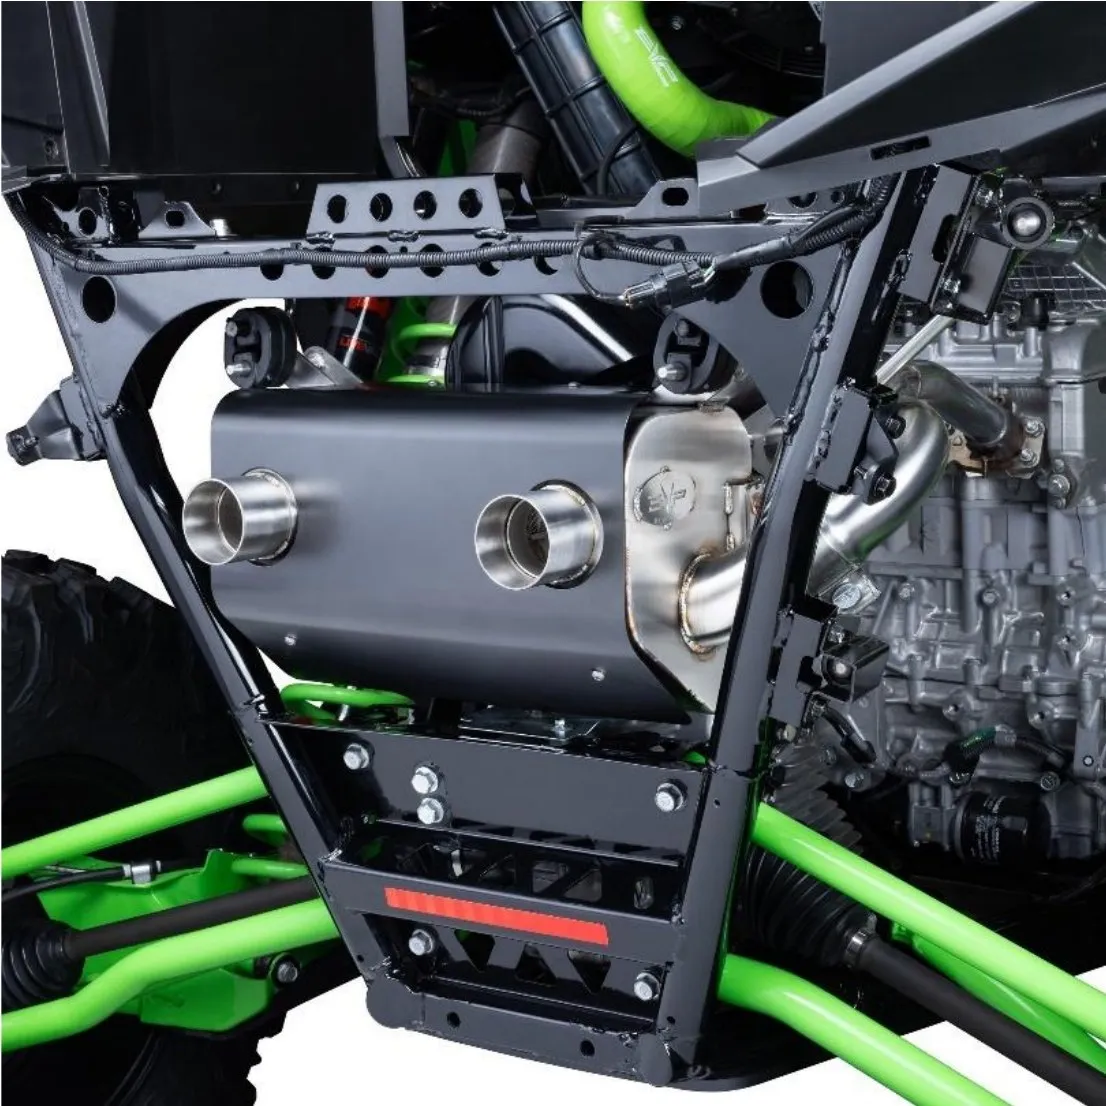
    When installing the new side muffler, use the (1) included 2.25” exhaust donut for the rear muffler mating. Use the OEM 2.0” for the header mating. Apply copper anti-seize to the threads of the 02 sensor. Installation will be the same process as removal.
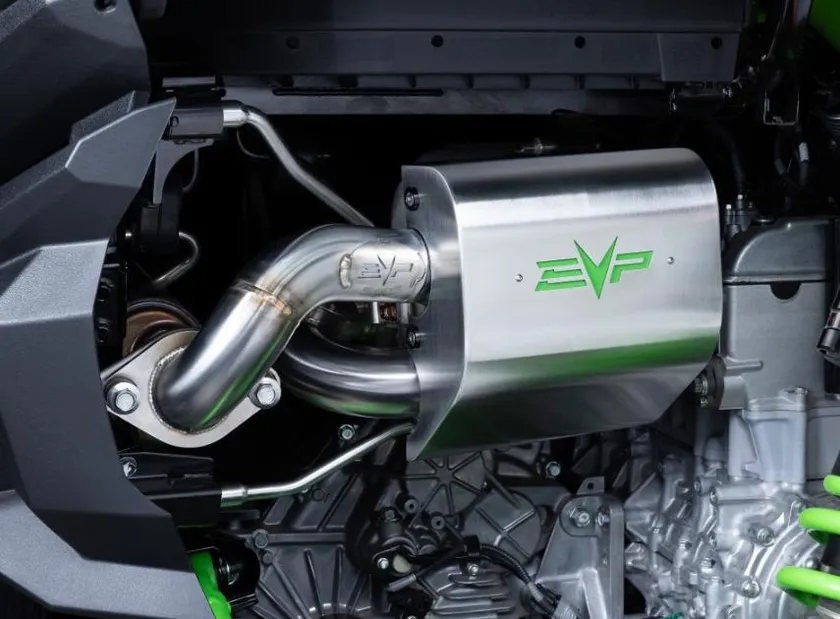
    When installing the new side muffler, use the (1) included 2.25” exhaust donut for the rear muffler mating. Use the OEM 2.0” for the header mating. Apply copper anti-seize to the threads of the 02 sensor. Installation will be the same process as removal.
Procedure

Remove and Installing Rear Muffler

  1. Step 1

    Remove (2) 14mm exhaust bolts and springs from the connection between the rear muffler and side muffler.

    Remove (2) 14mm exhaust bolts and springs from the connection between the rear muffler and side muffler.
  2. Step 2

    Remove (2) pins holding the rear muffler isolators in place.

    Remove (2) pins holding the rear muffler isolators in place.
  3. Step 3

    Remove the rear muffler from the vehicle. This can be done with or without the side muffler installed.

  4. Step 4

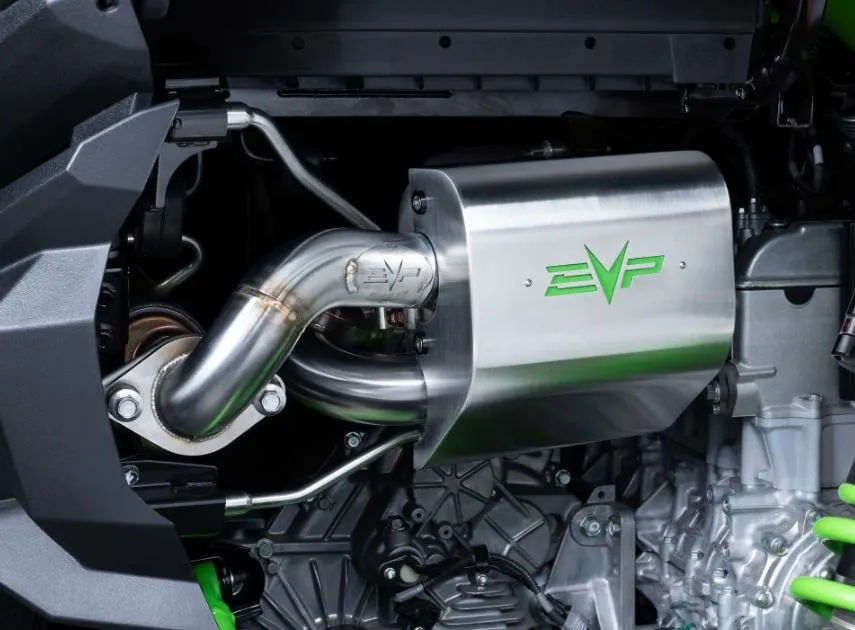
    Use the OEM 2.0” exhaust donut to mate the link pipe to OEM header. Install (2) supplied support brackets. Install EVP rear muffler into rubber grommets and reinstall the pins.
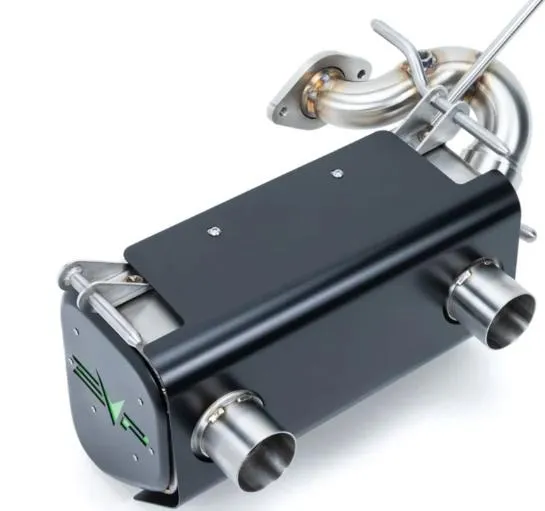
    Use the OEM 2.0” exhaust donut to mate the link pipe to OEM header. Install (2) supplied support brackets. Install EVP rear muffler into rubber grommets and reinstall the pins.

Procedure

Removing and Installing Header with Rear Muffler.

  1. Step 1

    Remove both upper and lower heat shields on the header. (6) 10mm nuts and washers.

    Remove both upper and lower heat shields on the header. (6) 10mm nuts and washers.
    Remove both upper and lower heat shields on the header. (6) 10mm nuts and washers.
  2. Step 2

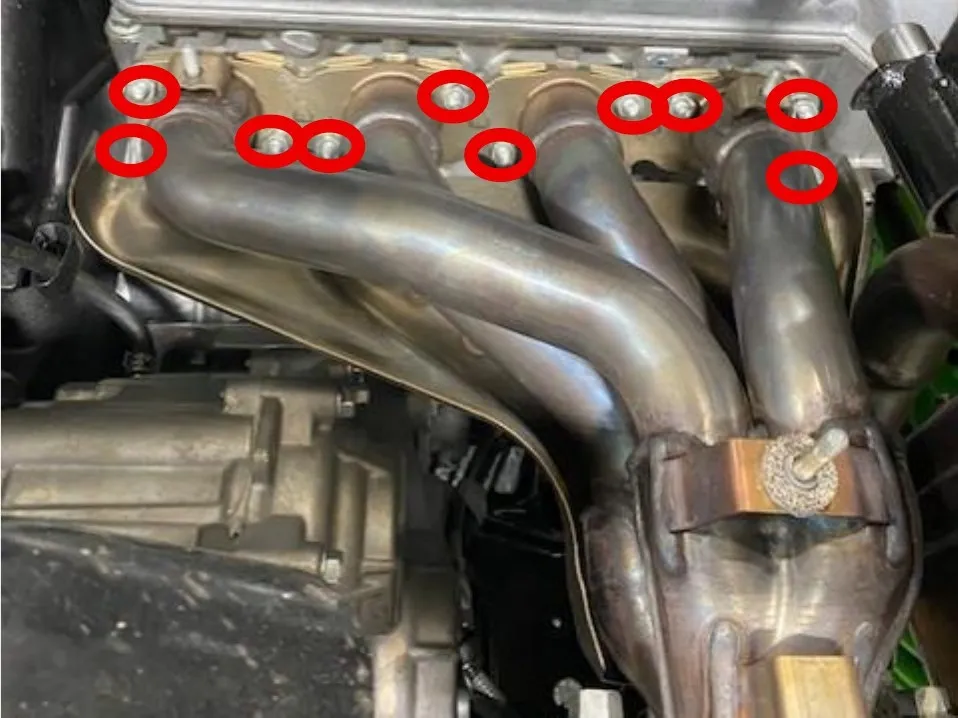
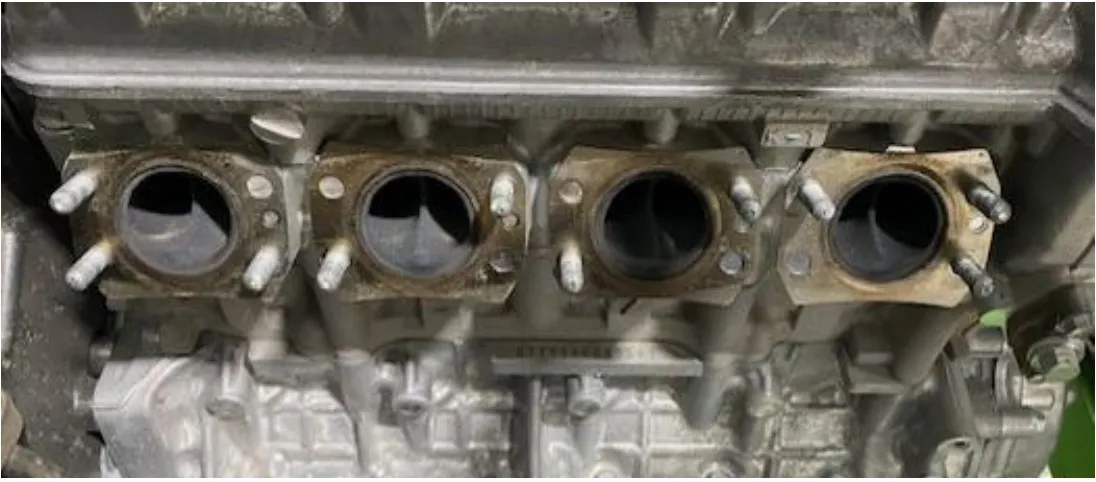
    Remove (10) 10mm nuts holding the header on. (Photo shows lower heat shield on).
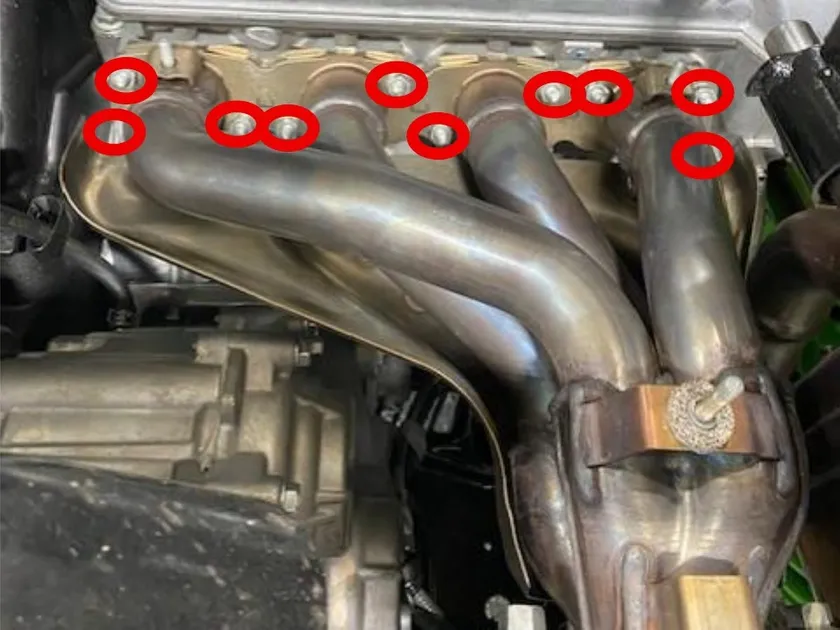
    Remove (10) 10mm nuts holding the header on. (Photo shows lower heat shield on).
  3. Step 3

    Remove the header and (4) OEM exhaust gaskets.
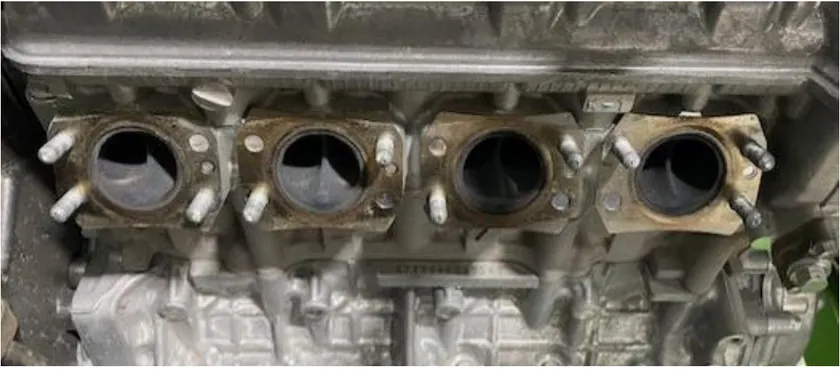
    Remove the header and (4) OEM exhaust gaskets.
  4. Step 4

    Clean the head surface and install new gaskets or EVP single gasket.
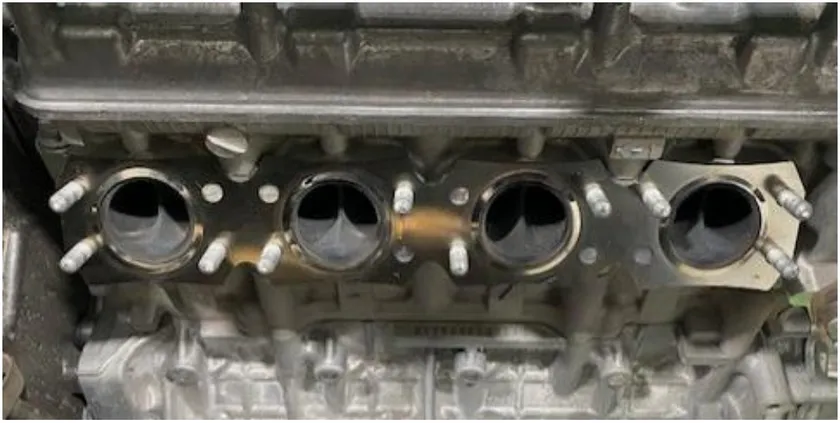
    Clean the head surface and install new gaskets or EVP single gasket.
  5. Step 5

    Install the EVP header (without heatshield) Torque exhaust nuts to 15 ft-lb. It is best to heat cycle the header a few times, re-torque the header nuts. Install the heat shield after.
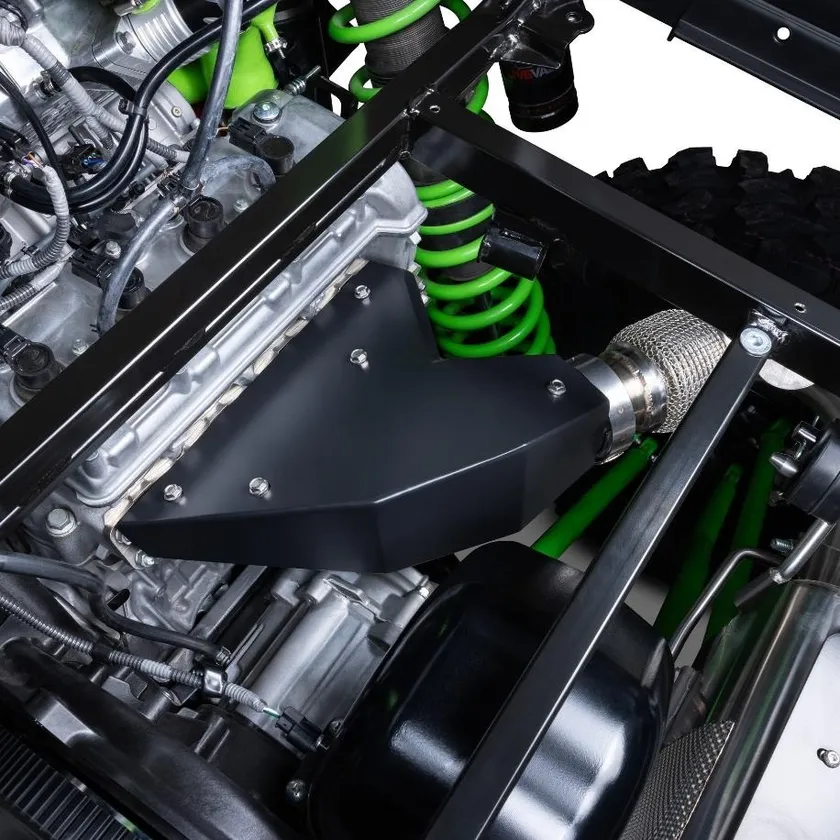
    Install the EVP header (without heatshield) Torque exhaust nuts to 15 ft-lb. It is best to heat cycle the header a few times, re-torque the header nuts. Install the heat shield after.
  6. Step 6

    Install the rear muffler into the rubber gromets, reinstall the cotter pins. Align the mid pipe V-band to the header. Leave V-band clamp loose for now. Slip the mid pipe over the muffler entrance. Once all aligned, tighten the clamps.
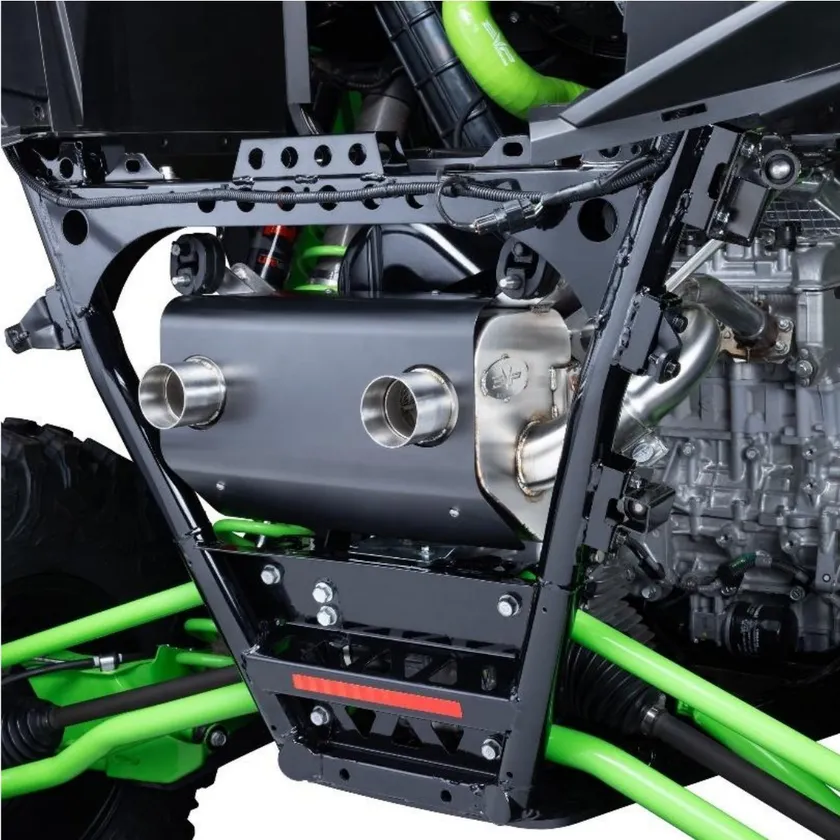
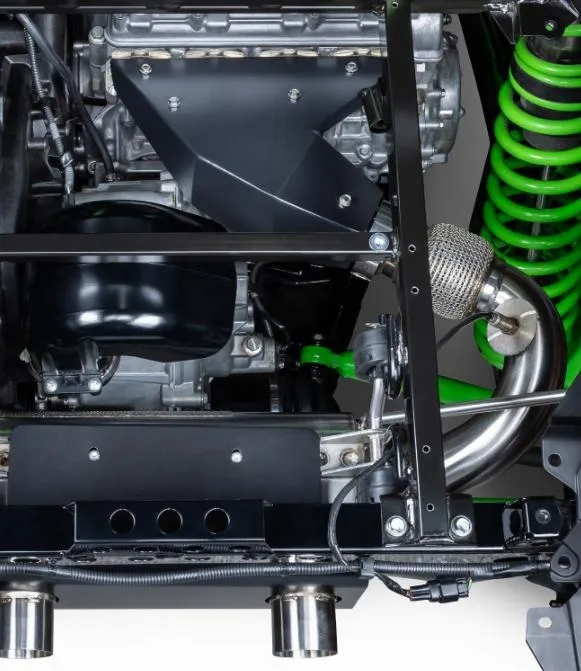
    Install the rear muffler into the rubber gromets, reinstall the cotter pins. Align the mid pipe V-band to the header. Leave V-band clamp loose for now. Slip the mid pipe over the muffler entrance. Once all aligned, tighten the clamps.
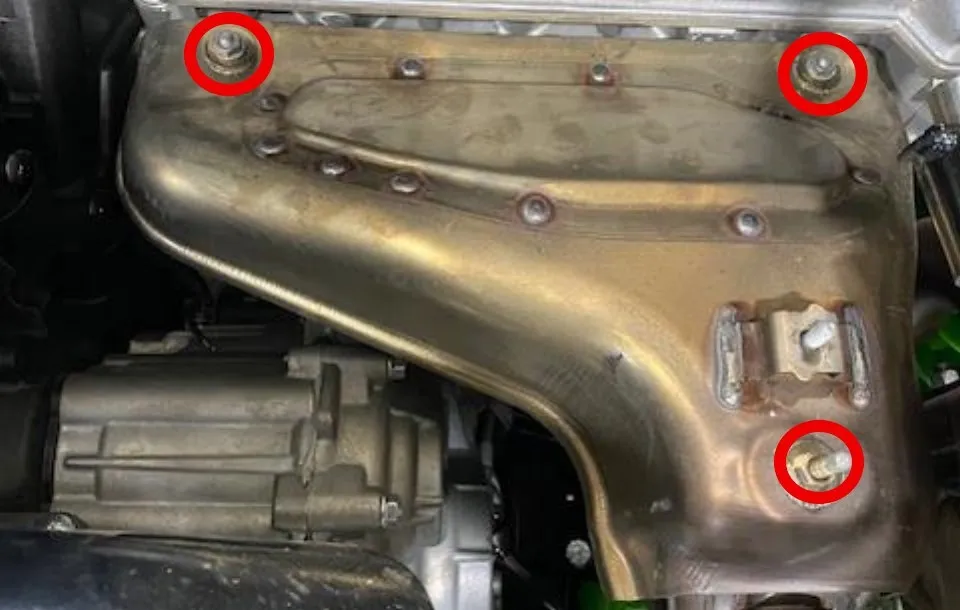
    Install the rear muffler into the rubber gromets, reinstall the cotter pins. Align the mid pipe V-band to the header. Leave V-band clamp loose for now. Slip the mid pipe over the muffler entrance. Once all aligned, tighten the clamps.
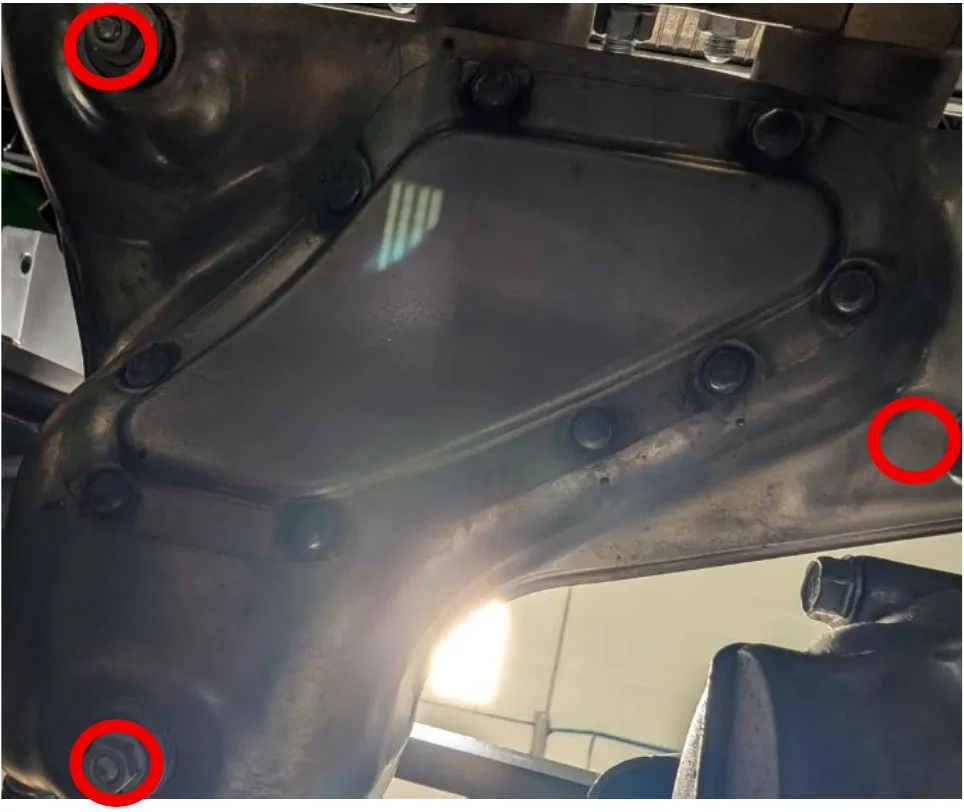
Need technical support?

Submit a ticket with your vehicle and what you're seeing, and our support team will get back to you.

Contact Support
We use cookies to improve your experience on our website. Read about how we use cookies in our Privacy Policy. By browsing this website, you agree to our use of cookies. privacy policy
accept

Your cart

×
×