 BUY NOW, PAY LATER. Starting at 0% APR


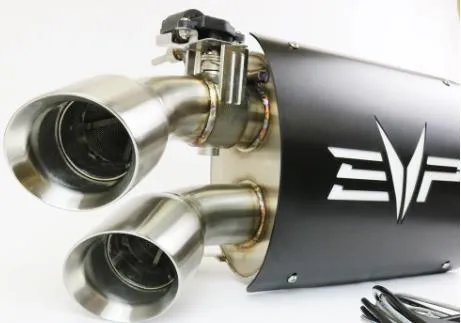
Polaris RZR Pro XP Slip-On Captains Choice, Electric Actuated
Polaris RZR Pro XP Slip-On Captains Choice, Electric Actuated Muffler
In the box
Parts and tools
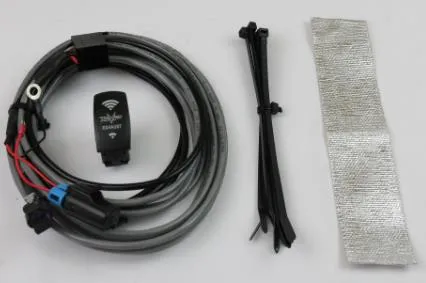
Included parts
- 48mm x 30mm Flanged Hex Bolts (Downpipe Only)
- 1RZR XPT/PRO G3 Wiring Harness
- 2Billet Hanger
- 23/8”-16 x 1/2" Stainless Button Head Allen Bolts
- 10Black Zip Ties
- 1Heat Tape Strip
Required tools
- Rachet
- 10mm,13mm Socket
- 10mm,12mm,22mm Open End Wrench
- T-30, T-40 Torx Driver
- Spring Tool
- High Temp Copper Anti-Seize
- Cutoff wheel or Saw
Procedure
Removing OEM Muffler
- Step 1
Remove (4) T30 Torx holding the rear valance covering the OEM exhaust muffler.
- Step 2
Remove the OEM aluminum heat shield, (2) bolts on top. Disregard this piece, the new EVP muffler has a built-in heat shield.
- Step 3
Remove (3) bolts holding the OEM muffler to the downpipe.
- Step 4
Remove (2) springs holding the OEM muffler to the vehicle.
Procedure
Installation of the New Muffler
- Step 1
You will need to cut off two plastic tabs off the factory frame using a saw. Make sure to de-bur the cuts with a file. (See figures 1-3)
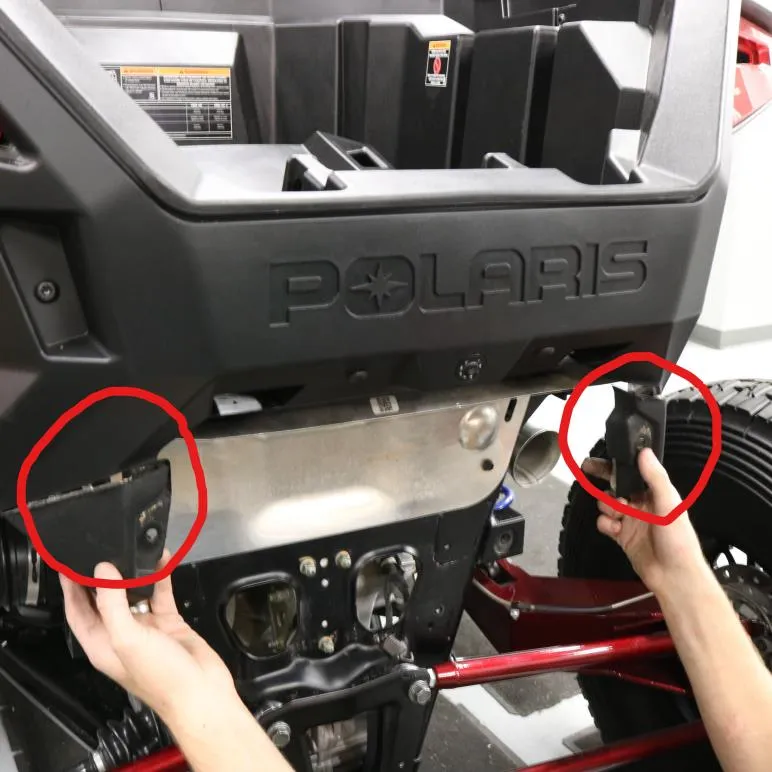
Figure 1 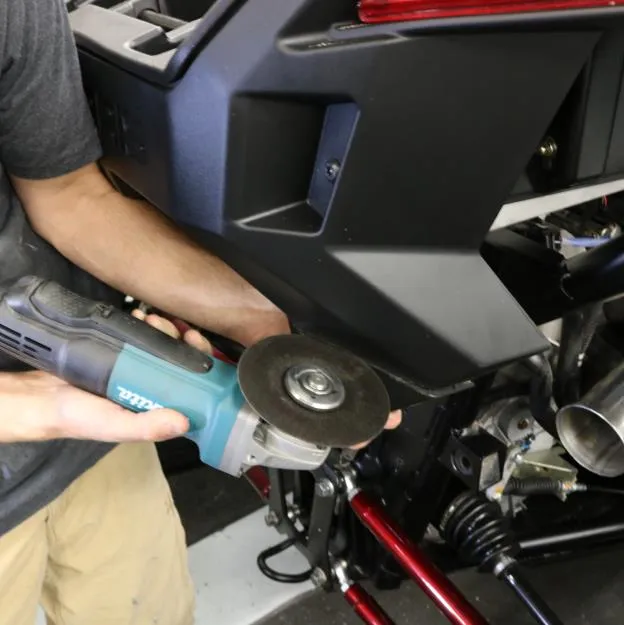
Figure 2 The rear factory plastics being cut to clear the new muffler. (Figures 2-3). 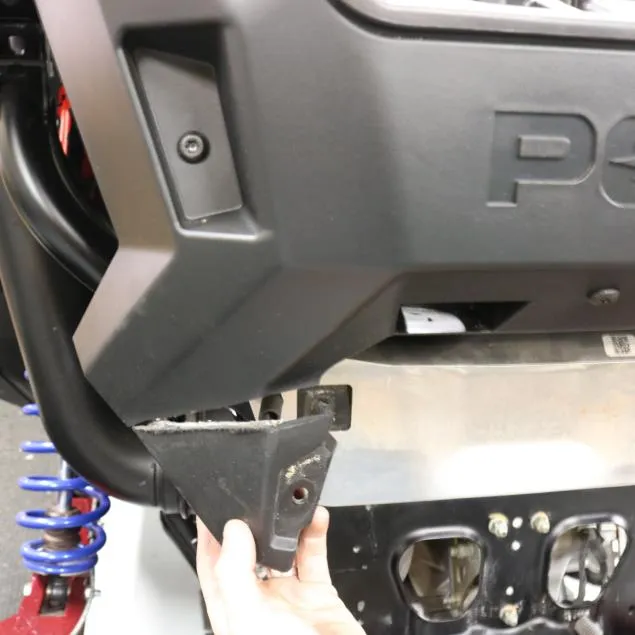
Figure 3 - Step 2
Open the small box labeled install kit. Inside you will find (2) billet hangers and (2) 3/8” Allen Bolts.
- Step 3
Install the billet mounts into the lower muffler mounts, use the OEM muffler as your guide. Fasten down with the Allen bolts.
- Step 4
Install the new muffler in the lower rubber isolators and re-attach the (2) springs holding it in place.
- Step 5
Reuse the OEM exhaust gasket and install the (3) flanged hex bolts. Tighten down.
Procedure
Wiring Installation
- Step 1
Remove the passenger seat.
- Step 2
Remove the rear firewall access panel to the turbo.
- Step 3
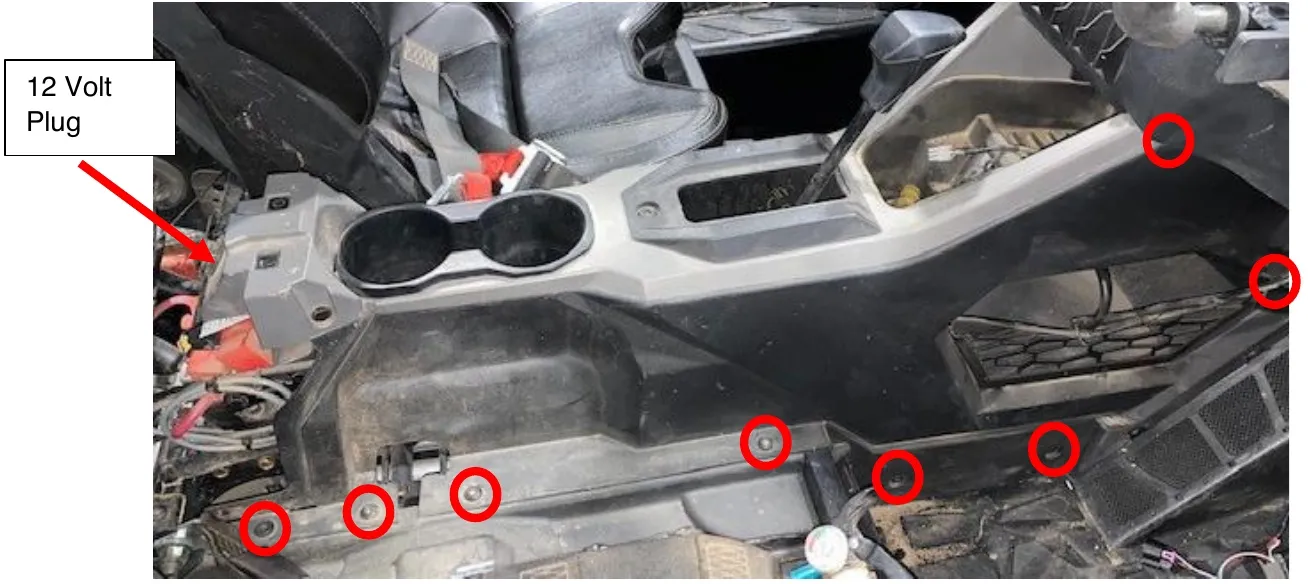
Remove the center console passenger side panel by removing (2) push darts and (8) T-40 Torx. Push the shifter rubber boot down into the center console. On the rear of the center console there is a 12 Volt plug, disconnect the Positive and Ground wire off. These wires are very short, and we need to lift the silver part of the center console away from the side panel. (Figure 1)
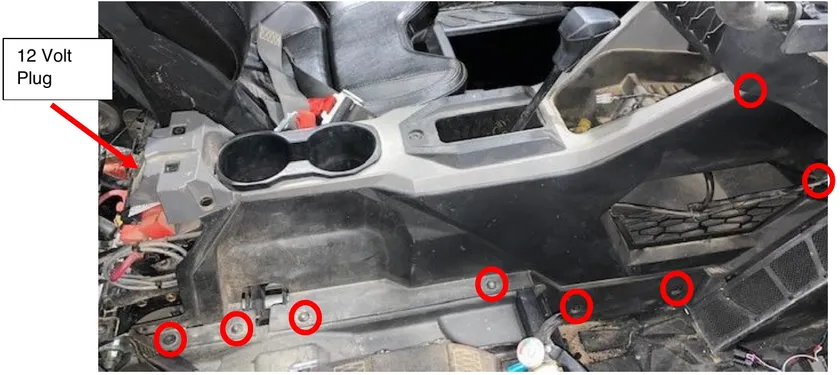
Figure 1 - Step 4
Remove the passenger side panel from the center console. Pull up on the silver trim, and with a small flat blade screwdriver disconnect the clips from the side panel, start in the rear and work your way towards the front of the vehicle. Let the side panel lay on the passenger floorboard.
- Step 5
Route the wiring harness from the Captains Choice muffler (keeping it away from heat source) up to the firewall. Route it up the center council to the dash. Pop the middle middle glove back compartment out.
- Step 6
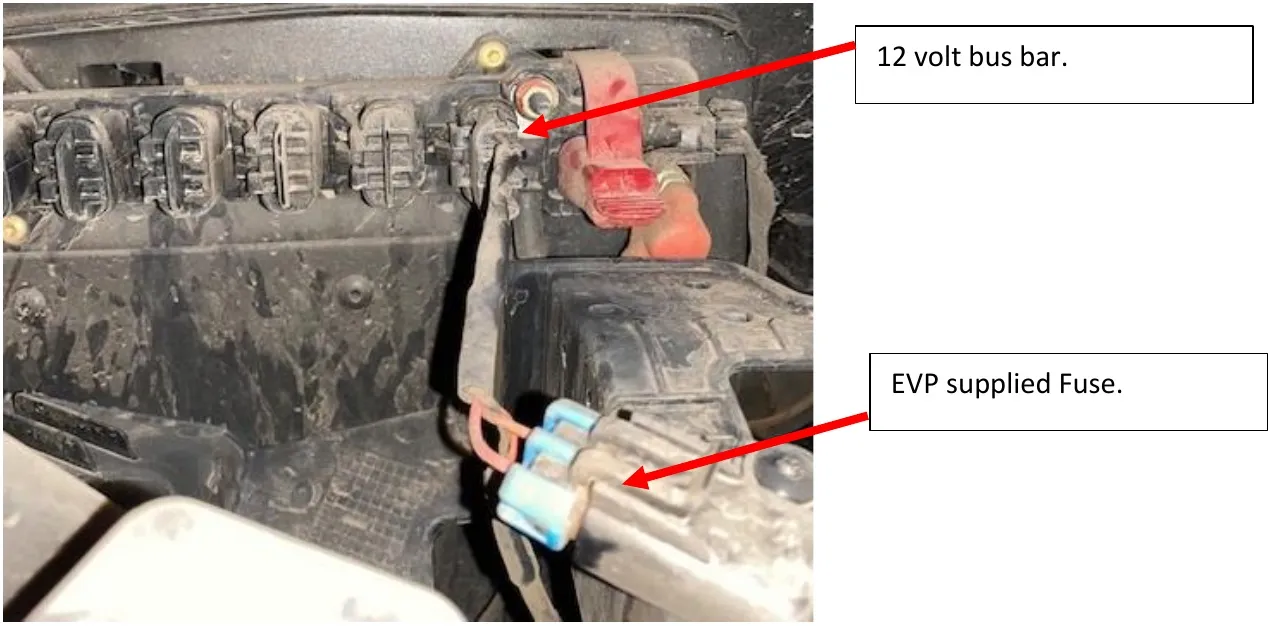
Underneath the middle center council you will find the OEM 12volt bus bar. Plug the EVP wiring harness into any of the blank 12volt bus bar spots. (Figure 5)
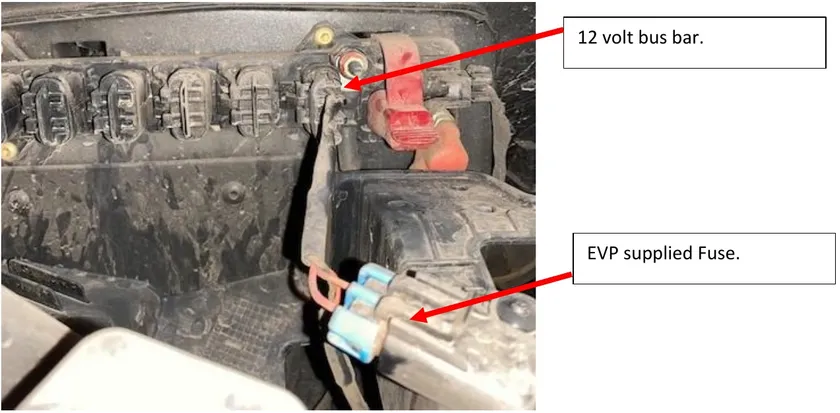
Figure 2 - Step 7
On the dash you will find blank rocker switches. Pop one out. Remove the face off the supplied EVP rocker switch. Feed the supplied rocker plug from the back of the dash and fill in the empty space. Connect the face of the EVP rocker switch to the plug. It will click into place.
- Step 8
Start zip tying from the Captains Choice muffler up to the dash, keeping the wiring harness tight to the frame and away from heat source. (Leave excess wiring under the dash)
- Step 9
Turn the ignition on and hit the EVP exhaust switch. You should hear it open/close. If you don’t, check your wiring.
- Step 10
When everything works properly, start reassembling the glove box, center council, firewall, and passenger seat.
- Step 11
Start the machine and test the functionality of your new exhaust and check for leaks.
Need technical support?
Submit a ticket with your vehicle and what you're seeing, and our support team will get back to you.
